
Pisichen 21.5INTS-White-NEW
Pisichen 21.5-Inch Touchscreen Monitor User Manual
Model: 21.5INTS-White-NEW
Introduction
This user manual provides comprehensive instructions for the setup, operation, maintenance, and troubleshooting of your Pisichen 21.5-Inch Touchscreen Monitor. Please read this manual thoroughly before using the product to ensure proper functionality and to prevent damage.
The Pisichen 21.5-inch touch monitor is designed to enhance your work efficiency and provide an interactive experience with its responsive 10-point capacitive touchscreen. It features a Full HD 1920x1080 resolution display, built-in speakers, and versatile connectivity options including HDMI, VGA, and USB for touch functionality.
Key Features
- Sensitive 10-Point Capacitive Touchscreen: Offers seamless and responsive interaction, allowing direct engagement with content and simultaneous multi-finger input.
- Stunning FHD 1080P Display: A 21.5-inch Full HD (1920x1080) resolution screen with a 1000:1 contrast ratio, 250cd/㎡ brightness, 170° viewing angle, and 60Hz refresh rate for clear and smooth visuals. Includes low-blue-light and eye-care technology.
- Wide Device Compatibility: Equipped with USB2.0 (for touch), HDMI, VGA, and DC ports for easy connection to PCs, laptops, PS3/4, and gaming consoles.
- Versatile Display Modes: Supports duplicate, extend, and second-screen modes to enhance productivity and workspace.
- Built-in Speakers and VESA Mounting: Integrated speakers provide audio, and the 75x75mm VESA mount allows for flexible installation options.
Package Contents
Please verify that all items are present in the package before proceeding with the setup.

The package includes the Pisichen 21.5-inch touchscreen monitor, a user manual, an HDMI cable, a USB cable, and a power adapter, ensuring it is ready for immediate use.
- Pisichen 21.5-Inch Touchscreen Monitor
- Power Adapter
- HDMI Cable
- USB Cable (for touch function)
- User Manual
Setup Instructions
1. Connecting the Monitor
The monitor offers various connection options to suit your needs. Ensure all connections are secure before powering on the device.

Detailed view of the monitor's input/output ports, including HDMI, VGA, headphone, DC power, and USB 2.0 touch ports.
- Power Connection: Connect the provided power adapter to the DC power port on the monitor and then plug it into a wall outlet.
- Video Connection (HDMI): Use the HDMI cable to connect the monitor's HDMI port to the HDMI output port on your computer, laptop, or gaming console.
- Video Connection (VGA): Alternatively, use a VGA cable to connect the monitor's VGA port to the VGA output port on your computer or laptop.
- Touch Function Connection: To enable the touch function, connect the included USB cable from the monitor's USB 2.0 touch port to an available USB port on your computer. This step is crucial for touch signal transmission.
- Audio Output (Optional): If you prefer external audio, you can connect headphones or external speakers to the headphone jack. The monitor also has built-in speakers.
2. Mounting Options
The Pisichen monitor supports both desktop placement and VESA wall mounting for flexible setup.
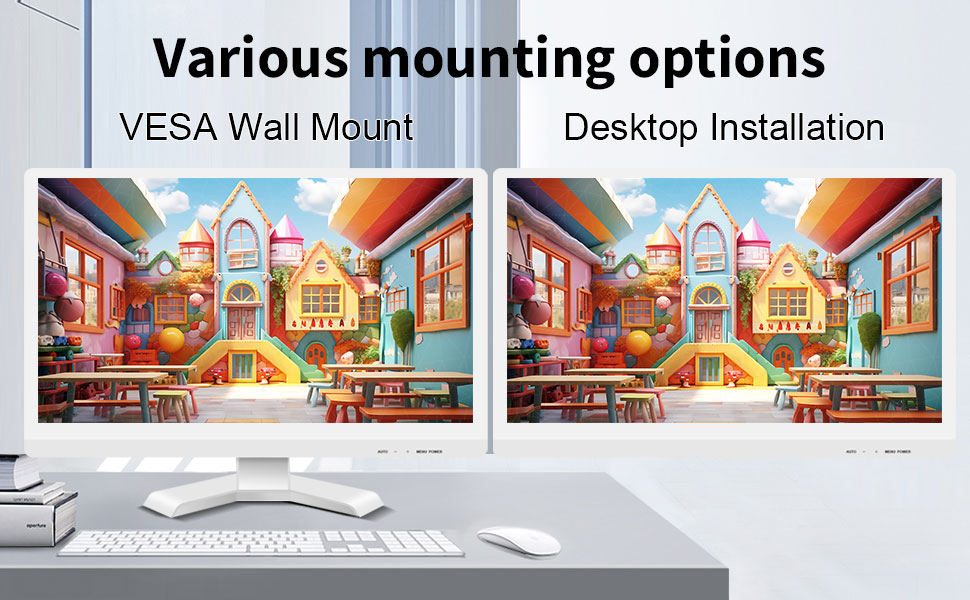
The monitor can be set up on a desktop stand or mounted on a wall using a VESA compatible bracket.
- Desktop Installation: Attach the provided stand to the monitor base and place it on a stable, flat surface.
- VESA Wall Mount: The monitor features a 75x75mm VESA mounting pattern. Use a compatible VESA bracket (not included) to mount the monitor on a wall or an adjustable arm. Ensure the mount can support the monitor's weight (9.88 pounds).

Rear view of the monitor highlighting the VESA 75x75mm mounting pattern and overall dimensions.
Operating Instructions
1. Powering On/Off
Locate the power button on the monitor. Press it to turn the monitor on or off. The power indicator light will illuminate when the monitor is on.
2. Using the Touchscreen Function
Once the USB cable is connected to your computer, the 10-point capacitive touch function will be active. You can interact with the screen using your fingers or a passive capacitive stylus.

The monitor supports direct touch interaction for intuitive control.
- Single Touch: Equivalent to a mouse click.
- Tap and Hold: Equivalent to a right-click.
- Drag: Move items by touching and dragging.
- Pinch-to-Zoom: Use two fingers to zoom in or out on content.
- Multi-Touch: The monitor supports up to 10 simultaneous touch points, enabling collaborative work or complex gestures.

The 10-point multi-touch feature allows for multiple users or complex interactions simultaneously.
Important Note: The touch functionality is disabled on Mac OS, iPad OS, and iOS. This monitor only supports passive capacitive styluses.
3. Display Modes
The monitor supports various display modes when connected to a computer:
- Duplicate Mode: Displays the same content on both your primary screen and the Pisichen monitor.
- Extend Mode: Extends your desktop across both screens, providing more workspace.
- Second Screen Only Mode: Displays content only on the Pisichen monitor, turning off your primary screen.
You can typically switch between these modes through your operating system's display settings (e.g., Windows Display Settings).
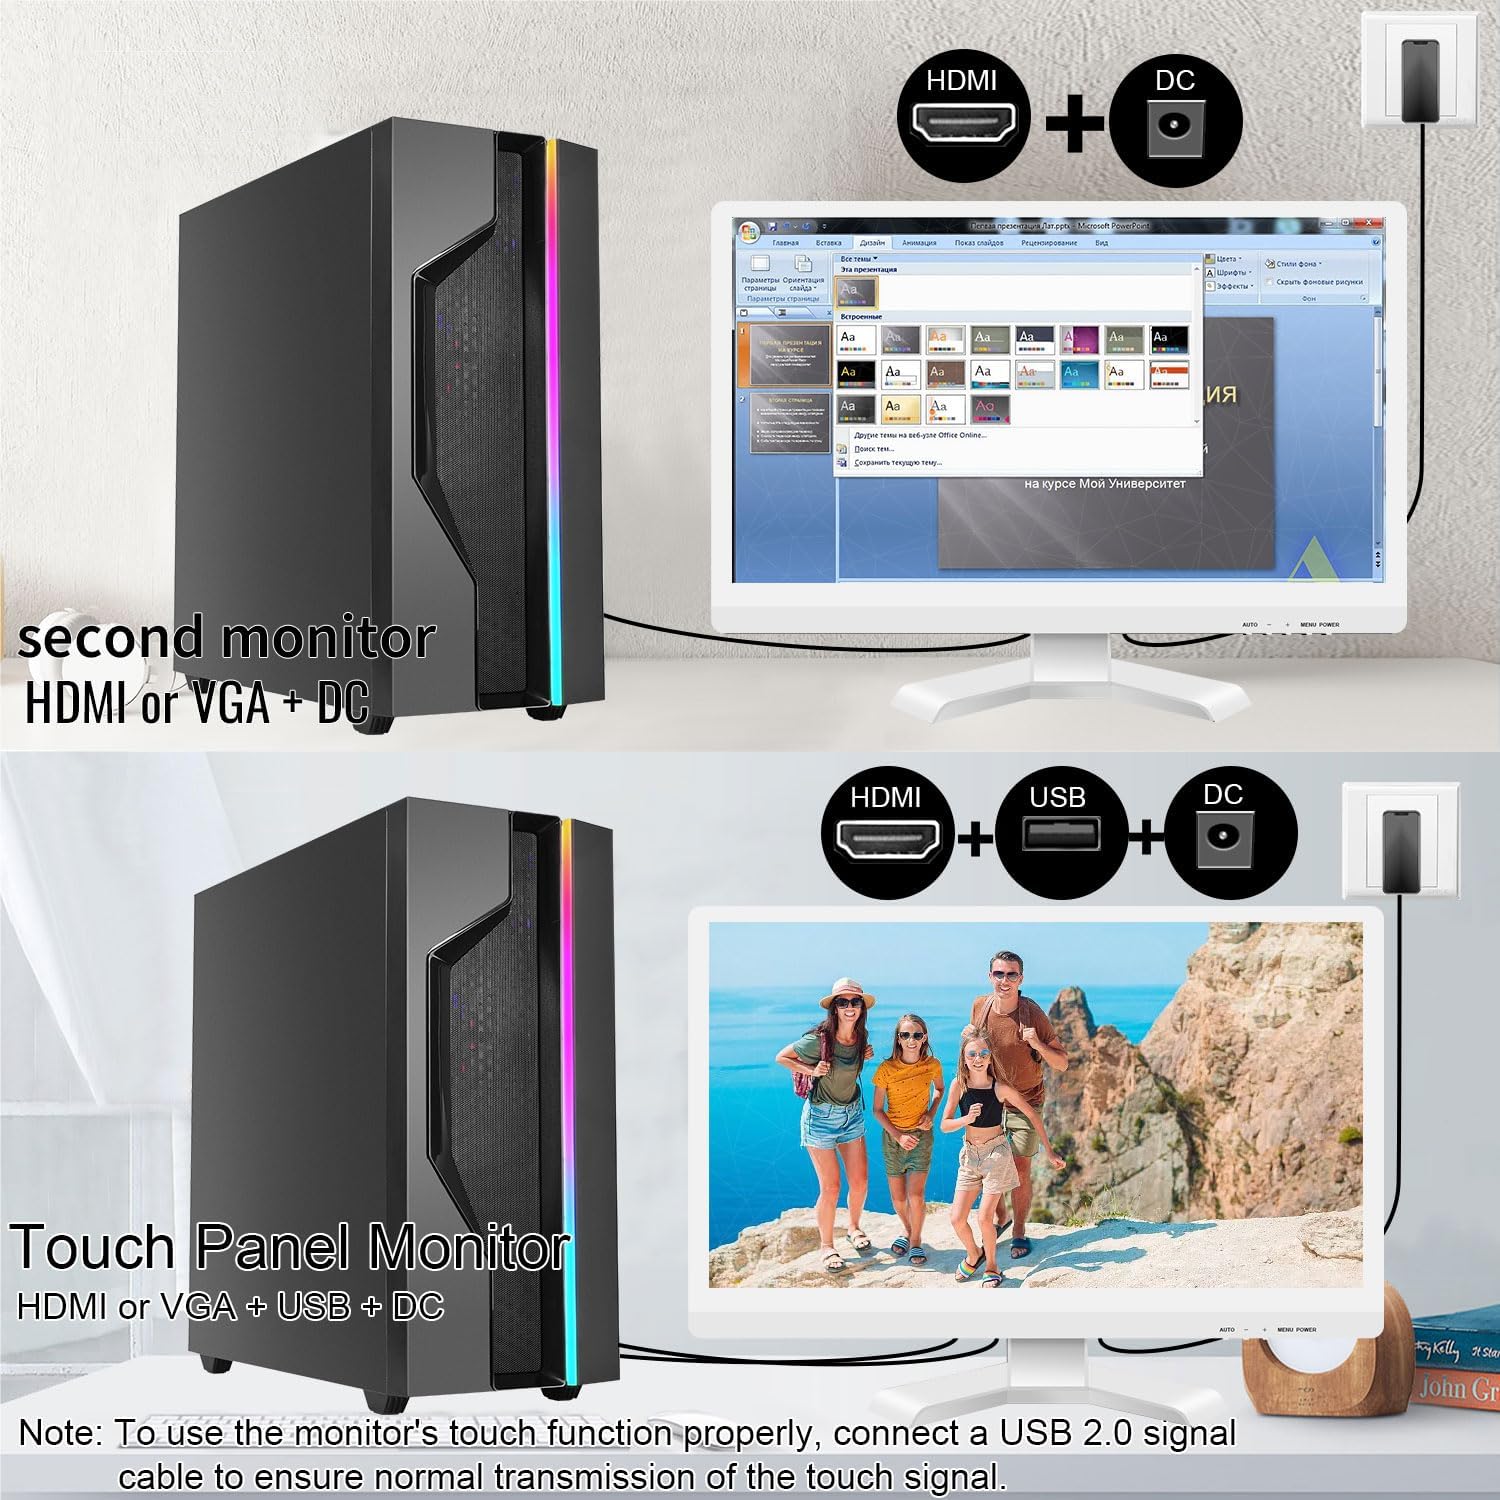
Illustrations of connecting the monitor as a secondary display or as a touch-enabled display.
4. On-Screen Display (OSD) Menu
The monitor features an OSD menu for adjusting display settings. Use the buttons located on the monitor's frame (usually on the bottom right) to navigate and select options.
- Menu Button: Opens the OSD menu.
- Up/Down Buttons: Navigate through menu options.
- Enter/Select Button: Confirms a selection or enters a sub-menu.
- Exit Button: Exits the current menu or OSD.
Common OSD settings include brightness, contrast, color temperature, input source selection, and aspect ratio.
Maintenance and Care
- Cleaning the Screen:
Always power off the monitor and unplug it before cleaning. Use a soft, lint-free cloth lightly dampened with water or a non-abrasive, monitor-specific cleaning solution. Do not spray liquid directly onto the screen. Avoid using alcohol, ammonia, or abrasive cleaners, as they can damage the screen surface.
- Cleaning the Casing:
Wipe the monitor casing with a soft, dry cloth. If necessary, a slightly damp cloth can be used, but ensure no moisture enters the vents or ports.
- Storage:
When not in use for extended periods, store the monitor in a cool, dry place, away from direct sunlight and extreme temperatures. If possible, use the original packaging for protection.
- Ventilation:
Ensure the monitor's ventilation openings are not blocked. Proper airflow is essential to prevent overheating.
- Handling:
Handle the monitor with care. Avoid dropping it or subjecting it to strong impacts. Do not place heavy objects on top of the monitor.
Troubleshooting
| Problem | Possible Cause | Solution |
|---|---|---|
| No image on screen |
|
|
| Touchscreen not responding |
|
|
| Image is blurry or distorted |
|
|
| No sound from built-in speakers |
|
|
Specifications
| Model Number | 21.5INTS-White-NEW |
| Screen Size | 21.5 Inches |
| Resolution | 1920 x 1080 Pixels (FHD 1080p) |
| Aspect Ratio | 16:9 |
| Brightness | 250 Candela (cd/㎡) |
| Contrast Ratio | 1000:1 |
| Viewing Angle | 170° |
| Refresh Rate | 60Hz |
| Touch Technology | 10-Point Capacitive Touch |
| Input Ports | HDMI, VGA, USB 2.0 (for touch), DC Power |
| Audio | Built-in Speakers, Headphone Jack |
| VESA Mount Compatibility | 75x75mm |
| Product Dimensions (L x W x H) | 0.78 x 20.4 x 14.9 inches |
| Item Weight | 9.88 pounds |
| Manufacturer | Shenzhen Konowa Electronics Co., LTD |
| Country of Origin | China |
Warranty and Support
For warranty information and technical support, please refer to the official Pisichen website or contact their customer service directly. Details are typically provided on the product packaging or the manufacturer's official support channels.
You can visit the Pisichen Store on Amazon for more product information and potential support contacts.
Related documents21.5INTS-White-NEW

Ask a question about this manual
Ask about setup, troubleshooting, compatibility, parts, safety, or missing instructions. Manuals+ will review the question and use this page’s manual context to help answer it.