1. Product Overview
The Revopoint Auto Turntable is an accessory designed to enhance the 3D scanning process for small to medium-sized objects. It provides a stable, rotating platform, allowing for comprehensive object capture without manual repositioning of the scanner.
- Easier Scans: Facilitates quick and easy 3D scanning of small to medium-sized objects by rotating the object, eliminating the need to move the scanner.
- Lightweight and Portable: Weighs approximately 315 g with a diameter of 125 mm, making it easy to transport. It supports a maximum load of 2.5 kg.
- Turntable Topper: Includes a topper with pre-placed marker points, which are crucial for scanning featureless objects by providing reference points for the 3D scanner.
- Compatibility: Designed to work seamlessly with all Revopoint 3D scanners for small and medium objects.

Image: The Revopoint Auto Turntable, a black circular platform with white marker points, designed for 3D scanning.
2. What's in the Box
Upon unboxing, verify that all components are present:
- Turntable Base
- Turntable Topper (with marker points)
- USB Cable (for power)

Image: The components of the Revopoint Auto Turntable, including the base, two half-circle toppers with markers, and a USB cable.
3. Setup Instructions
- Unpack Components: Carefully remove the turntable base, turntable topper, and USB cable from the packaging.
- Assemble Turntable Topper: Place the turntable topper onto the turntable base. Ensure it is seated correctly and securely. The topper is designed to fit precisely.
- Position the Turntable: Place the assembled turntable on a stable, flat surface suitable for 3D scanning.
- Connect Power: Connect the provided USB cable to the turntable's power input port. Connect the other end of the USB cable to a suitable USB power source (e.g., computer USB port, USB wall adapter).
- Place Object: Position the object to be scanned centrally on the turntable topper. For featureless objects, the pre-marked points on the topper will assist the scanner in tracking.
- Position 3D Scanner: Place your Revopoint 3D scanner on a stable tripod or stand next to the turntable, ensuring it has a clear view of the object and the turntable.
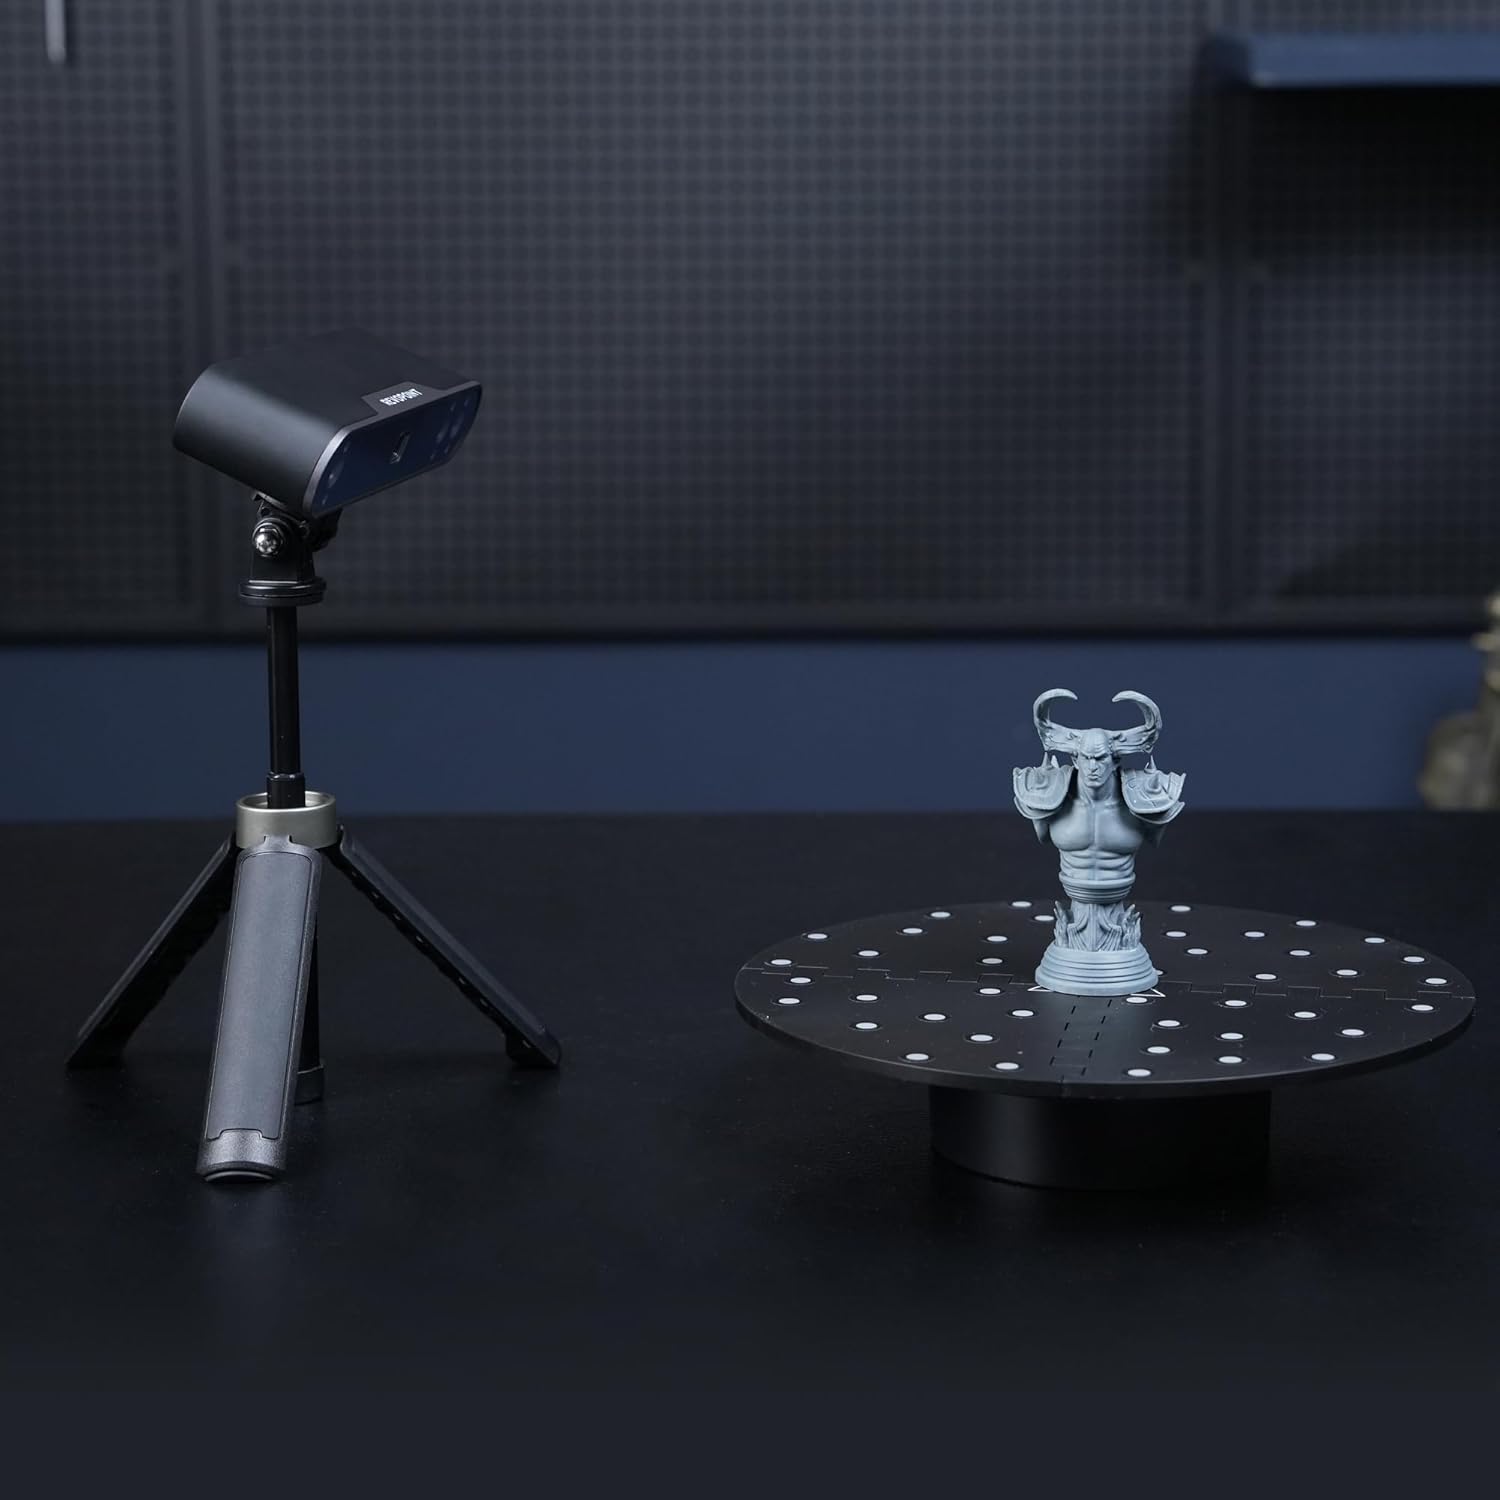
Image: A Revopoint 3D scanner on a tripod positioned next to the Auto Turntable, which holds a small statue, demonstrating a typical scanning setup.
4. Operating Instructions
- Power On: Once connected to power, the turntable should be ready for operation. Some models may have a power button or indicator light.
- Initiate Scan: Launch your Revopoint 3D scanning software on your computer or mobile device.
- Select Turntable Mode: Within the scanning software, select the appropriate scanning mode that utilizes a turntable. This mode often optimizes the scanning process for rotating objects.
- Adjust Settings: Configure scanner settings such as exposure, resolution, and scanning speed as recommended by your scanner's manual or the software interface.
- Start Scanning: Begin the scanning process through the software. The turntable will automatically rotate the object, allowing the scanner to capture data from all angles.
- Monitor Progress: Observe the scanning progress in the software. Ensure the scanner maintains tracking of the object and the turntable's marker points (if applicable).
- Complete Scan: Once the scan is complete, the turntable will stop rotating. You can then process the captured 3D data in your software.

Image: The Auto Turntable with a white bust placed on its marked surface, illustrating its use for scanning featureless objects.

Image: A Revopoint 3D scanner positioned to scan a red apple placed on the Auto Turntable, demonstrating its capability for small objects.
5. Maintenance
- Cleaning: Use a soft, dry cloth to wipe the turntable surface. Avoid abrasive cleaners or solvents that could damage the finish or marker points.
- Storage: Store the turntable in a dry, dust-free environment when not in use.
- Cable Care: Ensure the USB cable is not bent sharply or subjected to excessive strain to prevent damage.
- Marker Points: Keep the marker points on the turntable topper clean and free from obstruction to ensure optimal tracking by the 3D scanner.
6. Troubleshooting
- Turntable Not Rotating:
- Check if the USB cable is securely connected to both the turntable and the power source.
- Ensure the power source is active and providing sufficient power.
- Verify that the scanning software has initiated the turntable rotation.
- Scanning Tracking Issues:
- Ensure the object is placed centrally on the turntable.
- Clean the marker points on the turntable topper if they appear dirty or obscured.
- Adjust the lighting conditions in your scanning environment to avoid glare or shadows.
- Refer to your Revopoint 3D scanner's manual for specific tracking troubleshooting.
- Unusual Noises:
- Discontinue use and check for any obstructions or damage to the turntable mechanism.
- If the issue persists, contact customer support.
7. Specifications
| Item Model Number | RevoScan Small Turntable |
| Package Dimensions | 5.75 x 4.96 x 2.68 inches |
| Item Weight | 10.86 ounces (approx. 308 grams) |
| Turntable Diameter | 125 mm (approx. 4.92 inches) |
| Maximum Load Capacity | 2.5 kg (approx. 5.5 lbs) |
| Manufacturer | Revopoint |
| ASIN | B0F7LJ4MCP |
8. Warranty and Support
Revopoint products are typically covered by a 2-year warranty. For any technical assistance, product inquiries, or warranty claims, please contact Revopoint customer support. 24/7 online support is available.
For further information, you may visit the official Revopoint store or support channels:
- Revopoint Official Store on Amazon
- Refer to your product packaging or the official Revopoint website for the most current support contact information.


