
DEWENWILS ALT200-12-I-1
Contents
DEWENWILS 200W Low Voltage Landscape Lighting Transformer
Model: ALT200-12-I-1
Introduction
This manual provides detailed instructions for the installation, operation, and maintenance of your DEWENWILS 200W Low Voltage Landscape Lighting Transformer. Please read this manual thoroughly before installation and use to ensure proper function and safety.
Safety Information
WARNING: To reduce the risk of fire or electric shock, observe the following precautions:
- Disconnect power at the circuit breaker before installation or servicing.
- Ensure the transformer is installed in a location that meets local electrical codes.
- Do not immerse the transformer in water.
- Do not connect two or more transformers in parallel.
- Do not exceed the maximum wattage rating of 200W.
- Use only with low voltage landscape lighting fixtures.
- Keep children away from electrical components.
Product Overview
The DEWENWILS 200W Low Voltage Landscape Lighting Transformer converts 120V AC household current to a safe 12V/14V AC output for outdoor landscape lighting. It features multiple lighting modes, a photocell sensor, and robust weather protection.
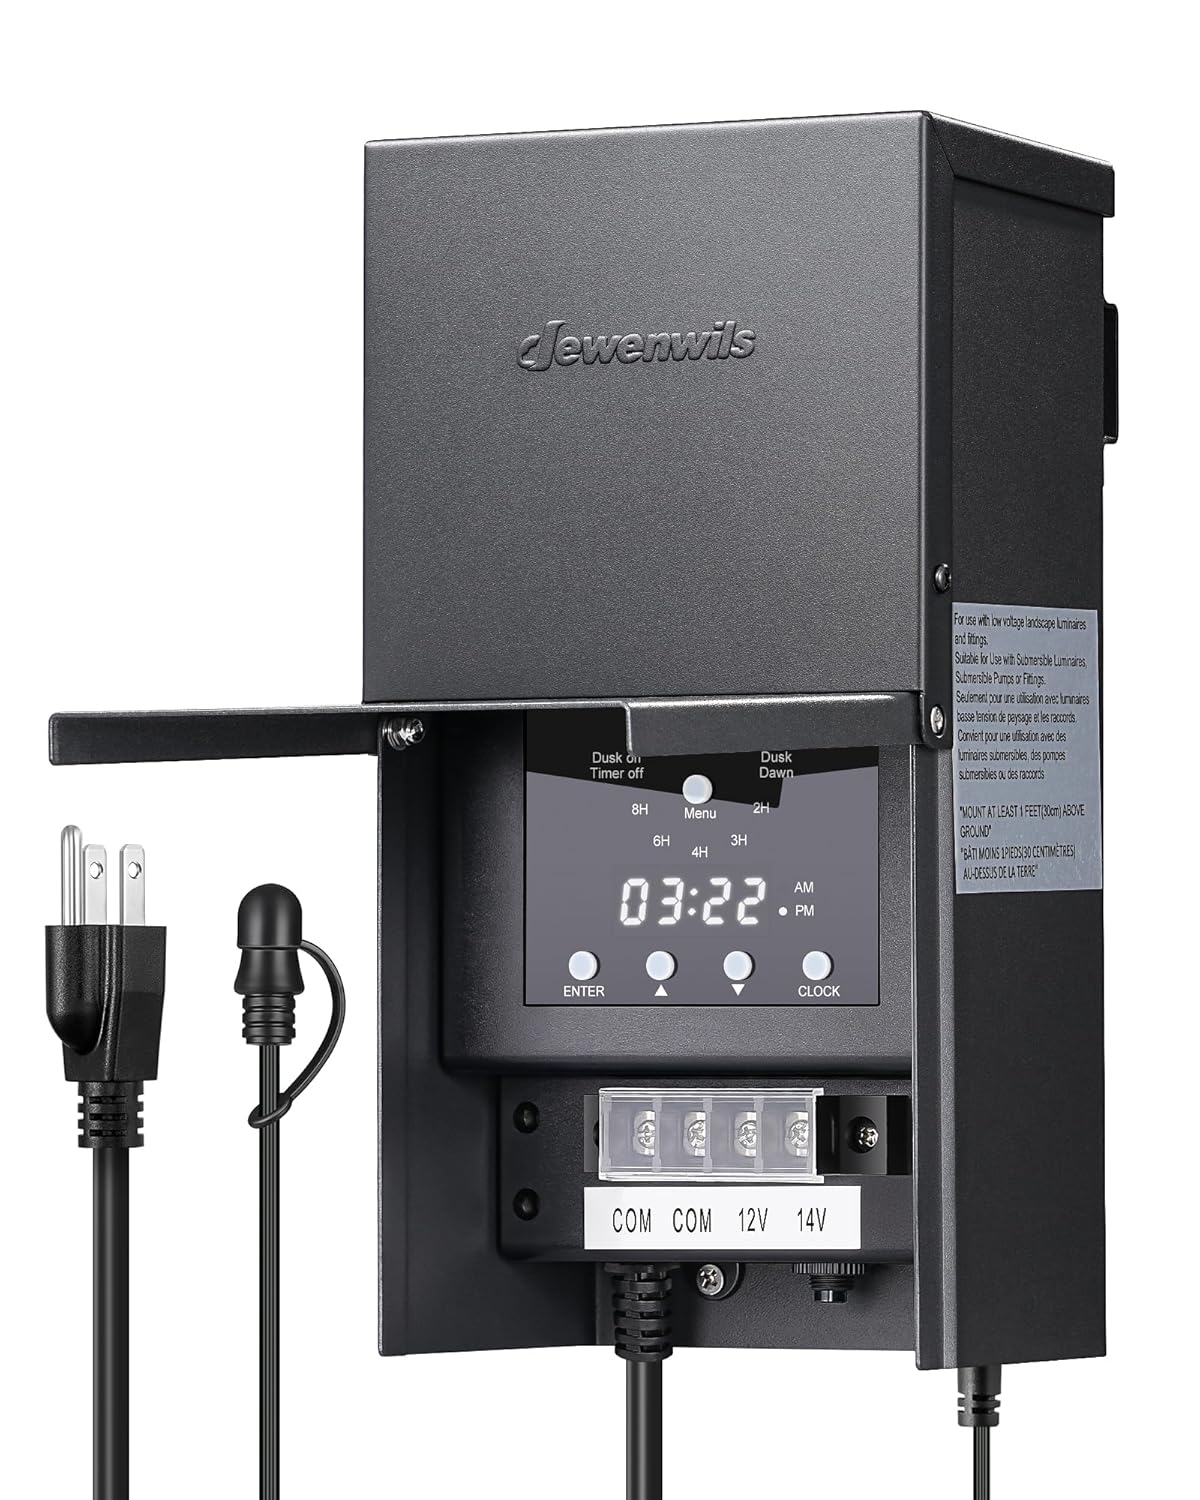
Image: Front view of the DEWENWILS 200W Low Voltage Landscape Lighting Transformer, showing the control panel, power cord, and low voltage output terminals.
Key Features:
- 5 Lighting Modes: Manual On/Off, Dusk-to-Dawn, Dusk-on with Countdown (2/3/4/6/8H), Dusk On/Timer Off, and Timer On/Off.
- Weatherproof Design: Durable metal housing with a weather-resistant coating and downward-opening cover for protection against outdoor elements.
- Safe Voltage Conversion: Converts 120V AC to 12V/14V AC low voltage.
- Built-in Safety Protections: Automatic circuit breaker for overload, short-circuit, over-voltage, overcurrent, and high-temperature protection.
- Photocell Sensor: External sensor for automatic dusk-to-dawn or dusk-on operation.

Image: Diagram showing the five safety protection features of the transformer, including short circuit, overcurrent, over-voltage, overload, and high temperature protection.
Setup and Installation
Follow these steps for proper installation of your landscape lighting transformer.
Mounting the Transformer:
- Select a suitable outdoor location for mounting the transformer. The location should be at least 12 inches above the ground and near a 120V AC power outlet.
- Use the built-in mounting holes on the back of the transformer to mark the drilling points on the wall or post.
- Drill pilot holes and secure the transformer using appropriate mounting screws (included). Ensure the transformer is firmly attached.

Image: Visual guide for installation, showing Step 1: connecting red and black wires to terminal blocks, and Step 2: mounting the transformer on a wall, with a minimum mounting height of 12 inches indicated.
Wiring the Landscape Lights:
- Ensure the transformer is unplugged from the power outlet.
- Strip approximately 1/2 inch of insulation from the ends of your low voltage landscape lighting wires.
- Connect the common wire (typically black) from your landscape lights to the 'COM' terminal on the transformer.
- Connect the positive wire (typically red) from your landscape lights to either the '12V' or '14V' terminal. Use the 14V terminal for longer wire runs or if you experience voltage drop with 12V.
- Tighten the terminal screws securely to ensure good electrical contact.

Image: Detailed view of the transformer's input and output connections, illustrating the conversion from 120V AC input to 12V/14V AC low voltage output.
Photocell Sensor Installation:
- Plug the photocell sensor into the designated port on the transformer.
- Mount the photocell sensor in a location where it will receive natural daylight and not be obstructed by artificial light sources (e.g., porch lights) at night. This ensures accurate dusk and dawn detection.

Image: Illustration of the external photocell sensor, demonstrating its role in activating lights at dusk and turning them off at dawn, or initiating a countdown timer after dusk.
Operating Instructions
The transformer offers five distinct lighting modes. Use the control panel buttons (ENTER, UP, DOWN, CLOCK, MENU) to navigate and set your desired mode.

Image: Close-up of the transformer's control panel, highlighting the five selectable lighting modes and control buttons.
Setting the Clock:
- Press the 'CLOCK' button.
- Use the 'UP' and 'DOWN' buttons to adjust the hour, then press 'ENTER'.
- Repeat for minutes.
- Press 'CLOCK' again to save and exit.
Selecting a Lighting Mode:
Press the 'MENU' button repeatedly to cycle through the available modes. Once the desired mode is displayed, press 'ENTER' to confirm or adjust settings.
- Manual On/Off: Lights are controlled manually by pressing the 'ON/OFF' button.
- Dusk-to-Dawn: Lights turn on automatically at dusk and turn off at dawn, controlled by the photocell sensor.
- Dusk-on with Countdown: Lights turn on at dusk and automatically turn off after a preset duration (2, 3, 4, 6, or 8 hours). Use 'UP'/'DOWN' to select the duration.
- Dusk On/Timer Off: Lights turn on at dusk and turn off at a specific time you set. Set the 'OFF' time using 'UP'/'DOWN' and 'ENTER'.
- Timer On/Off: Lights turn on and off at specific times you set, independent of the photocell. Set both 'ON' and 'OFF' times using 'UP'/'DOWN' and 'ENTER'.
The transformer retains the last selected mode even after a power interruption.

Image: Diagram illustrating the memory function, where the transformer remembers the last programmed setting even after being powered off and on.
Maintenance
- Periodically inspect the transformer and wiring for any signs of damage or wear.
- Keep the photocell sensor clean and free from obstructions to ensure accurate operation.
- Clean the exterior of the transformer with a soft, damp cloth. Do not use harsh chemicals or abrasive cleaners.
- Ensure all terminal connections remain tight.
Troubleshooting
| Problem | Possible Cause | Solution |
|---|---|---|
| Lights do not turn on. | No power to transformer; loose wiring; photocell obstructed; incorrect mode setting; overloaded circuit. | Check power outlet and circuit breaker; ensure all wires are securely connected; clear photocell obstruction; verify mode settings; reduce total wattage of connected lights. |
| Lights stay on continuously. | Photocell receiving artificial light at night; photocell faulty; incorrect mode setting. | Relocate photocell away from artificial light sources; replace photocell; verify mode settings. |
| Lights flicker or are dim. | Voltage drop due to long wire run; loose connections; overloaded circuit. | Use 14V output terminal; check and tighten all wire connections; reduce total wattage or use thicker gauge wire. |
| Timer not working correctly. | Clock not set; incorrect timer settings. | Set the current time on the transformer; re-program the desired timer mode and settings. |
Specifications
| Feature | Specification |
|---|---|
| Model Number | ALT200-12-I-1 |
| Input Voltage | 120V AC |
| Output Voltage | 12V AC / 14V AC |
| Max Power Output | 200 Watts |
| Product Dimensions | 13"D x 5"W x 7"H (13 x 5 x 7 inches) |
| Item Weight | 9 Pounds |
| Power Source | Corded Electric |
| Mounting Type | Wall Mount |
| Safety Certification | UL Listed |
Warranty and Support
DEWENWILS products are designed for reliability and performance. For warranty information or technical support, please refer to the contact details provided with your purchase or visit the official DEWENWILS website.
Please retain your proof of purchase for warranty claims.
Ask a question about this manual
Ask about setup, troubleshooting, compatibility, parts, safety, or missing instructions. Manuals+ will review the question and use this page’s manual context to help answer it.