Introduction
This manual provides detailed instructions for the safe and proper installation and operation of your VIVO Pop-Out Steel Video Wall Mount (MOUNT-VW65-1). This mount is designed to securely hold one TV screen ranging from 37 to 90 inches, supporting a wide VESA range and offering screen leveling capabilities. Please read all instructions carefully before beginning installation.
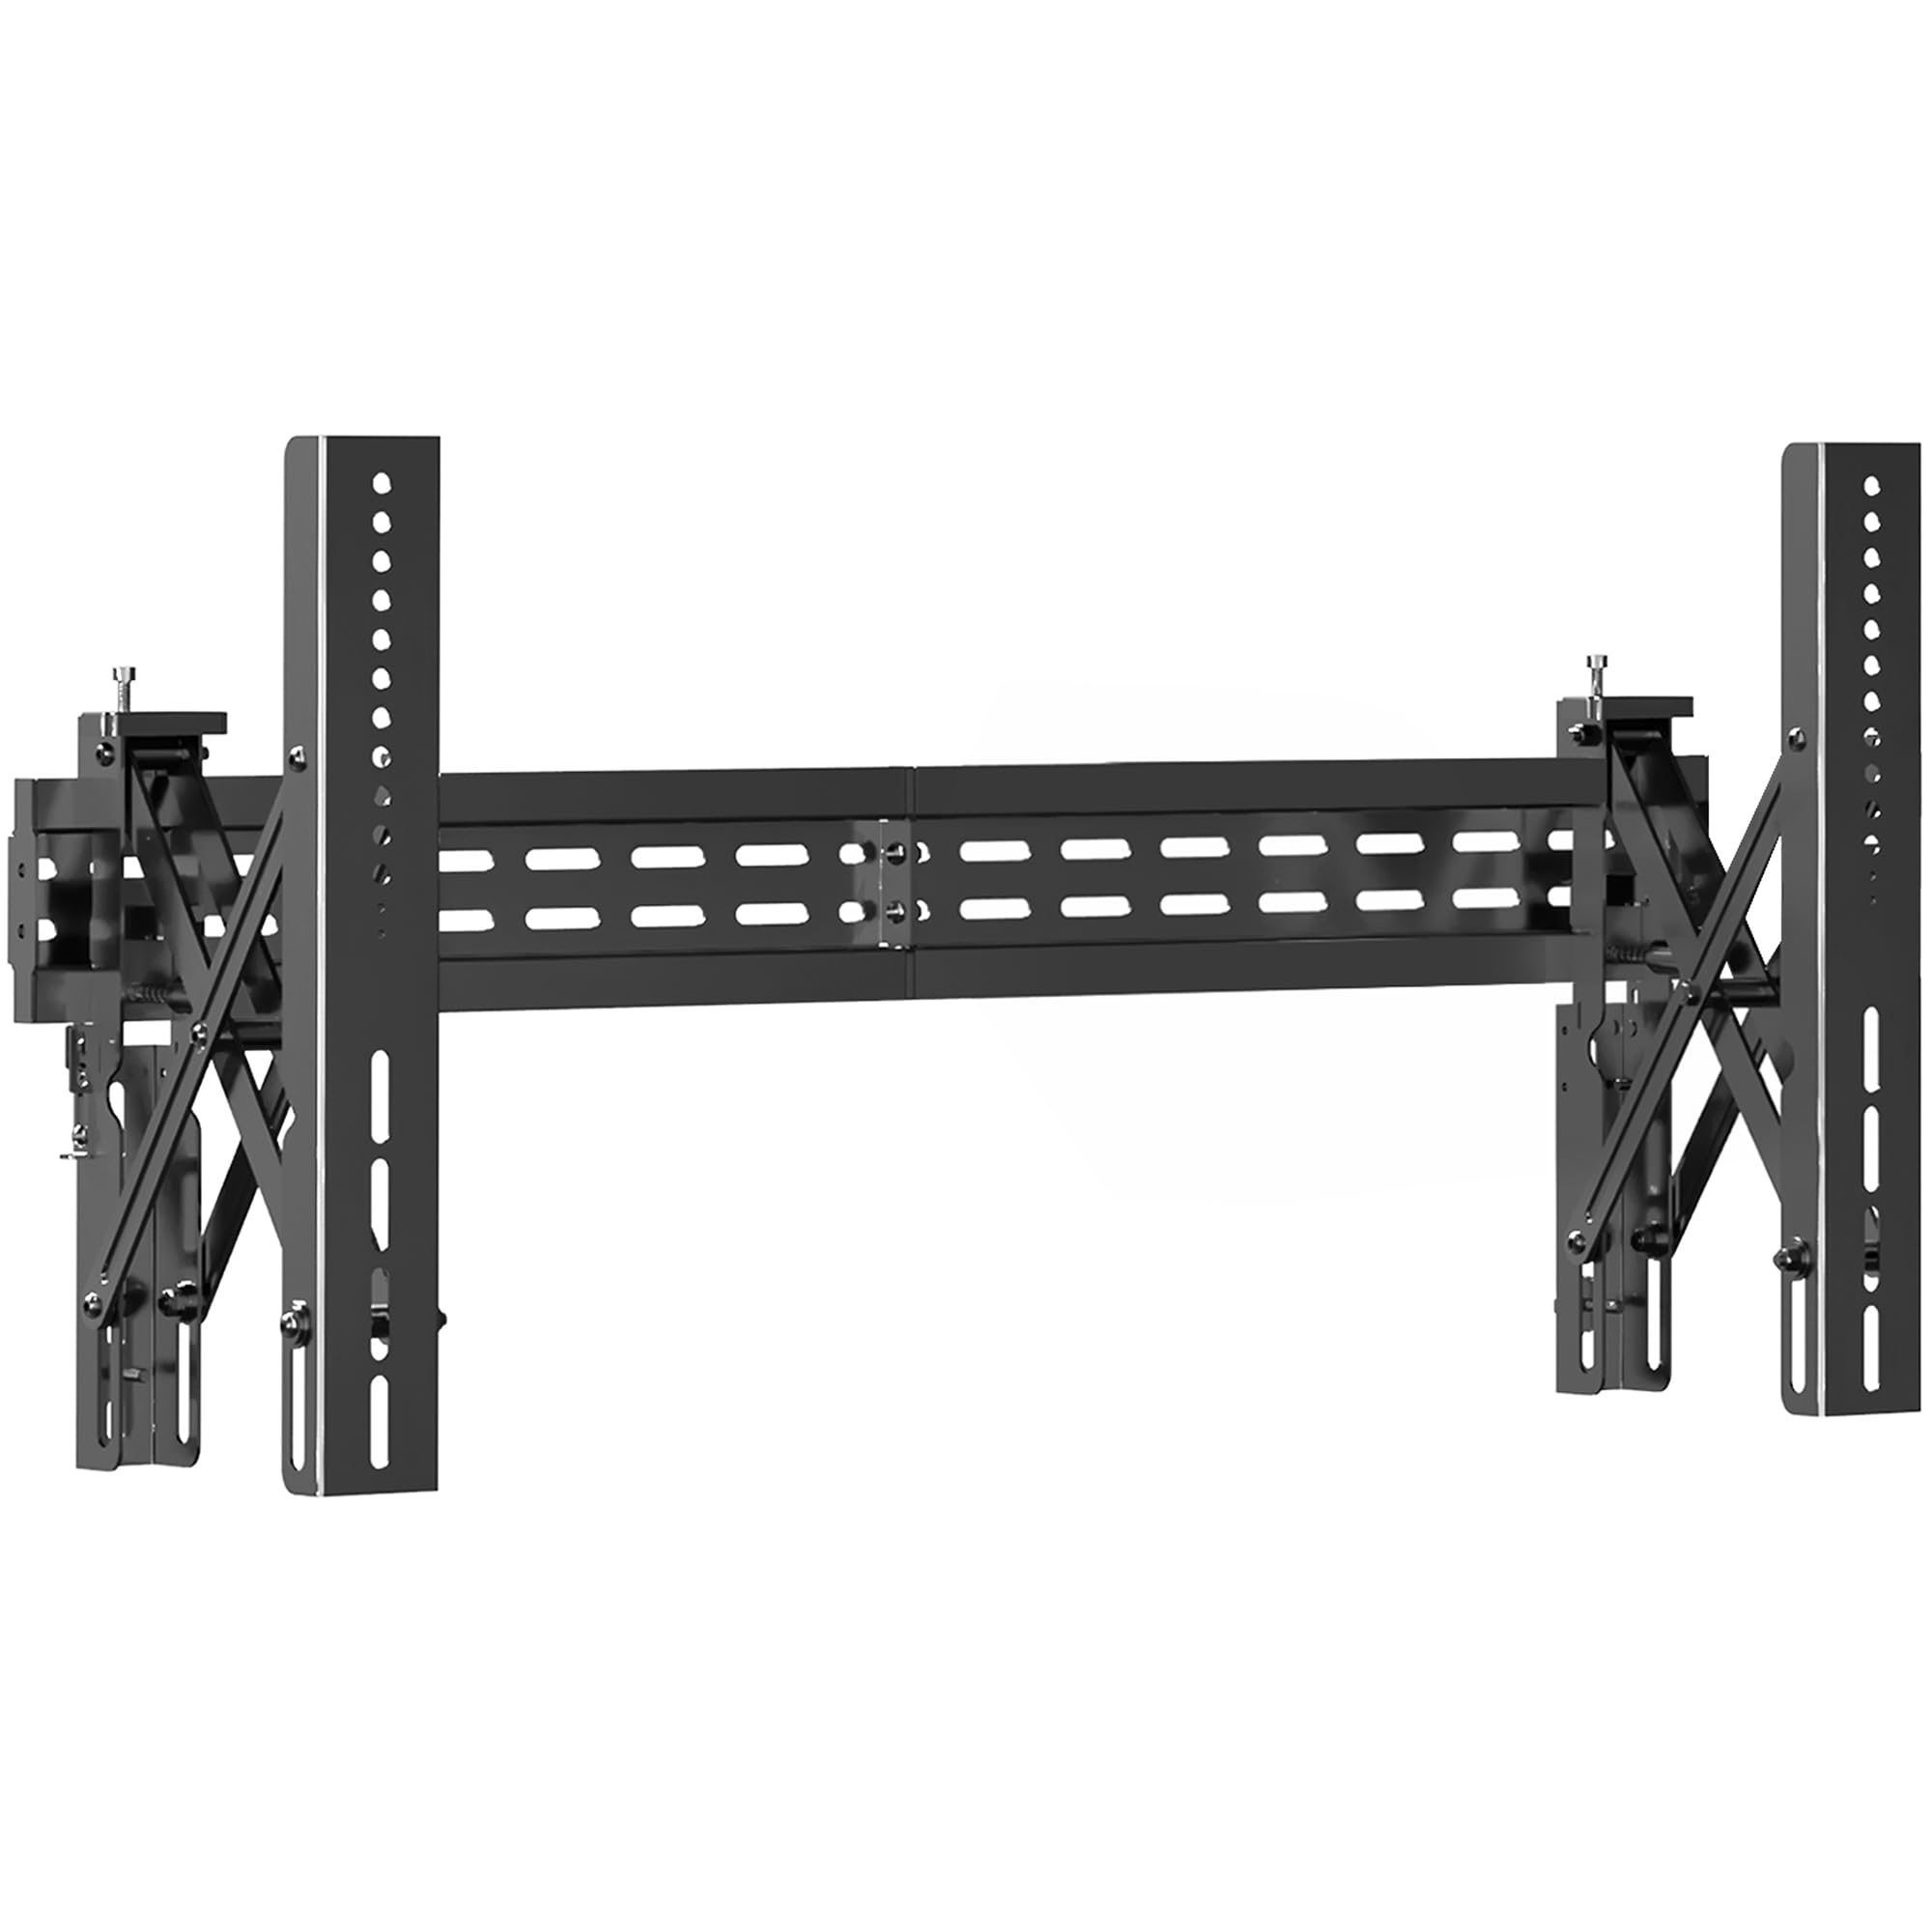
Image: A large television mounted on a wall using the VIVO Pop-Out Steel Video Wall Mount, showcasing a clean and modern installation in a living room setting.
Important Safety Information
WARNING: Failure to read and follow all instructions can result in personal injury, property damage, or voiding of warranty. If you do not understand these instructions or have doubts about the safety of the installation, please contact a qualified installation contractor.
- Do not install on drywall alone. This mount requires installation into wood studs, solid concrete, or brick walls.
- Ensure the mounting surface can safely support the combined weight of the equipment and all attached hardware.
- Do not exceed the maximum weight capacity of 154 lbs (70 kg).
- Use only the provided screws and hardware. Do not use damaged or defective parts.
- This product contains small items that could be a choking hazard if swallowed. Keep children away from all parts.
Package Contents
Verify that all parts are included and undamaged before assembly. If any parts are missing or defective, please contact VIVO customer support.
- Wall Plate Assembly (x1)
- TV Brackets (x2)
- Mounting Hardware Kit (various screws, washers, spacers for TV and wall attachment)
- Level (x1)
- Allen Key (x1)
Video: An unboxing and overview of the components included with a tilting TV wall mount, demonstrating the various screws, brackets, and tools provided for installation.
Specifications
| Model Number | MOUNT-VW65-1 |
| Screen Size Compatibility | 37" to 90" |
| VESA Compatibility | 200x200, 300x200, 300x300, 400x200, 400x300, 400x400, 600x400, 800x400 mm |
| Weight Capacity (Wood Stud) | 110 lbs (50 kg) |
| Weight Capacity (Concrete) | 154 lbs (70 kg) |
| Tilt Adjustment | 0° to -1.5° (via adjustment knobs) |
| Swivel Adjustment | +3° to -3° (for screen leveling) |
| Extension Range (Pop-Out) | 3" - 8.8" |
| Material | Alloy Steel |
| Color | Black |
| Product Dimensions | 35.5 x 8.7 x 17.3 inches |

Image: A detailed diagram illustrating the dimensions of the VIVO Pop-Out Steel Video Wall Mount, including its width (35.5"), height (17.3"), and extension range (3" - 8.8"). It also shows the tilt (0° to -1.5°) and swivel (+3° to -3°) adjustment capabilities.

Image: A graphic displaying the weight capacity of the VIVO Pop-Out Steel Video Wall Mount: 110 lbs for wood stud applications and 154 lbs for concrete applications.
Setup and Installation
1. Pre-Installation Checks
- Verify VESA Pattern: Check the VESA mounting holes on the back of your TV to ensure compatibility with the mount's supported VESA patterns (200x200 to 800x400 mm).
- Check TV Weight: Ensure your TV's weight does not exceed the mount's capacity (110 lbs for wood studs, 154 lbs for concrete).
- Identify Wall Type: Determine if your wall is wood stud, solid concrete, or brick. This will dictate the appropriate hardware and drilling method.

Image: An illustration showing different wall types suitable for installation: brick, concrete, and wood studs, emphasizing the importance of proper wall construction for secure mounting.
2. Attaching TV Brackets to TV
- Select the correct screws, washers, and spacers from the hardware kit that fit your TV's VESA holes.
- Attach the two TV brackets to the back of your TV using the selected hardware. Ensure they are securely fastened.
Video: A detailed animation demonstrating the installation process of the VIVO Pop-Out Video Wall Mount, including attaching the TV brackets to the television, marking and drilling holes in the wall, and finally hanging the TV securely.
3. Mounting Wall Plate to Wall
- For Wood Stud Installation:
- Locate the center of your wood studs using a stud finder.
- Position the wall plate at your desired height and use the integrated level to ensure it is straight. Mark the drilling points.
- Drill pilot holes into the center of the studs.
- Secure the wall plate to the wall using the appropriate lag bolts and washers.
- For Concrete/Brick Wall Installation:
- Position the wall plate at your desired height and use the integrated level to ensure it is straight. Mark the drilling points.
- Drill holes using a masonry drill bit.
- Insert concrete anchors into the drilled holes.
- Secure the wall plate to the wall using the appropriate lag bolts and washers.
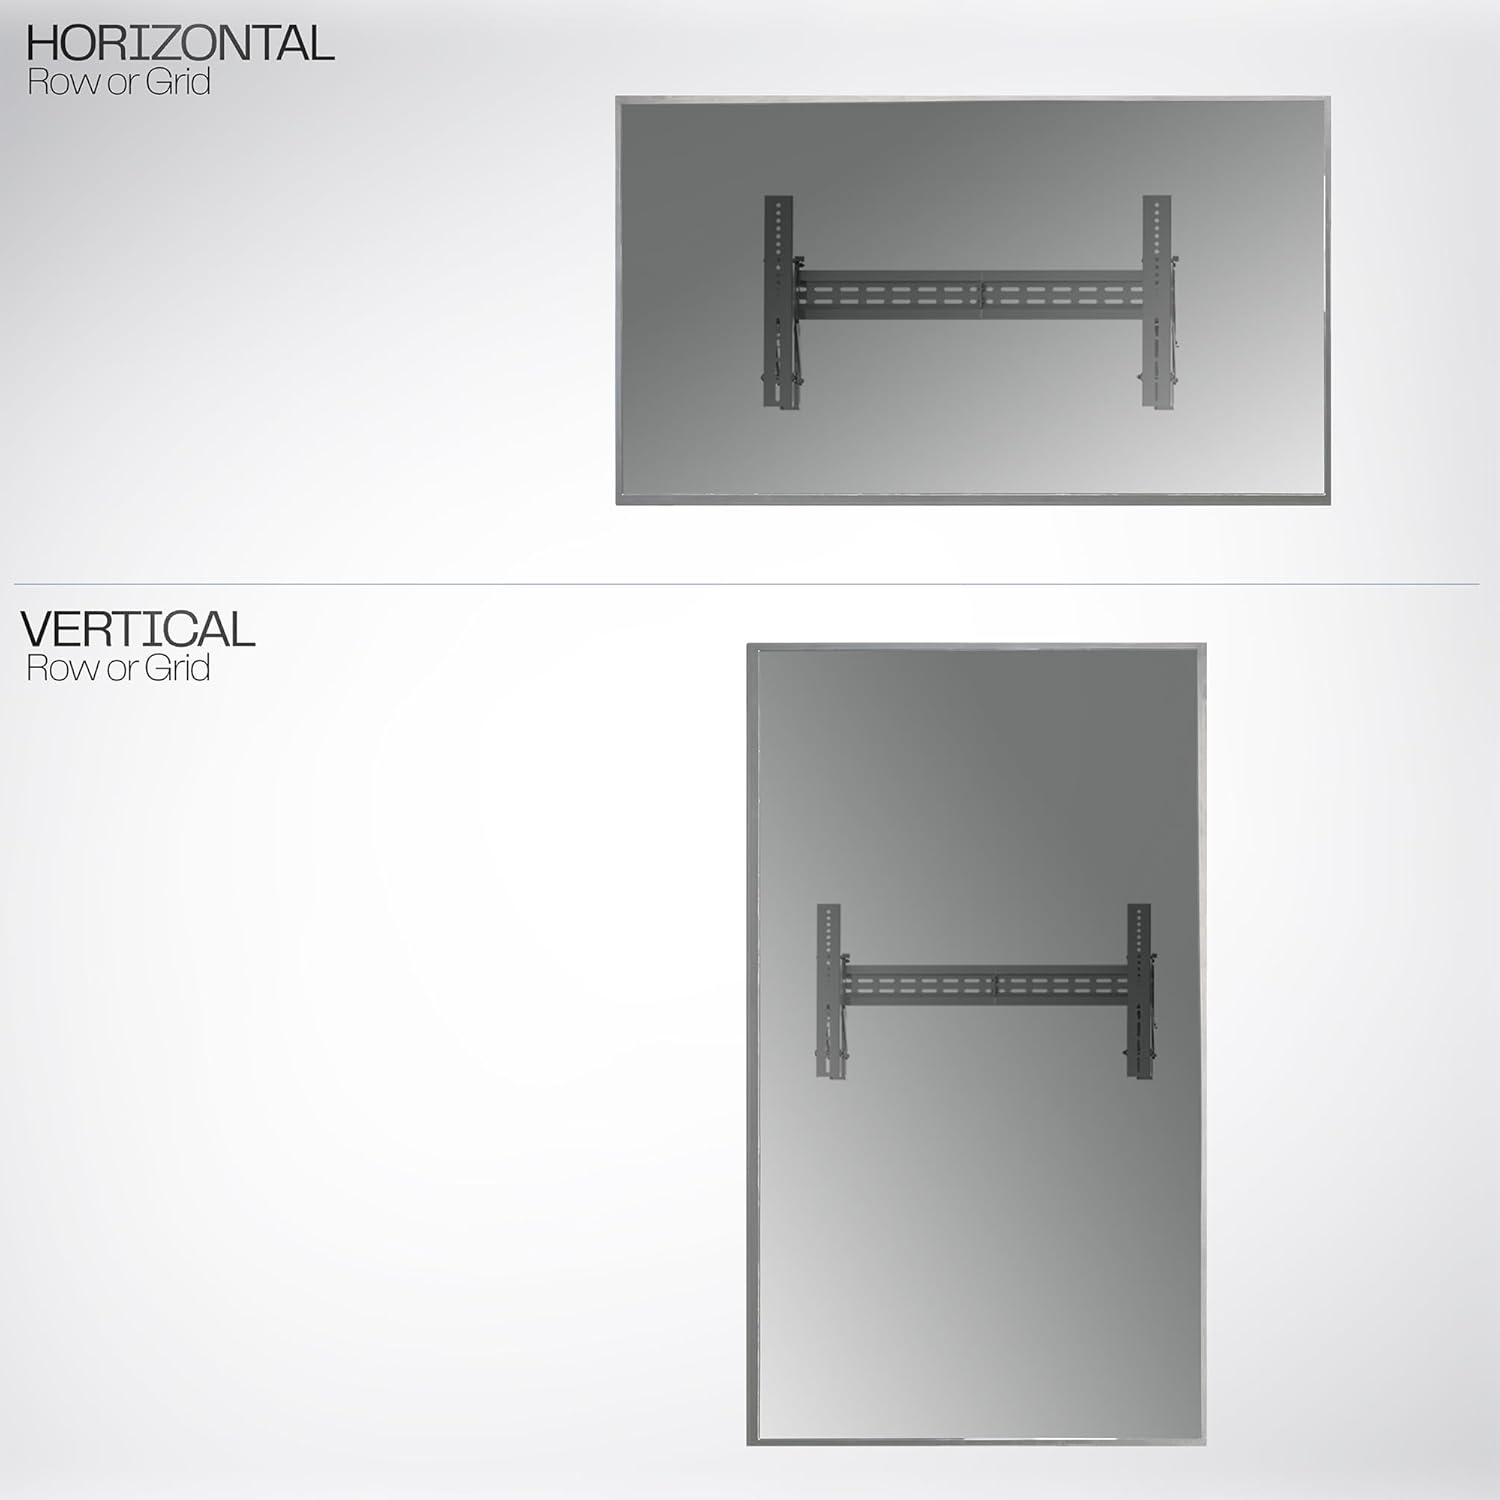
Image: A diagram illustrating both horizontal and vertical mounting options for the TV, indicating how the mount can be adapted for different screen orientations.
4. Hanging the TV
- With assistance, carefully lift the TV with the attached brackets and hook them onto the top edge of the wall plate.
- Gently lower the TV until the brackets engage with the bottom locking mechanism. The pull straps will click into place, securing the TV.
- Pull the quick-release straps to ensure the TV is securely locked onto the wall plate.
Operating Instructions
Pop-Out Feature
The unique pop-out design allows for easy access to the back of your TV for cable management, port access, or maintenance. Simply push the TV gently, and the VESA bracket arms will extend forward, providing ample space behind the screen. Push it back to lock it flush against the wall.

Image: An illustration demonstrating the pop-out feature of the VIVO wall mount, showing the TV extending forward from the wall to allow easy access to ports and cables.

Image: A close-up view of the pop-out mechanism of the VIVO wall mount, highlighting the VESA brackets and the extension range for accessing the back of the TV.
Screen Leveling and Adjustment
- Tilt: Use the adjustment knobs on the TV brackets to achieve a tilt angle between 0° and -1.5° to reduce glare or optimize viewing.
- Swivel: The mounting brackets allow for a swivel of +3° to -3° for fine-tuning screen leveling after installation.
- Lateral Shift: The TV can be slid left or right along the wall plate to achieve perfect centering.
Maintenance
- Periodically check all screws and connections to ensure they remain tight and secure.
- Clean the mount with a soft, dry cloth. Avoid abrasive cleaners or solvents.
- Do not attempt to lubricate any moving parts.
Troubleshooting
| Problem | Possible Cause | Solution |
|---|---|---|
| TV is not level | Wall plate not level during installation, or minor adjustments needed. | Use the swivel adjustment (+3° to -3°) on the TV brackets to fine-tune the level. Re-check wall plate level if necessary. |
| TV feels unstable | Screws are loose, incorrect hardware used, or improper wall type. | Ensure all wall and TV screws are tightened. Verify correct hardware for your wall type. If installed on drywall alone, re-install into studs or concrete. |
| Difficulty with pop-out feature | Mechanism might be stiff or obstructed. | Ensure no cables are obstructing the mechanism. Apply gentle, even pressure to activate the pop-out. |
Warranty and Support
For technical assistance, warranty information, or to request replacement parts, please contact VIVO customer support. Refer to the product packaging or VIVO's official website for contact details. Please have your model number (MOUNT-VW65-1) ready when contacting support.


