1. Introduction
This manual provides essential instructions for the installation, operation, and maintenance of the replacement water inlet valve designed for GE GTW490ACJ5WS washing machines. Adhering to these guidelines will help ensure optimal performance and extend the lifespan of your appliance.
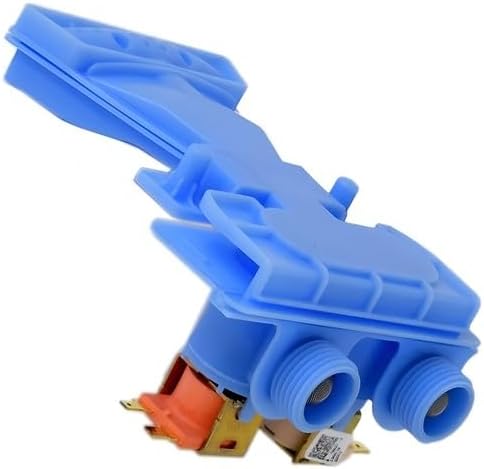
Image 1: This image displays the replacement water inlet valve, primarily light blue plastic with two threaded water inlets at the bottom and electrical solenoid connections. It is designed to control water flow into a washing machine.
2. Product Description and Compatibility
This water inlet valve serves as a direct replacement part for GE GTW490ACJ5WS washer models. Its primary function is to regulate the flow of hot and cold water into the washing machine tub during various cycles. To ensure proper fit and function, it is crucial to verify that the dimensions and specifications of this part match your appliance's requirements before proceeding with installation.
- Replaces the original water inlet valve for efficient water flow and optimal washer performance.
- Ensures proper functioning of your washing machine by controlling water intake.
- Always check product dimensions and photos to confirm compatibility with your specific GE GTW490ACJ5WS model.
3. Safety Information
Prior to any installation or maintenance, observe the following safety precautions:
- Disconnect Power: Always unplug the washing machine from the electrical outlet to prevent electric shock.
- Turn Off Water Supply: Close both the hot and cold water supply valves to the washing machine to prevent flooding.
- Wear Protective Gear: Use appropriate personal protective equipment, such as work gloves and eye protection.
- Professional Assistance: If you are uncertain about any step of the installation process, consult a qualified appliance technician.
- Check for Leaks: After installation, ensure all connections are secure and leak-free before restoring power and water.
4. Setup and Installation
Follow these general steps for replacing the water inlet valve. Specific procedures may vary slightly depending on your washer's design.

Image 2: A side view of the water inlet valve, showing the overall shape and the two distinct solenoid coils responsible for opening and closing the water pathways for hot and cold water.
- Preparation: Ensure the washer is unplugged and both hot and cold water supply valves are completely closed.
- Access the Valve: Carefully move the washing machine away from the wall. Depending on your specific GE GTW490ACJ5WS model, you may need to remove the rear access panel or the top console to gain access to the water inlet valve.
- Disconnect Hoses: Using a wrench, disconnect the hot and cold water fill hoses from the existing valve. Have a towel ready to catch any residual water.
- Disconnect Wiring: Carefully detach the electrical wiring harness from the solenoids on the old valve. Note the position of each wire if they are not uniquely keyed or color-coded.
- Remove Old Valve: Unscrew or unclip the old water inlet valve from its mounting bracket within the washer.
- Install New Valve: Position the new water inlet valve in the same location as the old one and secure it using the appropriate screws or clips.
- Reconnect Wiring: Reattach the electrical wiring harness to the solenoids on the new valve, ensuring a secure connection.
- Reconnect Hoses: Attach the hot and cold water fill hoses to their respective threaded inlets on the new valve. Hand-tighten, then use a wrench for a final quarter-turn to ensure a leak-free seal. Do not overtighten.
- Test for Leaks: Slowly open the hot and cold water supply valves. Carefully inspect all connections around the new valve and hoses for any signs of leaks. Address any leaks before proceeding.
- Restore Power: Once satisfied that there are no leaks, plug the washing machine back into the electrical outlet.
- Function Test: Run a short wash cycle (e.g., Rinse & Spin) to confirm that the valve fills the tub correctly and operates without issues.
5. Operating Instructions
Once properly installed, the water inlet valve operates automatically in conjunction with your washing machine's control system. It functions by opening its internal solenoids to allow hot and/or cold water to flow into the washer tub during the fill cycles, and then closes to stop the water flow once the desired water level is reached or the wash cycle progresses to the next stage.
6. Maintenance
Regular maintenance can help prolong the life of your water inlet valve:
- Periodic Inspection: Periodically check the water inlet valve and the connected hoses for any visible signs of wear, cracks, or leaks. Address any issues promptly.
- Clean Filter Screens: The valve typically includes small filter screens at the hose connection points to prevent sediment from entering. If you notice restricted water flow, turn off the water supply, disconnect the hoses, remove and clean these screens, then reassemble.
- Avoid Harsh Chemicals: Do not use abrasive cleaners or harsh chemicals near the valve, as they can damage plastic components or rubber seals.
7. Troubleshooting
If you encounter issues with your washing machine's water fill, consider the following:
- No Water or Slow Fill:
- Ensure both hot and cold water supply valves are fully open.
- Inspect the filter screens on the water inlet valve for clogs caused by sediment.
- Verify that the electrical connections to the valve solenoids are secure.
- Continuous Water Fill (Valve Not Closing):
- The valve may be faulty and require replacement.
- Check for any small debris that might be preventing the valve from fully closing.
- Leaks Around the Valve:
- Ensure that the water fill hoses are tightly connected and that their rubber washers are intact and properly seated.
- Inspect the body of the valve itself for any visible cracks or damage.
8. Specifications
| Manufacturer | 20 SECOND SOAP |
| Part Number | GTW490ACJ5WS |
| Item Model Number | GTW490ACJ5WS |
| Compatibility | Designed for GE GTW490ACJ5WS Washer |
| ASIN | B0F7931JVT |
9. Warranty and Support
For detailed warranty information or technical support regarding this replacement part, please refer to your original purchase documentation or contact the seller directly. The manufacturer, 20 SECOND SOAP, can also provide assistance.


