
1. Product Overview
The Higeego H2 Mini Portable Closet is a heavy-duty garment rack designed for organizing clothes and accessories. It features a robust carbon steel construction, adjustable shelves, and smooth-rolling wheels for portability. This manual provides essential information for safe assembly, operation, and maintenance.

Image 1.1: Fully assembled Higeego H2 Mini Portable Closet in a room, showcasing its storage capacity for hanging clothes, folded items, and luggage.

Image 1.2: The garment rack positioned in a laundry room, demonstrating its versatility for various storage needs, including clothes and cleaning products.
2. Safety Information
- Ensure all parts are present and undamaged before assembly.
- Assemble the unit on a flat, stable surface.
- Do not exceed the maximum weight capacity of 430 lbs (195 kg).
- Distribute weight evenly across shelves and hanging rods to prevent tipping.
- Lock the wheels when the rack is in a stationary position to ensure stability.
- Keep small parts away from children during assembly.
3. Package Contents
Verify that all components listed below are included in your package:
- Metal Poles (various lengths)
- Wire Shelves (3 units)
- Hanging Rods (2 units)
- S Hooks (quantity as specified)
- Adjustable Shelf Clips
- Wheels (4 units, 2 with brakes)
- Assembly Instructions Manual

Image 3.1: Illustration of key components including shelves, hooks, and hanging rods.
4. Assembly Instructions
Follow these steps carefully for proper assembly. It is recommended to assemble the unit with another person.
- Prepare the Base: Attach the wheels to the bottom of the four main vertical poles. Ensure the two lockable wheels are positioned on the same side for easy access.
- Install Lower Shelf: Slide the adjustable shelf clips onto the poles at the desired height for the bottom shelf. Ensure the clips are securely locked into the grooves. Place the first wire shelf onto these clips, pressing down firmly to secure it.
- Attach Lower Hanging Rod: If using the lower hanging rod, attach its supports to the vertical poles above the first shelf.
- Install Middle Shelf: Determine the desired height for the middle wire shelf. Slide the adjustable shelf clips onto the poles and secure the second wire shelf.
- Attach Upper Hanging Rod: Attach the supports for the upper hanging rod to the vertical poles above the middle shelf.
- Install Top Shelf: Slide the adjustable shelf clips onto the poles at the desired height for the top shelf. Secure the third wire shelf.
- Final Checks: Ensure all shelves and rods are level and securely fastened. Gently shake the rack to confirm stability.

Image 4.1: Detailed views of assembly steps, including how to fit flanges into grooves, ensure gaps for stability, and attach hanging rods and side hooks.

Image 4.2: Example configurations showing how shelves and rods can be adjusted to create different storage layouts.
5. Operating Instructions
5.1 Adjusting Shelves
The wire shelves are adjustable to accommodate items of various heights. To adjust a shelf:
- Empty the shelf completely.
- Carefully lift the shelf off its clips.
- Remove the adjustable clips from the vertical poles.
- Re-position the clips at the desired height, ensuring they snap securely into the grooves on all four poles at the same level.
- Place the shelf back onto the clips, pressing down firmly until it is stable.
5.2 Using Hanging Rods
The rack includes two detachable hanging rods. These can be used for coats, shirts, skirts, and trousers. For longer garments like dresses or long coats, the lower hanging rod can be removed, and the middle wire shelf can be raised to provide ample vertical space.
5.3 Mobility and Stability
The garment rack is equipped with four smooth-rolling wheels, two of which are lockable. To move the rack, unlock the wheels. To keep the rack stationary and prevent accidental movement, engage the brakes on the two lockable wheels.
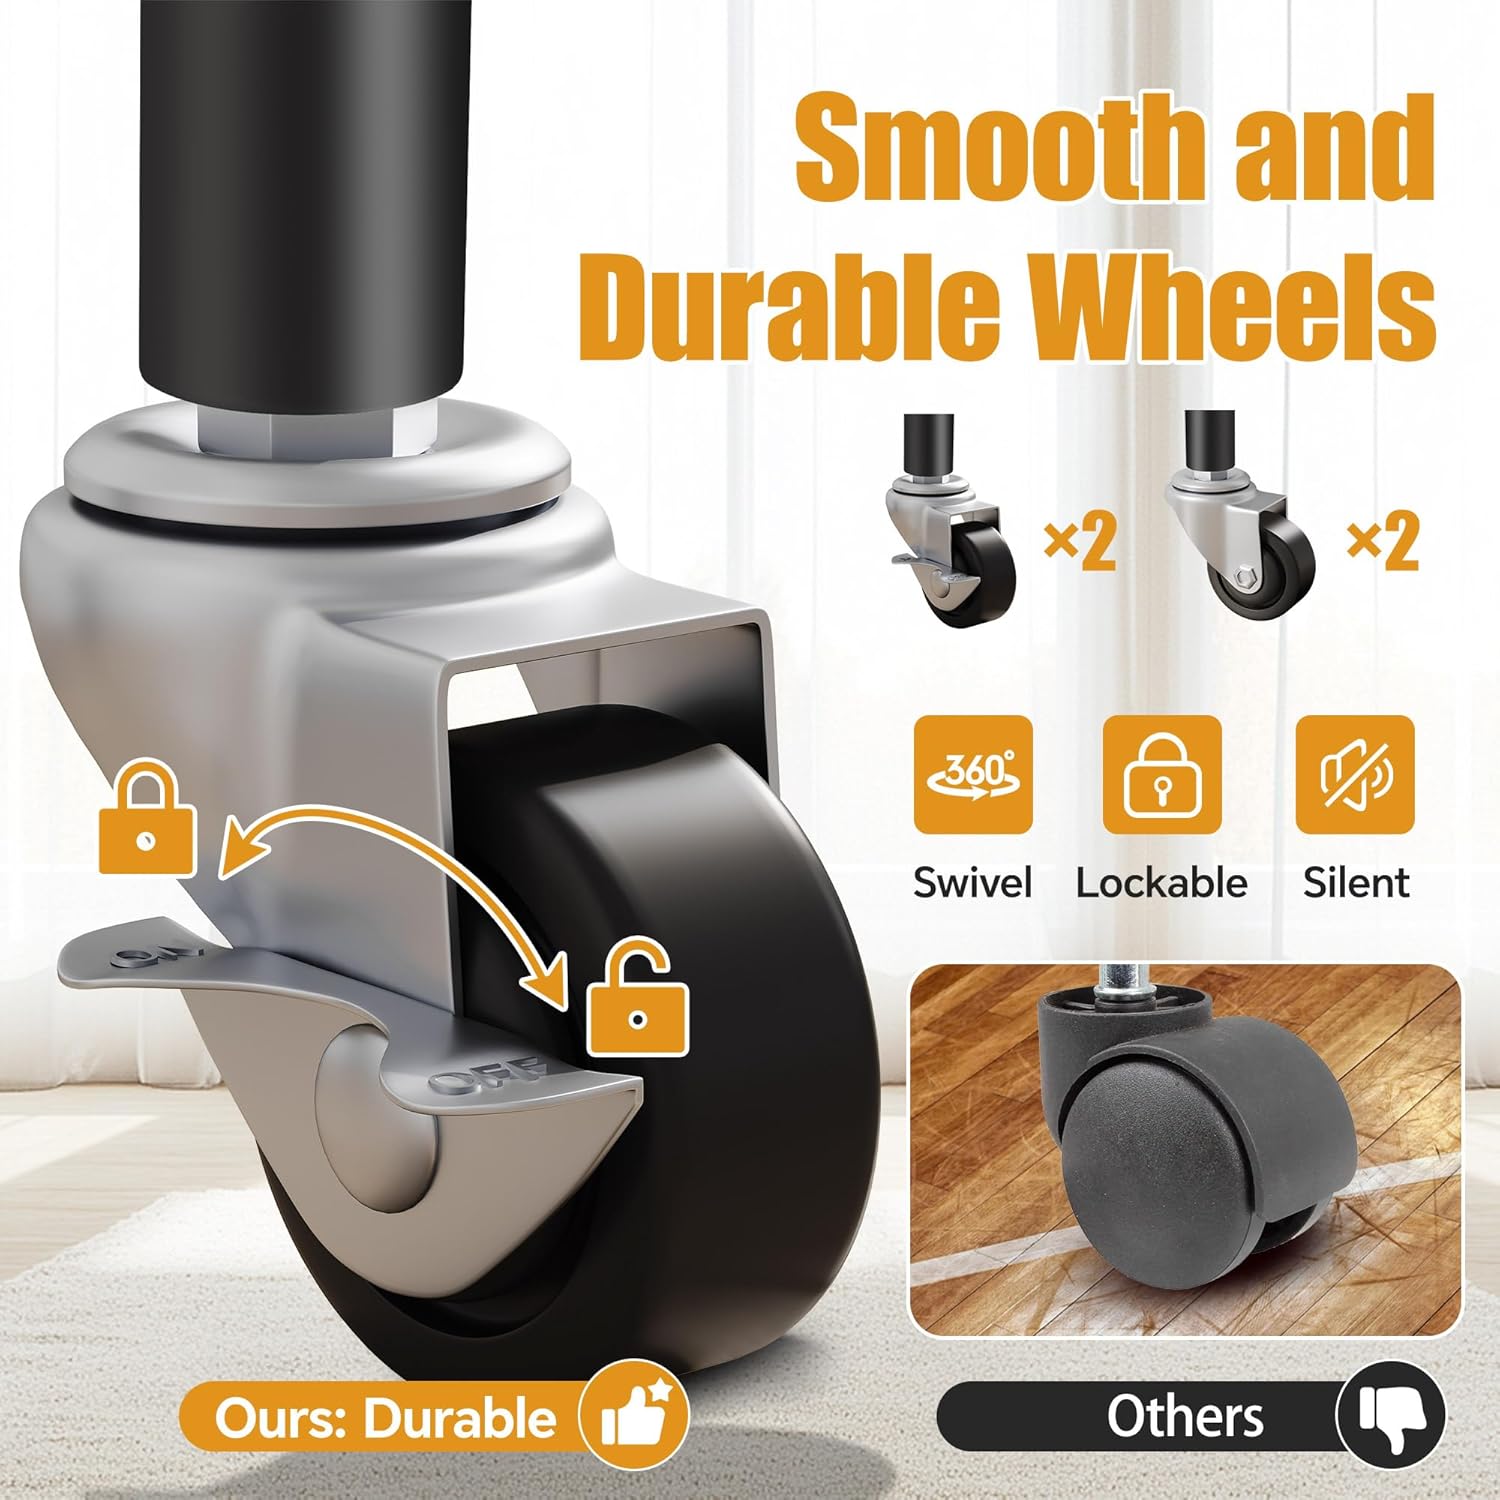
Image 5.1: Detail of the durable wheels, highlighting the 360-degree swivel and lockable brake mechanism for stability.
Video 5.1: Official product video demonstrating the rolling functionality and hanger rods of the Higeego garment rack.
6. Maintenance
- Cleaning: Wipe down the carbon steel frame and wire shelves with a soft, damp cloth. Avoid abrasive cleaners or harsh chemicals that could damage the powder-coated finish.
- Rust Prevention: The rack features a powder-coated carbon steel finish designed to protect against water and rust. However, avoid prolonged exposure to excessive moisture.
- Wheel Care: Periodically check the wheels for any debris (e.g., hair, lint) that might hinder smooth rolling. Clean as necessary.
- Tightening: Occasionally check all connections and ensure they remain tight to maintain stability.
7. Troubleshooting
- Rack is Unstable:
- Ensure all shelf clips are securely snapped into the grooves on the vertical poles.
- Verify that all poles are fully inserted and connected.
- Check that weight is distributed evenly.
- Confirm wheels are locked when stationary.
- Wheels Not Rolling Smoothly:
- Check for and remove any debris (e.g., hair, lint) caught in the wheels.
- Ensure the wheel locks are disengaged.
- Difficulty Adjusting Shelves:
- Ensure the shelf is completely empty before attempting to adjust.
- Make sure the clips are properly aligned with the grooves on the poles.
8. Specifications
| Brand | Higeego |
| Model Number | Higeego H2 Mini Rolling Garment Rack |
| Material | Carbon Steel |
| Color | Black |
| Product Dimensions (D x W x H) | 14.6"D x 23.6"W x 78.8"H |
| Item Weight | 15 Pounds (6.8 kg) |
| Maximum Weight Recommendation | 430 Pounds (195 kg) |
| Number of Shelves | 3 |
| Included Components | S hook, adjustable shelves, hanging rod, metal poles, wheels |
| Installation Type | Free Standing |
| Required Assembly | Yes |

Image 8.1: Visual representation of the garment rack's dimensions and maximum load capacity.
9. Warranty and Support
For any questions, concerns, or to report missing or damaged parts, please contact Higeego customer support. While specific warranty details are not provided in this manual, Higeego strives to offer quality products and support.
For further assistance, please visit the official Higeego store or contact their customer service through the platform where the product was purchased.