1. Introduction
This manual provides essential information for the installation, operation, maintenance, and troubleshooting of your new Generic Replacement Dishwasher Drain Pump. This component is designed to effectively remove water from your dishwasher tub during wash and rinse cycles. Please read these instructions carefully before attempting any installation or repair to ensure safe and proper functioning.
Product Model: SHX5ER55UC/86 (Generic Replacement)
Brand: Generic
2. Safety Information
Always prioritize safety when working with electrical appliances and water. Failure to follow these safety guidelines may result in electric shock, personal injury, or property damage.
- Disconnect Power: Before beginning any installation, maintenance, or troubleshooting, always disconnect the dishwasher from its power supply by unplugging it or turning off the circuit breaker.
- Water Supply: Turn off the water supply to the dishwasher before starting work.
- Professional Installation: If you are not comfortable performing appliance repairs, it is highly recommended to seek assistance from a qualified technician.
- Wear Protective Gear: Use appropriate personal protective equipment, such as gloves and safety glasses, to prevent injury.
- Check for Leaks: After installation, carefully check all connections for leaks before fully restoring power and water.
3. Compatibility
This replacement drain pump is compatible with a wide range of Bosch and Thermador dishwasher models. Please verify your dishwasher's model number against the lists below to ensure proper fitment.
Compatible Bosch Models:
- SHE68T55UC/02, SHP53T55UC/02, SGE63E06UC/51, SPX5ES55UC/06, SPX5ES55UC/26, SHV68T53UC/01, SHX9PT75UC/98, SPX5ES55UC/07, SHP7PT55UC/02, SGE63E06UC/72, SHE7PT52UC/02, SHX9ER55UC-01, SGE63E06UC/52, SPE5ES55UC/15, SGE63E15UC/80, SHX9PT55UC/C9, SHX7ER55UC/73, SGE63E15UC/44, SHX68T52UC/01, SHE65T52UC/02, SHX7PT55UC/04, SPV5ES53UC/07, SHX7ER55UC/50, SHX9PT75UC/87, SHX9PT55UC/87, SHV53T53UC/01, SHE9PT55UC/70
- SGE63E06UC/87, SGE63E15UC/A3, SGE63E15UC/86, SHE9PT55UC/A5, SHX9PT75UC/80, SHX65T55UC/02, SHE53TF5UC/02, SHE9PT55UC/93, SHE53TF5UC/01, SHP53T55UC/01, SHE9PT55UC/86, SHE8PT55UC/05, SHX9PT75UC/D5, SHE7PT52UC/01, SHE9PT55UC/76, SHX68T55UC/01, SHX7ER55UC/82, SHP65TL5UC/02
- SHX53T55UC/01, SHV9PT53UC/01, SPV5ES53UC/19, SPV5ES53UC/04, SHE7PT56UC/02, SHE53T55UC/02, SHE7PT55UC/03, SHX9PT75UC/B4, SPV5ES53UC/30, SHX8PT55UC/02, SGE63E15UC/48, SHV53T53UC/02, SHP65T55UC/01, SGE63E06UC/50, SHE8PT55UC/02, SGV63E03UC/73, SHV68TL3UC/04, SHP65TL6UC/02, SPV5ES53UC/15, SGE63E06UC/73, SHE53TF6UC/02, SGE63E15UC/72, SHE9PT55UC/B4, SHP65T52UC/01, SGE63E06UC/80, SHX9PT55UC/D5, SHE9PT55UC/87, SPE5ES55UC/19, SGE63E06UC/74, SPV5ES53UC/23, SGE63E15UC/51, SHE53T56UC/01, SHE68T55UC/01, SGE63E06UC/A3, SHX7PT55UC/01, SHX9PT75UC/B3, SHP65T56UC/02, SHX9PT55UC/B3, SHE65T55UC/02, SHX9PT55UC/93, SHE53TF2UC/01, SHV9PT53UC/80, SHX9PT75UC/76, SPV5ES53UC/20, SPX5ES55UC/04, SGE63E06UC/82, SHE53TF2UC/02, SGE63E15UC/87, SHE8PT55UC/01, SHX53TL5UC/01, SPV5ES53UC/26, SHX9PT75UC/A5, SPE5ES55UC/01, SPE5ES55UC/28, SHE53T52UC/02, SGE63E06UC/21, SHE9PT55UC/98, SGE63E06UC/44, SHE68T52UC/01, SHX9PT75UC/01, SHE68T56UC/01, SHP65TL2UC/02, SHE9PT55UC/73, SPE5ES55UC/04, SHE53TL2UC/01, SHX68T55UC/02, SPX5ES55UC/28, SGE63E15UC/55, SGE63E15UC/82, SPX5ES55UC/23, SHV9PT53UC/C9, SHX8PT55UC/01, SHXN8U55UC/06, SHX9PT55UC/82, SHE53TF6UC/01, SGE63E06UC/55, SHV9PT53UC/93, SPV5ES53UC/14, SHE7PT55UC/02, SHV68TL3UC/01, SHE9PT55UC/C9, SHV9PT53UC/82, SPE5ES55UC/23, SHE9PT55UC/82, SHX7PT55UC/02, SHX7ER55UC/93, SPE5ES55UC/26, SHV68T53UC/04, SGE63E15UC/01, SHE65T56UC/01, SHV9PT53UC/70, SPX5ES55UC/15, SGE63E06UC/86, SHE7PT56UC/01, SHE53T55UC/01, SPV5ES53UC/06, SGE63E06UC/98, SHE9PT55UC/B3, SHX7ER55UC/55, SHX9PT75UC/93, SHP65T52UC/02, SHE7PT55UC/01, SHX9PT55UC/86, SHX68T56UC/01, SHX9PT75UC/74, SHX65T55UC/01, SHX9PT55UC/B4, SHX7ER55UC/51, SHX68T52UC/02, SHX9PT75UC/73, SGV63E03UC/01, SHE68T52UC/02, SHE53TL2UC/02, SGE63E15UC/98, SHX9PT75UC/C9, SHX9ER55UC/01, SHX7ER55UC/74, SGE63E06UC/93, SPE5ES55UC/07, SHXN8U55UC/01, SHX53T55UC/02, SHE53T56UC/02, SHP65T55UC/02, SHX7ER55UC/52, SGE63E06UC/48, SPE5ES55UC/30, SGE63E15UC/74, SHX53TL5UC/02, SHX9PT75UC/70, SHP7PT55UC/01, SHV9PT53UC/B3, SGE63E15UC/52, SPV5ES53UC/28, SHV9PT53UC/87, SHV9PT53UC/76, SHE65T55UC/01, SHE53T52UC/01, SHP65TL2UC/01, SHP65T56UC/01, SHV9PT53UC/98, SHV68TL3UC/02, SPE5ES55UC/06, SHV9PT53UC/D5, SHV9PT53UC/86, SHX68T56UC/02, SHP68T55UC/01, SHV9PT53UC/B4, SHX7ER55UC/01, SHX68TL5UC/02, SHV7PT53UC/04, SPX5ES55UC/30, SHE9PT55UC/D5, SPX5ES55UC/20, SHE9PT55UC/74, SPE5ES55UC/20, SPE5ES55UC/14, SGE63E15UC/50, SHX7ER55UC/86, SHE68T56UC/02, SGE63E15UC/73, SHE65T56UC/02, SHX9PT55UC/98, SHE68T55UC/03, SHE65T52UC/01, SHV9PT53UC/73, SHX7ER55UC/48, SHP68TL5UC/01, SGE63E15UC/93, SHX8PT55UC/05, SHX7ER55UC/44, SHV9PT53UC/A5, SHV9PT53UC/74, SPX5ES55UC/01, SHE9PT55UC/80, SPX5ES55UC/19, SPX5ES55UC/14, SHX9PT75UC/86, SHX9PT55UC/A5, SHE9PT55UC/01, SHV68T53UC/02, SHX9PT75UC/82, SHP65TL5UC/01
Compatible Thermador Models:
- SHE65T52UC/01, SHX5ER55UC/86, DWHD640JFP/98, SHX5ER55UC/73, SHE33T56UC/02, SHX5ER55UC/55, SHX5ER55UC/98, SHP68T55UC/01, SHX5ER55UC/01, DWHD440MFP/01, SHS63VL2UC/01, SHX53TL5UC/01, SHE33T56UC/01, SHX5ER55UC/72, SHX68T52UC/02, SHX53TL5UC/02, SHP65T55UC/01, SHE53TL6UC/02, SHX5ER55UC/82, SHP65T55UC/02, SHV7PT53UC/02, SHX5ER55UC/87, SHS63VL5UC/01, SHV7PT53UC/01, SHX5ER55UC/50, SHX5ER55UC/80, SHX68TL5UC/01, SHX5ER55UC/74, SHX5ER55UC/93, DWHD440MFP/02
4. Package Contents
Your package should contain the following item:
- 1 x Generic Replacement Dishwasher Drain Pump
5. Setup and Installation
Replacing a dishwasher drain pump typically involves working with water and electrical connections. If you are unsure about any step, consult a qualified appliance technician.
Required Tools (May Vary):
- Screwdrivers (Phillips and Flathead)
- Pliers
- Adjustable Wrench
- Towels or Rags
- Bucket or Pan
General Installation Steps:
- Disconnect Power and Water: Ensure the dishwasher is unplugged and the water supply valve is closed.
- Access the Pump: Depending on your dishwasher model, you may need to pull the dishwasher out from under the counter, or access the pump from the front by removing the lower access panel. Some models require tilting the dishwasher on its back.
- Drain Residual Water: Place towels and a pan under the dishwasher to catch any remaining water when disconnecting hoses.
- Disconnect Hoses and Wiring: Carefully disconnect the drain hose and any other hoses connected to the pump. Disconnect the electrical wiring harness from the old pump. Note the orientation of all connections.
- Remove Old Pump: Unfasten any clamps, screws, or mounting brackets securing the old drain pump. Remove the old pump.
- Install New Pump: Position the new Generic Replacement Drain Pump in place. Secure it with the appropriate clamps, screws, or mounting brackets.
- Reconnect Hoses and Wiring: Reconnect the drain hose and other hoses, ensuring all connections are tight and secure. Reattach the electrical wiring harness.
- Test for Leaks: Partially restore the water supply and power. Run a short cycle and carefully check for any leaks around the pump and hose connections. Address any leaks immediately.
- Final Assembly: Once you confirm there are no leaks, fully restore power and water. Reinstall any access panels or reposition the dishwasher.
6. Operating
The drain pump operates automatically as part of your dishwasher's wash cycle. Its primary function is to pump out dirty water from the dishwasher tub at specific stages of the cycle, ensuring clean water is used for rinsing and that the tub is empty at the end of the cycle.
No direct user interaction is required for the drain pump's operation once correctly installed.
7. Maintenance
While the drain pump itself requires minimal maintenance, regular checks of your dishwasher's drainage system can help prolong its life and prevent issues.
- Clean Filters: Regularly clean your dishwasher's food trap and filters to prevent debris from reaching and clogging the drain pump.
- Inspect Drain Hose: Periodically check the drain hose for kinks, blockages, or damage that could impede water flow.
- Avoid Overloading: Do not overload the dishwasher, as this can sometimes lead to improper drainage.
8. Troubleshooting
If your dishwasher is experiencing drainage issues after installing the new pump, consider the following common troubleshooting steps:
| Problem | Possible Cause | Solution |
|---|---|---|
| Dishwasher not draining | Clogged drain hose or air gap; clogged filter; faulty check valve; improper installation. | Check and clear drain hose/air gap. Clean dishwasher filters. Verify check valve operation. Re-check pump installation and connections. |
| Loud noise during draining | Debris in pump impeller; loose pump mounting; worn bearings (less likely for new pump). | Disconnect power, inspect pump impeller for foreign objects. Ensure pump is securely mounted. |
| Water leaking from pump area | Loose hose clamps; damaged gasket/seal; cracked pump housing (unlikely for new pump). | Ensure all hose clamps are tight. Verify gaskets and seals are properly seated and undamaged. |
9. Specifications
| Specification | Detail |
|---|---|
| Manufacturer | generic |
| Item Model Number | SHX5ER55UC/86 |
| Style | Inline |
| Material | Stainless Steel |
| Power Source | Corded Electric |
| Package Dimensions | 1 x 1 x 1 inches |
| Date First Available | May 1, 2025 |
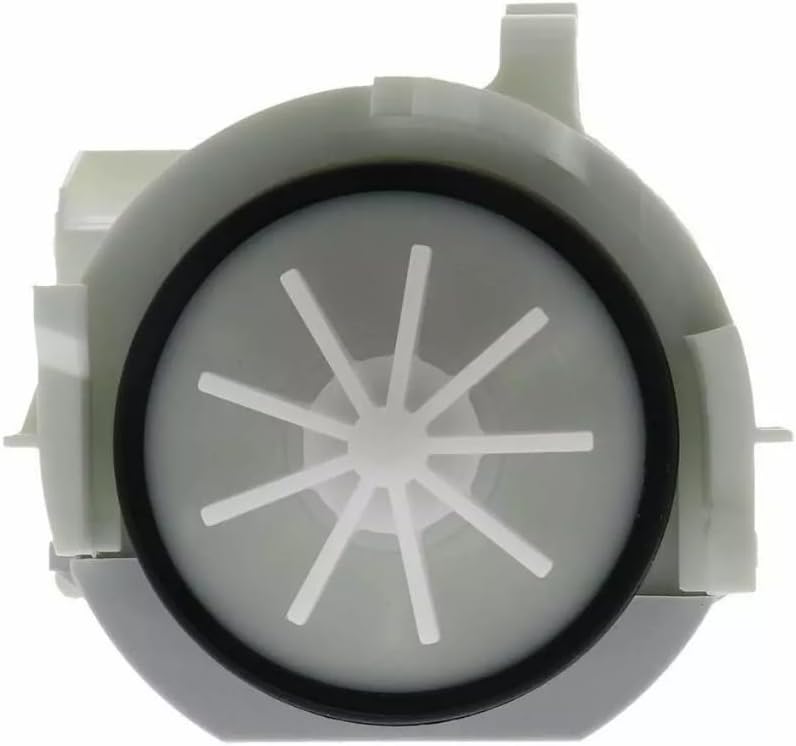
10. Product Images
Refer to the following images for visual reference of the drain pump.


11. Warranty and Support
Specific warranty information for this Generic Replacement Dishwasher Drain Pump is not provided in the product details. For any warranty inquiries or technical support, please contact the seller directly through your purchase platform.


