
1. Product Overview
The AUDERWIN Low Voltage Landscape Lighting Kit provides an energy-efficient solution for outdoor illumination. This kit includes LED spotlights, a 60W transformer, and 65 feet of wire, designed for various outdoor applications such as yards, gardens, trees, pathways, and house exteriors. The system operates on a safe 12V AC/DC input, with each light providing 180 lumens of warm white (3000K) light using 3 watts of power.
The components are constructed from durable aluminum and feature an IP65 waterproof rating, ensuring resistance to rain, snow, frost, and high temperatures. The included transformer features a photocell sensor for automatic dusk-to-dawn operation and programmable countdown timers.
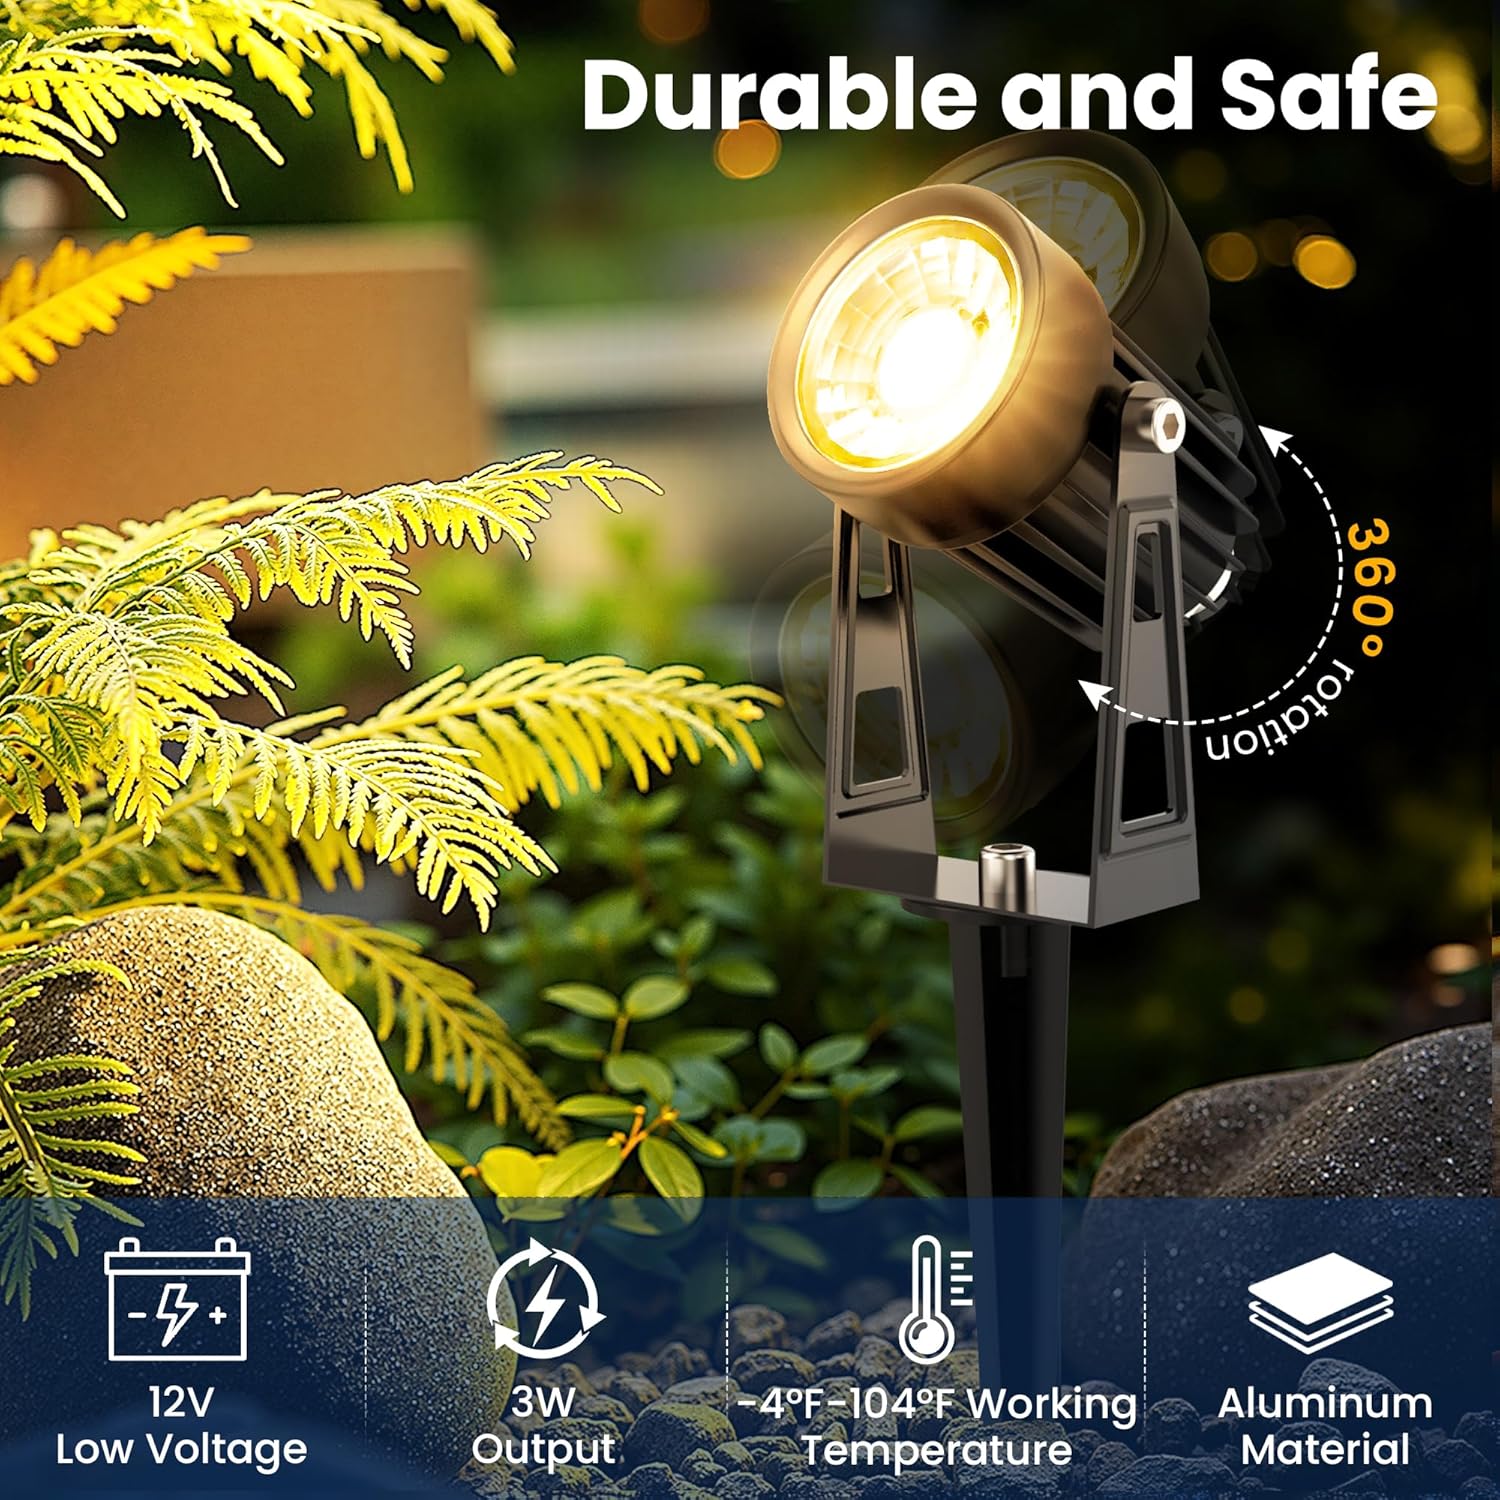
Image: An AUDERWIN LED landscape spotlight, highlighting its 360-degree rotation capability, 12V low voltage, 3W output, -4°F-104°F working temperature, and aluminum material construction.

Image: Various outdoor scenes showcasing the landscape lighting illuminating a house, trees, and garden walls at night.
2. Package Contents
Verify that all components are present in the package before beginning installation:
- 8 x 3W Aluminum LED Landscape Spotlights
- 1 x 65FT UL-Listed Low-Voltage Wire
- 1 x 60W Low-Voltage Transformer with Photocell Sensor
- 16 x Wire Connectors
- 1 x Instruction Manual (this document)
- LED Lens (included within spotlights)

Image: A visual representation of the complete kit, including 8 spotlights, the transformer, 65ft wire, and 16 connectors, along with dimensions of the spotlight.
3. Installation Guide
Follow these steps for proper installation of your landscape lighting kit. Ensure power is disconnected before handling any electrical components.
3.1. Assembling Landscape Lights
- Connect the light head to the ground stake: Align the spotlight head with the ground stake and securely attach it.
- Tighten the screw: Use an L-wrench (not included) to tighten the screw, securing the light head in place.
- Position fixtures: Lay out the fixtures in your desired locations. Ensure the total wattage of all connected lights does not exceed the 60-watt rating of the transformer.

Image: Visual instructions for assembling the landscape lights, showing how to connect the light head to the ground stake and position them.
3.2. Connecting the Fixtures to the Cable
The kit includes connectors for attaching the spotlights to the main wire. If you experience issues with the provided connectors, consider using alternative waterproof wire nuts or splice tap connectors for a more secure connection, as suggested by some users.
- Divide the power cable: Carefully divide the main power cable into two halves at the desired connection point for each light.
- Insert cable into large cap: Place one half of the divided power cable into the large cap of the connector. Screw the pin part of the connector to pierce the power cable, establishing contact.
- Insert light wire: Thread the wire from the spotlight through the small cap of the connector.
- Screw small cap into joint: Securely screw the small cap into the main connector joint to complete the connection.

Image: Visual instructions detailing how to connect the light fixtures to the main cable using the provided connectors.
Video: Official seller video demonstrating the installation process for the AUDERWIN Outdoor Low Voltage Landscape Lighting Kit with Transformer. Duration: 1:00.
Video: Official seller video providing an overview and installation steps for the AUDERWIN All-in-One Outdoor Low Voltage Landscape Lighting Kit. Duration: 0:36.
3.3. Installing the Transformer and Photocell
- Connect wires to transformer: Insert the ends of the two main wires from your lighting circuit into the terminal clamping plates on the transformer.
- Tighten connections: Use a screwdriver (not included) to tighten the screws, securing the wires firmly in the transformer terminals.
- Mount the transformer: Install the transformer on a wall using screws. Ensure it is in a location protected from direct heavy weather if possible, and where the photocell can detect ambient light.
- Activate photocell sensor: Open the cap of the photocell sensor to enable its light detection function.

Image: Visual instructions for connecting wires to the transformer, mounting the transformer, and activating the photocell sensor.
Video: Official seller video demonstrating the complete installation process for the AUDERWIN Low Voltage Landscape Lighting system. Duration: 3:01.
4. Operating Instructions
The 60W low-voltage transformer features a photocell sensor and multiple operating modes for convenient control of your landscape lights.
4.1. Transformer Modes
The transformer offers three primary operating modes, selectable via a single button:
- Manual ON/OFF: Allows you to manually turn the lights on or off as needed.
- Dusk to Dawn (AUTO): The built-in photocell sensor automatically turns the lights on at dusk and off at dawn.
- Countdown Off: After the lights turn on at dusk, you can set them to automatically shut off after 2, 4, 6, 8, or 10 hours.
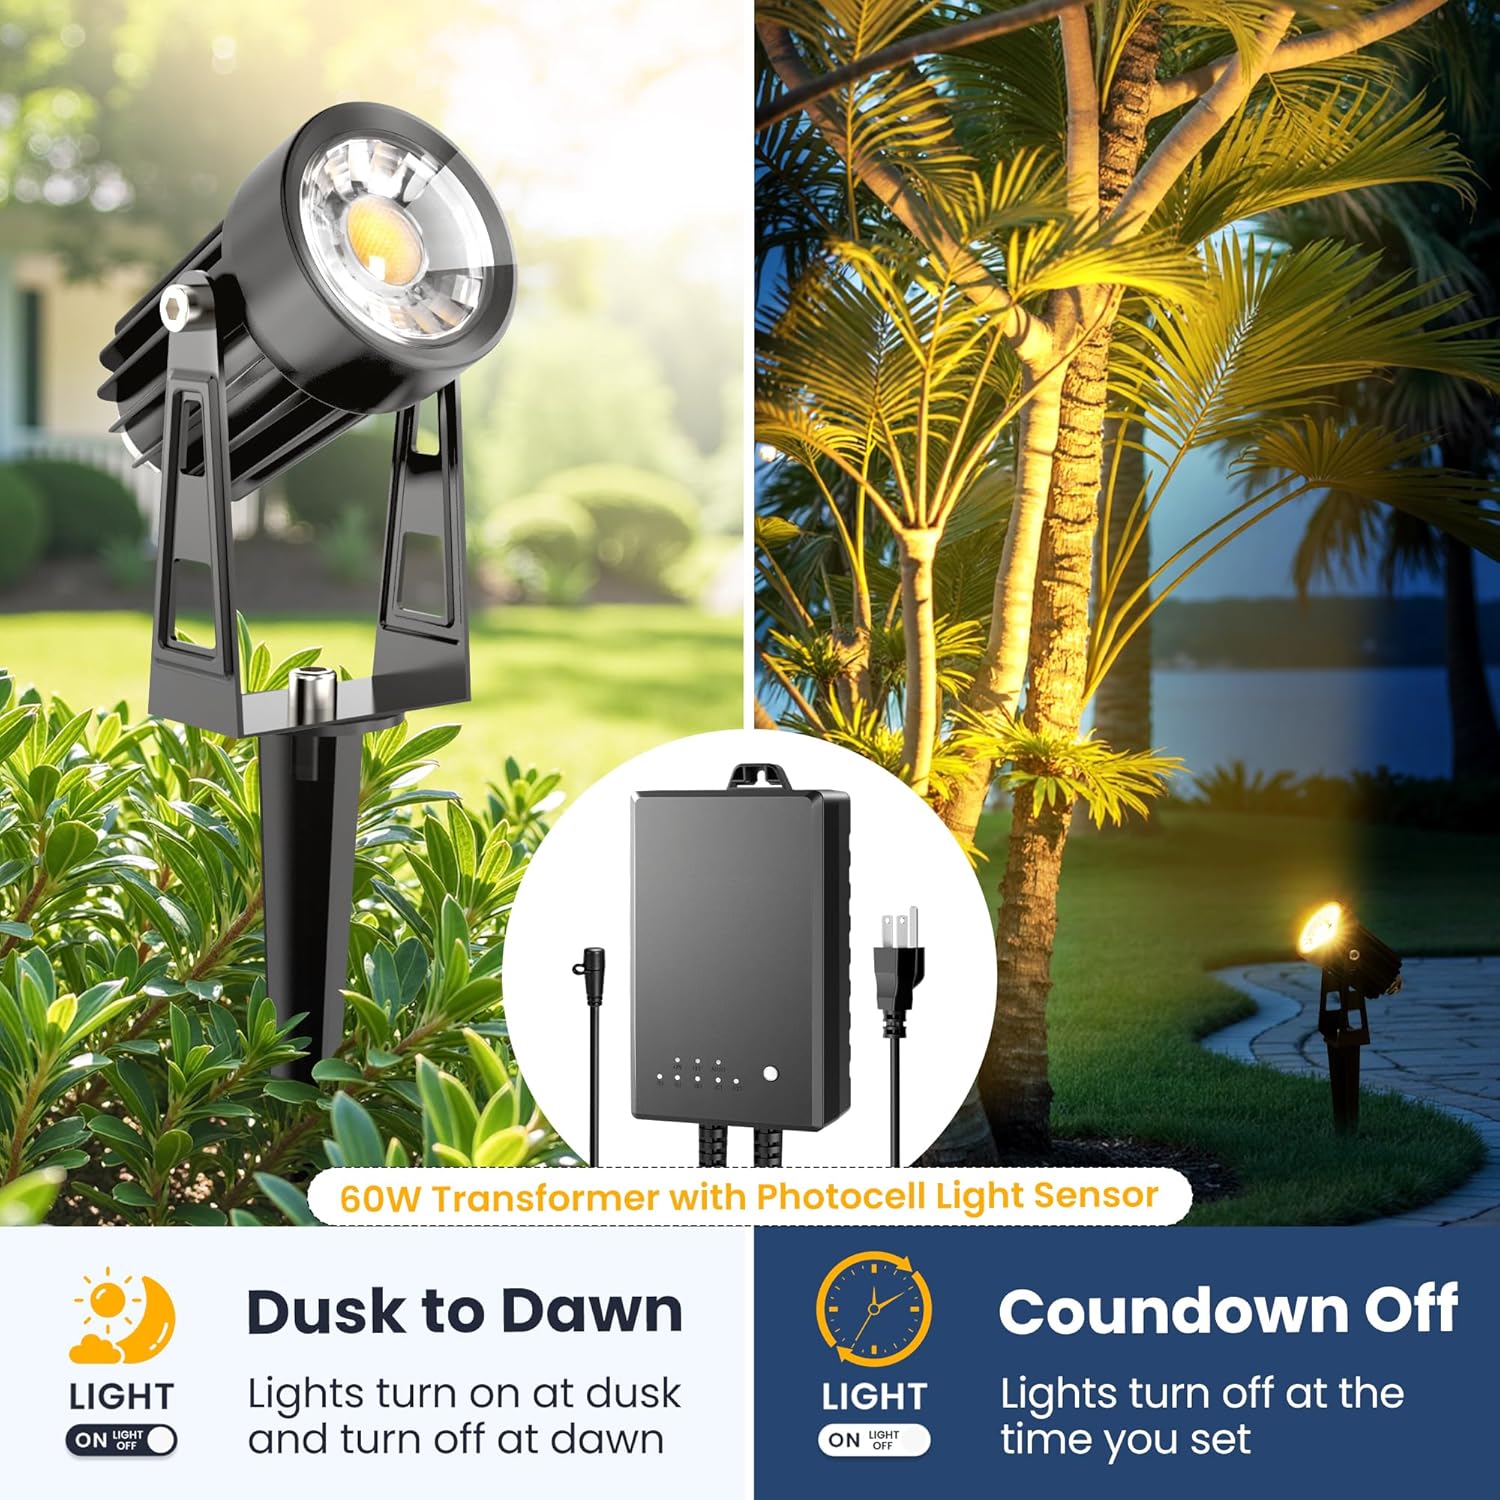
Image: The 60W transformer with its photocell light sensor, illustrating the "Dusk to Dawn" and "Countdown Off" functionalities.

Image: Close-up of the transformer's control panel, showing the single button for mode selection (Manual ON/OFF, Dusk to Dawn, Countdown Off for 2/4/6/8/10 hours).
5. Maintenance
The AUDERWIN landscape lighting kit is designed for durability and minimal maintenance. Regular checks can help ensure optimal performance and longevity.
- Cleaning: Periodically wipe down the light fixtures and transformer with a soft, damp cloth to remove dirt, dust, and debris. Avoid abrasive cleaners.
- Connection Inspection: Annually inspect all wire connections for corrosion or looseness. Re-tighten or replace connectors if necessary. Ensure waterproof seals are intact.
- Photocell Sensor: Keep the photocell sensor clear of obstructions (e.g., leaves, dirt) to ensure accurate dusk-to-dawn operation. If the sensor is too sensitive or not sensitive enough, consider its placement relative to other light sources.
- Fixture Adjustment: Adjust the angle of the spotlights as needed to achieve desired illumination. The fixtures offer 360-degree rotation.
- Weather Resistance: The lights and transformer are IP65 waterproof rated and designed to withstand various weather conditions including rain, snow, frost, and high temperatures. The aluminum structure is rust-resistant.

Image: The transformer and a spotlight shown in rainy conditions, emphasizing their IP65 waterproof, UV resistant, snowproof, heat resistant, and frost resistant features.
6. Troubleshooting
If you encounter issues with your AUDERWIN landscape lighting kit, refer to the following common problems and solutions:
| Problem | Possible Cause | Solution |
|---|---|---|
| Lights do not turn on. |
|
|
| Lights flicker or are dim. |
|
|
| Lights stay on during the day. |
|
|
| Water inside light fixture lens. |
|
|
7. Product Specifications
| Feature | Detail |
|---|---|
| Brand | AUDERWIN |
| Model Number | 10281 |
| Color | Black |
| Material | Aluminum |
| Light Fixture Form | Spotlight |
| Indoor/Outdoor Usage | Outdoor |
| Power Source | AC/DC |
| Control Method | Remote (via transformer settings) |
| Light Source | LED |
| Number of Light Sources | 8 |
| Light Color | Warm White (3000K) |
| Wattage (Total) | 60 watts (Transformer output) |
| Wattage (Per Light) | 3 watts |
| Brightness (Per Light) | 180 lumens |
| Total Brightness | 1440 lumens (8 lights x 180 lumens) |
| Water Resistance Level | IP65 Waterproof |
| Mounting Type | Floor Mount (with stakes) |
| Item Dimensions (L x W x H) | 1.6"L x 1.6"W x 8.4"H (per spotlight) |
| Included Components | LED Lens, 60W Transformer, 65FT Wire, Connectors |
8. Warranty and Support
AUDERWIN provides a 12-month warranty for this landscape lighting kit, covering any quality issues with the lights and the transformer. Please retain your proof of purchase for warranty claims.
For technical support, troubleshooting assistance, or warranty inquiries, please contact AUDERWIN customer service through the retailer where the product was purchased or refer to the contact information provided on the product packaging.