1. Product Overview
This manual provides detailed instructions for the installation, maintenance, and troubleshooting of the Masterpart Grey Rubber Door Seal Gasket Bellows, designed as an original manufacturer's replacement part for various Candy Rapido Washing Machines. This component is crucial for maintaining the watertight seal of your washing machine door, preventing leaks during operation.

Figure 1: Front view of the Masterpart Grey Rubber Door Seal Gasket Bellows.
2. Specifications
| Attribute | Detail |
|---|---|
| Brand | Masterpart |
| Part Number | 70006595 |
| Product Dimensions | 43 x 43 x 10 cm |
| Item Weight | 623 g |
| Colour | Grey |
| Access Location | Front Load |
| Included Components | Washing Machine Door Seal |
3. Compatibility
This door seal is compatible with a wide range of Candy Rapido Washing Machine models. Please verify your washing machine's model number against the list below to ensure compatibility. The manufacturer's part number for this replacement seal is 70006595.
Compatible Models include:
- RO1274DXH5Z-19 (31010313)
- RO1284DWH7\1-S (31008897)
- RO1284DWMCE/1-S (31010361)
- RO1284DWME/1-S (31010344)
- RO1284DWMSE/1-S (31010370)
- RO1284DXH5\1-S (31008901)
- RO1284DXHC5\1-S (31008933)
- RO1284DXHS5\1-S (31008965)
- RO1294DWMCE/1-S (31010358)
- RO1294DWME/1-S (31010366)
- RO1294DWMSE/1-S (31010353)
- RO1294DXH5\1-S (31008913)
- RO1294DXH5Z-19 (31010315)
- RO1294DXHC5\1-S (31008922)
- RO1294DXHS5\1-S (31008955)
- RO14104DWMCE-80 (31010913)
- RO14104DWME/1-S (31010367)
- RO14104DWMSE/1-S (31010372)
- RO14104DXH5\1-S (31008893)
- RO14104DXHC5\1-S (31008924)
- RO14104DXHS5\1-S (31008958)
- RO14106DWMCRE-S (31010954)
- RO14114DWMCE-80 (31010959)
- RO14116DWHC7-80 (31009518)
- RO14116DWHC7B-80 (31009504)
- RO14116DWHC7R-ZA (31010251)
- RO14116DWHCRZ-19 (31010155)
- RO14116DWMCBE-80 (31010576)
- RO14116DWMCE-80 (31010556)
- RO14116DWMCE-S (31010571)
- RO141256DWMC8-19 (31010395)
- RO14126DWMSE-S (31010523)
- RO14146DWHC8/1-S (31010150)
- RO14146DWMC8-19 (31010371)
- RO14146DWMC8R-ZA (31010475)
- RO14146DWMC8Z-19 (31011045)
- RO14146DWMCE/1-S (31010533)
- RO14146DWMCR-19 (31011548)
- RO14146DWMCRE-IS (31011461)
- RO14146DWMCRE-S (31010416)
- RO14146DWMCRZ-19 (31018635)
- RO1484DWMCRE/1-S (31010420)
- RO1484DWMCRE-IS (31011470)
- RO1484DWME/1-S (31010356)
- RO1484DXH5\1-S (31008964)
- RO1486DWH7/1-S (31008963)
- RO1486DWHC7\1-S (31008928)
- RO1486DWMCE/1-S (31010360)
- RO1486DWME/1-S (31010357)
- RO1486DXHC5\1-S (31008929)
- RO1494DWMCE/1-S (31010531)
- RO1494DWME/1-S (31010342)
- RO1494DWME-S (31010342)
- RO1494DXH5\1-S (31008954)
- RO1496DWH7\1-S (31008923)
- RO1496DWHC7/1-19 (31010156)
- RO1496DWHC7\1-S (31008956)
- RO1496DWHC7R-ZA (31010252)
- RO1496DWMCE/1-88 (31011298)
- RO1496DWMCE/1-S (31010352)
- RO1496DWMCRE/1-S (31010419)
- RO1496DWME/1-S (31010359)
- RO1496DXHC5/1-S (31008930)
- RO151056DWHCR-12 (31010391)
- RO15116DWHC7/1-S (31009527)
- RO15116DWHC7-AL (31010773)
- RO16104DWMCE-80 (31010960)
- RO16104DWME/1-S (31010343)
- RO16104DXH5\1-S (31008957)
- RO16106DWH7\1-S (31008959)
- RO16106DWHC7\1-S (31008900)
- RO16106DWHC7-19 (31010161)
- RO16106DWHC7-80 (31009500)
- RO16106DWHC7G-80 (31009503)
- RO16106DWHC7G-IS (31011081)
- RO16106DWHC7-ISR (31010208)
- RO16106DWHC7R-ZA (31010254)
- RO16106DWHC7Z-19 (31010182)
- RO16106DWMCE/1-S (31010364)
- RO16106DWMCE-80 (31010368)
- RO16106DWMCRE-80 (31010577)
- RO16106DWME/1-S (31010373)
- RO16106DXHC5\1-S (31008932)
- RO16116DWHR7R-19 (31010162)
- RO16116DWHR7R-AL (31010797)
- RO1694DWMCE/1-80 (31010961)
- RO1696DWH7\1-12 (31010392)
- RO1696DWHC7/1-80 (31009501)
- RO1696DWHC7B-80 (31009521)
- RO1696DWHC7R-12 (31010393)
- RO1696DWMCE/1-80 (31010355)
- RO1696DWMCEB-80 (31010354)
- RO41074DWM4-07 (31011132)
- RO41274DWM4-07 (31011131)
- RO41274DWMCE/1-S (31010534)
- RO41274DWME/1-S (31010363)
- RO41274DWMSE/1-S (31010345)
- RO41274DXH5\1-S (31008894)
- RO41274DXHC51-S (31008925)
- RO41274DXHS5\1-S (31008960)
- RO41276DWHC6/1-S (31009528)
- RO41276DWMC3-07 (31010859)
- RO41276DWMC4-07 (31011116)
- RO41276DWMCE-S (31011083)
- RO41276DWMCR3-07 (31010663)
- RO41276DWMCRE-S (31010953)
- RO441284DWME-S (31011084)
- RO441286DWMC4-07 (31011117)
- RO441286DWME-S (31011203)
- RO441286DWMSE-S (31011204)
- ROZ1296DXHS5-80 (31011036)
- RP4106BWMR/1-S (31018807)
- RP4146BWMR/1-S (31018690)
- RP4476BWMR/1-S (31018699)
- RP496BWMBCB/1-S (31018821)
- RP586BWMBC/1-S (31018810)
- RP696BWMRR/1-S (31018695)
4. Installation Guide
Replacing a washing machine door seal requires careful attention. It is recommended to consult a qualified technician if you are unsure about any steps. Always disconnect the washing machine from the power supply before beginning any repair work.
4.1. Safety Precautions
- Disconnect Power: Ensure the washing machine is unplugged from the mains electricity supply.
- Water Supply: Turn off the water supply to the washing machine.
- Drain Water: Drain any residual water from the machine.
- Wear Gloves: Protect your hands from sharp edges or old detergent residue.
4.2. Tools Required
- Screwdriver (Phillips and Flathead)
- Pliers
- New Masterpart Door Seal (Part Number 70006595)
4.3. Step-by-Step Installation
- Remove the Outer Clamp: Open the washing machine door. Locate the metal retaining band or spring clamp around the outer edge of the old door seal. Carefully pry it off using a flathead screwdriver or pliers.
- Detach the Outer Lip: Once the outer clamp is removed, pull the outer lip of the old door seal away from the washing machine's front panel.
- Remove the Inner Clamp: Reach inside the drum and locate the inner retaining clamp or spring that holds the seal to the drum. This might be a wire spring or a plastic band. Carefully remove it.
- Remove the Old Seal: Once both clamps are removed, carefully pull the old door seal out of the washing machine. Note its orientation, especially any drainage holes or alignment marks.
- Clean the Area: Thoroughly clean the area where the old seal was seated, removing any dirt, mold, or detergent residue. This ensures a proper seal with the new part.
- Install the New Seal (Inner Lip First): Carefully position the new Masterpart door seal. Start by fitting the inner lip of the seal around the drum opening. Ensure any drainage holes or alignment marks on the new seal match the machine's design.
- Secure the Inner Clamp: Reinstall the inner retaining clamp or spring to secure the inner lip of the new seal to the drum. Ensure it is seated firmly all around.
- Fit the Outer Lip: Pull the outer lip of the new seal over the front panel of the washing machine. Ensure it sits flush and evenly.
- Secure the Outer Clamp: Reinstall the outer metal retaining band or spring clamp around the outer lip of the seal, ensuring it is tight and holds the seal securely in place.
- Test for Leaks: Once installed, reconnect the water supply and power. Run a short, empty wash cycle (e.g., a rinse cycle) to check for any leaks around the new seal.
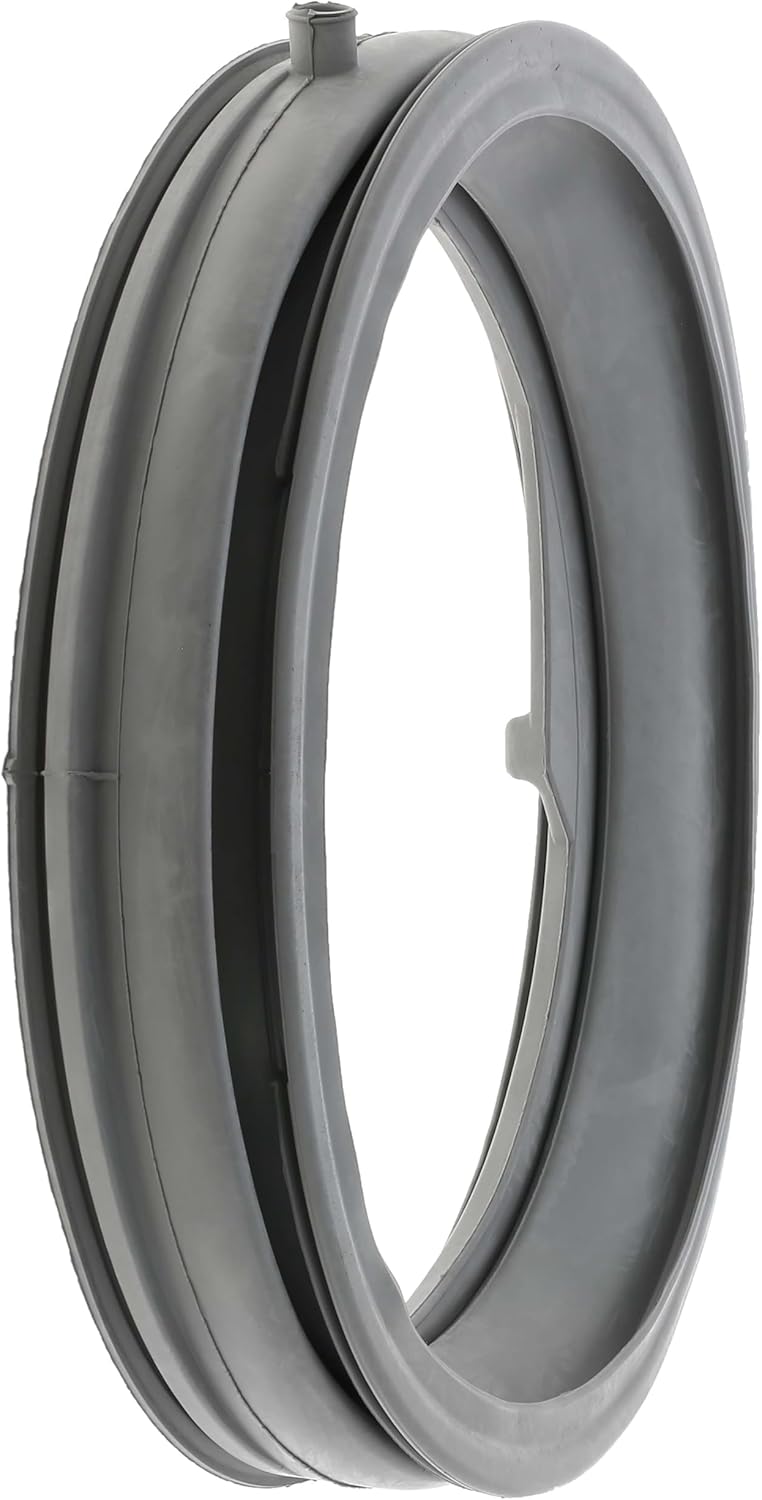
Figure 2: The outer ring of the door seal, where the retaining clamp is typically located.
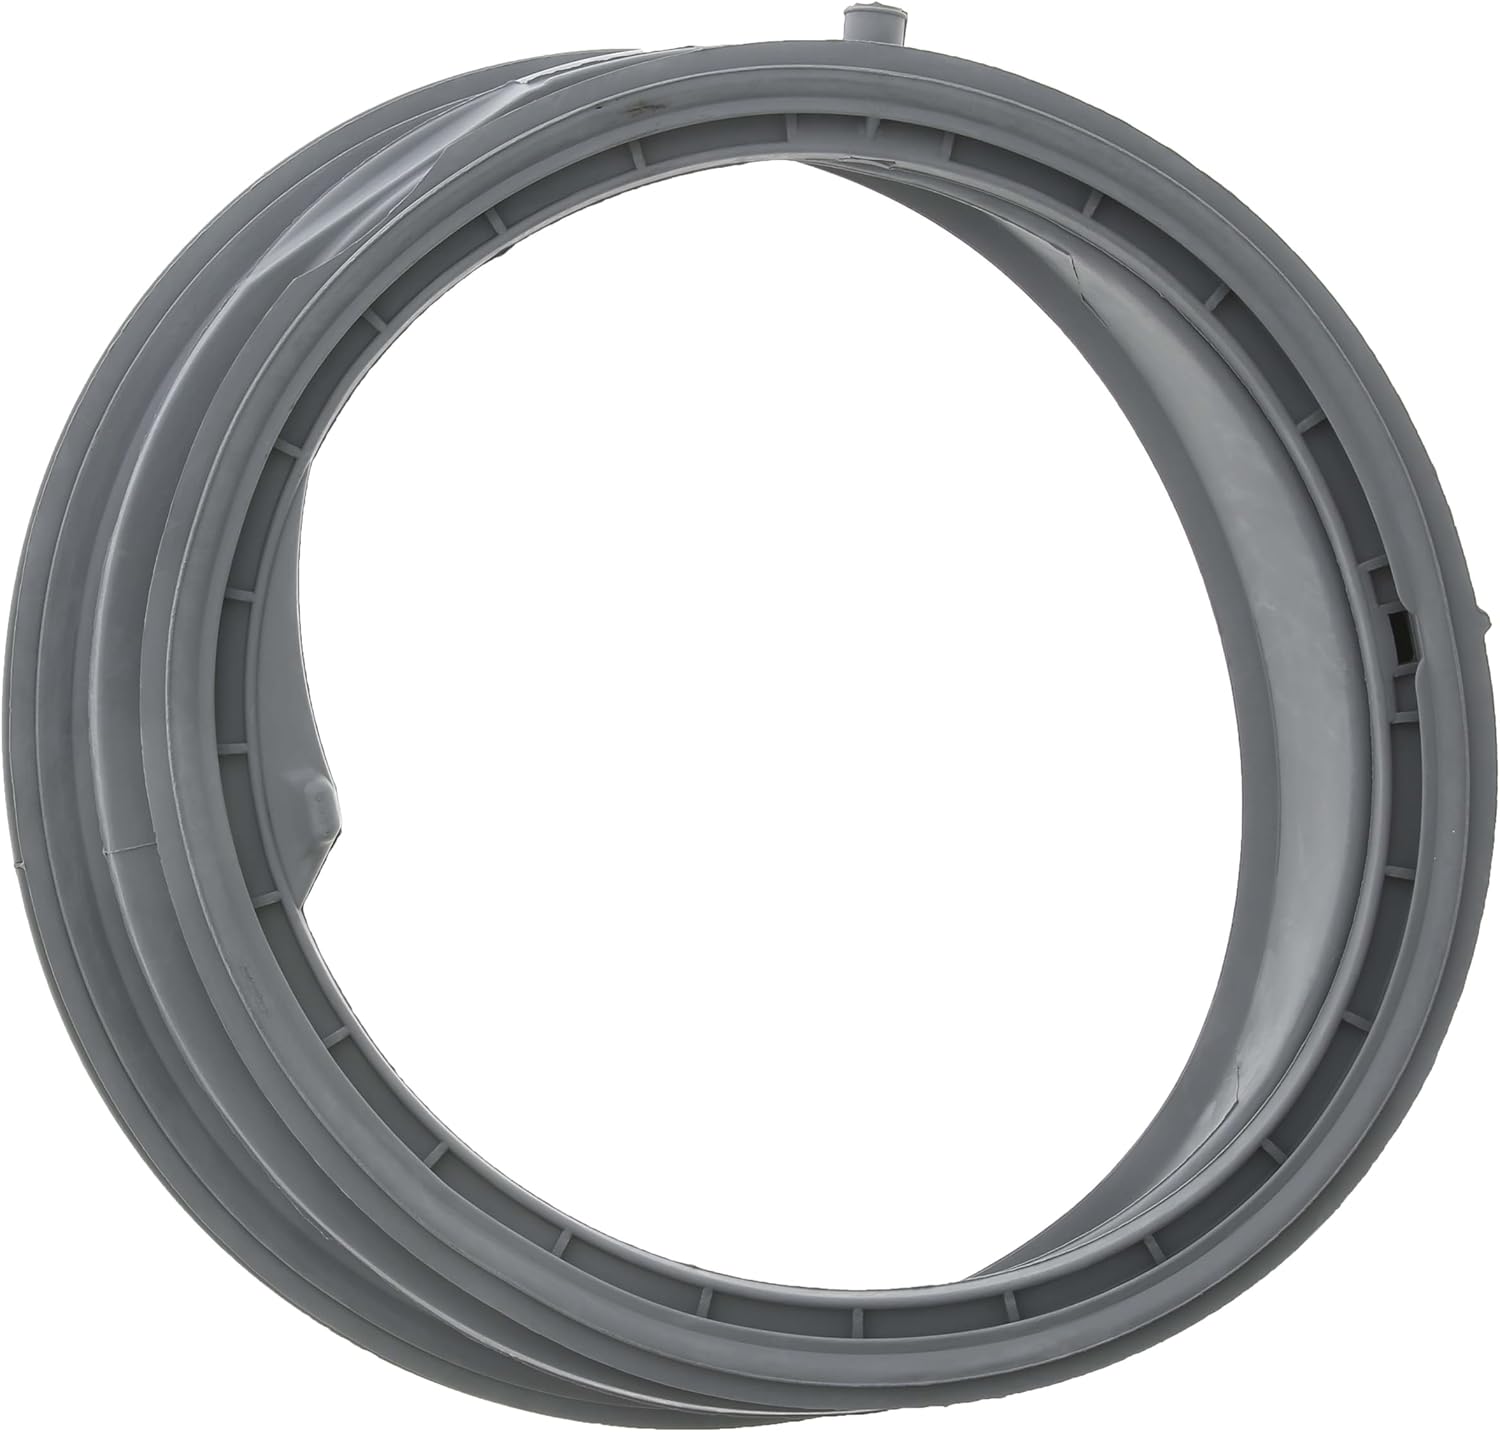
Figure 3: The inner ring of the door seal, which attaches to the washing machine drum.

Figure 4: Close-up view of a drainage point on the door seal, which must be correctly aligned during installation.
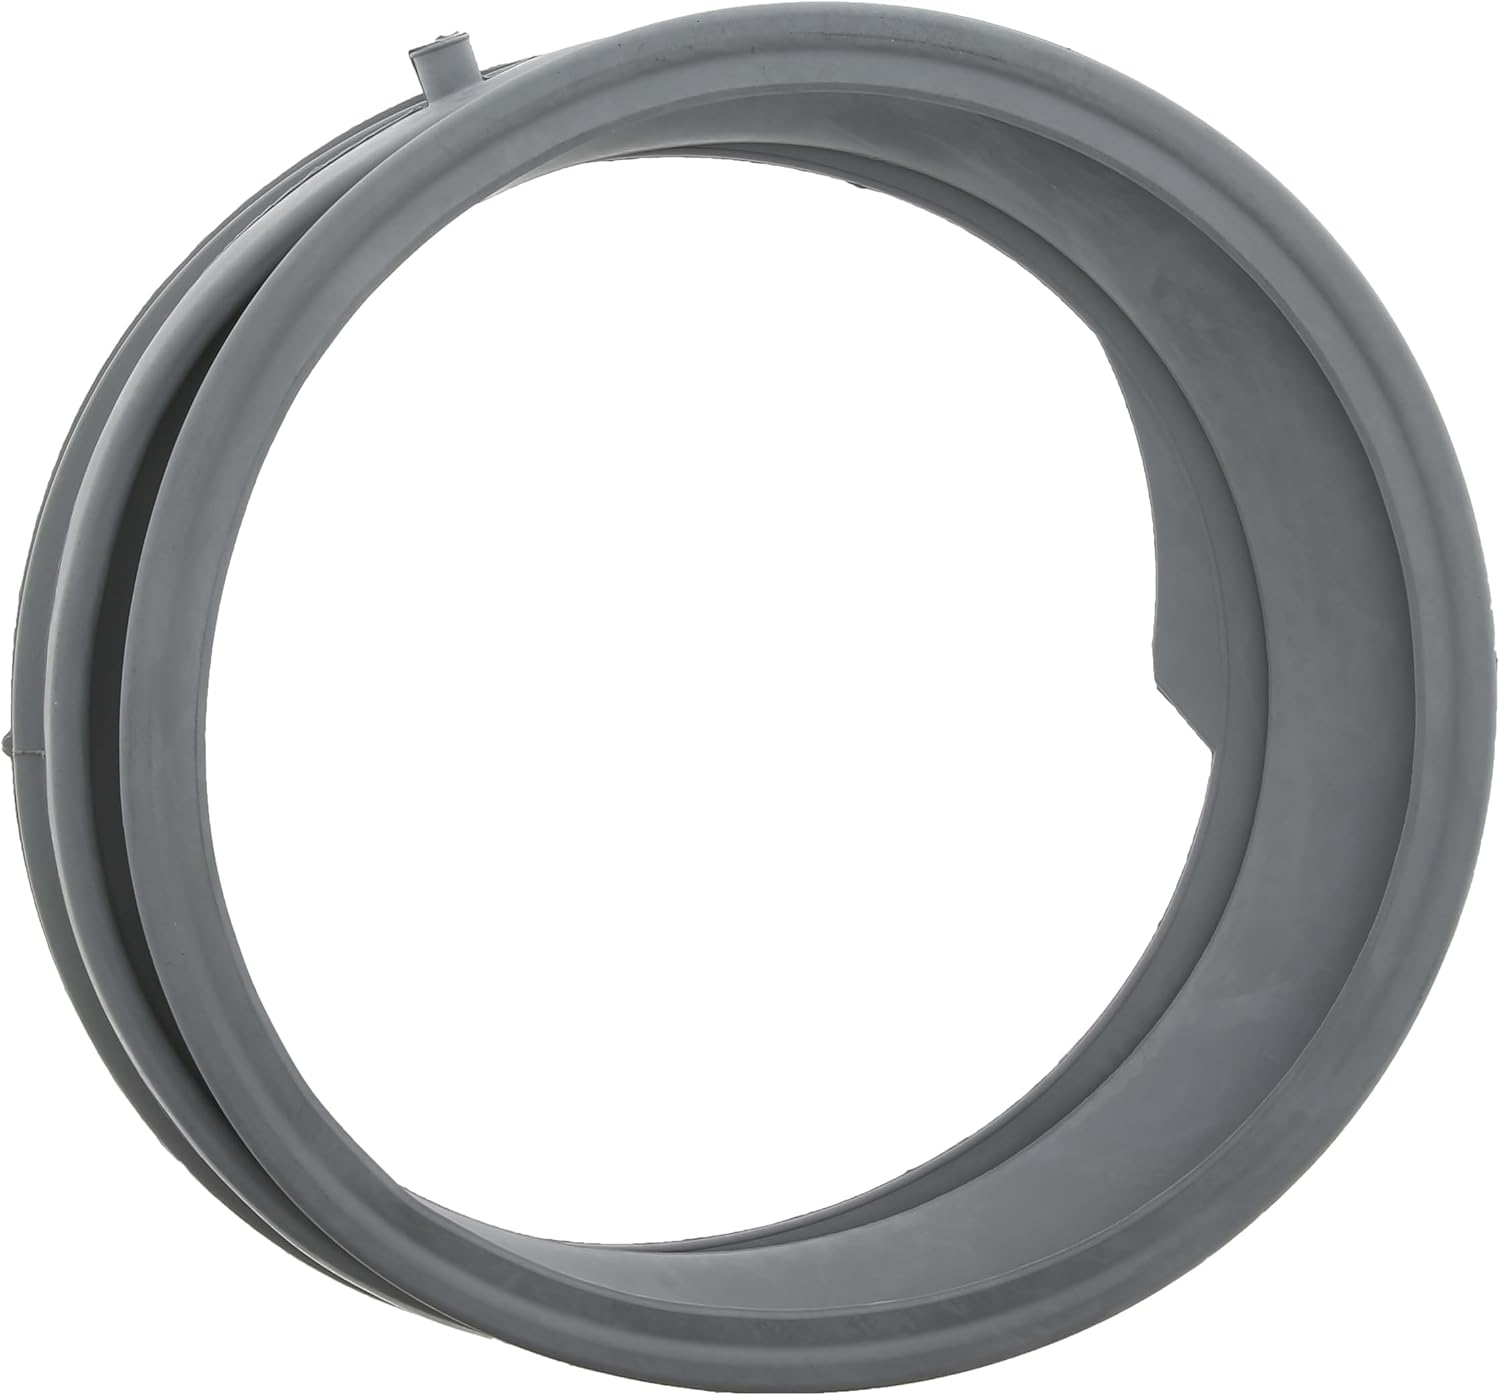
Figure 5: The full profile of the door seal, illustrating how both inner and outer lips need to be correctly positioned.
5. Maintenance
Proper maintenance of your washing machine door seal can extend its lifespan and prevent issues like mold buildup and leaks.
- Regular Cleaning: After each wash, wipe down the door seal with a clean cloth to remove any trapped water, lint, or detergent residue.
- Deep Cleaning: Periodically clean the seal with a mild detergent solution or a washing machine cleaner to prevent mold and mildew growth. Pay attention to the folds and crevices.
- Leave Door Ajar: When the washing machine is not in use, leave the door slightly ajar to allow air circulation and prevent moisture buildup, which can lead to odors and mold.
- Check for Damage: Regularly inspect the seal for any signs of wear, tears, cracks, or hardening. Replace the seal if any damage is observed to prevent leaks.
6. Troubleshooting
If you encounter issues after replacing the door seal, consider the following common problems and their solutions:
| Problem | Possible Cause | Solution |
|---|---|---|
| Water Leaking from Door |
|
|
| Mold or Odor on Seal |
|
|
| Door Not Closing Properly |
|
|
7. What's in the Box
The package for this product contains:
- 1 x Masterpart Washing Machine Door Seal (Part Number 70006595)