
SINBEN SINBEN-1
SINBEN Hidden Camera Detector User Manual
Model: SINBEN-1
1. Introduction
The SINBEN Hidden Camera Detector is a versatile device designed to enhance your privacy and security by detecting various hidden surveillance equipment. This includes hidden cameras, listening devices, and GPS trackers. Its advanced technology and user-friendly interface make it an essential tool for personal and professional use in various environments such as hotels, homes, offices, and vehicles.
2. Safety Information
- Do not expose the device to extreme temperatures, direct sunlight, or high humidity.
- Keep the device away from water and other liquids.
- Do not attempt to disassemble or repair the device yourself. Refer to qualified service personnel.
- Use only the specified charging cable and adapter to prevent damage.
- Keep out of reach of children.
3. Product Overview
3.1. Package Contents
The SINBEN Hidden Camera Detector package includes:
- 1 x Camera Detector
- 1 x Charging Cable
- 1 x User Manual (this document)
3.2. Device Layout and Controls
Familiarize yourself with the various parts and controls of your SINBEN Hidden Camera Detector:

Figure 3.2.1: Device Layout and Controls
- Antenna: Extends for RF signal detection.
- Light: Built-in flashlight for low-light environments.
- Viewfinder: Used for optical detection of hidden camera lenses.
- LED Lights: Infrared LEDs for illuminating hidden camera lenses during optical detection.
- Magnetic Field Detection: Indicator for magnetic field detection mode.
- Signal Detection Sensitivity: LED indicators showing signal strength.
- Magnetic Mode Light: Indicates when magnetic detection mode is active.
- Charging Indicator Light: Shows charging status.
- Function Switching Button: Toggles between detection modes (RF, Optical, Magnetic).
- Signal Strength Adjustment Button: Adjusts sensitivity for RF detection.
- ON/OFF Button: Powers the device on or off.
- Charging Port: For connecting the charging cable.
4. Setup
4.1. Initial Charging
Before first use, fully charge the device. Connect the charging cable to the charging port on the detector and plug the other end into a USB power source. The charging indicator light will illuminate during charging and turn off when fully charged. A full charge typically takes approximately 1 hour and provides up to 25 hours of continuous use or 30 days of standby time.
4.2. Powering On/Off
To power on the device, press and hold the ON/OFF Button until the indicators light up. To power off, press and hold the ON/OFF Button again until the indicators turn off.
5. Operating Instructions
The SINBEN Hidden Camera Detector offers multiple detection modes to identify various types of hidden devices.
5.1. Hidden Camera Detection (Optical/IR Mode)
This mode is used to visually locate hidden camera lenses, including pinhole cameras, by reflecting light off their lenses.
- Power on the device.
- Press the Function Switching Button to select the optical detection mode. The LED lights on the front of the detector will flash.
- Look through the Viewfinder on the top of the detector.
- Slowly scan the area you suspect might contain a hidden camera. Pay close attention to common hiding spots such as smoke detectors, light fixtures, power outlets, and decorative items.
- If a hidden camera lens is present, it will appear as a bright red dot when viewed through the viewfinder.

Figure 5.1.1: Hidden Camera Optical Detection
5.2. RF Wireless Signal Detection
This mode detects wireless signals emitted by hidden cameras, eavesdropping devices, and other RF-emitting bugs.
- Power on the device.
- Extend the Antenna fully.
- Press the Function Switching Button to enter RF detection mode. The signal detection sensitivity LEDs will activate.
- Adjust the sensitivity using the Signal Strength Adjustment Button. Start with lower sensitivity to narrow down the search area, then increase it for broader scanning.
- Slowly sweep the detector around the room. As you approach a hidden wireless device, more signal detection sensitivity LEDs will light up, and the device may emit an audible alert.
- Follow the increasing signal strength to pinpoint the exact location of the hidden device.

Figure 5.2.1: RF Wireless Signal Detection
5.3. Magnetic Field Signal Detection (GPS Tracker Detection)
This mode is specifically designed to detect magnetic GPS trackers, which are often covertly attached to vehicles using magnets.
- Power on the device.
- Press the Function Switching Button until the Magnetic Mode Light illuminates, indicating magnetic detection mode.
- Slowly move the detector along surfaces where magnetic trackers might be hidden, such as under vehicles, inside car bumpers, or under desks.
- If a magnetic field is detected, the device will vibrate and/or emit an audible alarm, and the magnetic mode light may change intensity or color.

Figure 5.3.1: Magnetic Field Signal Detection
5.4. Flashlight Mode
The device includes a built-in flashlight for use in dark environments or to aid in visual inspection.
- To activate the flashlight, briefly press the dedicated Light button (if available, otherwise refer to the function switching button for flashlight mode).
- Press again to turn off.
6. Maintenance
6.1. Cleaning
Wipe the device with a soft, dry cloth. Do not use abrasive cleaners or solvents, as they may damage the surface or internal components.
6.2. Storage
When not in use, store the detector in a cool, dry place, away from direct sunlight and extreme temperatures. Ensure the device is powered off before storing.
6.3. Battery Care
To prolong battery life, avoid fully discharging the battery frequently. If storing for an extended period, charge the battery to approximately 50% every few months.
7. Troubleshooting
| Problem | Possible Cause | Solution |
|---|---|---|
| Device does not power on. | Low battery. | Charge the device fully. |
| No signal detected in RF mode. | Sensitivity too low; no active wireless signals. | Increase sensitivity. Ensure there are active wireless devices to detect. |
| Cannot find hidden camera in optical mode. | Incorrect scanning technique; camera too well hidden. | Scan slowly and thoroughly. Check all potential hiding spots. Ensure the room is dark enough for optimal reflection. |
| False alarms in RF mode. | High sensitivity; interference from legitimate wireless devices (Wi-Fi, Bluetooth). | Lower sensitivity. Temporarily turn off known wireless devices in the area if possible. |
8. Specifications
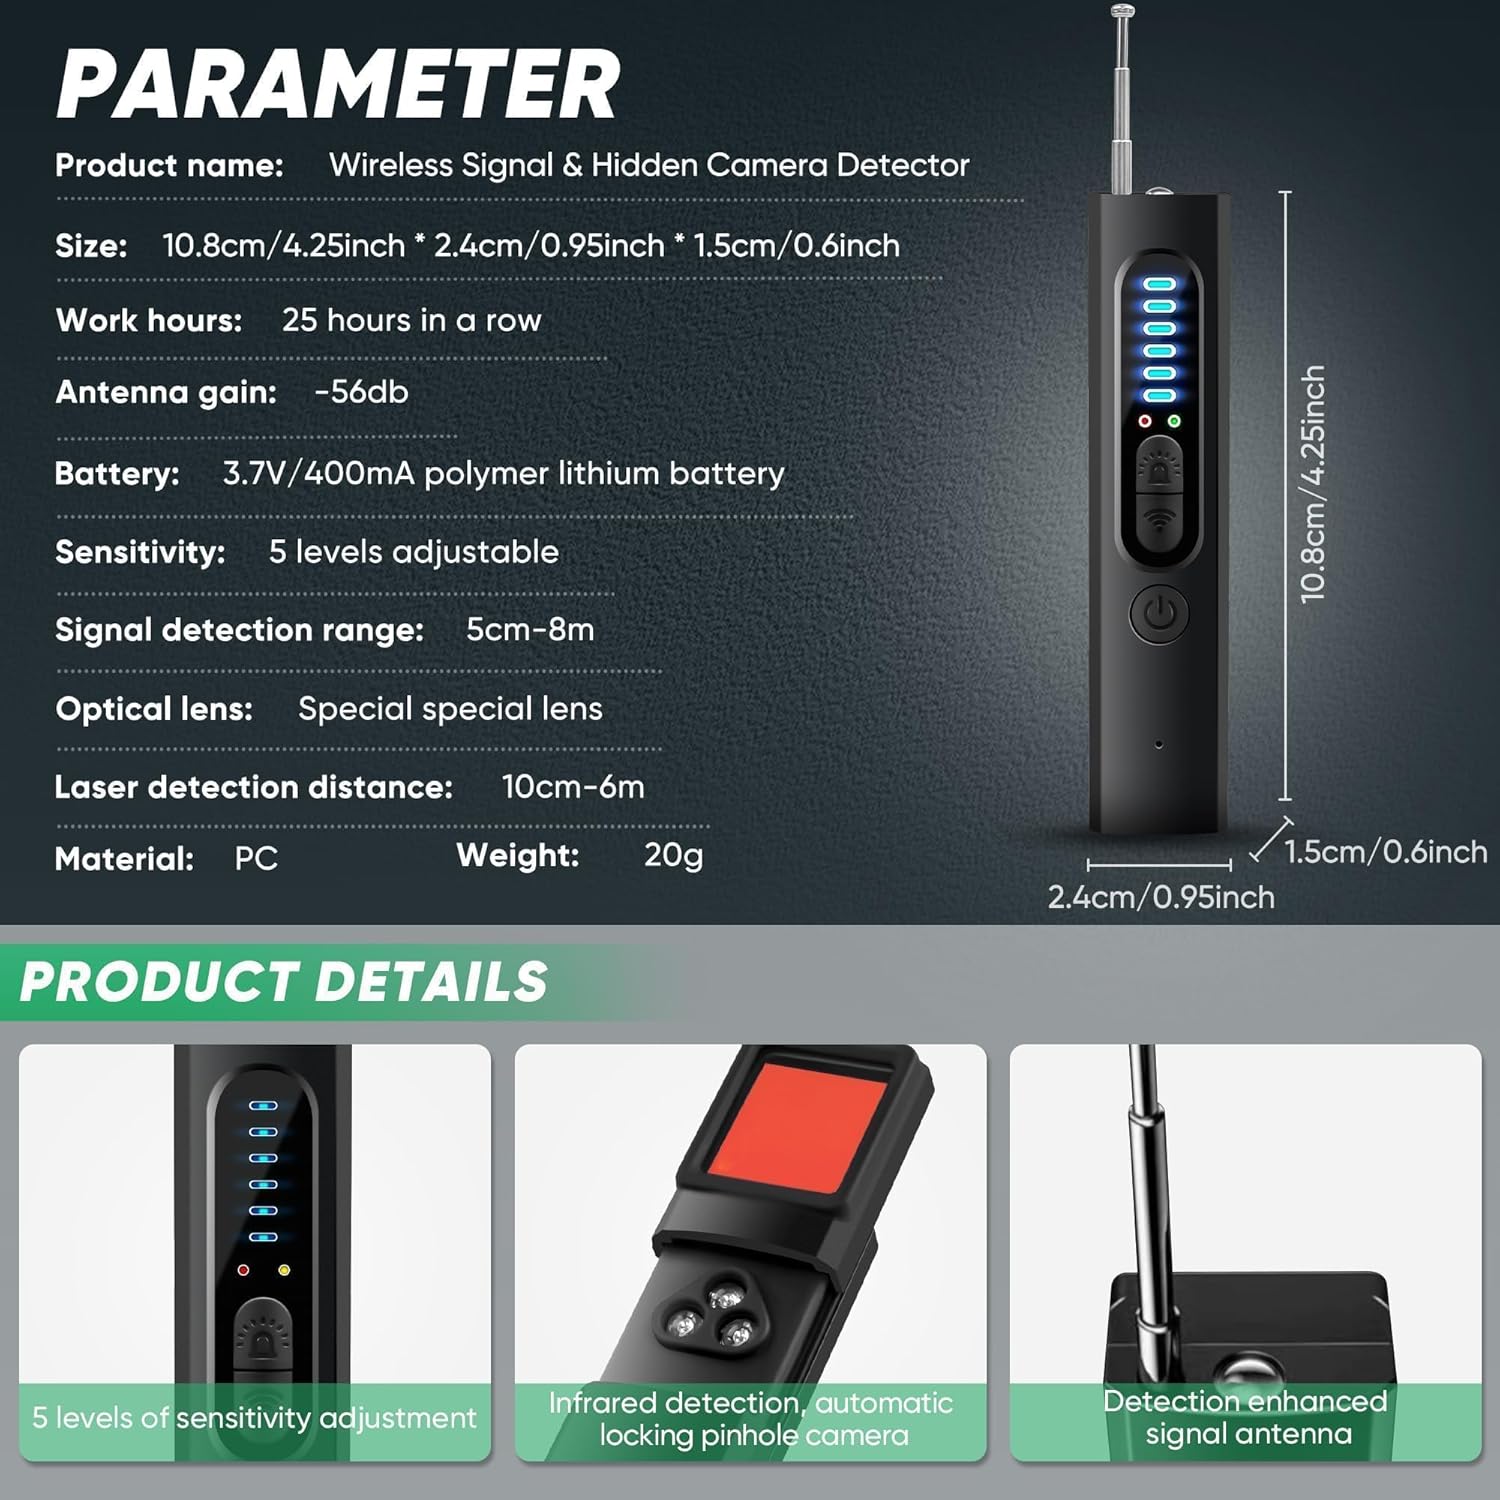
Figure 8.1.1: Product Specifications Overview
| Feature | Detail |
|---|---|
| Product Name | Wireless Signal & Hidden Camera Detector |
| Model Name | SINBEN-1 |
| Dimensions (L x W x H) | 10.8cm x 2.4cm x 1.5cm (4.25in x 0.95in x 0.6in) |
| Item Weight | 20g (0.7 oz) |
| Battery | 3.7V/400mA Polymer Lithium Battery |
| Work Hours | Up to 25 hours (continuous use) |
| Standby Time | Up to 30 days |
| Antenna Gain | -56dB |
| Sensitivity Levels | 5 levels adjustable |
| Signal Detection Range | 5cm - 8m (depending on signal strength) |
| Optical Lens | Special optical lens |
| Laser Detection Distance | 10cm - 6m |
| Material | PC |
| Connectivity Technology | Wireless, Bluetooth |
| Power Source | Battery Powered |
| Included Components | Camera detector |
9. Warranty and Support
9.1. Warranty Information
The SINBEN Hidden Camera Detector comes with a standard manufacturer's warranty. Please refer to the product packaging or contact customer support for specific warranty terms and conditions.
9.2. Customer Support
For any questions, technical assistance, or warranty claims, please contact SINBEN customer support. Contact details can typically be found on the product packaging or the official SINBEN website.
Ask a question about this manual
Ask about setup, troubleshooting, compatibility, parts, safety, or missing instructions. Manuals+ will review the question and use this page’s manual context to help answer it.