1. Introduction
This manual provides detailed instructions for the Ashfly 4.3-inch LCD Digital Microscope, Model 366. This device is designed for observing microscopic details of various objects, offering up to 1000x magnification, a 1080P display, and adjustable LED illumination. It is suitable for a wide range of applications, including coin inspection, PCB board examination, watch repair, and plant observation.

Image: The Ashfly 4.3-inch LCD Digital Microscope, Model 366, in white.
2. Package Contents
Verify that all items are present in the package:
- Ashfly 4.3-inch LCD Digital Microscope Unit
- Adjustable Stand (Base, Pole, Bracket)
- Type-C Charging Cable
- User Manual
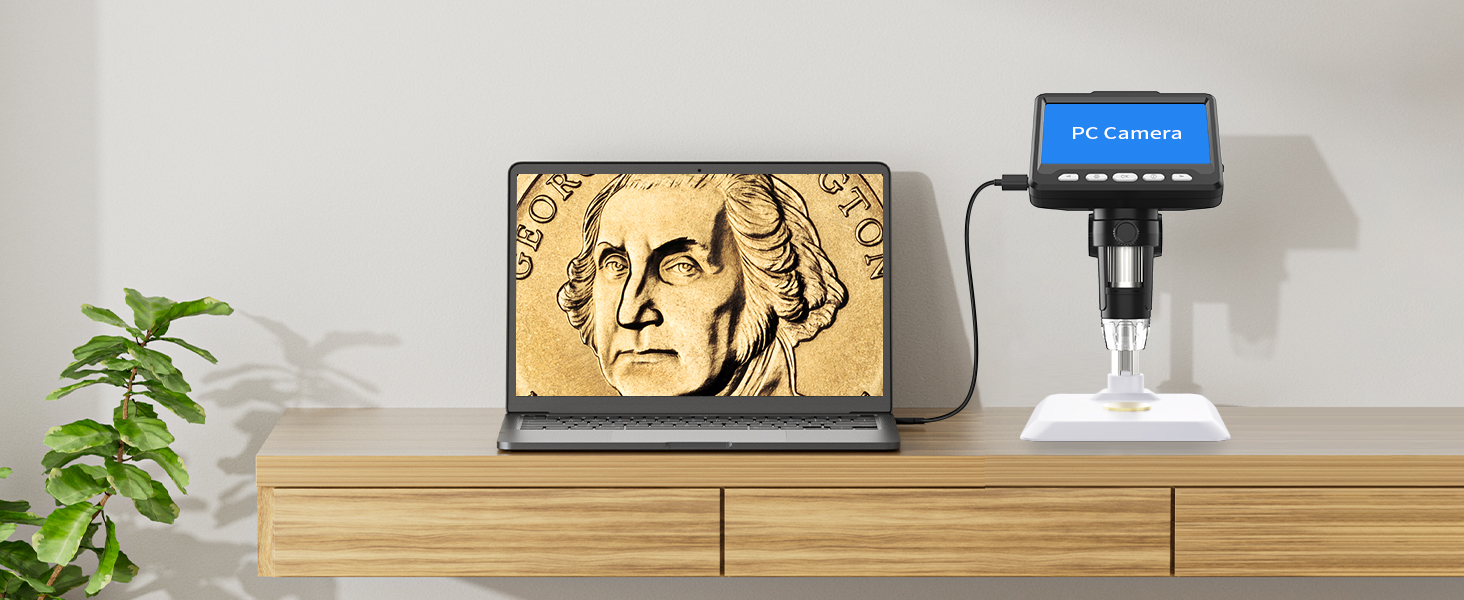
Image: All components included in the Ashfly Digital Microscope package, laid out for inspection.
3. Setup Instructions
Follow these steps to assemble your digital microscope:
- Step 1: Insert the vertical pole into the base. Ensure it is securely seated.
- Step 2: Attach the microscope unit's bracket to the vertical pole.
- Step 3: Place the microscope unit onto the bracket.
- Step 4: Tighten the two knobs on the bracket to secure the microscope unit at the desired height and angle.

Image: A four-step visual guide demonstrating the assembly of the microscope stand and unit.
Before first use, ensure the lens dust cap is removed from the bottom of the microscope objective.
4. Operating Instructions
4.1 Power On/Off
Press and hold the power button (usually marked with an “ ” symbol) to turn the microscope on or off. The 4.3-inch IPS screen will illuminate.
4.2 Adjusting Magnification
The microscope offers a magnification range of 50x to 1000x. Adjust the focusing wheel on the side of the microscope unit to change the magnification and bring the object into clear focus. Move the microscope unit up or down on the stand to adjust the working distance for different magnification levels.

Image: Visual representation of 50x, 500x, and 1000x magnification views of a circuit board.
4.3 Adjusting LED Illumination
The microscope is equipped with 8 high-brightness LED ring lights. Use the brightness adjustment dial, typically located on the side of the screen unit, to control the intensity of the LED lights from 0% to 100%. This allows for optimal lighting conditions for various objects and environments, reducing glare and improving image clarity.
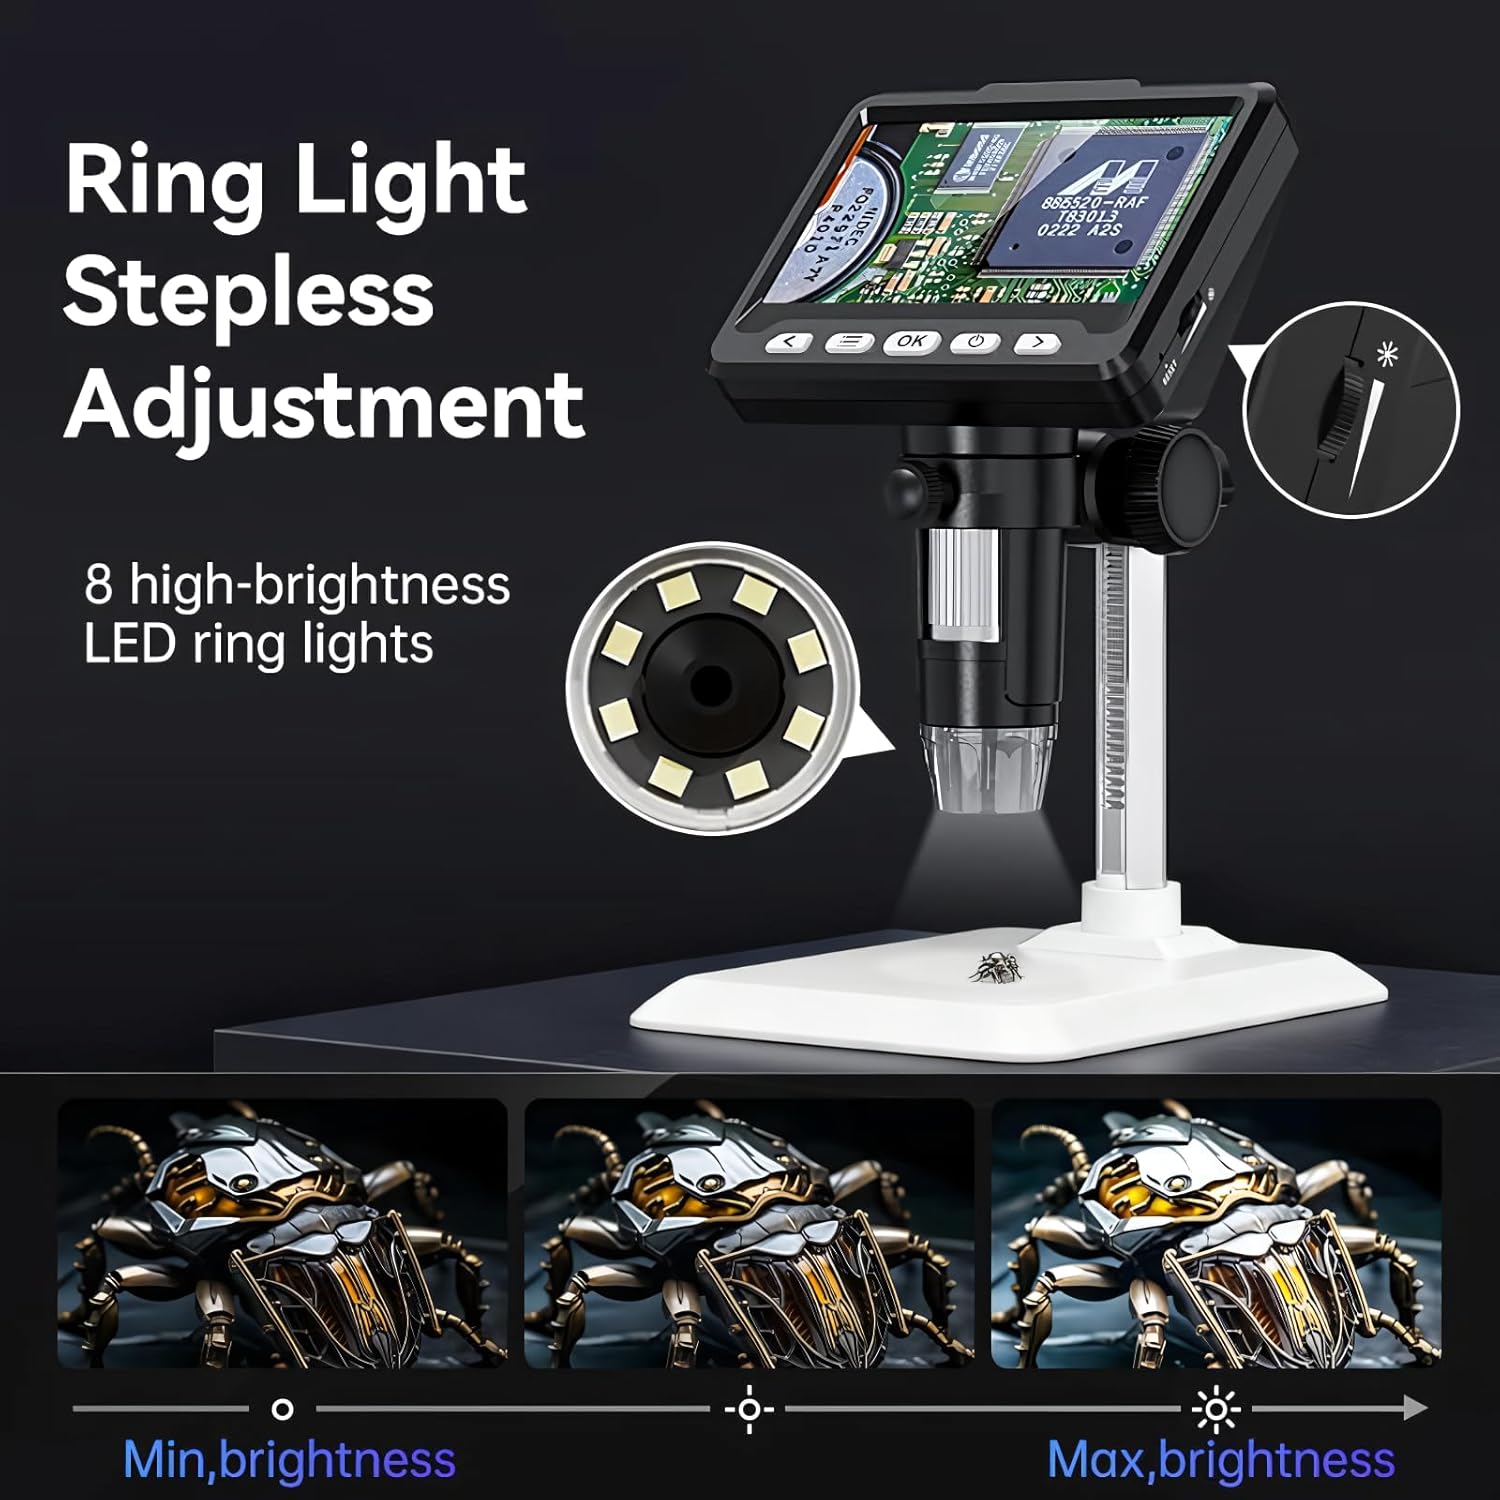
Image: A diagram showing the stepless adjustment of the 8 LED ring lights, with examples of minimum and maximum brightness on an insect specimen.
4.4 Capturing Photos and Videos
The microscope supports capturing high-definition photos and videos. Insert a compatible memory card (not included) into the designated slot to store your observations. Refer to the on-screen menu for options to switch between photo and video modes and initiate recording.
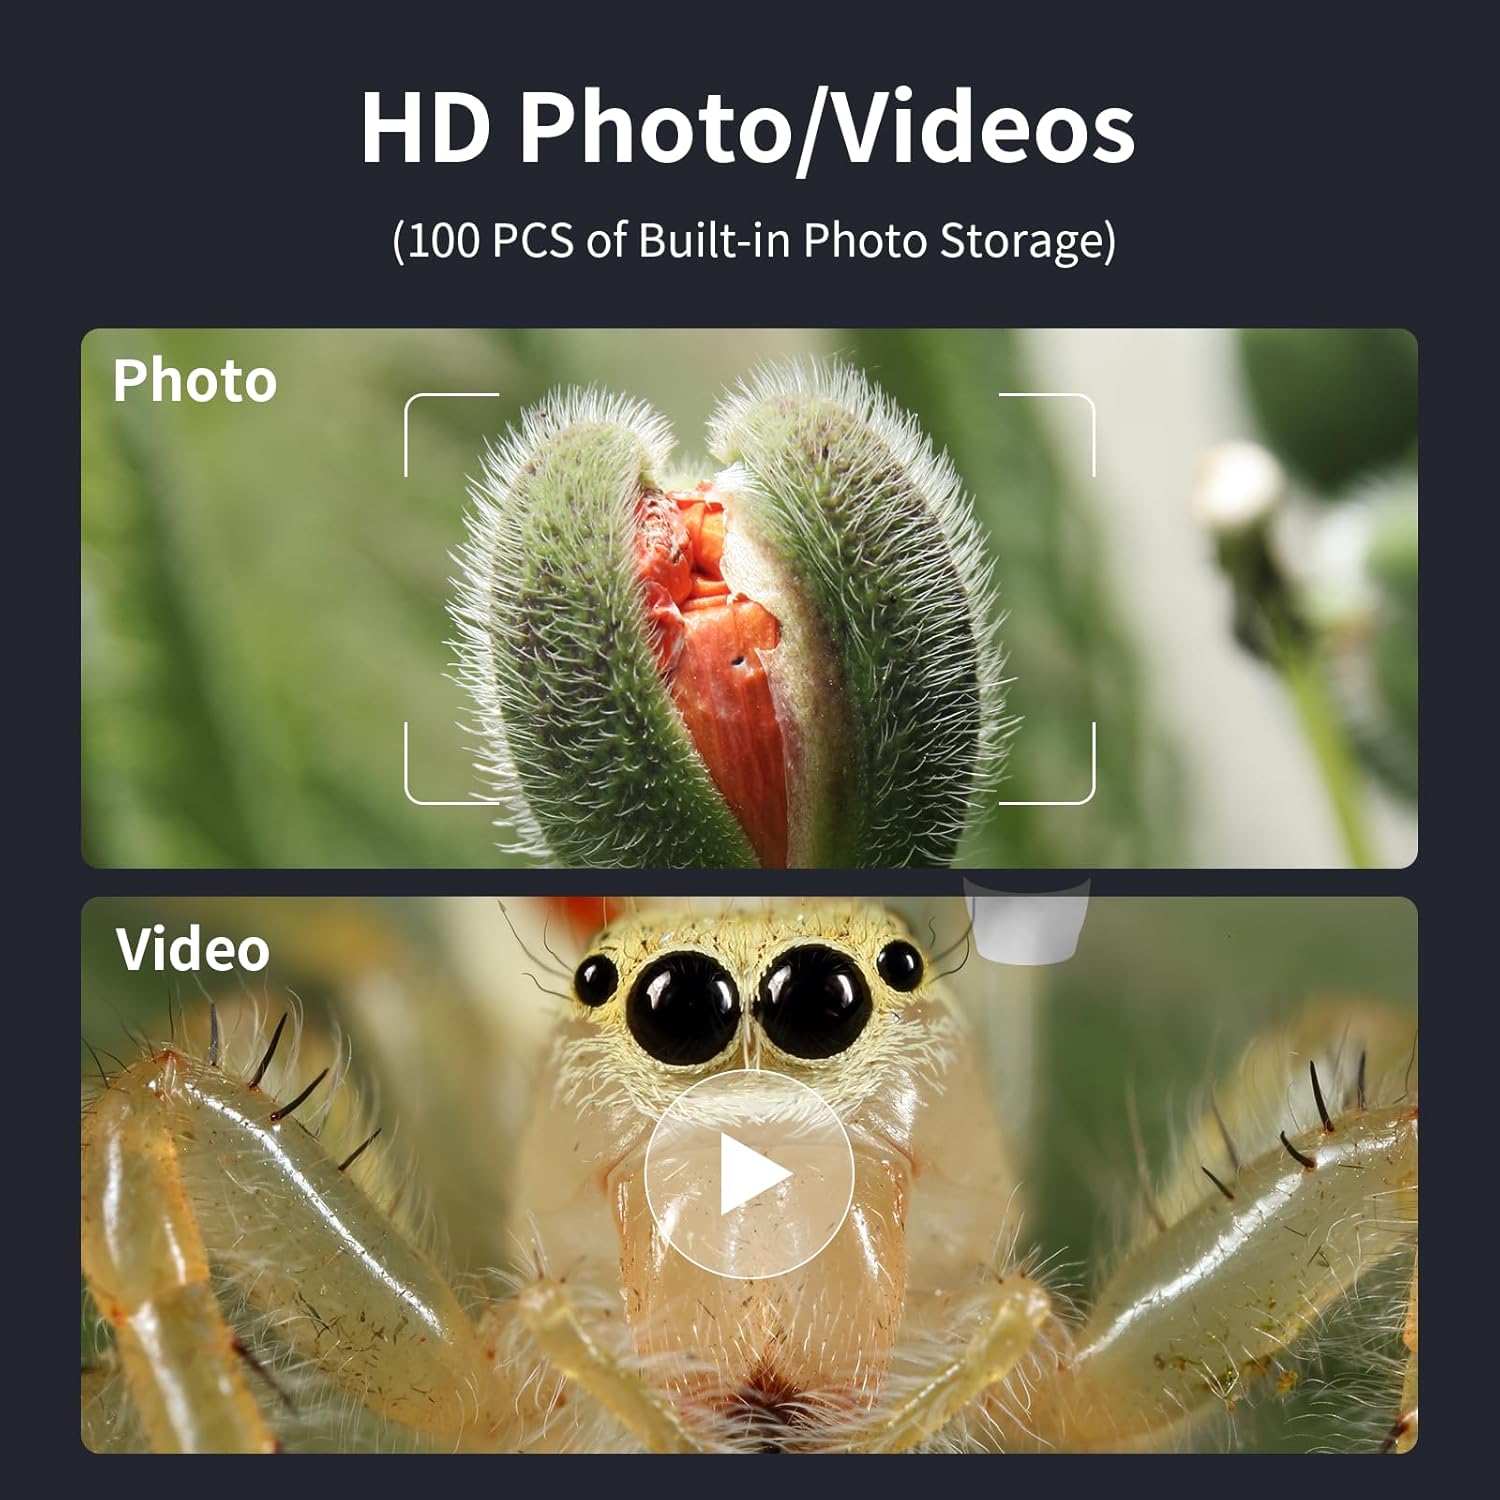
Image: Examples of a captured photo of a plant bud and a video frame of a spider's eye, illustrating the HD photo/video capabilities.
4.5 PC View Connectivity
Connect the microscope to a computer (MacOS or Windows) via the USB-C cable for a real-time, zoomed-in view on a larger screen. This feature is useful for collaborative viewing, detailed analysis, or recording directly to your computer.

Image: The microscope connected to a laptop, displaying a magnified image of a coin on the computer screen.
5. Features
5.1 4.3-inch IPS Screen
The integrated 4.3-inch IPS screen provides a wide 178-degree viewing angle and consistent image quality with vibrant colors and crisp details. This ensures comfortable viewing for extended periods and allows multiple users to view simultaneously without color distortion.
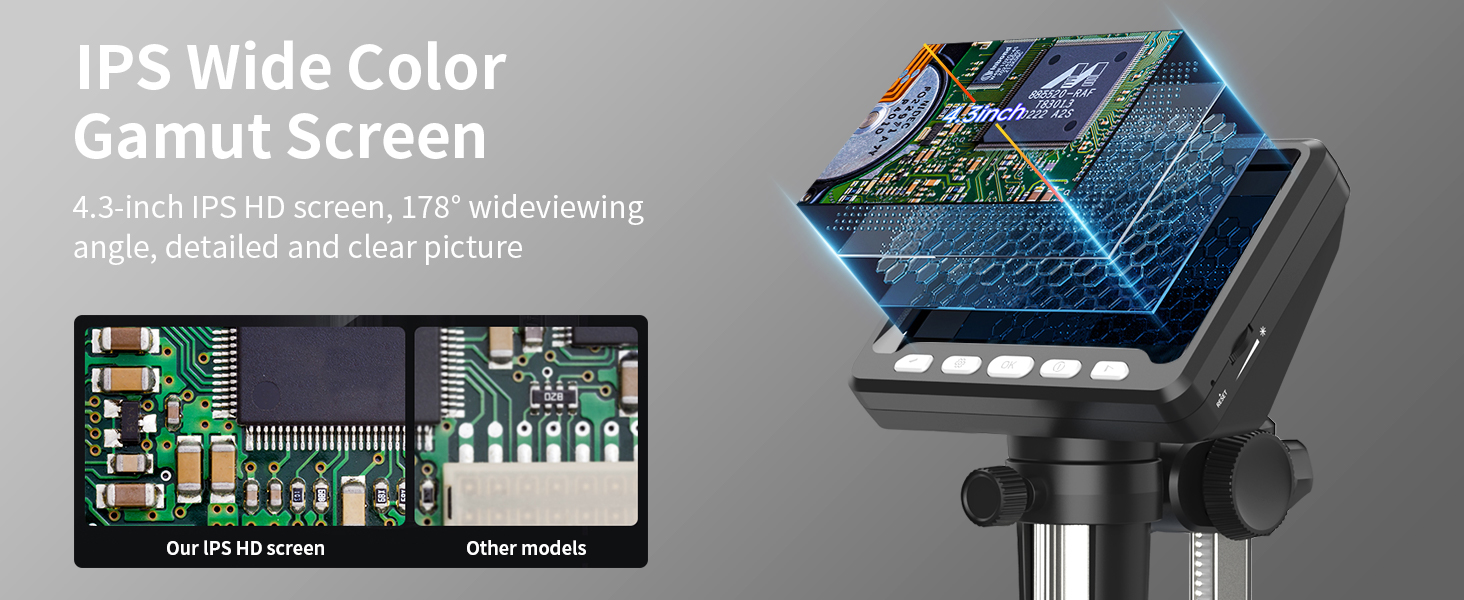
Image: A comparison showing the clear and detailed image quality of the Ashfly IPS HD screen versus other models.
5.2 High Resolution Lens
Equipped with a 2MP HD lens, the microscope delivers detailed visualization of specimens. The lens design supports the wide magnification range and contributes to the overall image clarity.

Image: An exploded view diagram illustrating the components of the high-resolution 2MP lens system.
5.3 Wide Application
The Ashfly digital microscope is a versatile tool suitable for various applications, including:
- Coin Collection and Inspection
- PCB Board Inspection and Soldering
- Watch and Jewelry Repair
- Plant and Insect Observation
- Quality Control Testing
- Educational Purposes

Image: A collage showing various applications of the microscope, including coin collection, PCB board inspection, watch repair, and plant inspection.
6. Maintenance
6.1 Cleaning
To clean the microscope, use a soft, dry cloth. For the lens, use a specialized lens cleaning cloth and solution. Avoid using abrasive cleaners or solvents that could damage the device.
6.2 Battery Charging
The microscope is powered by a rechargeable Lithium-Ion battery. Connect the provided Type-C charging cable to the microscope and a suitable USB power adapter (not included) to charge. A full charge typically takes approximately 2 hours and provides up to 3 hours of continuous use.
6.3 Storage
Store the microscope in a cool, dry place away from direct sunlight and extreme temperatures. When not in use, it is recommended to cover the lens to prevent dust accumulation.
7. Troubleshooting
7.1 No Image on Screen
- Ensure the microscope is powered on.
- Check battery level and charge if necessary.
- Verify that the lens cap has been removed.
- Adjust the focusing wheel to bring the object into view.
7.2 Image is Blurry
- Rotate the focusing wheel slowly until the image is sharp.
- Adjust the height of the microscope unit on the stand to change the working distance.
- Ensure the object is placed directly under the lens.
7.3 Insufficient Lighting
- Increase the brightness of the LED lights using the adjustment dial.
- Ensure the object is positioned correctly to receive maximum illumination.
- Consider using an external light source if the built-in LEDs are not sufficient for very dark or reflective objects.
7.4 PC Connection Issues
- Ensure the USB-C cable is securely connected to both the microscope and the computer.
- Try a different USB port on your computer.
- Check if your computer's operating system recognizes the device. You may need to select the microscope as a webcam or imaging device in your computer's settings or software.
8. Specifications
| Brand | Ashfly |
| Model Name | 366 |
| Screen Size | 4.3 inches (IPS HD) |
| Magnification Maximum | 1000x |
| Resolution | 1080P (for display and capture) |
| Light Source Type | 8 Adjustable LED Lights |
| PC Compatibility | MacOS, Windows |
| Battery Type | 1 Lithium Ion (included) |
| Item Weight | 1.04 pounds |
| Material | Plastic |
| Color | White |
9. Warranty and Support
For warranty information and technical support, please refer to the official Ashfly website or contact their customer service directly. Keep your purchase receipt as proof of purchase for any warranty claims.


