1. Introduction
This manual provides detailed instructions for the installation, operation, and maintenance of your MOES WiFi Smart Light Switch (1-Gang). This smart switch is designed to enhance your home lighting control with convenience and smart features.
Key Features:
- Supports both no-neutral wire and with-neutral wire configurations.
- No hub required; connects directly to your 2.4GHz Wi-Fi network.
- Compatible with Alexa and Google Assistant for voice control.
- Remote control via smartphone application.
- Timer and scheduling functions for automated lighting.
- Space-saving design fits most standard wall boxes.

Image 1.1: MOES WiFi Smart Light Switch packaging and the 1-gang switch unit.
2. Safety Information
- Always turn off power at the circuit breaker before installation or maintenance.
- If you are unsure about electrical wiring, consult a qualified electrician.
- This switch is designed for indoor use only.
- Do not exceed the maximum load ratings specified in the product specifications.
3. Installation Guide
3.1. Pre-Installation Checklist
- Ensure your home has a 2.4GHz Wi-Fi network. 5GHz networks are not supported.
- Confirm the existing wiring in your wall box (neutral wire present or not).
- Tools required: Screwdriver, wire strippers, voltage tester.
3.2. Wiring Instructions
The MOES Smart Light Switch supports both neutral wire and no-neutral wire configurations. Please identify your wiring type before proceeding.
3.2.1. No-Neutral Wire Installation
If your wall box does not have a neutral wire, a capacitor (included in the package) is required for proper operation. This capacitor must be connected across the light bulb terminals.
- Turn off power: Locate your circuit breaker and turn off the power to the switch you are replacing. Verify power is off with a voltage tester.
- Identify wires: In your wall box, identify the Line (Live) wire, Load wire(s), and Ground wire.
- Connect wires to the switch:
- Connect the Line wire to the 'L' terminal on the smart switch.
- Connect the Load wire(s) to the 'L1' (OUT) terminal. For 1-gang switches, typically only L1 is used.
- Connect the Ground wire to the 'GND' terminal.
- Install Capacitor: Connect the provided capacitor across the light bulb terminals (between the live and neutral wires at the light fixture). This is crucial for no-neutral setups to ensure stable power to the smart switch.
- Mount the switch: Secure the smart switch into the wall box and attach the faceplate.
- Restore power: Turn the power back on at the circuit breaker.

Image 3.1: Wiring diagram for no-neutral wire installation, showing capacitor connection.

Image 3.2: Comparison of Neutral + Live Wire and No Neutral Wire diagrams, highlighting the capacitor for no-neutral setups.
3.2.2. With-Neutral Wire Installation
If your wall box has a neutral wire, the installation is straightforward.
- Turn off power: Locate your circuit breaker and turn off the power to the switch you are replacing. Verify power is off with a voltage tester.
- Identify wires: In your wall box, identify the Line (Live) wire, Neutral wire, Load wire(s), and Ground wire.
- Connect wires to the switch:
- Connect the Line wire to the 'L' terminal on the smart switch.
- Connect the Neutral wire to the 'N' terminal.
- Connect the Load wire(s) to the 'L1' (OUT) terminal. For 1-gang switches, typically only L1 is used.
- Connect the Ground wire to the 'GND' terminal.
- Mount the switch: Secure the smart switch into the wall box and attach the faceplate.
- Restore power: Turn the power back on at the circuit breaker.
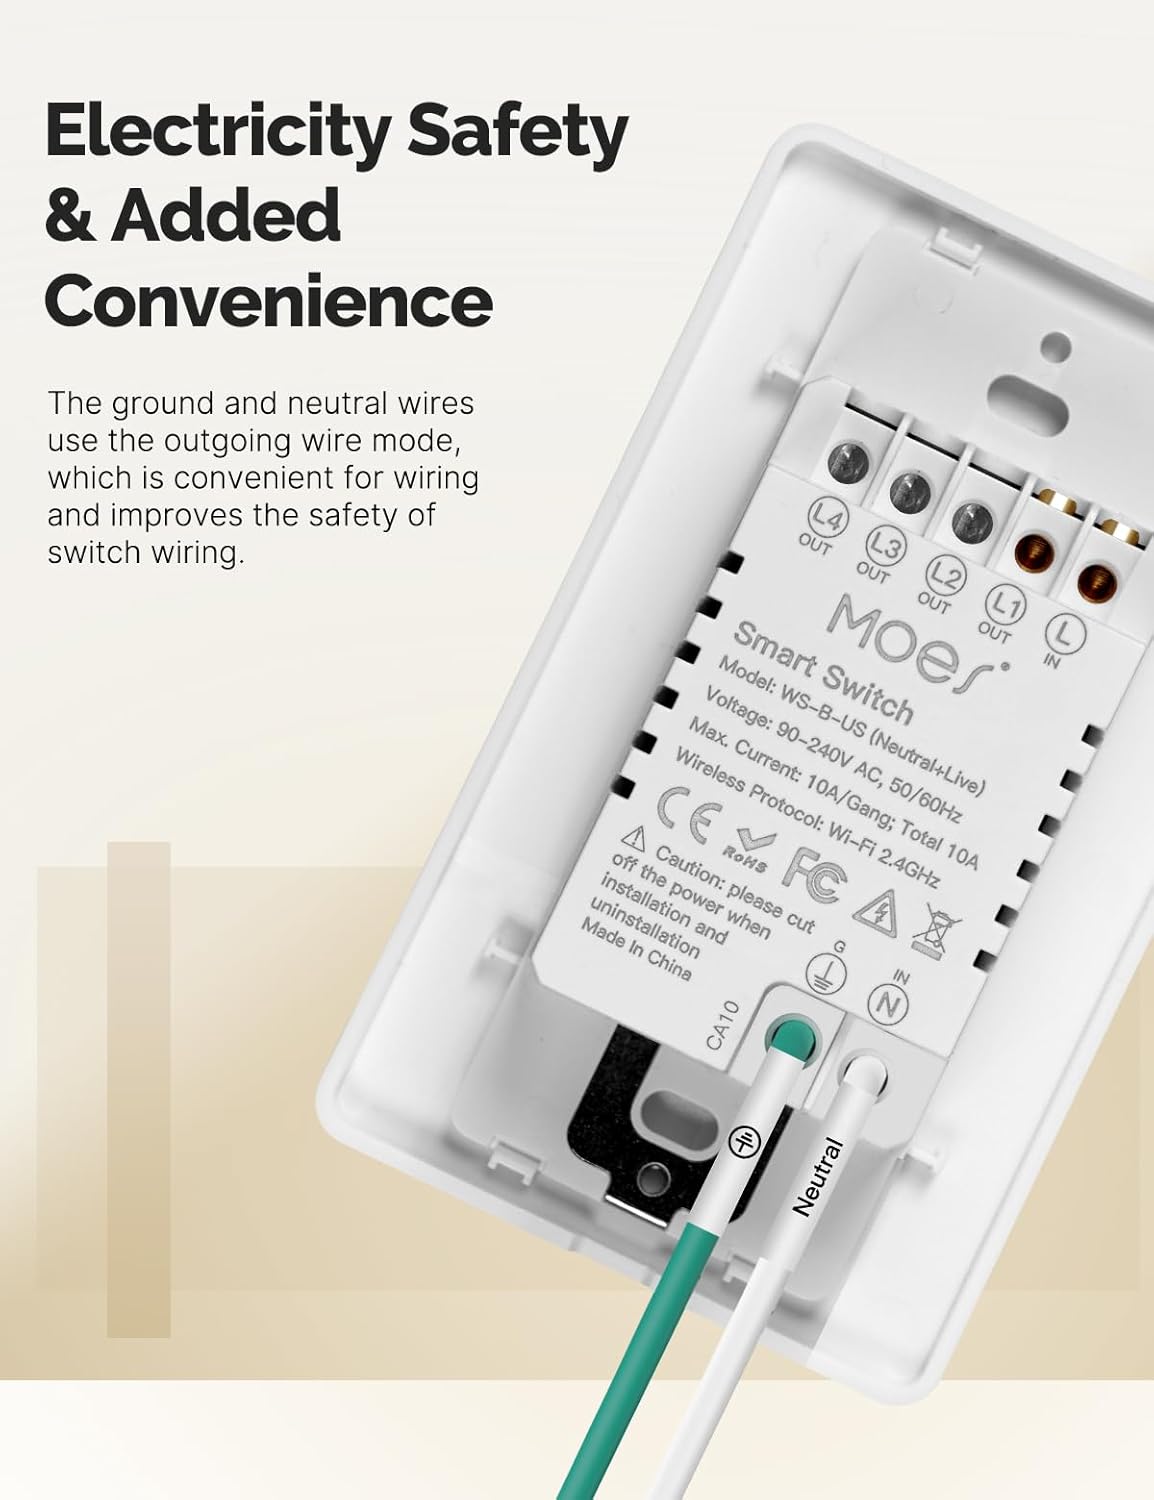
Image 3.3: Rear view of the MOES Smart Switch showing wiring terminals for Line, Neutral, Load, and Ground connections.
3.3. App Pairing
- Download the App: Download the "Smart Life" or "MOES" app from your smartphone's app store.
- Register/Login: Create an account or log in to the app.
- Add Device: Tap the '+' icon in the top right corner of the app to add a new device.
- Select Device Type: Choose "Electrical" then "Light Switch" or "Switch (Wi-Fi)".
- Enter Wi-Fi Details: Ensure your phone is connected to a 2.4GHz Wi-Fi network. Enter your Wi-Fi password.
- Pairing Mode: The switch should automatically enter pairing mode (indicator light blinking rapidly). If not, press and hold the switch button for 5-10 seconds until it blinks rapidly.
- Complete Pairing: Follow the on-screen instructions in the app to complete the pairing process. Once connected, you can rename the switch.
Video 3.1: A visual guide demonstrating the general installation process for the MOES Smart Light Switch, including wiring and app pairing. (Note: Video may show a multi-gang switch, but principles apply to 1-gang).
4. Operating Instructions
4.1. Manual Control
Press the physical button(s) on the switch to turn the connected light(s) on or off. The switch features high-quality buttons for reliable operation.
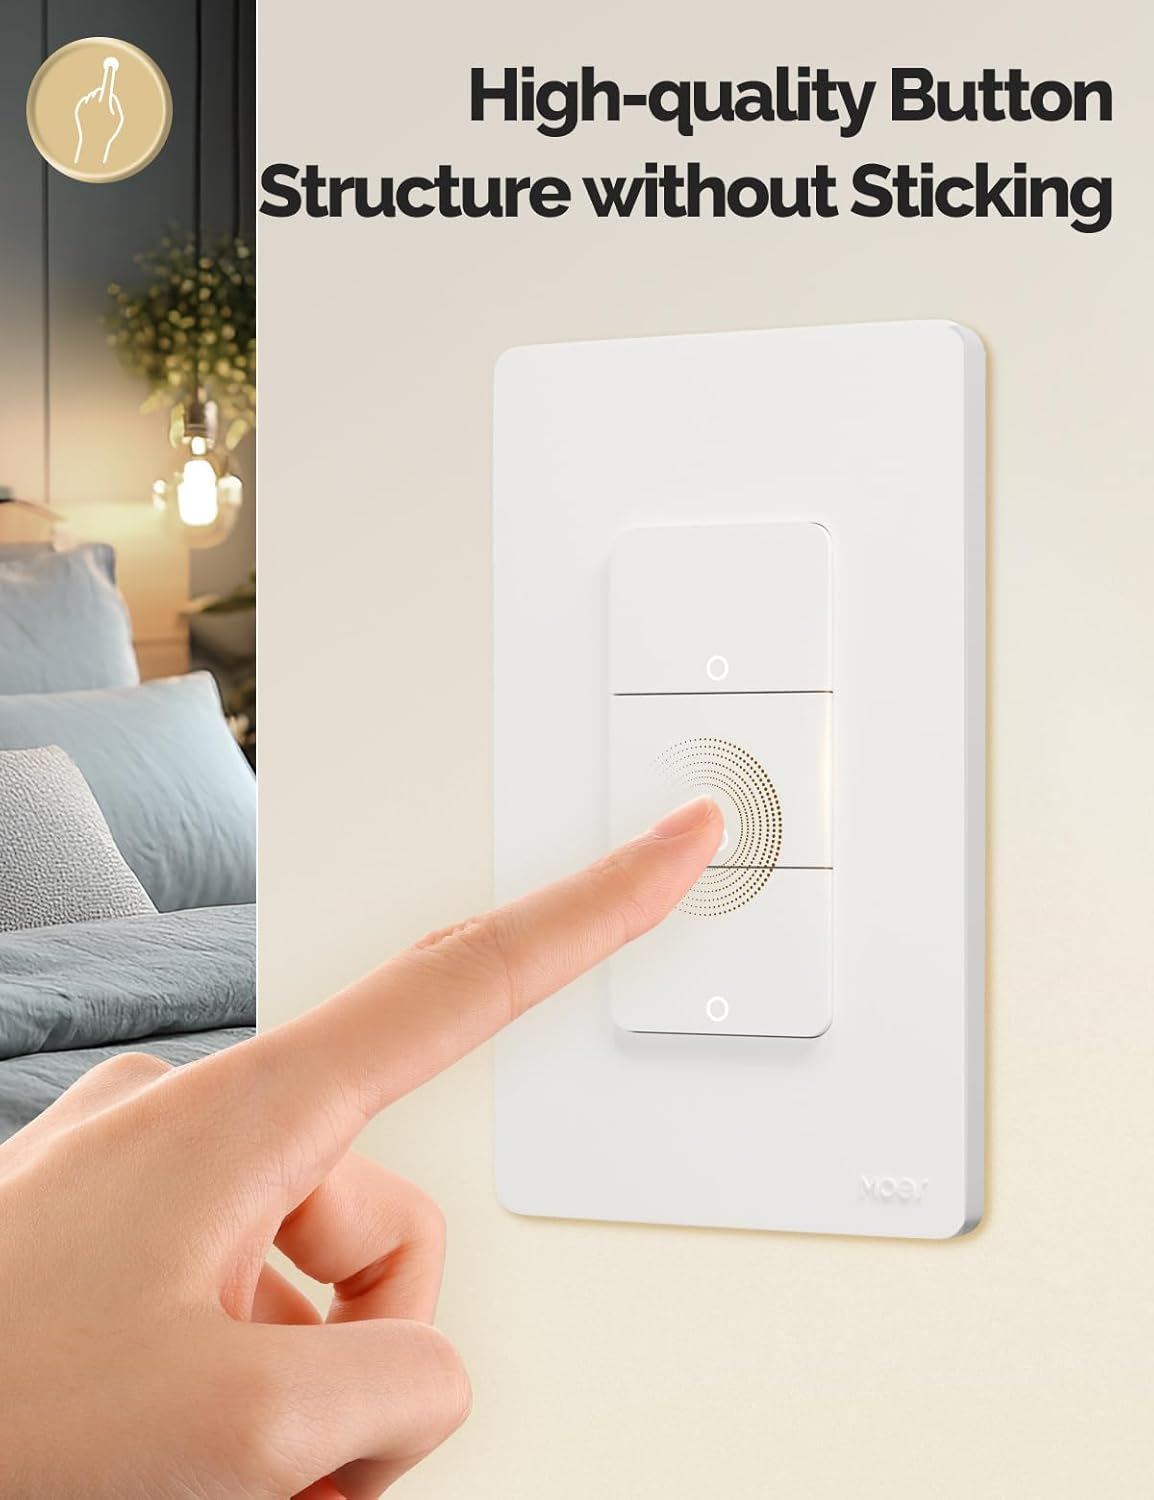
Image 4.1: Close-up of the MOES Smart Switch highlighting its high-quality button design.
4.2. App Control (Remote Control)
Once paired with the app, you can control your lights from anywhere using your smartphone.
- Open the "Smart Life" or "MOES" app.
- Select your smart switch from the device list.
- Tap the on/off icons to control your lights.

Image 4.2: Demonstrates remote control functionality of the smart switch via the mobile application.
4.3. Voice Control
The switch is compatible with Amazon Alexa and Google Assistant for hands-free control.
- Link Account: In your Alexa or Google Home app, link your "Smart Life" or "MOES" account.
- Discover Devices: Ask your voice assistant to discover new devices.
- Voice Commands: Use commands like "Alexa, turn on the living room light" or "Hey Google, turn off the bedroom light."

Image 4.3: Setup showing smart speakers (Alexa, Google Home) interacting with the smart switch for voice control.
4.4. Timer and Schedule Functions
Automate your lighting with customizable timers and schedules through the app.
- Schedule: Set specific times for lights to turn on or off daily or on selected days.
- Countdown: Set a countdown timer for lights to turn off after a set duration.
- Cycle Timing: Configure lights to cycle on and off at regular intervals.
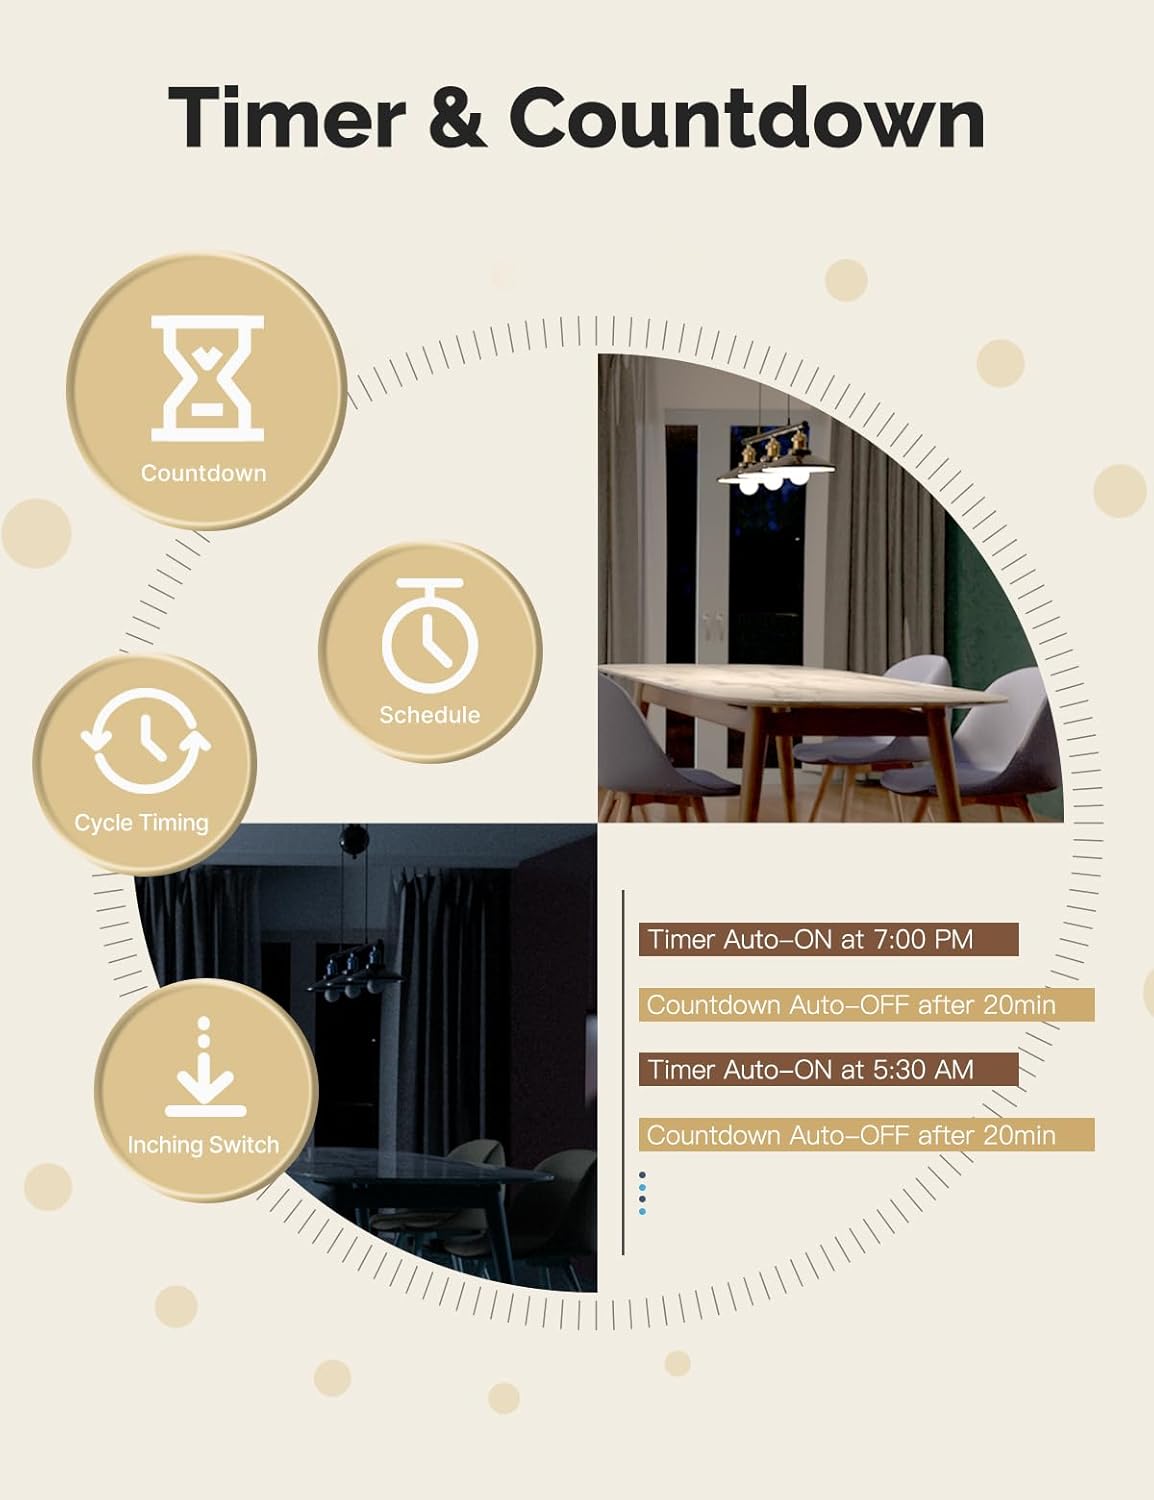
Image 4.4: Visual representation of timer and countdown settings available in the smart home application.
4.5. Indicator Light Mode
The switch features an indicator light that can be configured via the app to show ON/OFF status or switch location in the dark.

Image 4.5: Illustrates different indicator light modes, such as showing ON/OFF status or switch location.
4.6. Relay Status Settings
Configure the switch's behavior after a power outage (Power-off, Power-on, or Restart Memory) through the app settings.

Image 4.6: Screenshot of the app interface for configuring relay status settings after a power interruption.
5. Maintenance
- Clean the switch faceplate with a soft, dry cloth. Avoid abrasive cleaners or solvents.
- Regularly check for app updates to ensure optimal performance and security.
- Ensure your Wi-Fi network is stable and within range of the switch.
6. Troubleshooting
| Problem | Possible Cause | Solution |
|---|---|---|
| Switch not responding to app/voice commands. |
|
|
| Lights flicker or do not turn off completely (no-neutral wiring). |
|
|
| Switch gets warm or burns out. |
|
|
| Difficulty with initial installation. |
|
|
7. Specifications
| Feature | Detail |
|---|---|
| Brand | MOES |
| Model | WS-US-L (1-Gang) |
| Operation Mode | Automatic |
| Contact Type | Normally Open |
| Connector Type | Screw Terminals |
| Terminal | Screw |
| Circuit Type | 2-way |
| Mounting Type | Wall Mount |
| Contact Material | Copper |
| Number of Positions | 1 |
| Control Method | App, Remote, Touch, Voice |
| Wireless Protocol | Wi-Fi 2.4GHz |
| Voltage | 90-240V AC, 50/60Hz |
| Max. Current (per gang) | 8A |
| Total Max. Current | 8A |

Image 7.1: Detailed dimensions and technical specifications of the MOES Smart Light Switch.
8. Warranty and Support
MOES products are designed for reliability and performance. For warranty information, technical support, or further assistance, please visit the official MOES website or contact their customer service directly.
You can find more information and support resources at the MOES Store on Amazon.