
1. Introduction
Thank you for purchasing the XPCLEOYZ 275W Moving Head Light, Model 295B. This professional stage lighting fixture is designed to produce dynamic beam effects, vibrant colors, and intricate gobo patterns for various events and venues. This manual provides essential information for safe installation, operation, and maintenance of your device. Please read it thoroughly before use and retain it for future reference.
2. Safety Instructions
To ensure safe operation, observe the following precautions:
- Always connect the fixture to a grounded power outlet.
- Do not open the housing; there are no user-serviceable parts inside. Refer all servicing to qualified personnel.
- Avoid direct eye exposure to the light source.
- Ensure adequate ventilation around the fixture to prevent overheating. Maintain a minimum distance of 0.5 meters from flammable materials.
- Mount the fixture securely using appropriate clamps and safety cables.
- Disconnect power before cleaning or performing any maintenance.
- Do not operate the fixture if the power cord is damaged.
3. Product Overview
3.1 Key Features
- Light Source: 275W LED for bright and powerful beam effects.
- Beam Effects: 10R Beam Effect, 8 magic beams with chasing and swing conversion capabilities.
- Gobos: 14 static gobos for diverse pattern projections.
- Colors: 14 vibrant colors plus white.
- Prisms: Dual prism effects for dynamic beam splitting.
- Optical System: Linear zoom, frost filter, and rainbow wheel for versatile visual effects.
- Movement: Pan (X-axis) 540 degrees, Tilt (Y-axis) 270 degrees.
- Control Modes: DMX, Sound Control, Master-Slave, Self-Propelled (Auto).
3.2 Product Components
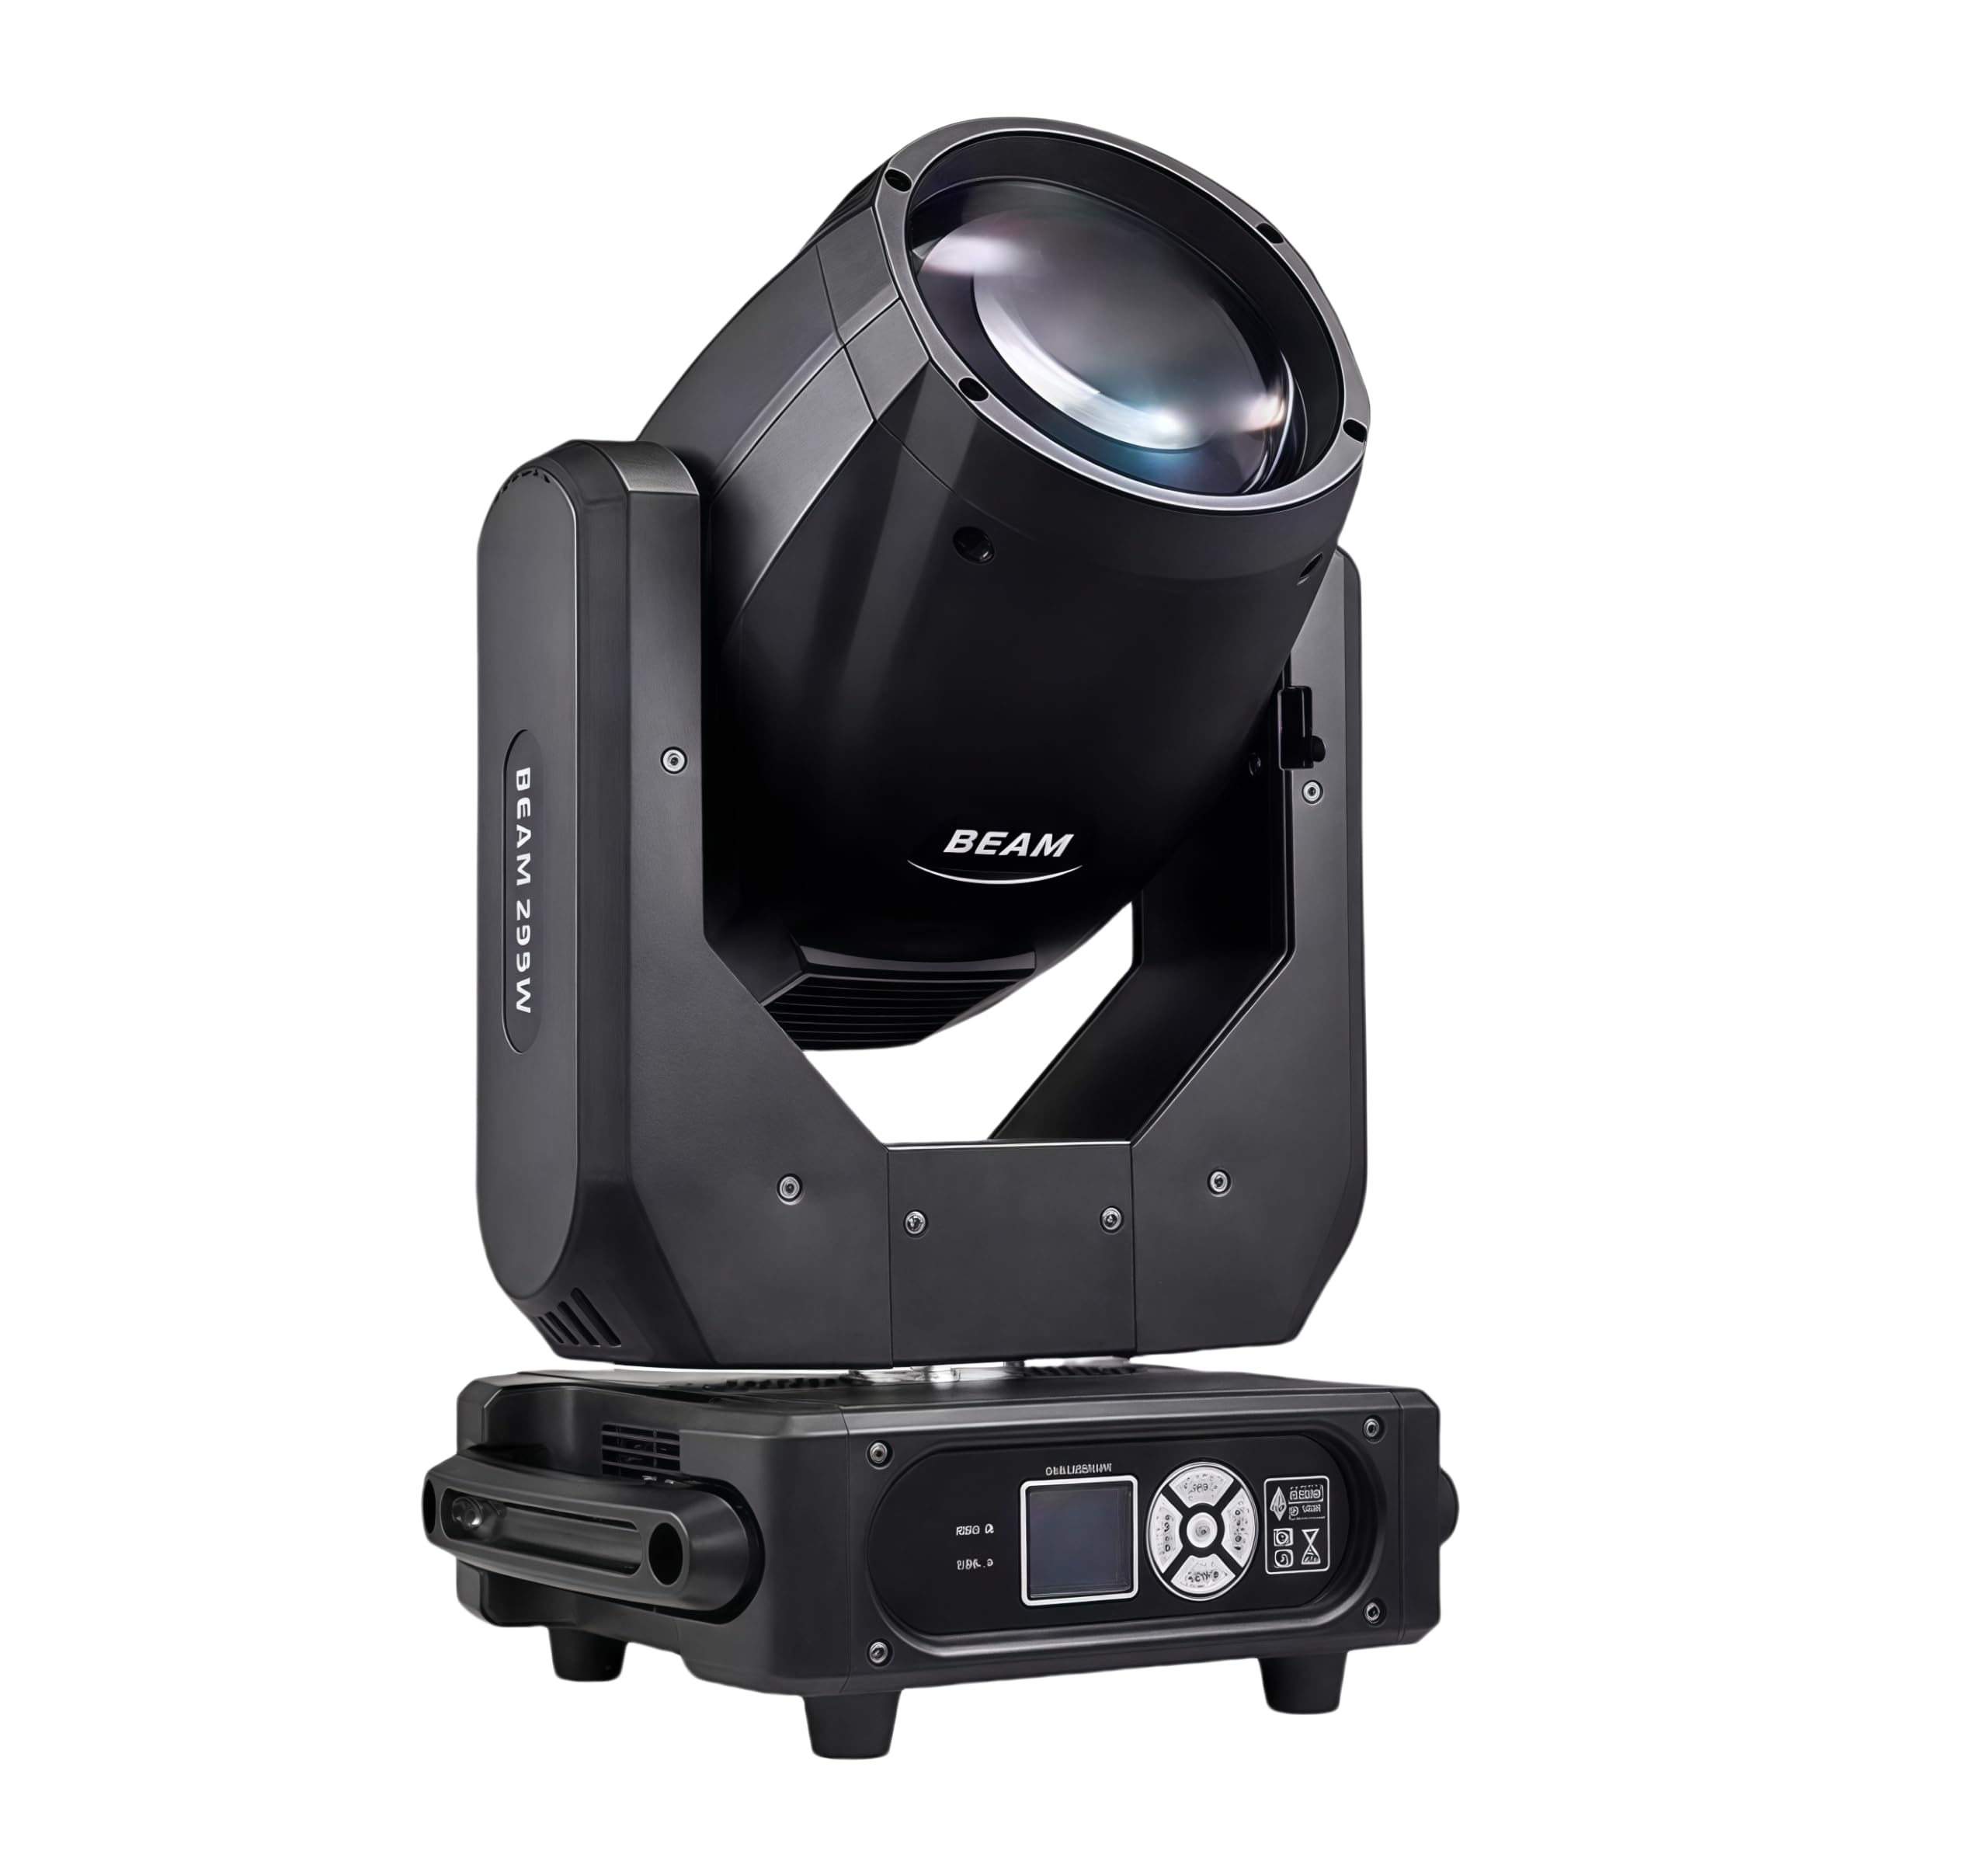
The XPCLEOYZ 275W Moving Head Light consists of a base, a moving head, and an optical system. The base houses the control panel, power input, and DMX connections.

4. Setup
4.1 Unpacking
Carefully remove the fixture from its packaging. Inspect for any damage during transit. Retain the packaging for future transportation or storage.
4.2 Mounting
The XPCLEOYZ 275W Moving Head Light can be floor-mounted or truss-mounted. Ensure the mounting surface or truss can support the weight of the fixture (approximately 33 pounds).
- Floor Mount: Place the fixture on a stable, level surface.
- Truss Mount: Use appropriate clamps (not included) to secure the fixture to a truss. Always use a safety cable (not included) attached to the designated safety point on the fixture and the truss.
4.3 Power Connection
Connect the provided power cord to the power input on the fixture and then to a grounded electrical outlet. Ensure the voltage matches the fixture's requirements (typically 100-240V AC, 50/60Hz).
4.4 DMX Connection (Optional)
For DMX control, connect a DMX cable from your DMX controller to the DMX IN port of the first fixture. For multiple fixtures, daisy-chain them by connecting the DMX OUT of the first fixture to the DMX IN of the next, and so on. Terminate the last fixture in the chain with a DMX terminator.
5. Operating Instructions
The XPCLEOYZ 275W Moving Head Light offers multiple control modes.

5.1 Control Panel
The fixture features an LCD display and control buttons on its base for menu navigation and setting adjustments. Refer to the on-screen menu for specific parameter settings.
5.2 DMX Control Mode
In DMX mode, the fixture is controlled by an external DMX controller. Set the DMX address for each fixture using the control panel. Each fixture requires a unique starting address to receive commands from the controller.
5.3 Sound Control Mode
In Sound Control mode, the fixture reacts to ambient sound. The built-in microphone detects sound, and the light effects synchronize with the music beat. Sensitivity can often be adjusted via the control panel.
5.4 Master-Slave Mode
Connect multiple fixtures via DMX cables. Set one fixture as the 'Master' and the others as 'Slave'. The slave units will mimic the master unit's movements and effects, creating synchronized lighting displays.
5.5 Self-Propelled (Auto) Mode
In Self-Propelled mode, the fixture runs through pre-programmed internal shows and patterns automatically. Various auto programs may be selected via the control panel.


6. Maintenance
Regular maintenance ensures optimal performance and extends the lifespan of your fixture.
- Cleaning: Periodically clean the lens and exterior housing with a soft, lint-free cloth. For stubborn dirt, use a mild glass cleaner. Ensure the fixture is powered off and cool before cleaning.
- Ventilation: Keep ventilation openings clear of dust and debris to prevent overheating. Use compressed air to clear vents if necessary.
- Inspection: Regularly inspect power cables, DMX cables, and mounting hardware for any signs of wear or damage. Replace damaged components immediately.
7. Troubleshooting
| Problem | Possible Cause | Solution |
|---|---|---|
| Fixture does not power on | No power supply; Damaged power cable; Faulty outlet | Check power connection; Test power cable; Try a different outlet |
| No DMX control | Incorrect DMX address; Faulty DMX cable; No DMX signal; Missing terminator | Verify DMX address; Test DMX cables; Check DMX controller; Add DMX terminator |
| Light output is dim or inconsistent | Dirty lens; Overheating; Internal fault | Clean lens; Ensure proper ventilation; Contact support if problem persists |
| Moving head not responding | Motor calibration issue; DMX signal problem; Obstruction | Restart fixture; Check DMX connection; Ensure no physical obstructions |
8. Specifications
| Feature | Detail |
|---|---|
| Model Number | 295B (Internal: XPCYT) |
| Brand | XPCLEOYZ |
| Light Source Type | LED |
| Light Source Wattage | 275 Watts |
| Power Source | Corded Electric |
| Material | Acrylonitrile Butadiene Styrene (ABS) |
| Finish Type | Painted |
| Product Dimensions | 9"L x 9"W x 10"H |
| Item Weight | 33 pounds |
| Beam Angle (Pan) | 540 Degrees |
| Beam Angle (Tilt) | 270 Degrees |
| Gobos | 14 |
| Colors | 14 + White |
| Prisms | 2 |
| Control Modes | DMX, Sound Control, Master-Slave, Self-Propelled |
| UPC | 762744518707 |
9. Warranty and Support
Specific warranty information is not provided in the product details. Please refer to the retailer or manufacturer's website for detailed warranty terms and conditions. For technical support or service inquiries, please contact XPCLEOYZ customer service through the platform where the product was purchased or visit their official support channels.
10. Product Videos
No official product videos from the seller were provided in the available product data. For visual demonstrations or additional information, please check the product listing page or the manufacturer's official website.