
1. Introduction
This manual provides detailed instructions for the safe and proper installation, operation, and maintenance of your VINGLI 4FT x 2.5FT In-Ground Swimming Pool Safety Fence Gate. Please read this manual thoroughly before beginning installation or use to ensure optimal performance and safety.
2. Safety Information
- Always supervise children and pets around the pool area, even with the fence installed.
- Ensure the gate is securely latched at all times when not in use.
- Regularly inspect the fence and gate for any signs of wear, damage, or loose components. Replace or repair as necessary.
- Do not climb on or lean heavily on the fence or gate.
- Keep the area around the fence clear of objects that could be used to climb over it.
- Installation requires drilling into concrete. Wear appropriate safety gear, including eye protection, gloves, and hearing protection.
3. Package Contents
Verify that all components are present before beginning assembly.
- Fence sections (mesh fabric with aluminum poles)
- Gate section (mesh fabric with aluminum frame)
- Plastic sleeves
- Hooks and springs for connecting fence sections
- L-shaped pipe fittings (A and B)
- PE tubes
- Screws and nuts
- Installation ruler

Figure 1: Included components for the VINGLI Pool Fence Gate.
4. Required Tools
The following tools are required for installation:
- Pencil or Chalk
- 5/8" Electric Drill
- Water Gun (for cleaning debris)
- Hammer
- Tape Measure
- Wood Block (to prevent sleeve damage during installation)
5. Setup and Installation
The VINGLI pool fence gate is designed for straightforward installation. Follow these steps carefully.
5.1 Planning and Marking
- Determine Fence Layout: Plan the perimeter of your pool fence. Ensure the fence is a minimum of 2 to 3 feet (approximately 60-90 cm) off the pool edge for safety and access.
- Mark First Hole: Measure 2 to 3 feet from the pool edge and mark the position for the first hole.
- Use Installation Ruler: Place the provided installation ruler with one end aligned to the first marked hole. Use a pencil or chalk to mark the positions for the subsequent holes. The ruler helps ensure consistent spacing.
- Repeat Marking: Continue marking holes around the pool perimeter. For each full mesh section, you will typically attach 5 poles. Count holes before marking the next section and re-count before drilling to verify.

Figure 2: Steps for marking and preparing holes for fence installation.
5.2 Drilling and Sleeve Insertion
- Drill Holes: Using a 5/8" electric drill, carefully drill holes at all the marked positions.
- Clean Debris: Use a water gun or similar tool to remove any drilling debris from the holes.
- Insert Plastic Sleeves: Remove the cap from each plastic sleeve and insert the sleeve into a drilled hole.
- Secure Sleeves: Place a wood block on top of the sleeve and gently tap it down with a hammer until it is flush with the ground. This prevents damage to the sleeve. Keep the sleeve caps for future reuse after disassembly.
5.3 Fence Section Connection
- Position Fence Sections: Place the fence sections around the pool, aligning the poles with the installed plastic sleeves.
- Insert Poles: For easier insertion, angle each pole slightly backward as you position it into its corresponding hole.
- Connect Sections: Drill holes in the 1st and 5th rails of the fence sections where they meet. Install the provided hooks to connect adjacent fence sections.
- Secure Hooks: Flip up the spring on the hook to expose it, then secure it. Once secured, release the spring to allow it to return to its original position, locking the connection.
5.4 Gate Assembly and Installation
- Insert PE Tube: Insert the PE tube into the fabric of the gate.
- Connect Aluminum Tube: Insert the PE tube into the grooved part of the aluminum tube.
- Attach L-shaped Fittings: Distinguish between Part A and Part B of the L-shaped pipe fittings. Attach them to the gate frame using the provided screws and nuts.
- Complete Assembly: Repeat the above steps to complete the installation of the other side of the gate.
- Integrate Gate: Install the assembled gate section into the designated opening in your fence layout, ensuring it aligns with the existing fence poles and sleeves.
Video 1: VINGLI Pool Fence Installation Guide. This video demonstrates the complete installation process for the pool fence, including marking, drilling, and connecting sections.
6. Operating Instructions
The VINGLI pool fence gate is designed for secure and simple operation.
- Opening the Gate: To open the gate, locate the latch mechanism. Pull the latch to disengage it from the gate frame. The gate can then be swung open.
- Closing the Gate: Swing the gate closed until the latch mechanism automatically engages with the gate frame. Ensure you hear a click or visually confirm that the latch is fully secured.
- Safety Check: Always perform a quick check after closing the gate to ensure it is firmly latched and cannot be easily opened by children or pets.

Figure 3: The gate features a secure pull-to-unlock mechanism for easy adult access.
7. Maintenance
Proper maintenance will extend the life and effectiveness of your VINGLI pool fence gate.
- Cleaning: Clean the mesh fabric and aluminum components periodically with mild soap and water. Rinse thoroughly with clean water and allow to air dry. Avoid harsh chemicals or abrasive cleaners.
- Inspection: Regularly inspect all fence sections, poles, and the gate for any signs of damage, corrosion, or loose connections. Pay close attention to the latch mechanism and springs.
- Storage: If the fence needs to be removed for an extended period, it can be conveniently rolled up for compact storage. Ensure all components are clean and dry before storing in a cool, dry place to prevent mildew or corrosion. Keep the plastic sleeve caps to protect the holes when the fence is removed.
8. Troubleshooting
If you encounter any issues with your VINGLI pool fence gate, please refer to the following common solutions:
- Gate not latching securely: Check the alignment of the gate with the latch mechanism. Ensure no debris is obstructing the latch. Inspect the spring for proper function.
- Fence sections loose: Verify that all poles are fully inserted into their sleeves and that connecting hooks are securely fastened.
- Difficulty inserting poles: Ensure the plastic sleeves are clear of debris. Try angling the pole slightly as described in the installation section.
For further assistance, please contact VINGLI customer support.
9. Specifications
| Feature | Specification |
|---|---|
| Brand | VINGLI |
| Model | 4FT x 2.5FT Pool Fence Gate |
| Material | Aluminum, Mesh Fabric |
| Color | Black |
| Product Dimensions (Gate) | 4FT (Height) x 2.5FT (Width) |
| Item Weight | 109.2 Pounds (for entire fence kit, gate is a component) |
| Required Assembly | Yes |
| UPC | 840323501392 |
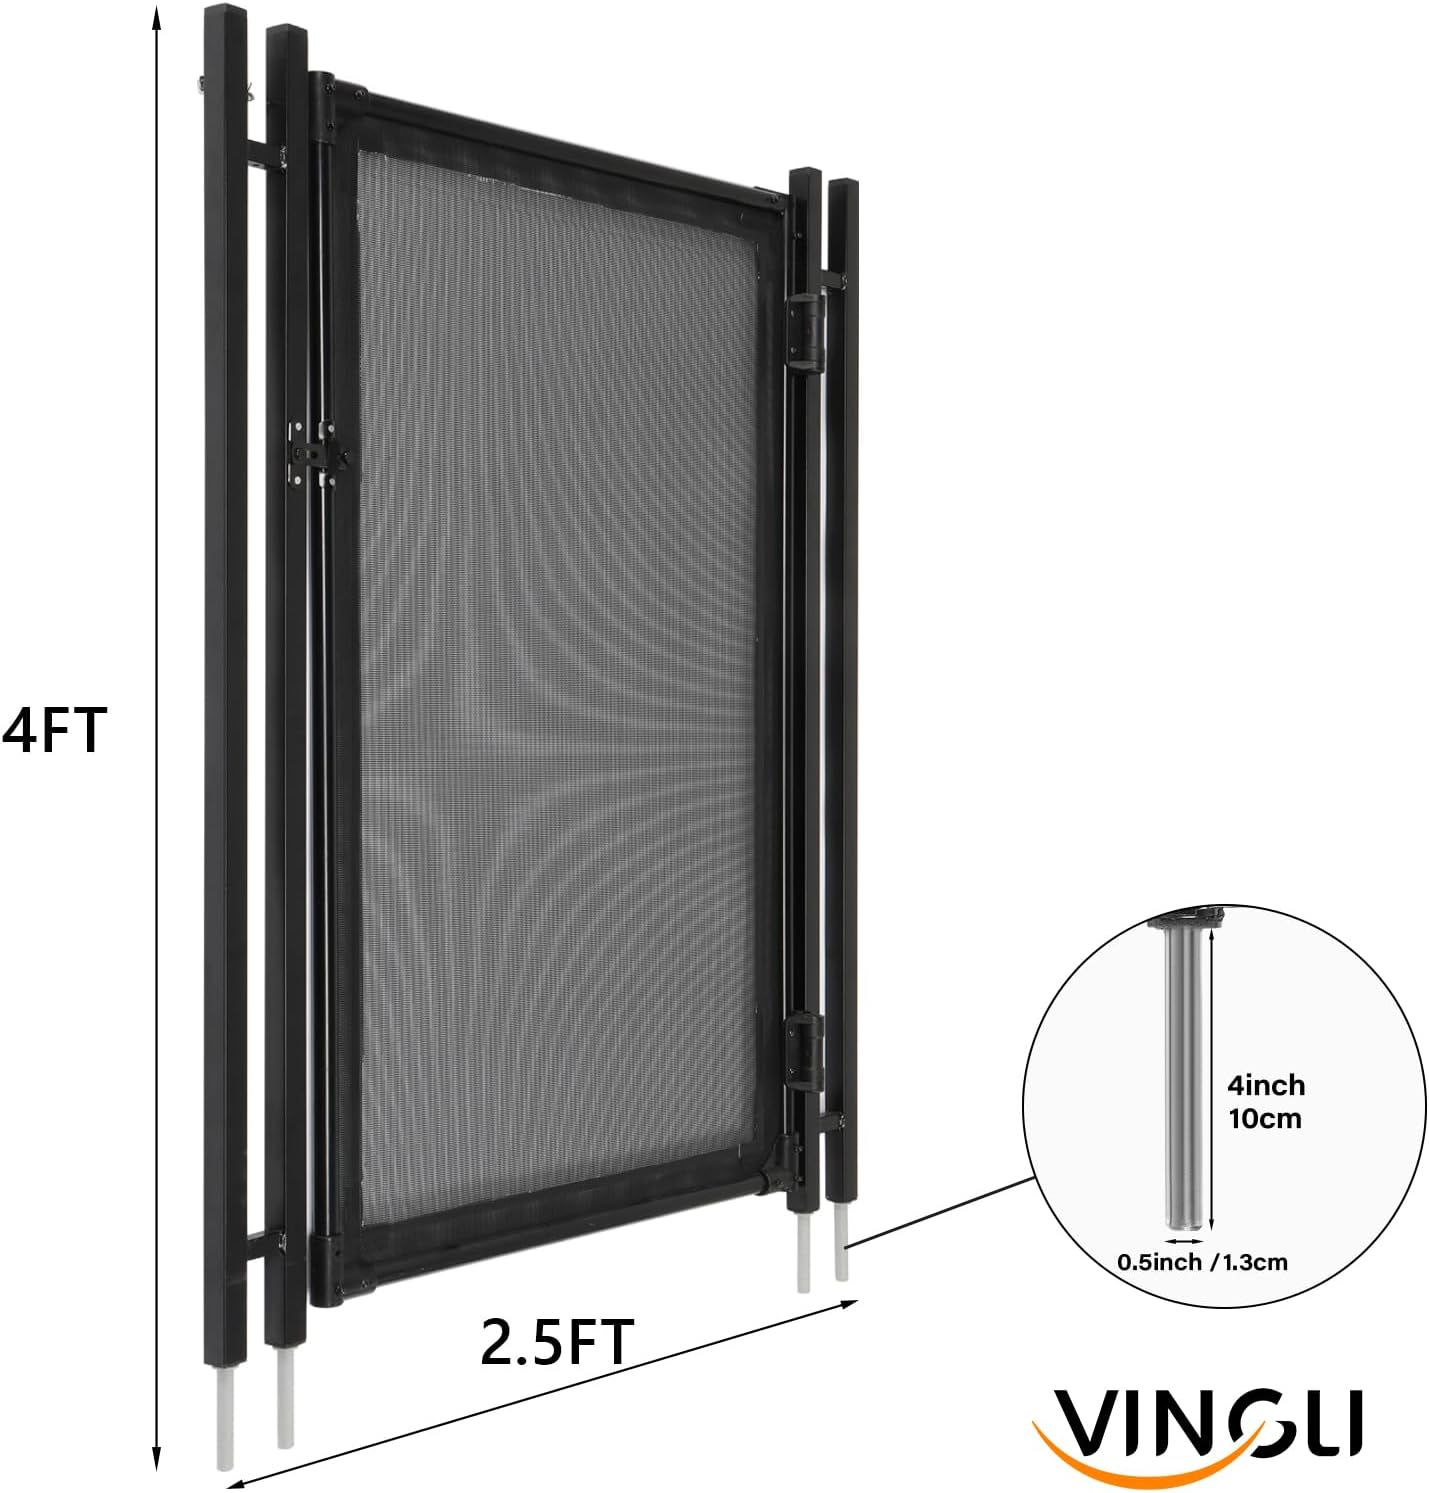
Figure 4: Dimensions of the VINGLI Pool Fence Gate.
10. Warranty Information
For specific warranty details regarding your VINGLI Pool Fence Gate, please refer to the product packaging or contact VINGLI customer support directly. VINGLI stands behind the quality of its products and aims to provide satisfactory solutions for any manufacturing defects.
11. Customer Support
If you have any questions, require assistance with installation, or need to report a problem, please contact VINGLI customer support. You can typically find contact information on the VINGLI official website or through your purchase platform.
Online Support: Visit the VINGLI store on Amazon: VINGLI Store