1. Introduction
This manual provides essential information for setting up, operating, and maintaining your CRUA 27-inch 4K UHD 60Hz IPS Monitor (Model CR270H). Please read these instructions carefully before using the monitor to ensure proper functionality and to prevent damage.
2. Package Contents
Verify that all items listed below are present in your package. If any items are missing or damaged, please contact customer support.
- CRUA 27-inch Monitor
- Monitor Base
- Monitor Support Arm
- DP Cable (DisplayPort Cable)
- Type-C Data Transmission Cable
- Power Supply Unit
- User Manual (this document)
3. Setup Instructions
3.1 Assembling the Stand
- Carefully remove the monitor from its packaging, placing it face down on a soft, clean surface to prevent screen damage.
- Attach the monitor support arm to the monitor panel. Ensure it clicks securely into place.
- Attach the monitor base to the support arm. Tighten any screws if provided, typically located on the underside of the base.
- Place the assembled monitor on a stable, flat surface.
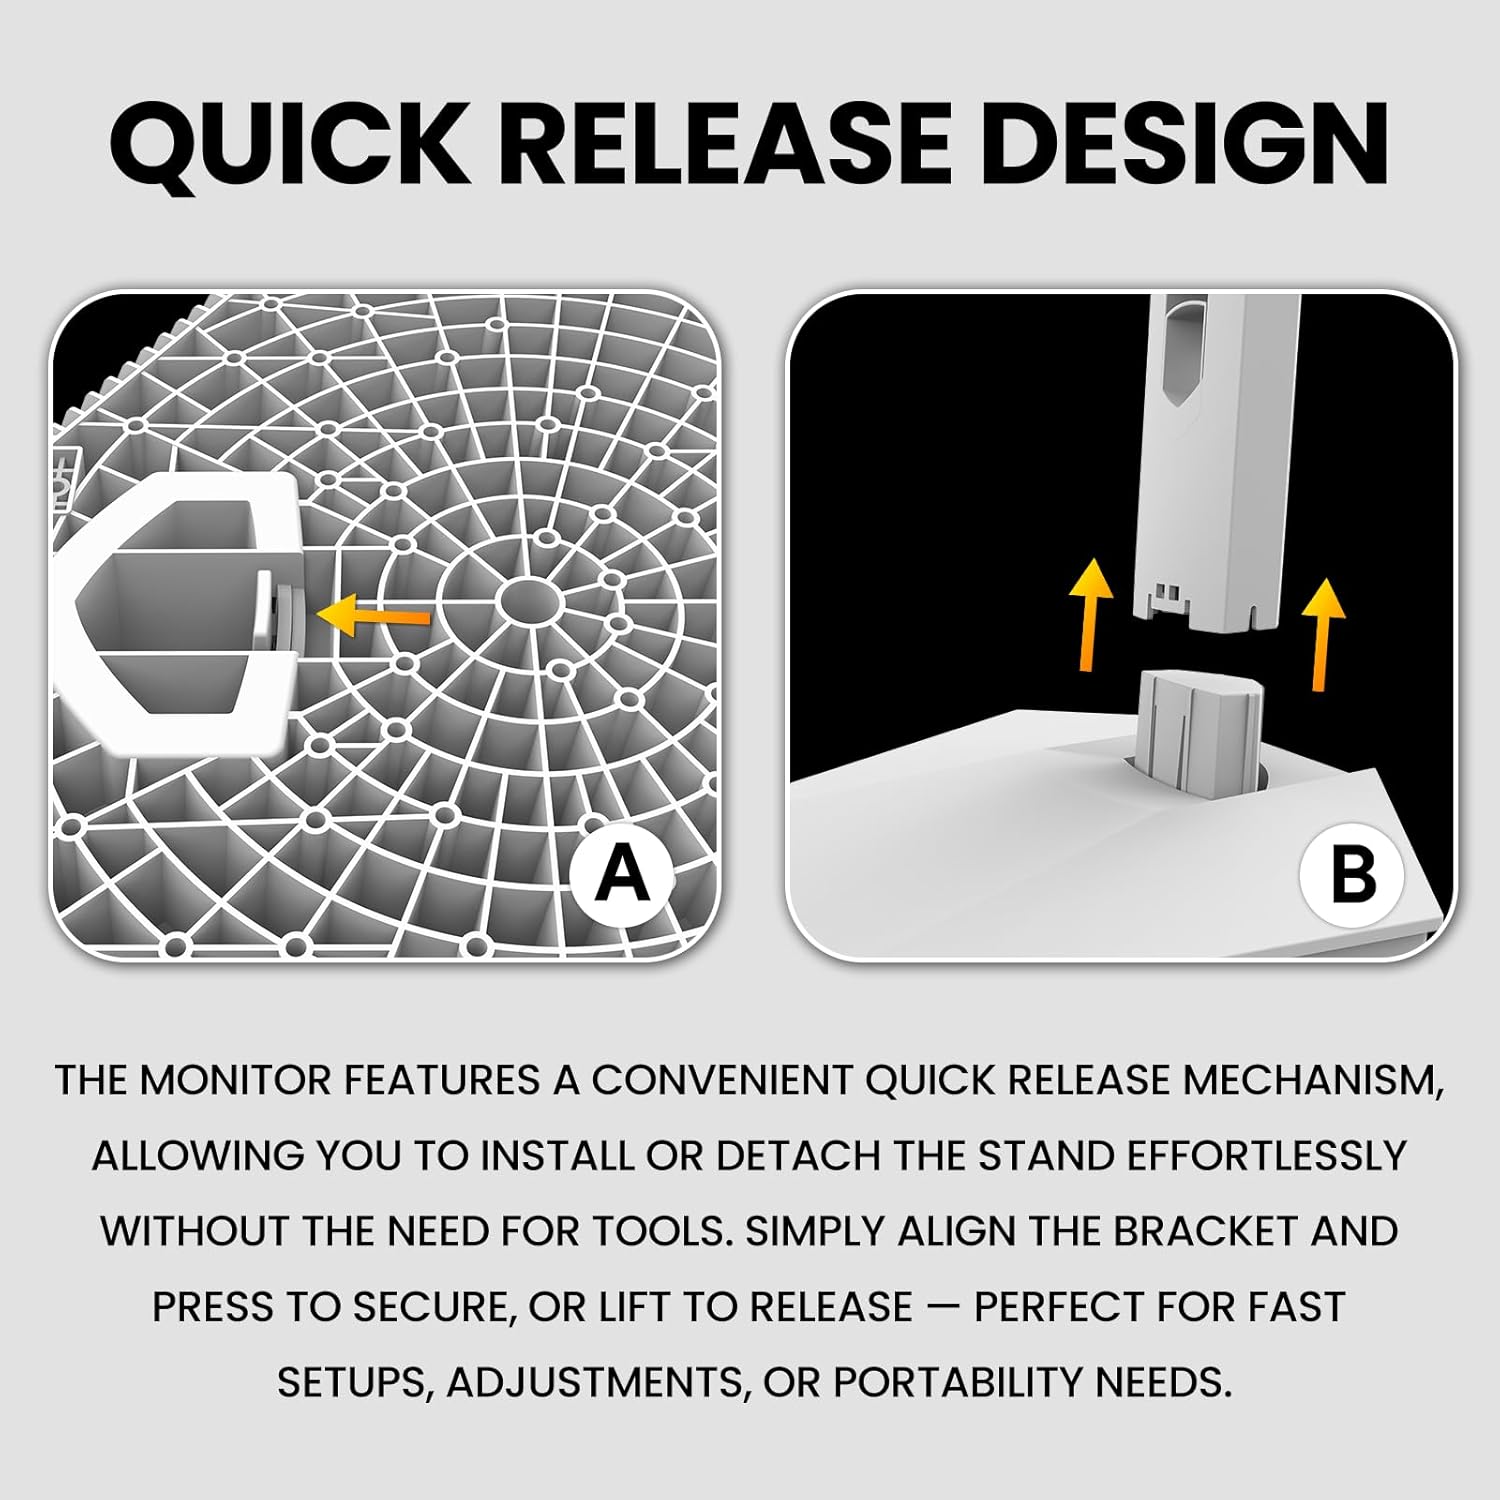
Figure 3.1: Quick Release Design for Stand Assembly. Align the bracket and press to secure, or lift to release.
3.2 Connecting to a Computer
The monitor supports DisplayPort (DP 1.4), HDMI (HDMI 2.0), and USB Type-C connections.
- Ensure both the monitor and your computer are powered off.
- Connect one end of the appropriate video cable (DP, HDMI, or Type-C) to the corresponding port on the monitor.
- Connect the other end of the video cable to the video output port on your computer.
- Connect the power supply unit to the monitor's power input, then plug the power cord into an electrical outlet.
- (Optional) For USB Type-C connectivity, use the provided Type-C cable to connect your device. This port supports charging and data transfer.

Figure 3.2: Monitor Connectivity Ports. Includes DisplayPort, HDMI, USB Type-C, and Audio Out.
3.3 Wall Mounting (Optional)
The monitor supports VESA wall mounts with a 75mm x 75mm pattern.
- Remove the stand from the monitor if it is already attached.
- Attach your VESA-compatible wall mount bracket (not included) to the four screw holes on the back of the monitor.
- Follow the instructions provided with your wall mount for secure installation.

Figure 3.3: VESA Wall Mount (75x75mm) and Tilt Adjustment.
4. Operating Instructions
4.1 Power On/Off
- To power on the monitor, press the power button located on the back or bottom of the monitor.
- To power off, press and hold the power button until the monitor display turns off.
4.2 On-Screen Display (OSD) Menu Navigation
The OSD menu allows you to adjust various monitor settings. Use the control buttons (typically located on the back or bottom of the monitor) to navigate.
- Press a control button to activate the OSD menu.
- Use the directional buttons to navigate through menu options.
- Press the select/confirm button to enter a sub-menu or confirm a setting.
- Press the exit/back button to return to the previous menu or exit the OSD.
4.3 Picture Settings
Adjust display characteristics such as brightness, contrast, color temperature, and aspect ratio.
- Brightness: Adjusts the overall luminance of the screen.
- Contrast: Controls the difference between the brightest and darkest areas of the image.
- Color Temperature: Selects preset color temperatures (e.g., Warm, Cool, User) or allows manual adjustment.
- Aspect Ratio: Sets the display ratio (e.g., 16:9, 4:3).
- Blue Light Filter: Reduces blue light emission for eye comfort during extended use.

Figure 4.1: Monitor displaying vibrant colors, indicating 120% sRGB color gamut, 8-bit color depth, and 16.7 million colors.
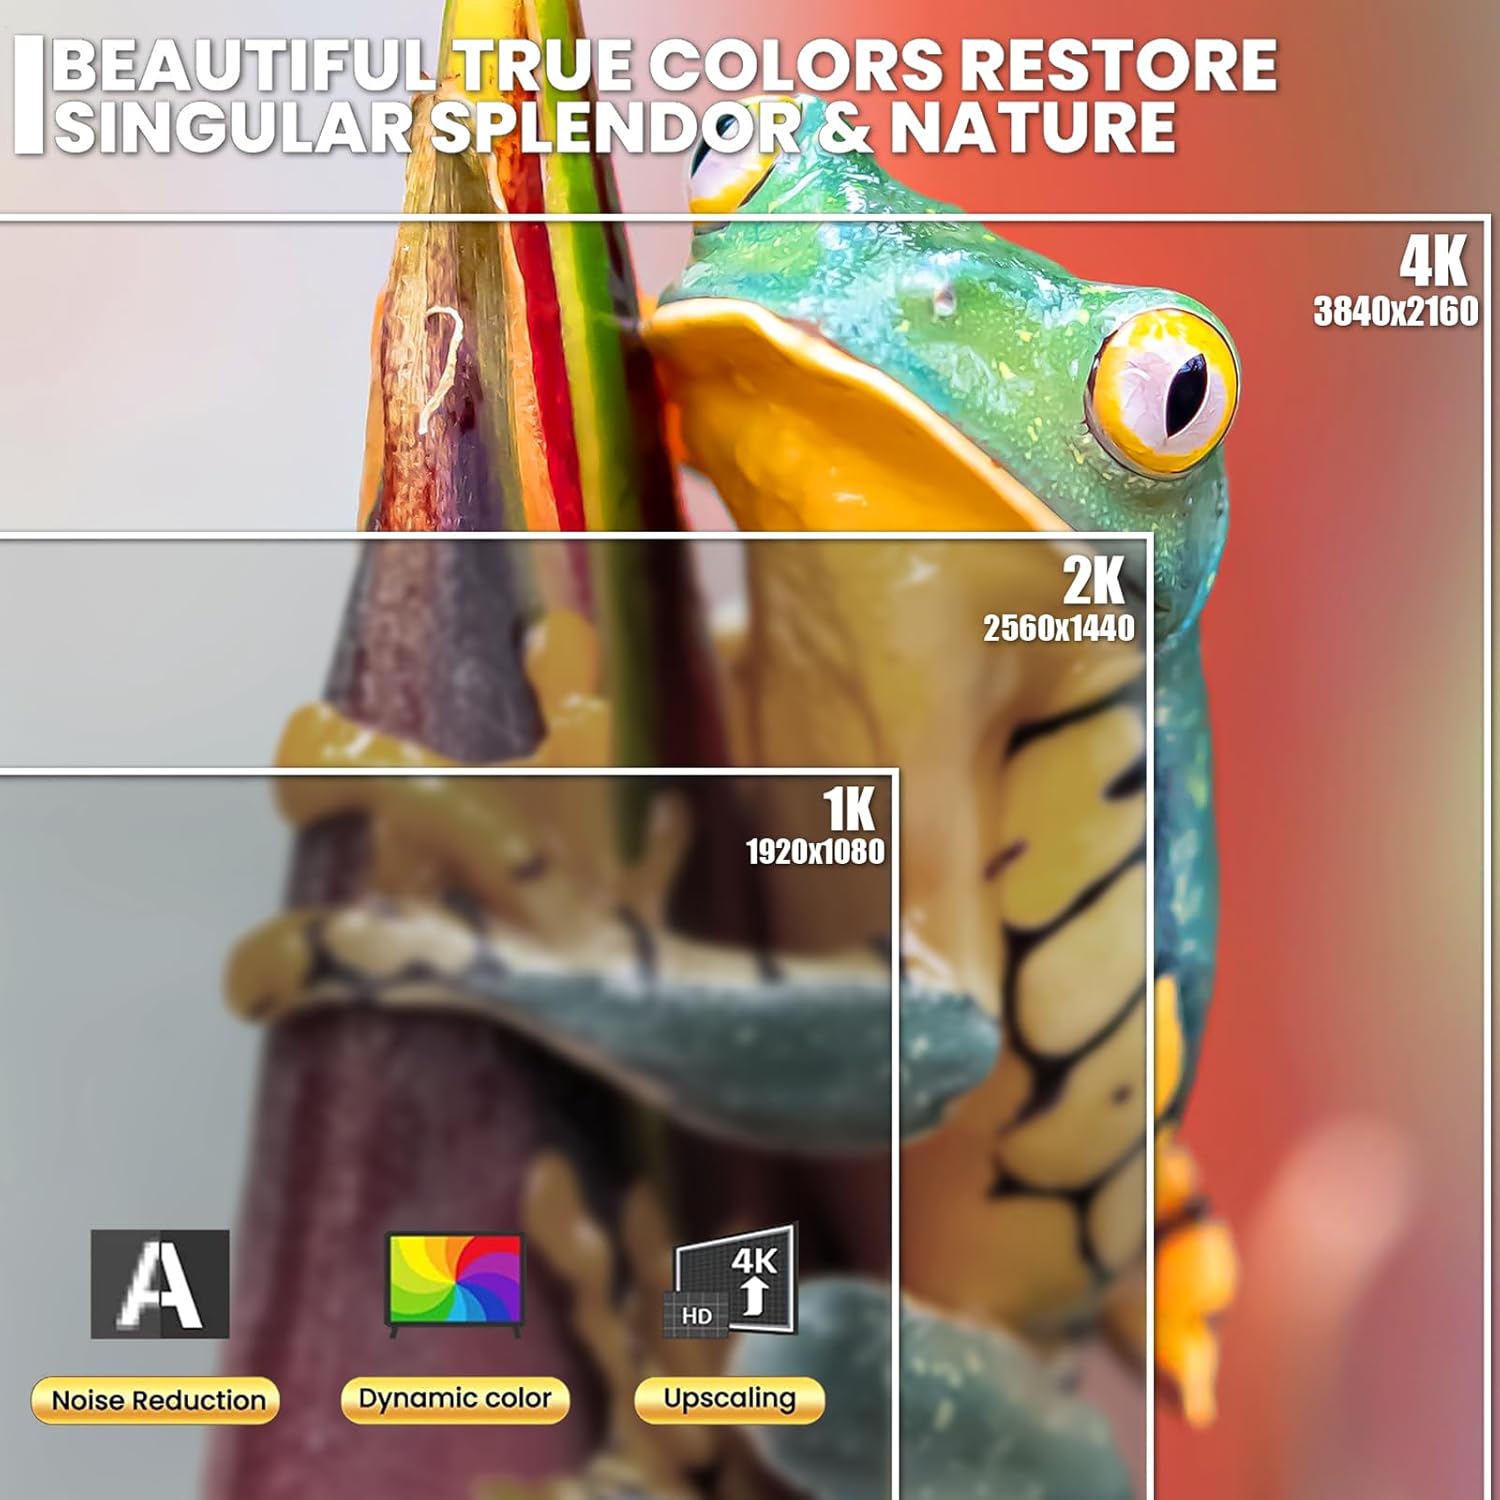
Figure 4.2: Visual comparison of 4K (3840x2160), 2K (2560x1440), and 1K (1920x1080) resolutions, demonstrating clarity and detail.
4.4 Audio Settings
The monitor includes built-in speakers. Adjust volume through the OSD menu or your connected device.
- Volume: Adjusts the output level of the built-in speakers.
- Mute: Toggles sound output on or off.
4.5 AMD FreeSync
This monitor supports AMD FreeSync technology, which synchronizes the monitor's refresh rate with your AMD graphics card's frame rate to reduce screen tearing and stuttering.
- Ensure your graphics card supports AMD FreeSync.
- Enable FreeSync in your graphics card's control panel.
- Activate FreeSync in the monitor's OSD menu if available.

Figure 4.3: Visual representation of 60Hz versus 30Hz refresh rates, illustrating reduced ghosting and blur at higher refresh rates.
5. Maintenance
5.1 Cleaning the Monitor
- Always power off the monitor and unplug the power cord before cleaning.
- Use a soft, lint-free cloth slightly dampened with water or a mild, non-abrasive screen cleaner.
- Do not spray cleaner directly onto the screen. Apply it to the cloth first.
- Avoid using benzene, thinner, ammonia-based cleaners, or abrasive materials, as these can damage the screen or casing.
5.2 Storage
- If storing the monitor for an extended period, disconnect all cables and pack it in its original packaging if possible.
- Store in a cool, dry place away from direct sunlight and extreme temperatures.
6. Troubleshooting
| Problem | Possible Cause | Solution |
|---|---|---|
| No image on screen |
|
|
| Image is blurry or distorted |
|
|
| No sound from speakers |
|
|
| Screen tearing or stuttering (with AMD GPU) |
|
|
7. Specifications
| Feature | Detail |
|---|---|
| Model Number | CR270H |
| Screen Size | 27 Inches |
| Panel Type | IPS |
| Resolution | 3840 x 2160 (4K UHD) |
| Refresh Rate | 60Hz |
| Aspect Ratio | 16:9 |
| Brightness | 300 cd/m² |
| Contrast Ratio | 1000:1 |
| Color Gamut | 120% sRGB |
| Connectivity | 1x DisplayPort 1.4, 1x HDMI 2.0, 1x USB Type-C (charging & data), Audio Out |
| Built-in Speakers | Yes |
| AMD FreeSync | Supported |
| VESA Mount Compatibility | 75mm x 75mm |
| Product Dimensions (without stand) | 2.6 x 24 x 14 inches (approx.) |
| Item Weight | 12.52 pounds (approx.) |
8. Warranty and Support
CRUA provides high-quality computer monitors and customer service. For warranty information or technical support, please refer to the warranty card included with your product or visit the official CRUA website.
If you have any questions or encounter issues not covered in this manual, please contact CRUA customer support.
- Online Support: Visit the CRUA Store on Amazon
- Contact: Refer to your product packaging or CRUA's official website for direct contact information.