1. Introduction
This manual provides detailed instructions for the installation, operation, and maintenance of your VORGUT Solar Security Camera System. Please read this manual thoroughly before use to ensure proper functionality and safety. This system features 2K resolution, 360° PTZ cameras, full-color night vision, human detection, and a 10-inch NVR monitor with 500GB local storage.
Package Contents:
- 1x 10'' Monitor NVR
- 4x Solar Cameras
- 4x Solar Panels
- 1x USB Mouse
- 1x User Manual

Image 1.1: Overview of the VORGUT Solar Security Camera System components.
2. Setup
2.1 Initial Charging and Power
The cameras are equipped with built-in rechargeable batteries and solar panels. For initial setup, it is recommended to fully charge the camera batteries using a USB-C cable before installation, especially if solar exposure will be limited initially. The NVR monitor requires continuous power via its adapter.

Image 2.1: Camera power options: solar, built-in battery, or USB-C plug-in.
2.2 Camera Mounting
The cameras can be mounted on walls or ceilings. Choose a location that provides optimal viewing coverage and sufficient sunlight for the solar panel. Ensure the mounting surface is stable and secure.
- Attach the mounting bracket to the desired location using the provided screws.
- Slide the camera onto the bracket until it securely locks into place.
- Adjust the solar panel angle to maximize sun exposure throughout the day. The solar panel can be adjusted 360 degrees and connected via a 3-meter extension cable for flexible placement.

Image 2.2: Example of a solar-powered camera installation.
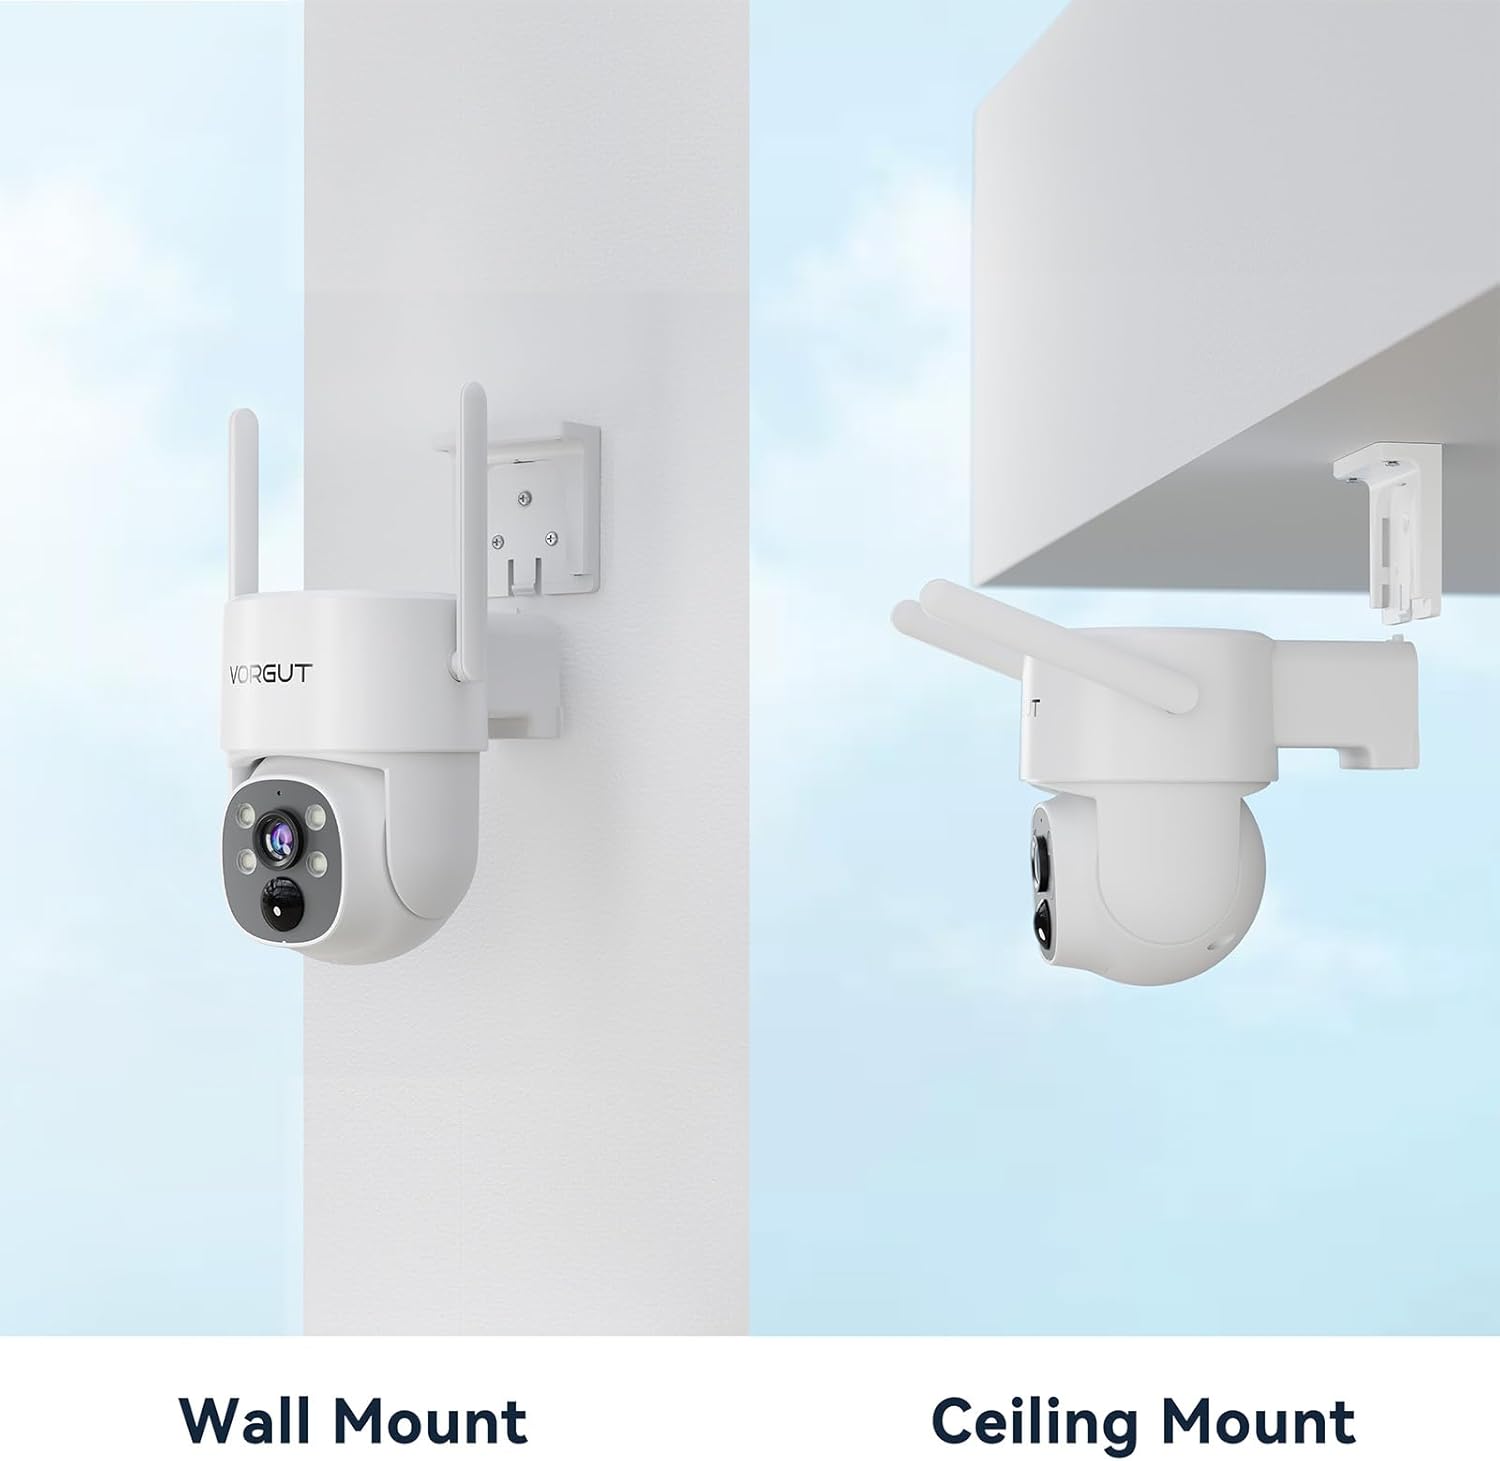
Image 2.3: Wall mount and ceiling mount configurations.

Image 2.4: Flexible solar panel placement with extension cable.
2.3 NVR Monitor and Camera Pairing
The system is designed for plug-and-play setup. The cameras are pre-paired with the NVR monitor. Simply power on the NVR and the cameras, and they should automatically connect.
- Connect the NVR monitor to a power outlet using the provided adapter.
- Ensure all cameras are powered on (either via solar charging or initial USB-C charge).
- The NVR monitor will display live feeds from the connected cameras.
- The system supports both 2.4GHz and 5GHz Wi-Fi for stable connections.
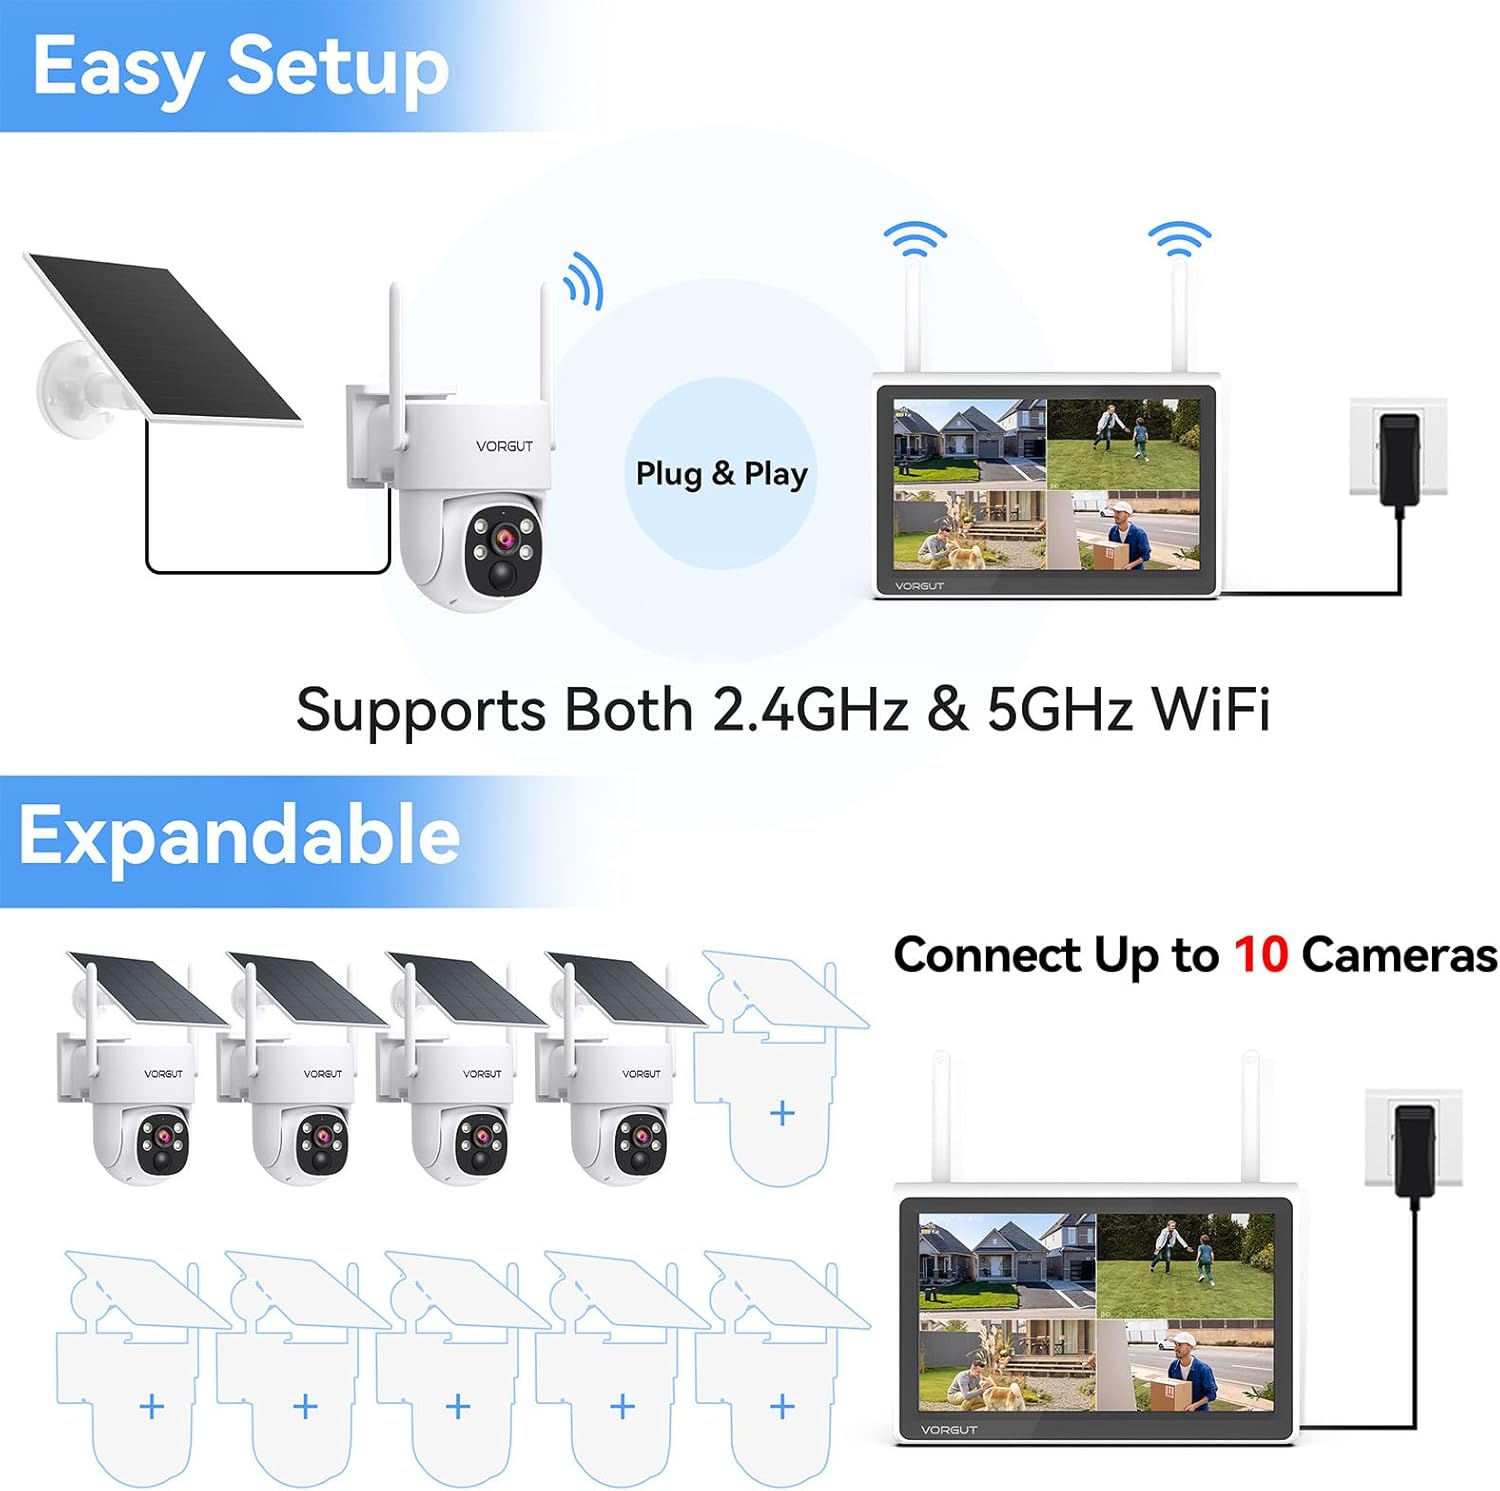
Image 2.5: Plug & Play setup and system expandability.

Image 2.6: Wireless connectivity between cameras and NVR.
2.4 Mobile App Download and Configuration
For remote viewing and advanced settings, download the EseeCloud app.
- Scan the QR code on the NVR or in the manual, or search for "EseeCloud" in your device's app store (App Store for iOS, Google Play for Android).
- Follow the in-app instructions to register an account and add your NVR system.
- Once added, you can view live feeds, access recordings, and configure camera settings from your smartphone or tablet.

Image 2.7: EseeCloud app download options.
Alternatively, download the app from the official website: http://www.dvr163.com/download/indexm.php
3. Operating Instructions
3.1 Live View and Playback
Access live camera feeds directly from the 10-inch NVR monitor or through the EseeCloud mobile application. Use the USB mouse connected to the NVR for navigation and control.
3.2 Camera Features
- 2K HD Resolution: Each camera provides clear 2K (3MP) video footage.
- Full-Color Night Vision: Advanced image sensors and built-in spotlights enable full-color video recording even in low-light conditions, eliminating traditional black-and-white night views.

Image 3.1: Details of advanced full-color night vision technology.

Image 3.2: Night vision comparison: VORGUT ColorPura vs. standard spotlight camera.

Image 3.3: Visual comparison of different night vision technologies.

Image 3.4: Enhanced low-light performance with F1.0 lens.
- 360° PTZ (Pan-Tilt-Zoom): Each camera offers 355° pan and 90° tilt capabilities, allowing for comprehensive coverage and reduced blind spots. Control camera movement via the NVR monitor or mobile app.

Image 3.5: 360° coverage with pan and tilt functionality.

Image 3.6: Pan 355° Tilt 90° for wide-angle coverage.
- Smart Human Detection: Built-in AI motion detection identifies human activity, reducing false alerts from animals or environmental factors.
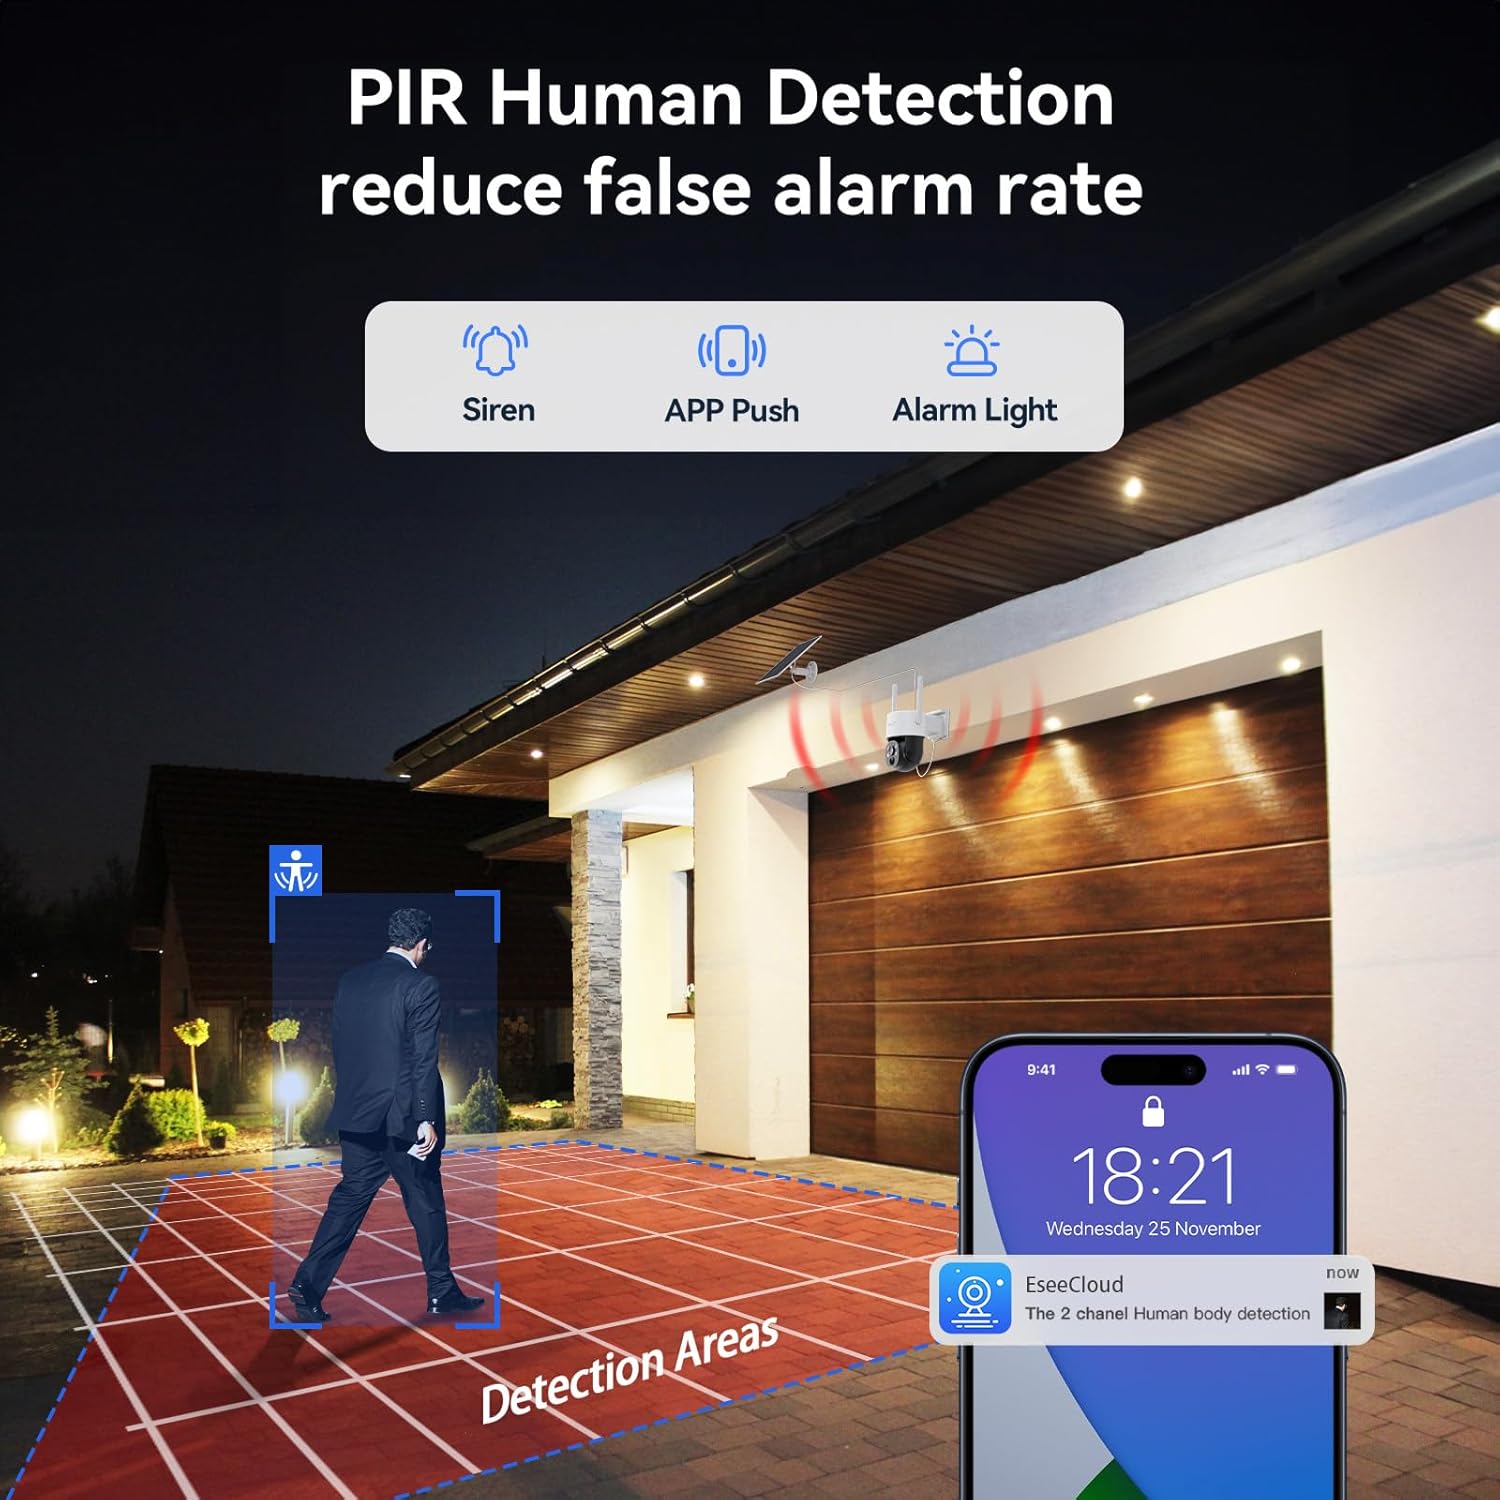
Image 3.7: PIR Human Detection in action.

Image 3.8: Human vs. Animal detection for reduced false alarms.
- Two-Way Audio: Communicate with visitors or deter intruders using the built-in microphone and speaker.

Image 3.9: Two-way audio communication.
3.3 Recording Options and Storage
The NVR includes a 500GB hard drive for local storage, requiring no monthly fees for video recording.
- 24/7 Continuous Recording: Available when the camera battery level is above 80% or when connected to plug-in power.
- Motion Detection Recording: Records only when motion is detected, saving storage space.
- Storage-Saving Recording: Motion-triggered recordings typically last 15 seconds.

Image 3.10: Available recording modes.

Image 3.11: NVR features including storage and expandability.
3.4 Security Alerts
When human motion is detected, the system can trigger various alerts:
- Spotlight: Activates the camera's built-in spotlight.
- NVR Buzzer: Sounds an alarm from the NVR.
- E-mail Alert: Sends a notification to your registered email.
- App Push Notification: Sends an alert to your mobile device via the EseeCloud app.
- Siren: Activates an audible siren from the camera.

Image 3.12: Security alert options.
3.5 Video Demonstration
Video 3.1: Demonstration of the VORGUT Solar ColorPura Camera Kit's capabilities, showcasing day and night vision performance.
4. Maintenance
4.1 Solar Panel Care
Regularly clean the surface of the solar panels to ensure maximum efficiency. Dust, dirt, or debris can reduce the panel's ability to charge the camera battery. Use a soft, damp cloth for cleaning.
4.2 Battery Management
The cameras are equipped with lithium-ion batteries. While solar power provides continuous charging, prolonged periods of low sunlight or high activity may deplete the battery. If the battery level drops significantly, consider temporarily charging the camera via USB-C.
4.3 Weather Resistance
The cameras are IP66 waterproof, designed to withstand various weather conditions including wind, rain, and storms. Ensure all rubber seals and covers are properly secured after accessing ports (e.g., for memory card or USB-C charging) to maintain water resistance.
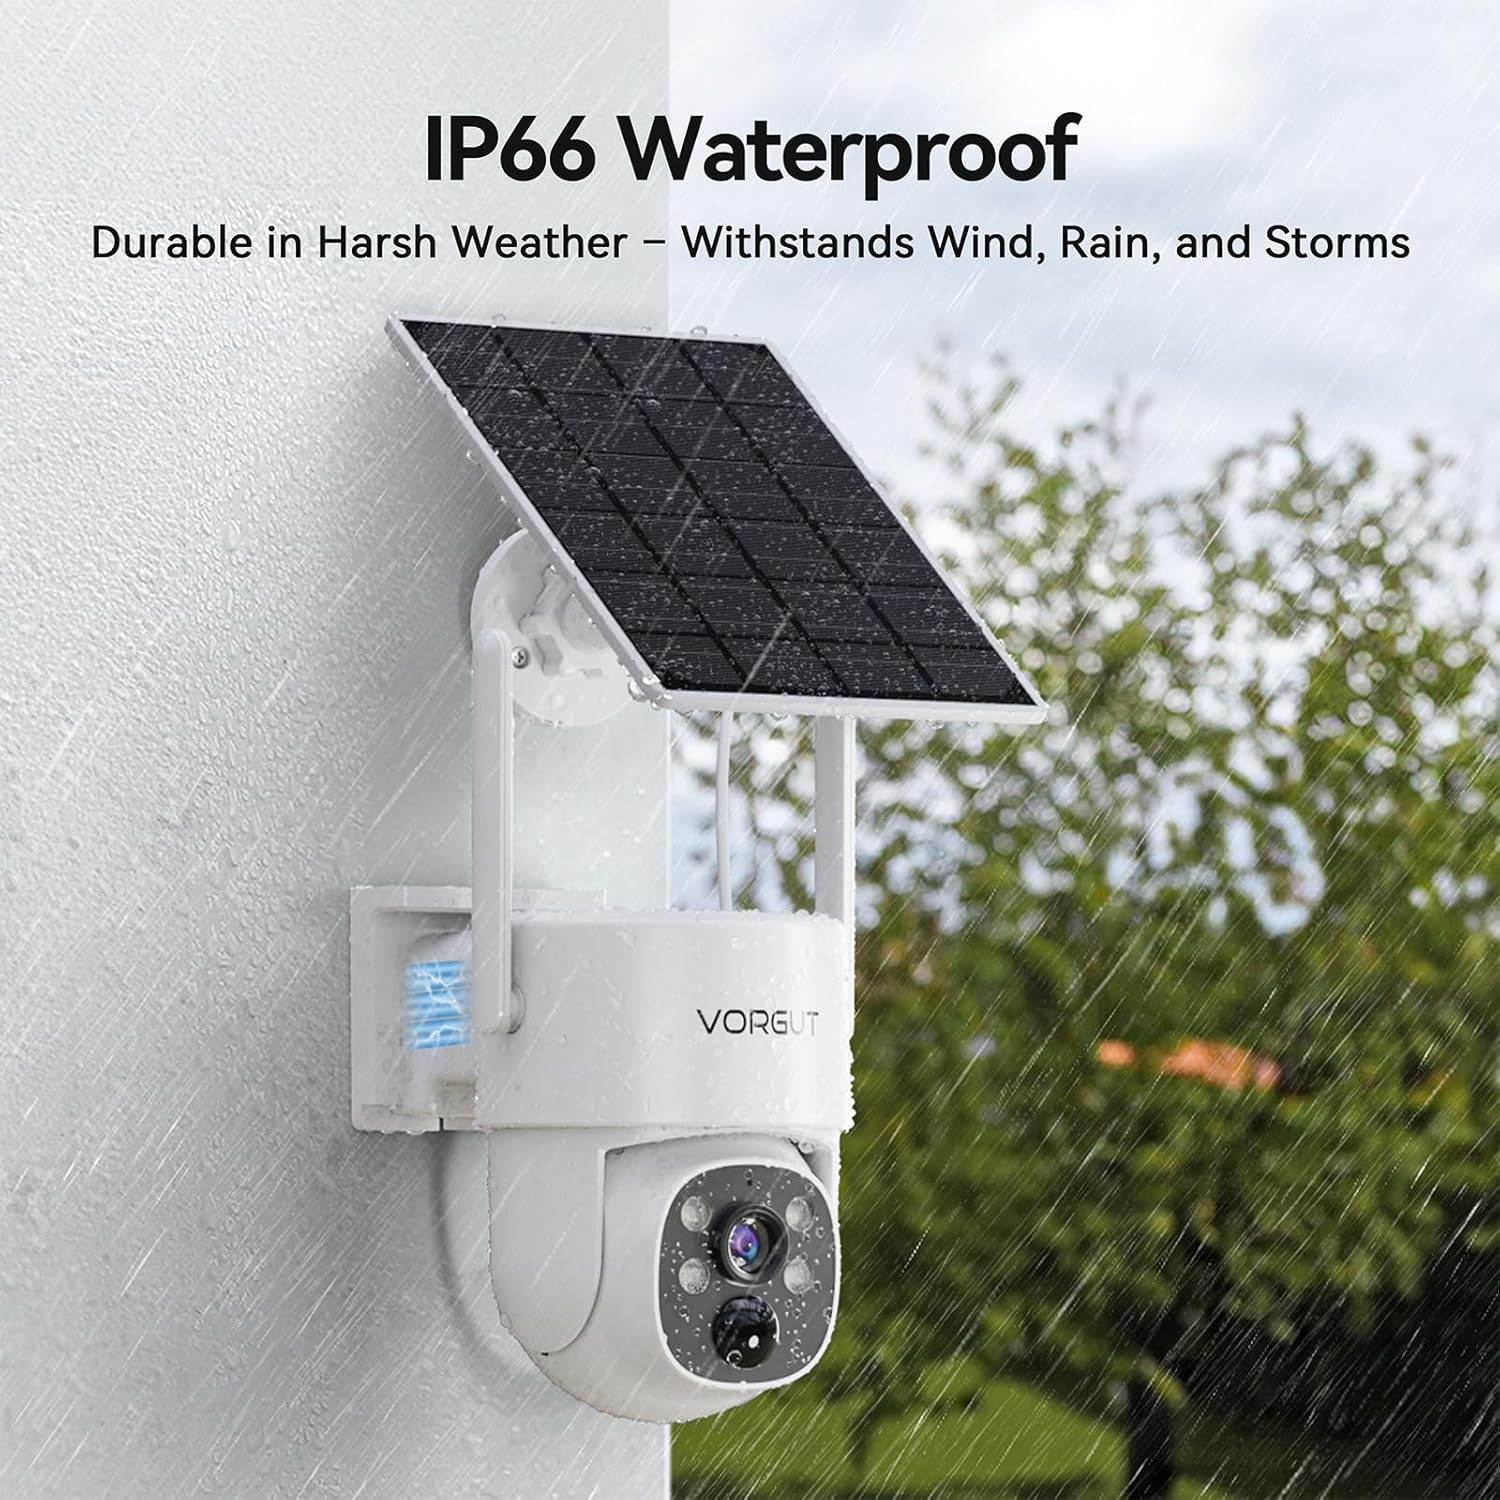
Image 4.1: IP66 waterproof design for durability in harsh weather.

Image 4.2: Camera operating effectively in rainy conditions.
5. Troubleshooting
If you encounter issues with your VORGUT Solar Security Camera System, refer to the following common solutions:
- No Camera Feed on NVR:
- Ensure the camera is powered on and its battery is charged.
- Verify the camera is within range of the NVR's Wi-Fi signal.
- Check if the camera is still paired with the NVR. Re-pair if necessary (refer to the NVR's on-screen menu for pairing options).
- Poor Wi-Fi Connection:
- Ensure the NVR is placed centrally or closer to the cameras.
- Minimize obstructions between cameras and the NVR.
- Confirm your router supports both 2.4G and 5G Wi-Fi and that the NVR is connected to a stable network.
- Camera Not Charging via Solar Panel:
- Clean the solar panel surface to remove any dirt or debris.
- Adjust the solar panel's angle and position to maximize direct sunlight exposure.
- Ensure the solar panel cable is securely connected to the camera.
- Frequent False Alarms:
- Adjust the human detection sensitivity settings in the EseeCloud app or NVR menu.
- Define specific detection zones to exclude areas with frequent non-human movement (e.g., trees swaying).
- No Remote Access via App:
- Ensure your NVR is connected to the internet.
- Verify your mobile device has a stable internet connection.
- Log out and log back into the EseeCloud app.
- Check for app updates.
For further assistance, please consult the EseeCloud app's help section or contact customer support.
6. Specifications
| Feature | Specification |
|---|---|
| Model Name | VRUS-K8512-B3-Q-XG-DQ03-4 |
| Indoor/Outdoor Usage | Outdoor |
| Power Source | Solar Powered |
| Connectivity Technology | Wireless (Wi-Fi 2.4G/5G) |
| Video Capture Resolution | 2K (3MP) |
| Viewing Angle | 355 Degrees (Pan), 90 Degrees (Tilt) |
| Night Vision Range | 30 Meters |
| Frame Rate | 15, 24, 30 fps |
| NVR Monitor Size | 10 inches |
| Included HDD | 500GB |
| Max HDD Storage | Up to 6TB (not included) |
| Number of Channels | 10 (expandable) |
| Water Resistance Level | IP66 Waterproof |
| Control Method | App (EseeCloud) |
| Item Dimensions (L x W x H) | 10 x 9 x 8 inches |
| Item Weight | 10.36 pounds |
| Batteries Required | 1 Lithium Ion batteries required (included) |
| Special Features | HD Resolution, Human Detection, PTZ Technology, Video Recording, Weather Proof |
7. Warranty and Support
7.1 Warranty Information
VORGUT products are designed for reliability and performance. For specific warranty terms and conditions, please refer to the warranty card included with your product or visit the official VORGUT website. Keep your purchase receipt as proof of purchase for warranty claims.
7.2 Customer Support
If you require technical assistance, have questions about your product, or need to report an issue, please contact VORGUT customer support. Contact details can typically be found on the VORGUT website or within the EseeCloud application.
For the latest software updates and additional resources, please visit the official VORGUT support page or the EseeCloud app download page: http://www.dvr163.com/download/indexm.php


