1. Product Overview
This document provides essential instructions for the installation, operation, and maintenance of your CUIPPWRJ EH12 Fuel Tank. This replacement fuel tank is designed for specific Mikasa Rammer models, ensuring reliable fuel storage and delivery to your equipment's engine. Proper installation and care are crucial for optimal performance and longevity.
The fuel tank is constructed from durable materials to withstand the demanding conditions of heavy-duty equipment operation. It features a secure fuel cap and designated mounting points for a precise fit.
2. Compatibility
This CUIPPWRJ EH12 Fuel Tank is specifically designed as a direct replacement part for the following models:
- Mikasa Rammer FW-75
- Mikasa Rammer MT72
- Mikasa Rammer EH12-2
- Mikasa Rammer EH12
Please verify your equipment's model number before installation to ensure proper fitment.
3. Setup and Installation
Safety First: Always ensure the equipment is turned off, cooled down, and disconnected from any power source before beginning installation. Wear appropriate personal protective equipment (PPE), including gloves and eye protection. Work in a well-ventilated area.
Required Tools:
- Wrench set
- Screwdriver set
- Pliers
- Clean rags
- Fuel-resistant sealant (optional, for connections)
Installation Steps:
- Drain Old Fuel: If the old tank contains fuel, carefully drain it into an approved container. Dispose of fuel according to local regulations.
- Disconnect Fuel Lines: Locate and carefully disconnect all fuel lines and hoses connected to the old fuel tank. Be prepared for residual fuel leakage.
- Remove Old Tank: Unbolt or unfasten the old fuel tank from its mounting points on the equipment. Remove it carefully.
- Inspect Area: Clean the mounting area and inspect for any damage or debris.
- Position New Tank: Carefully place the new CUIPPWRJ EH12 Fuel Tank into position, aligning its mounting holes with the equipment's frame.
- Secure New Tank: Fasten the new tank using the appropriate bolts and hardware. Ensure it is securely mounted and does not wobble. Do not overtighten.
- Reconnect Fuel Lines: Reconnect all fuel lines and hoses to the new tank. Ensure all connections are tight and secure to prevent leaks. Use new clamps if necessary.
- Fill with Fuel: Slowly fill the new tank with the appropriate fuel type (see Section 4: Operation). Check for any leaks around the connections.
- Test Equipment: Start the equipment and allow it to run for a few minutes, checking for proper fuel delivery and any signs of leaks.
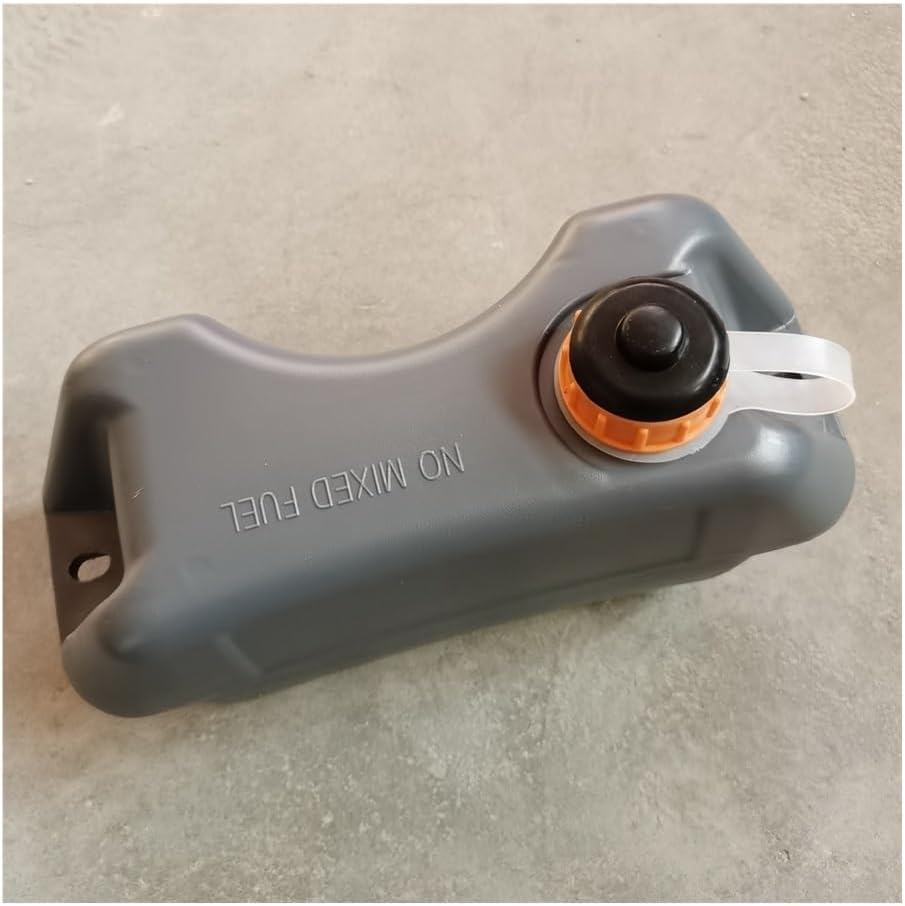
Figure 3.1: Top view of the CUIPPWRJ EH12 Fuel Tank, showing the fuel cap and 'NO MIXED FUEL' inscription.

Figure 3.2: Side profile of the CUIPPWRJ EH12 Fuel Tank, illustrating its ergonomic design.

Figure 3.3: Bottom view of the CUIPPWRJ EH12 Fuel Tank, showing the integrated mounting points for secure attachment.
4. Operation
The CUIPPWRJ EH12 Fuel Tank is designed for standard gasoline. Important: As indicated on the tank itself, DO NOT USE MIXED FUEL. Using mixed fuel (gasoline with oil) in an engine designed for straight gasoline can cause severe engine damage.
- Always use fresh, clean, unleaded gasoline of the recommended octane for your equipment's engine.
- Ensure the fuel cap is securely tightened after refueling to prevent spills and contamination.
- Avoid overfilling the tank to allow for fuel expansion.
5. Maintenance
Regular maintenance of your fuel tank helps ensure the longevity and safe operation of your equipment.
- Regular Inspection: Periodically inspect the fuel tank for cracks, leaks, or signs of damage. Check fuel lines and connections for wear or looseness.
- Cleanliness: Keep the exterior of the fuel tank clean. Avoid allowing dirt or debris to accumulate around the fuel cap, which could lead to contamination when refueling.
- Fuel Cap: Ensure the fuel cap seal is intact and free of cracks. Replace if damaged to prevent fuel evaporation and contamination.
- Storage: If storing the equipment for an extended period, it is recommended to drain the fuel tank or use a fuel stabilizer to prevent fuel degradation and gumming.
6. Troubleshooting
This section addresses common issues related to the fuel tank.
Issue: Fuel Leakage
- Possible Cause: Loose fuel line connections.
- Solution: Tighten all fuel line clamps and connections.
- Possible Cause: Damaged fuel lines or tank.
- Solution: Inspect fuel lines and the tank for cracks or punctures. Replace any damaged components immediately.
- Possible Cause: Faulty fuel cap seal.
- Solution: Inspect the fuel cap seal for wear or damage. Replace the fuel cap if the seal is compromised.
Issue: Engine Not Receiving Fuel
- Possible Cause: Empty fuel tank.
- Solution: Refill the fuel tank with appropriate fuel.
- Possible Cause: Clogged fuel filter (if applicable to your equipment).
- Solution: Inspect and replace the fuel filter as per your equipment's maintenance schedule.
- Possible Cause: Kinked or blocked fuel line.
- Solution: Inspect fuel lines for kinks or obstructions. Clear any blockages.
7. Specifications
| Feature | Specification |
|---|---|
| Brand | CUIPPWRJ |
| Model Number | CUIPPWRJ123 |
| Compatible Models | Mikasa Rammer FW-75, MT72, EH12-2, EH12 |
| Item Weight | 50 Grams (approx. 1.76 ounces) |
| Package Dimensions | 0.39 x 0.39 x 0.39 inches (Note: This may refer to packaging, not product dimensions) |
| Material | Durable plastic (implied by product images) |
8. Warranty and Support
For warranty information or technical support regarding your CUIPPWRJ EH12 Fuel Tank, please refer to the seller or manufacturer's official channels. Keep your purchase receipt as proof of purchase.
For general inquiries or further assistance, please contact your product supplier.