
Alphard BUNV2OMNIPRO
Contents
Alphard Golf Electric Caddy Bundle: Club Booster V2Pro + Omni Cart User Manual
Model: BUNV2OMNIPRO
Introduction
This manual provides comprehensive instructions for the safe and efficient operation, maintenance, and troubleshooting of your Alphard Golf Electric Caddy Bundle, featuring the Club Booster V2Pro and Omni Cart. This bundle offers a complete motorized golf caddy solution, designed for effortless navigation across the golf course.
The Club Booster V2Pro is equipped with advanced features such as a 6-axis gyroscope for stable tracking, downhill speed control, and an automatic parking brake. When combined with the lightweight and easily foldable Omni Cart, it provides a seamless and enjoyable golfing experience.
Safety Information
- Always read and understand all instructions before operating the device.
- Keep hands and feet clear of moving parts, especially wheels and motors.
- Do not operate the caddy in extreme weather conditions (heavy rain, lightning).
- Ensure the parking brake is engaged when the caddy is stationary on an incline.
- Keep the remote control dry and protected from impact.
- Supervise children and pets when the caddy is in operation.
- Only use the provided charger for the battery.
Package Contents
Your Alphard Golf Electric Caddy Bundle includes the following components:
- Club Booster V2Pro Unit
- Omni-Cart Pro
- Lithium-Ion Battery
- Battery Charger
- Anti-Tip Wheels (permanently attached to V2Pro)
- Remote Control
- Umbrella Holder
- Drink Holder
- Owner's Manual (this document)
Setup
Follow these steps to set up your Alphard Golf Electric Caddy Bundle:
- Unpack Components: Carefully remove all items from the packaging.
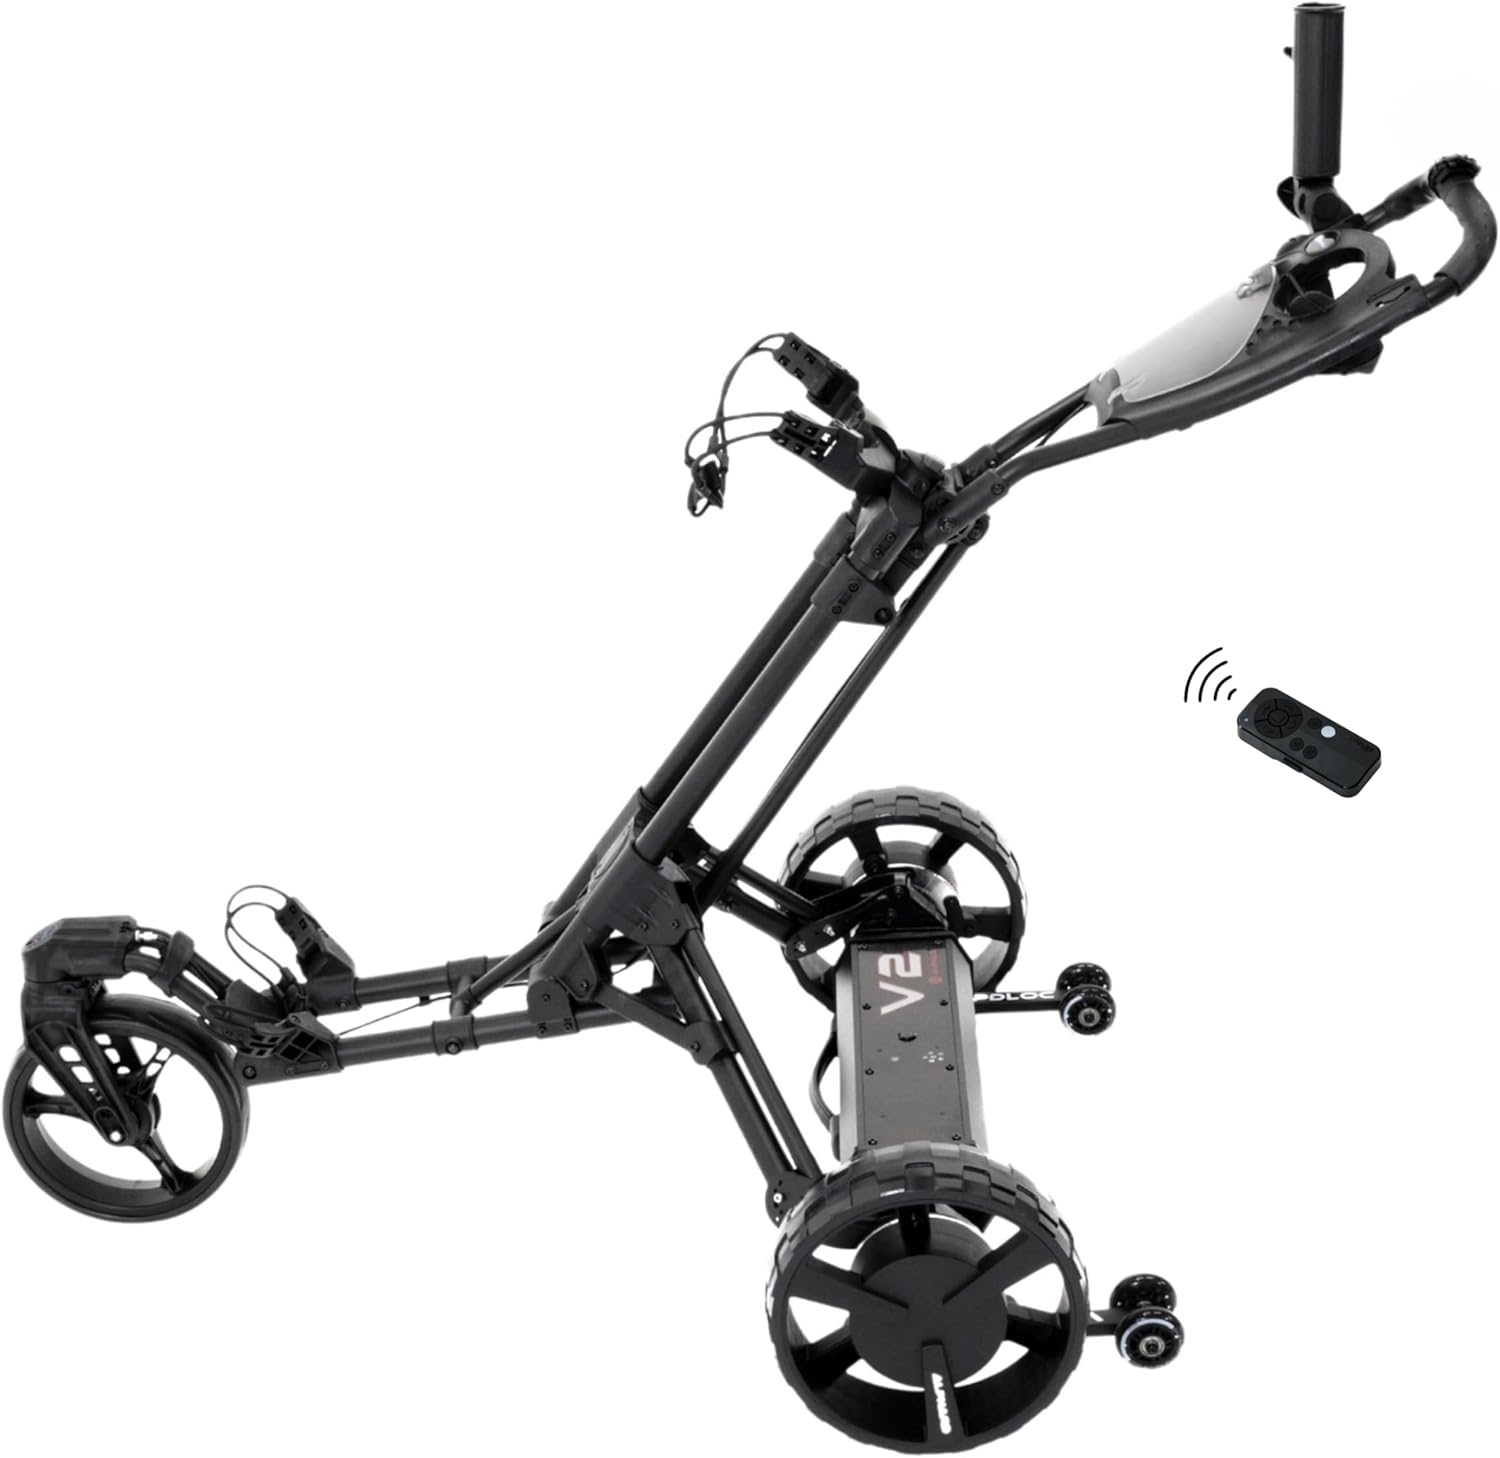
Image: The complete Alphard Golf Electric Caddy Bundle, showing the Omni Cart attached to the Club Booster V2Pro unit, along with the remote control.
- Assemble Omni Cart: The Omni Cart folds with a single click. Unfold it until it locks into its open position.

Image: The Omni Cart in its compact, folded state, ready for transport or storage.
- Attach Club Booster V2Pro to Omni Cart:
Place the Omni Cart on top of the Club Booster V2Pro unit. The V2Pro is designed to attach easily without additional brackets or complex assembly. Ensure the connection is secure.

Image: The Alphard Golf Electric Caddy Bundle fully assembled, showing the Omni Cart mounted on the Club Booster V2Pro, with the remote control visible.
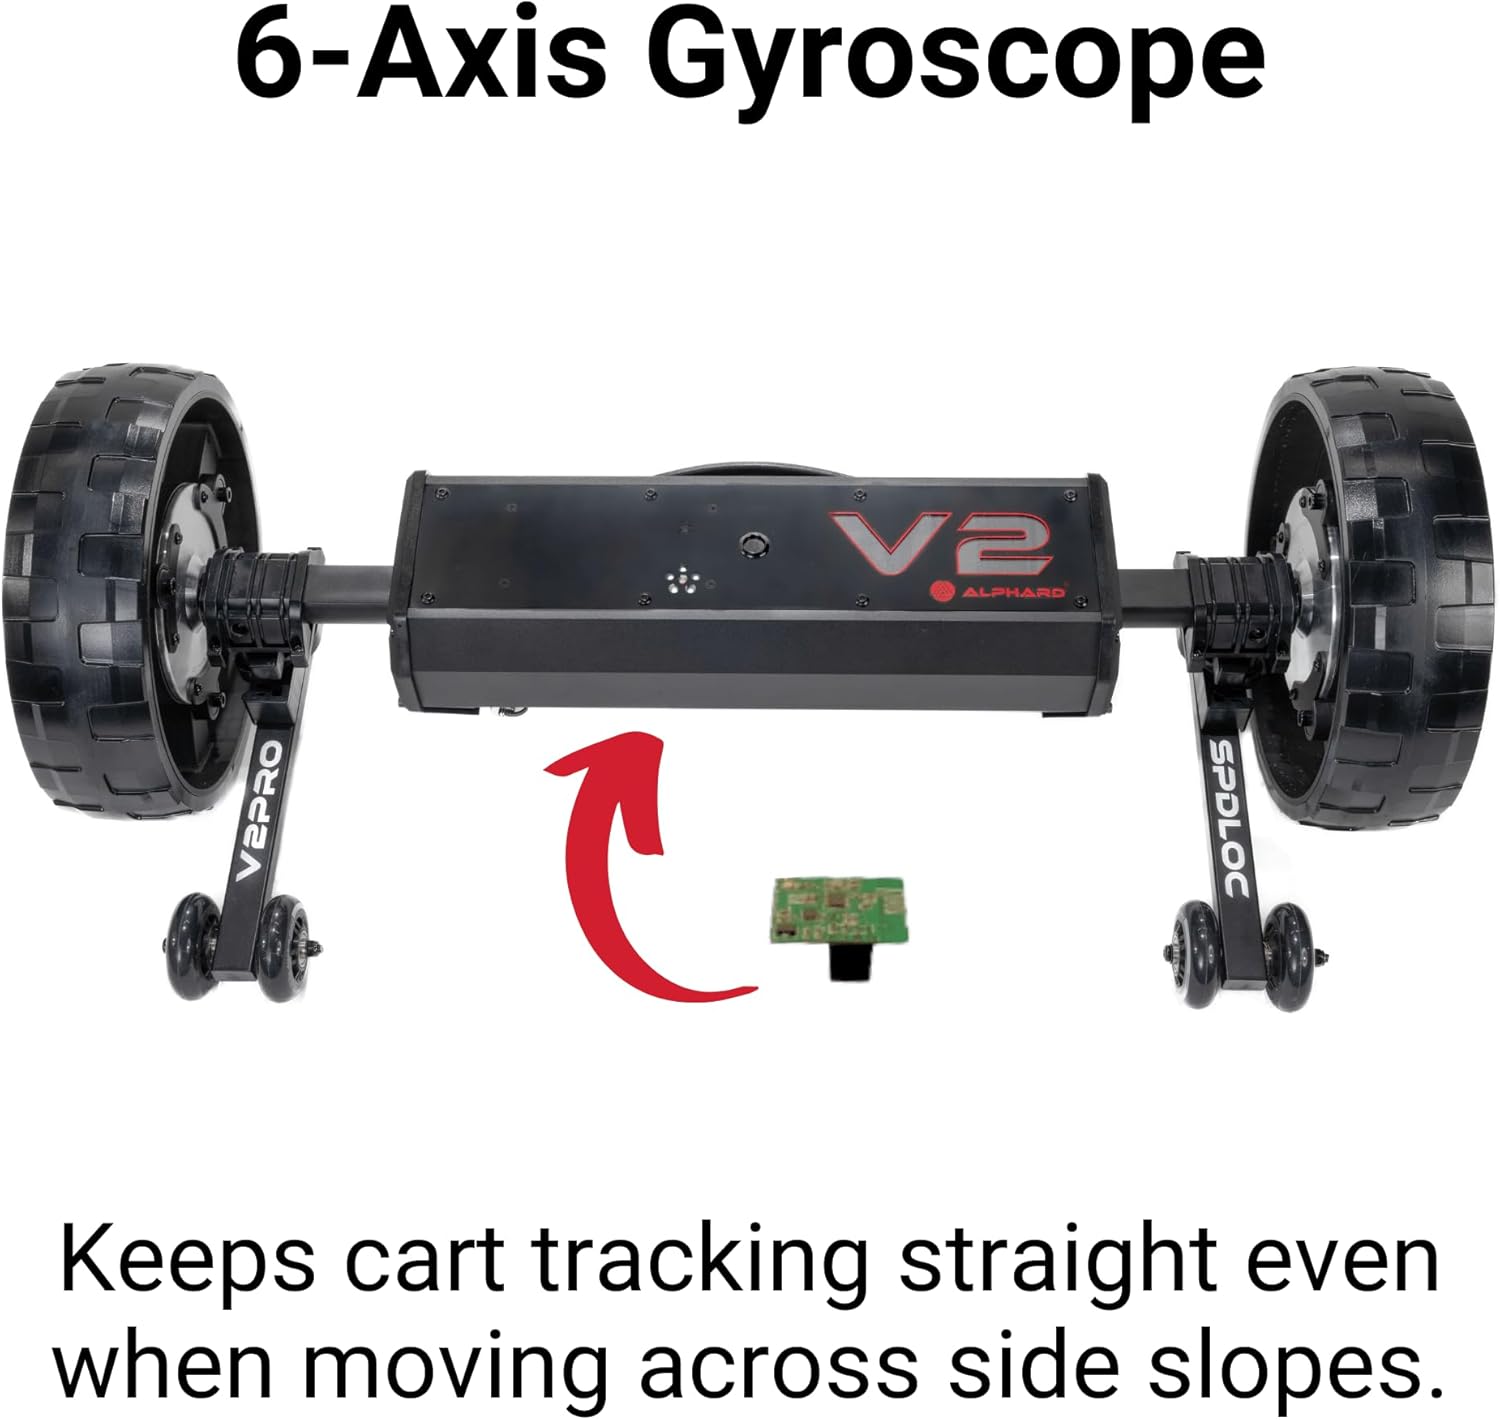
Image: A detailed view of the Club Booster V2Pro unit, highlighting its robust construction and integrated components.
- Extend Anti-Tip Wheels: Pivot the permanently attached anti-tip wheels outwards from the V2Pro unit for stability.

Image: A close-up view of the Alphard V2Pro unit, showing the anti-tip wheels extended for enhanced stability during operation.
- Charge Battery: Before first use, fully charge the lithium-ion battery using the provided charger. Connect the charger to the battery and then to a power outlet. The charging indicator will show when charging is complete.
- Install Battery: Once charged, insert the battery into its designated compartment on the Club Booster V2Pro unit. Ensure it is securely seated.
- Power On: Press the power button on the Club Booster V2Pro unit to turn it on.
- Pair Remote Control: The remote control should be pre-paired. If not, refer to the remote control's specific pairing instructions (usually involves holding a button on both devices).
- Attach Accessories: Install the umbrella holder and drink holder into their respective slots on the Omni Cart handle.
Video: Club Booster V2Pro Setup on Course
Video: This short video demonstrates the quick and easy setup process of the Club Booster V2Pro on a golf course, showing how to attach it to a cart and prepare it for use.
Operating Instructions
Remote Control Operation
The remote control allows for effortless steering and speed adjustments. Familiarize yourself with the buttons and their functions:
- Forward/Backward: Use the directional buttons to move the caddy forward or backward.
- Left/Right: Steer the caddy by pressing the left or right directional buttons.
- Speed Control: Adjust the caddy's speed using the dedicated speed buttons. Multiple speed settings are available.
- Distance Timer: Send the caddy a preset distance (e.g., 15 or 30 yards) with a single button press.
- Automatic Parking Brake: The caddy features an automatic parking brake that engages when stationary, preventing unintended movement, especially on slopes.
6-Axis Gyroscope
The integrated 6-axis gyroscope automatically detects terrain changes and adjusts the caddy's movement to maintain a straight path and steady pace, even when traversing bumps or side slopes. This ensures optimal stability and tracking.

Image: A diagram explaining the function of the 6-Axis Gyroscope, showing how it helps the cart track straight even on uneven terrain.
Downhill Speed Control
The caddy automatically regulates its speed when descending hills, preventing it from running away and ensuring controlled movement on varied terrain.
Smartphone App Control
For additional control and convenience, you can pair your smartphone with the Club Booster V2Pro via the dedicated Alphard Golf app. This provides an alternative control interface and may offer additional features.

Image: The Alphard Golf Electric Caddy Bundle positioned on a golf course, demonstrating its use in a natural environment.

Image: Two golfers walking on a golf course, each accompanied by their Alphard electric caddy, illustrating the hands-free convenience.
Maintenance
- Cleaning: Wipe down the caddy and V2Pro unit with a damp cloth after each use to remove dirt and debris. Avoid using harsh chemicals or abrasive cleaners.
- Battery Care:
- Always fully charge the battery after each round.
- Store the battery in a cool, dry place when not in use.
- If storing for an extended period, charge the battery to approximately 50% every 2-3 months.
- Do not expose the battery to extreme temperatures.
- Storage: When not in use, store the caddy in a dry, protected area. The Omni Cart folds compactly for easier storage.
- Wheel Inspection: Periodically check the wheels for any signs of wear or damage. Ensure they rotate freely.
Troubleshooting
| Problem | Possible Cause | Solution |
|---|---|---|
| Caddy does not power on. | Battery not charged or not properly installed. | Ensure battery is fully charged and securely inserted. |
| Remote control not responding. | Remote battery low or not paired. | Replace remote battery. Re-pair remote if necessary (refer to pairing instructions). |
| Caddy not tracking straight. | Uneven terrain or gyroscope calibration issue. | The 6-axis gyroscope should compensate. If persistent, consult support. |
| Caddy stops unexpectedly. | Low battery or obstruction. | Check battery level. Remove any obstructions. |
Specifications
| Feature | Detail |
|---|---|
| Model Name | BUNV2OMNIPRO |
| Brand | Alphard |
| Material | Aluminum |
| Color | Black |
| Collapsed Dimensions (V2Pro) | 28" (L) x 11" (W) x 11" (H) |
| Extended Dimensions (V2Pro) | 33" (L) x 11" (W) x 11" (H) |
| V2Pro Weight | 20 lbs. |
| Battery Weight | 4 lbs. |
| Battery Dimensions | 16" (L) x 6" (W) (approximate) |
| Control System | Remote Controlled, Smartphone App Enabled |
| Stability Features | 6-Axis Gyroscope, Downhill Speed Control, Automatic Parking Brake, Anti-Tip Wheels |

Image: Visual representation of the collapsed and extended dimensions of the V2Pro unit, along with the weight and approximate dimensions of the battery.
Warranty Information
The Alphard Golf Electric Caddy Bundle (Club Booster V2Pro and Omni Cart) comes with a 2-Year Manufacturer Warranty on all parts, excluding the battery. The battery is covered by a 1-Year Warranty.
This warranty covers defects in materials and workmanship under normal use. It does not cover damage caused by misuse, accidents, unauthorized modifications, or normal wear and tear. Please retain your proof of purchase for warranty claims.
Customer Support
For technical assistance, troubleshooting not covered in this manual, or warranty claims, please contact Alphard Golf customer support:
- Website: Visit the official Alphard Golf website for FAQs, support resources, and contact information.
- Email: Refer to your product packaging or the Alphard Golf website for the most current support email address.
- Phone: Refer to your product packaging or the Alphard Golf website for the most current support phone number.
Please have your product model number (BUNV2OMNIPRO) and proof of purchase ready when contacting support.
Documents and downloads
Ask a question about this manual
Ask about setup, troubleshooting, compatibility, parts, safety, or missing instructions. Manuals+ will review the question and use this page’s manual context to help answer it.