1. Introduction
This manual provides detailed instructions for the installation, use, and maintenance of your SmallRig GFX100RF Leather Case Kit. This kit is specifically designed for the FUJIFILM GFX100RF camera, offering enhanced protection, improved ergonomics, and a classic aesthetic.
The kit includes a durable leather case, a back wood thumb panel for comfortable grip, a matching leather shoulder strap, and a concave shutter button cap to improve tactile feedback during operation.

Figure 1.1: SmallRig GFX100RF Leather Case Kit on camera.
2. Package Contents
Please verify that all items listed below are present in your package:
- Leather Case × 1
- Back Thumb Pad × 1
- Leather Shoulder Strap × 1
- Shutter Button Cap × 1

Figure 2.1: Included components of the kit.
Note: As the leather case and shoulder strap are made of genuine leather, slight variations in texture and appearance may occur.
3. Installation Guide
3.1 Leather Case Installation
- Align the leather case with the bottom and sides of your FUJIFILM GFX100RF camera.
- Gently slide the camera into the case, ensuring a snug fit.
- Secure the case to the camera using the integrated 1/4"-20 screw located at the bottom of the case. Tighten clockwise until firm.
3.2 Back Wood Thumb Panel Installation
- Clean the desired application area on the back of your camera thoroughly to ensure proper adhesion.
- Remove the protective film from the 3M adhesive on the back of the wood thumb panel.
- Carefully position the thumb panel on the camera's rear, aligning it for optimal ergonomic comfort.
- Press firmly for several seconds to ensure secure attachment. The 3M adhesive is designed for secure, residue-free attachment.

Figure 3.1: Ergonomic front handle and back wood thumb panel.
3.3 Shoulder Strap Installation
Follow these steps to attach the leather shoulder strap to your camera:

Figure 3.2: Shoulder Strap Installation Steps.
- Step 1: Thread the thin end of the strap through the camera's strap lug.
- Step 2: Pass the thin end through the metal ring on the main strap.
- Step 3: Fold the thin end back and secure it through the buckle on itself. Repeat for the other side of the camera.
The shoulder strap features an adjustable length ranging from 100 cm to 110 cm (39.4 to 43.3 inches) to accommodate various user heights.
3.4 Concave Shutter Button Cap Installation
- Gently screw the concave shutter button cap clockwise onto the camera's shutter button until it is finger-tight. Do not overtighten.
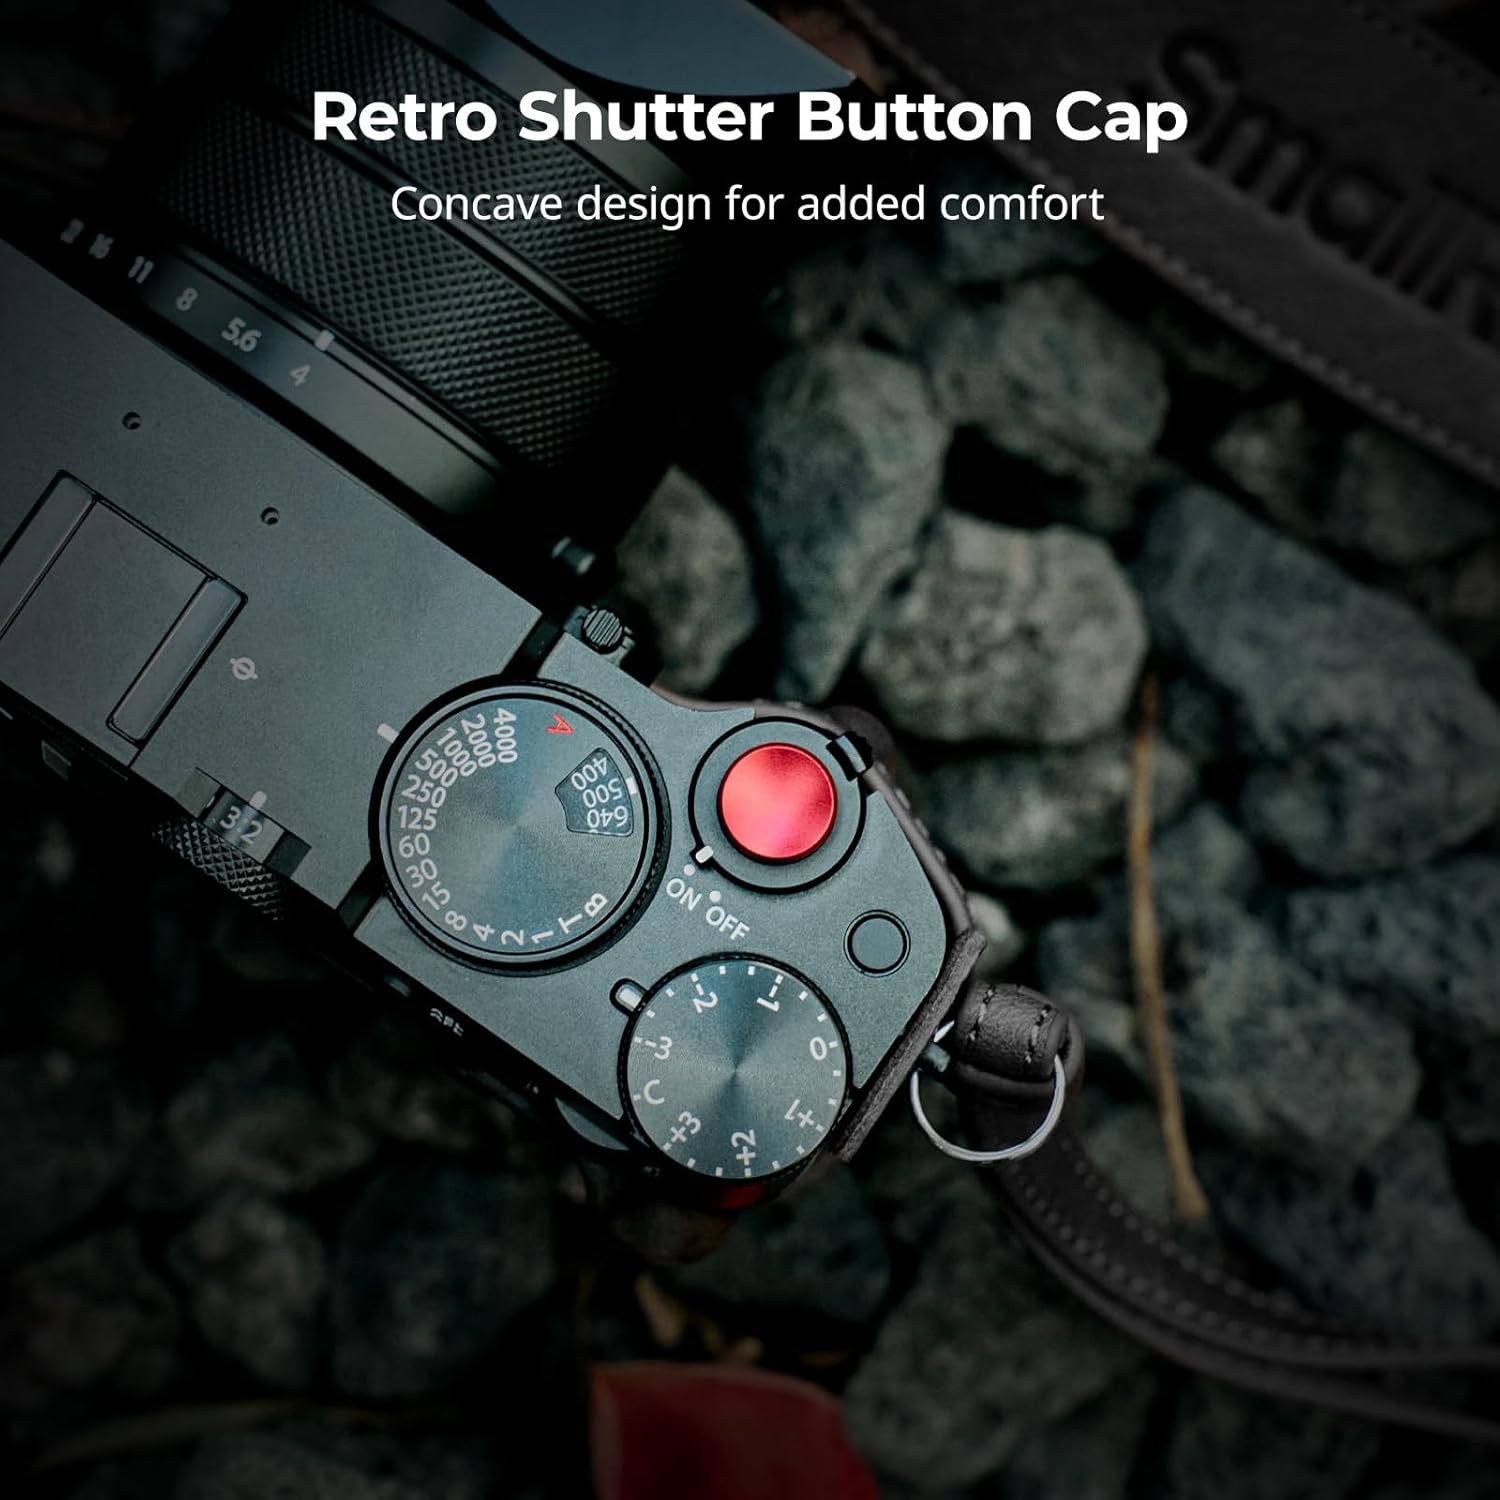
Figure 3.3: Concave Shutter Button Cap.
4. Product Features
4.1 Ergonomic Design
The leather case features a front handle with foam padding and a curved contour, designed to blend seamlessly with the camera and provide enhanced comfort. The back wood thumb panel further reduces strain during extended use by offering a superior grip.
4.2 Camera Port Accessibility
The design of this leather case kit ensures full access to all essential camera interfaces. This includes the battery compartment, focus controls, and card slot, allowing for convenient operation without removing the case.

Figure 4.1: Unobstructed access to camera ports.
4.3 Protection
The interior of the leather case is lined with microfiber suede, custom-fitted to provide a snug fit and all-around protection against scratches and minor impacts. The wear-resistant and breathable leather exterior adds a layer of defense while maintaining a classic appearance.

Figure 4.2: Microfiber suede lining for protection.
5. Care and Maintenance
- Cleaning: For the leather components, wipe gently with a soft, damp cloth. Avoid harsh chemicals or abrasive cleaners.
- Storage: Store the case in a cool, dry place away from direct sunlight and extreme temperatures to prevent material degradation.
- Leather Care: Periodically apply a small amount of leather conditioner to maintain the leather's suppleness and appearance.
- Thumb Pad: If the back thumb pad's adhesive weakens over time, ensure the surface is clean and dry before re-applying or using a suitable replacement adhesive.
6. Troubleshooting
- Loose Shutter Button Cap: If the shutter button cap becomes loose, gently re-tighten it clockwise. Avoid overtightening.
- Thumb Pad Detachment: If the back thumb pad detaches, ensure both the camera surface and the pad's adhesive area are clean and dry. Reapply with firm pressure. If the original adhesive is no longer effective, a new 3M adhesive strip may be required.
- Tripod Mounting: The current design of the leather case covers the camera's 1/4"-20 tripod mount. To use a tripod, the leather case must be removed.
7. Specifications
| Feature | Detail |
|---|---|
| Product Dimensions | 114.0 x 50.0 x 57.5 mm (4.49 x 2.26 x 1.97 inches) |
| Item Weight | 70 Grams (2.47 ounces) |
| Package Dimensions | 144.0 x 102.5 x 56.0 mm (5.7 x 4.0 x 2.2 inches) |
| Package Weight | 108.5 g (3.8 ounces) |
| Material(s) | Aluminum Alloy, Genuine Leather |
| Model Number | 5267 |
| Compatibility | FUJIFILM GFX100RF |
8. Warranty and Support
For warranty information and customer support, please refer to the official SmallRig website or contact your local distributor. Keep your purchase receipt for any warranty claims.
Official SmallRig Website: www.smallrig.com


