
1. Introduction
This manual provides detailed instructions for the setup, operation, and maintenance of your DockCase Smart 7-in-1 USB C Hub & M.2 NVMe SSD Enclosure. Please read this manual thoroughly before using the device to ensure optimal performance and longevity.
2. Product Overview
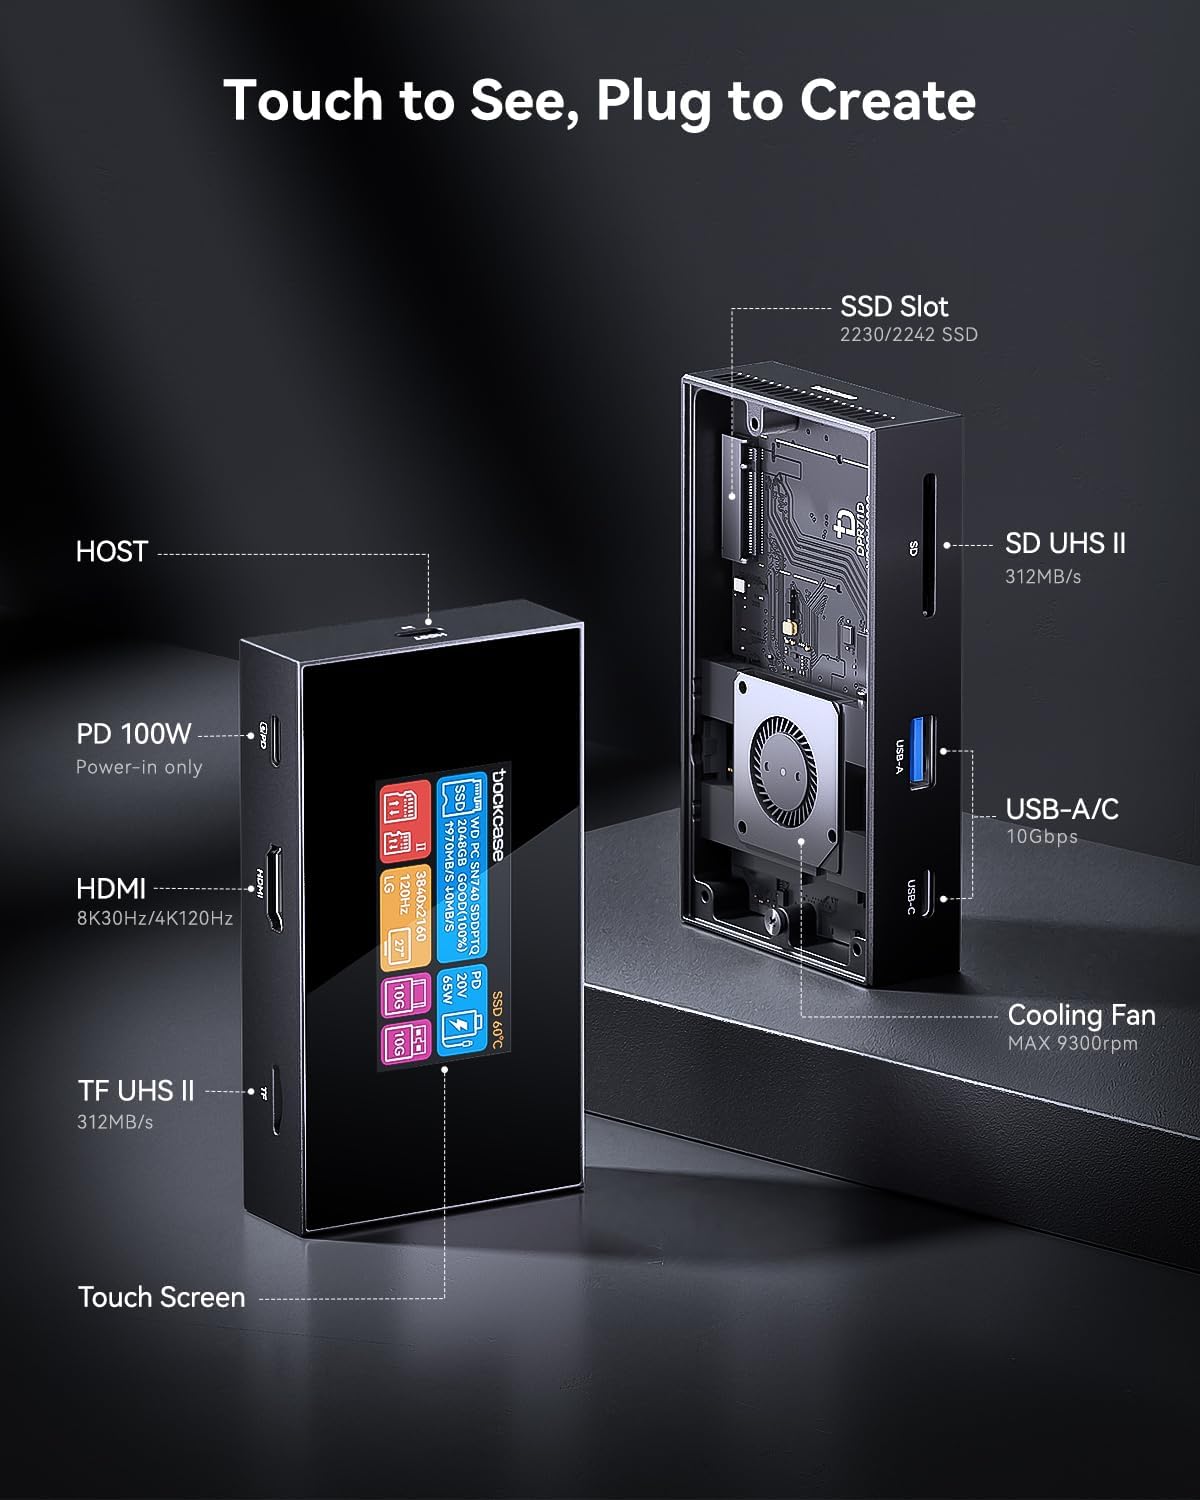
The DockCase Smart 7-in-1 USB C Hub is a versatile device combining a high-speed M.2 NVMe SSD enclosure with a comprehensive 7-in-1 USB-C hub. It features a responsive touchscreen for real-time monitoring and control, enhanced active cooling, and multiple high-speed ports for data transfer, display output, and power delivery.
Key Features:
- 2-in-1 Functionality: M.2 NVMe SSD enclosure (10Gbps, supports 2230/2242 SSDs) integrated with a 7-in-1 USB-C hub.
- Power Delivery: 100W PD fast charging port to keep your devices powered.
- High-Resolution Display: 4K@120Hz HDMI output for stunning visuals.
- High-Speed Data Transfer: 10Gbps USB-C and USB-A ports.
- Card Reader: UHS-II SD/TF card reader for fast media access.
- Smart Touchscreen: Intuitive interface for real-time device monitoring and adjustments.
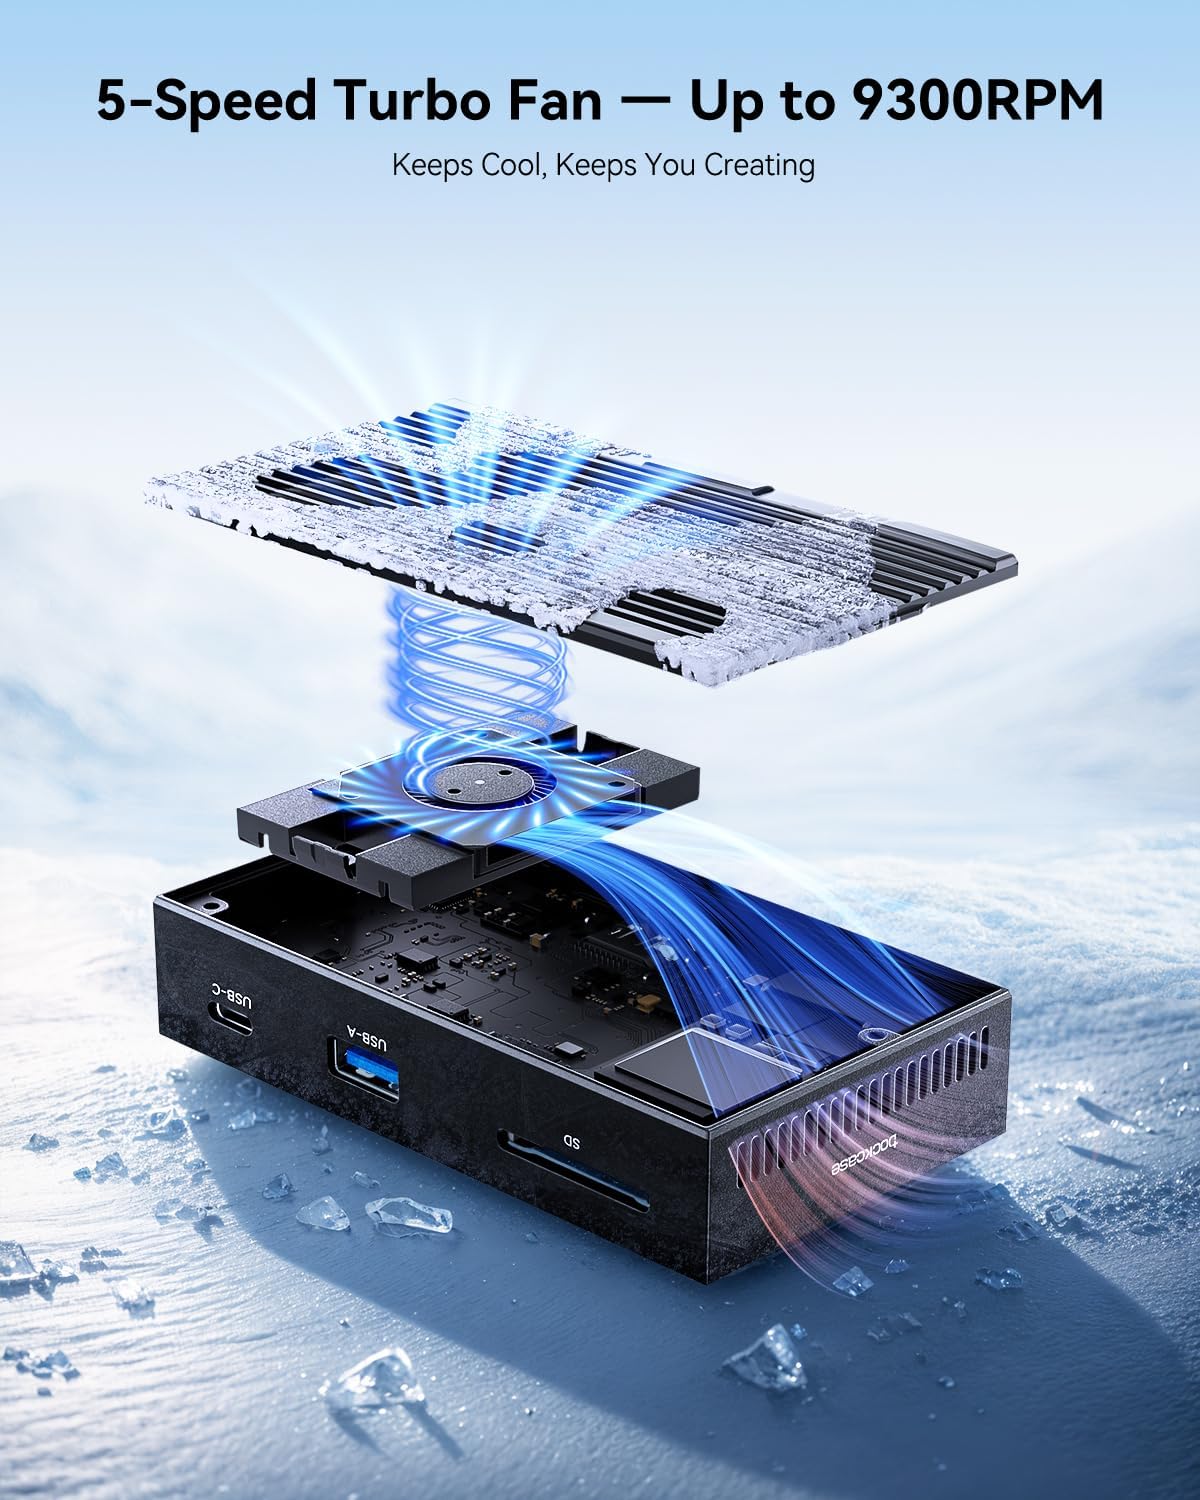
- Enhanced Active Cooling: Adjustable-speed fan, low-resistance vents, and air guide grilles for optimal temperature management.

3. Setup
3.1 Installing an M.2 NVMe SSD
- Locate the screw on the back cover of the enclosure.
- Use the provided screwdriver to remove the screw and detach the back cover.
- Carefully insert your M.2 NVMe SSD (supports 2230 and 2242 sizes) into the designated slot.
- Secure the SSD with the provided screw.
- Reattach the back cover and secure it with the screw.
Note: If using a 2230-size SSD, use the included extension board for proper fit. If using a 2242-size SSD, install directly.
3.2 Initializing and Formatting a New SSD
For brand new SSDs, initialization and formatting are required before first use. The recommended format for compatibility with both Windows and Mac systems is ExFAT.
Important: Back up any important data on used SSDs before reformatting.
3.2.1 For macOS:
- Connect the DockCase hub with the SSD installed to your Mac.
- Open "Disk Utility" (search in Spotlight or Applications > Utilities).
- Select the external SSD (e.g., "DockCase DSWC1F Media") from the sidebar.
- Click "Erase" in the toolbar.
- Enter an English name for the SSD (e.g., "DC").
- Set the format to "ExFAT".
- Click "Erase" to confirm and complete the process.
Video 3.1: A step-by-step guide on how to initialize and format a new SSD for use with the DockCase hub on a macOS system, demonstrating the Disk Utility process.
3.2.2 For Windows:
- Connect the DockCase hub with the SSD installed to your Windows PC.
- Right-click the Start button and select "Disk Management".
- Find the external SSD (it may appear as "Unallocated Space").
- Right-click the unallocated space and select "New Simple Volume".
- Follow the wizard, ensuring to change the file system to "ExFAT" during the formatting step.
- Complete the wizard to format the SSD.
Video 3.2: A step-by-step guide on how to initialize and format a new SSD for use with the DockCase hub on a Windows system, demonstrating the Disk Management process.
3.3 Connecting to Your Device
Connect the DockCase hub to your host device (laptop, Mac mini, etc.) using the provided USB-C cable. The host port is labeled "HOST" on the hub.

4. Operating Instructions
4.1 Using the Smart Touchscreen
The integrated touchscreen provides real-time information and control over the hub's functions. Tap on different icons to view details about connected devices, SSD health, power delivery status, and port information.
- SSD Info: Displays capacity, health status, read/write speeds, and temperature of the installed SSD.
- USB Port Info: Shows details for connected USB-A and USB-C devices.
- PD Power Status: Indicates input and output power for Power Delivery.
- SD/TF Card Info: Provides status for inserted SD and TF cards.
- HDMI Info: Displays resolution and refresh rate of the connected display.
Video 4.1: A demonstration of the DockCase hub's touchscreen interface, showing how to navigate through different information pages for SSD, USB ports, power delivery, and HDMI output.
4.2 Read-Only Mode for SSD
To protect your SSD data from accidental changes or malware, you can enable Read-Only mode:
- From the main touchscreen interface, tap the "SSD" icon to enter the SSD information page.
- Tap the "SSD Info" section again to access the read-only setting page.
- Slide the switch from "OFF" to "ON" to enable read-only mode.
Video 4.2: This video demonstrates how to enable the read-only mode for the installed SSD via the touchscreen interface, enhancing data protection.
4.3 Using USB Ports and Card Readers
- USB-A/USB-C (10Gbps): Connect your USB devices for high-speed data transfer.
- SD/TF Card Slots (UHS-II): Insert your SD or microSD cards for fast photo and video transfers.

4.4 HDMI Display Output
Connect an HDMI cable from the hub's HDMI port to your external monitor or TV for 4K@120Hz display output.
Note: To achieve 4K@120Hz on Windows computers, the USB-C port must use one of the following graphics cards: NVIDIA RTX 20 Series or newer, AMD RX5000M Series or newer, AMD Radeon 600M Series or newer.

5. Maintenance
5.1 Active Cooling System
The DockCase hub features an adjustable-speed fan, low-resistance vents, and precision air guide grilles to maintain optimal temperature and stable performance. The touchscreen allows you to monitor the device temperature and adjust fan speed if needed.
5.2 General Care
- Keep the device clean and free from dust. Use a soft, dry cloth for cleaning.
- Avoid exposing the device to extreme temperatures or humidity.
- Do not drop or subject the device to strong impacts.
6. Troubleshooting
- SSD Not Recognized: Ensure the SSD is correctly installed and securely fastened. For new SSDs, ensure it has been initialized and formatted (refer to Section 3.2). Check the file system format for compatibility.
- Slow Data Transfer: Verify that your host device and cables support the advertised speeds (e.g., 10Gbps for USB 3.2 Gen2). Ensure the SSD is not overheating, as this can reduce performance.
- No Display Output: Check all HDMI cable connections. Ensure your external monitor is powered on and set to the correct input. Verify your computer's display settings. For 4K@120Hz on Windows, check graphics card compatibility (refer to Section 4.4).
- Device Overheating: The active cooling system should manage temperatures. If the device feels excessively hot, ensure the vents are not obstructed. The touchscreen displays real-time temperature for monitoring.
- Power Delivery Issues: Ensure your power adapter connected to the PD port is sufficient (up to 100W). Check the power status on the touchscreen.
7. Specifications
| Feature | Detail |
|---|---|
| Product Dimensions | 3.85 x 2.17 x 0.82 inches |
| Item Weight | 4 ounces |
| ASIN | B0F66WY5QC |
| Item Model Number | DE-71D |
| Brand | DockCase |
| Color | Black |
| Hardware Interface | HDMI, MicroSD, USB Type C |
| Special Feature | Fast Charging, Fast Data Transfer, Plug and Play, Portable |
| Compatible Devices | Desktops, Laptops |
| Manufacturer | DOCKCASE |
7.1 Compatibility
The DockCase Smart 7-in-1 USB C Hub is compatible with a wide range of devices. Please refer to the image below for a detailed list of compatible and incompatible devices and port types.

8. Warranty and Support
DockCase offers the following support for this product:
- 30-Day Return Service: For any problems or malfunctions upon receiving the product.
- One-Year Quality Assurance: Free replacement for quality-related issues within one year of purchase.
- Lifetime Technical Support: Ongoing assistance for any technical queries or issues.
Please feel free to contact us if you encounter any problems or malfunctions after receiving the product.