Glitter 801H
GLITTER 801H Spot Welder Instruction Manual
Model: 801H
1. Introduction
The GLITTER 801H Spot Welder is a high-performance precision welding machine designed for assembling lithium battery packs. It features a powerful 21000W output with 3500A current, specifically engineered for welding pure nickel onto aluminum electrodes of LiFePO4 battery packs. This unit supports both automatic (AT) and manual (MT) triggering modes, offering flexibility for various welding tasks. Its robust design ensures stable and consistent welding results for both DIY enthusiasts and professional applications.

Image 1.1: The GLITTER 801H Spot Welder with its primary components.
2. Safety Instructions
Read all safety warnings and instructions before using this product. Failure to follow the warnings and instructions may result in electric shock, fire, and/or serious injury.
- Eye Protection: Always wear appropriate eye protection (welding goggles or face shield) to protect against sparks and intense light.
- Ventilation: Use the welder in a well-ventilated area to avoid inhaling fumes.
- Electrical Safety: Ensure the power supply matches the welder's requirements. Do not operate with damaged cords or plugs. Keep hands dry.
- Battery Handling: Exercise extreme caution when working with batteries. Avoid short circuits, punctures, or overheating, which can lead to fire or explosion.
- Flammable Materials: Keep flammable materials away from the welding area.
- Children and Bystanders: Keep children and unauthorized persons away from the operating area.
- Maintenance: Disconnect power before performing any maintenance or cleaning.
3. What's in the Box
Carefully unpack all components and verify that you have received the following items:

Image 3.1: Detailed diagram of included components.
- 801H Spot Welder x 1
- 75B Welding Pen x 1
- 73SA Press-down Welding Arm x 1
- Welding Pins for 73SA x 4
- Welding Pins for 75B x 4
- Pure Nickel Strip Sample x 10
- Aluminum Nickel Composite Strip Sample x 10
- Foot Pedal Switch x 1
- Welder Base x 1
- Power Adapter x 1
- Hex Key x 1
- User Manual x 1
4. Setup
Follow these steps to set up your GLITTER 801H Spot Welder:
- Placement: Place the welder on a stable, non-flammable surface in a well-ventilated area.
- Power Connection: Connect the power adapter to the welder and then plug it into a suitable AC power outlet.
- Welder Base: Attach the welder to its base for stability, if desired.
- Connecting Welding Tools:
- For the 73SA Press-down Welding Arm, connect its cables to the designated ports on the welder.
- For the 75B Split Spot Welding Pen, connect its cables to the designated ports on the welder. Ensure secure connections.
- Foot Pedal (Optional): If using the Manual Trigger (MT) mode, connect the foot pedal switch to its port on the welder.
- Initial Power On: Press the power button to turn on the welder. The digital display will illuminate.
5. Operating Instructions
The GLITTER 801H offers versatile operation for various welding needs.
5.1. General Operation and Display
Upon powering on, the display shows current voltage, energy level (gears), and the selected triggering mode (AT/MT). Use the 'UP' and 'DOWN' buttons to adjust settings and 'PWR/SET' to confirm or enter setting mode. The 'DISCH DELAY' button adjusts the preload delay.
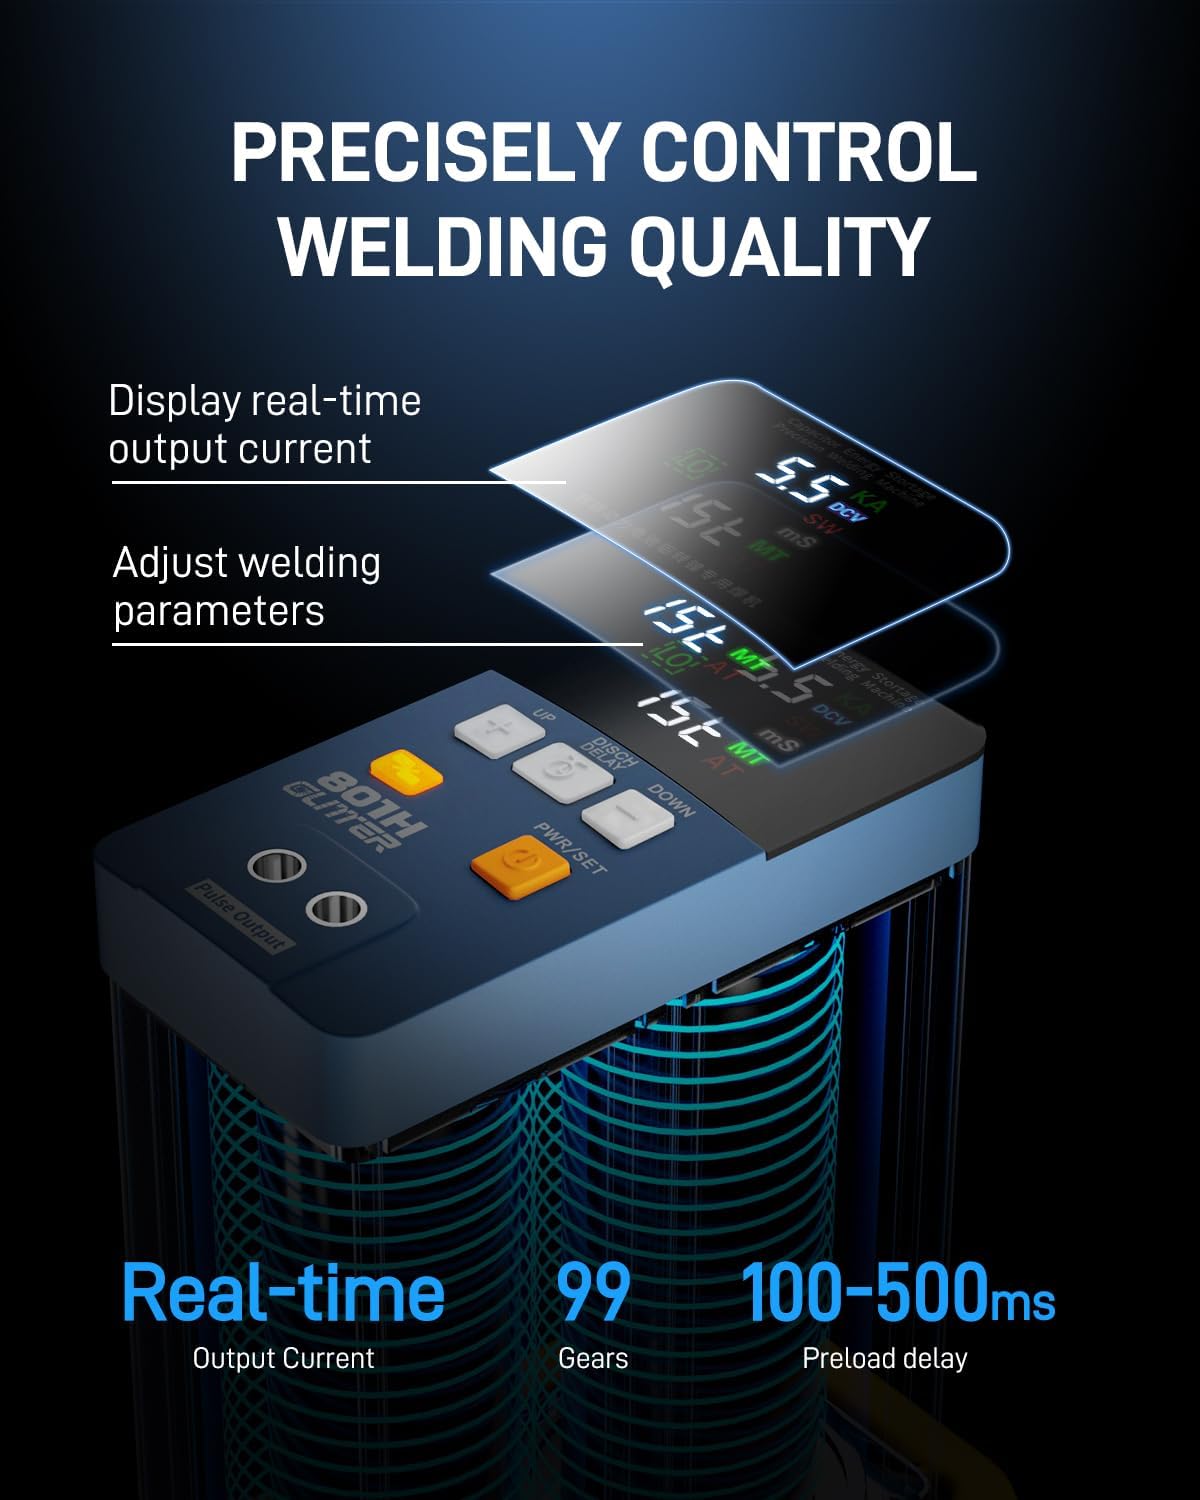
Image 5.1: Control panel for precise welding quality adjustment.
5.2. Mode Selection (AT/MT)
The welder supports two triggering modes:
- AT (Automatic Trigger) Mode: Ideal for fast and efficient batch spot welding. The weld is triggered automatically upon contact with sufficient pressure.
- MT (Manual Trigger) Mode: Provides maximum accuracy and flexibility using the foot pedal control. This mode allows the user to precisely position the electrodes before initiating the weld.

Image 5.2: Illustration of AT and MT triggering modes.
5.3. Aluminum to Nickel Welding (LiFePO4 Battery Packs)
This mode is specifically designed for welding pure nickel strips onto aluminum electrodes of LiFePO4 batteries. The welder provides 21000W pulse power and 3500A output current in this mode.
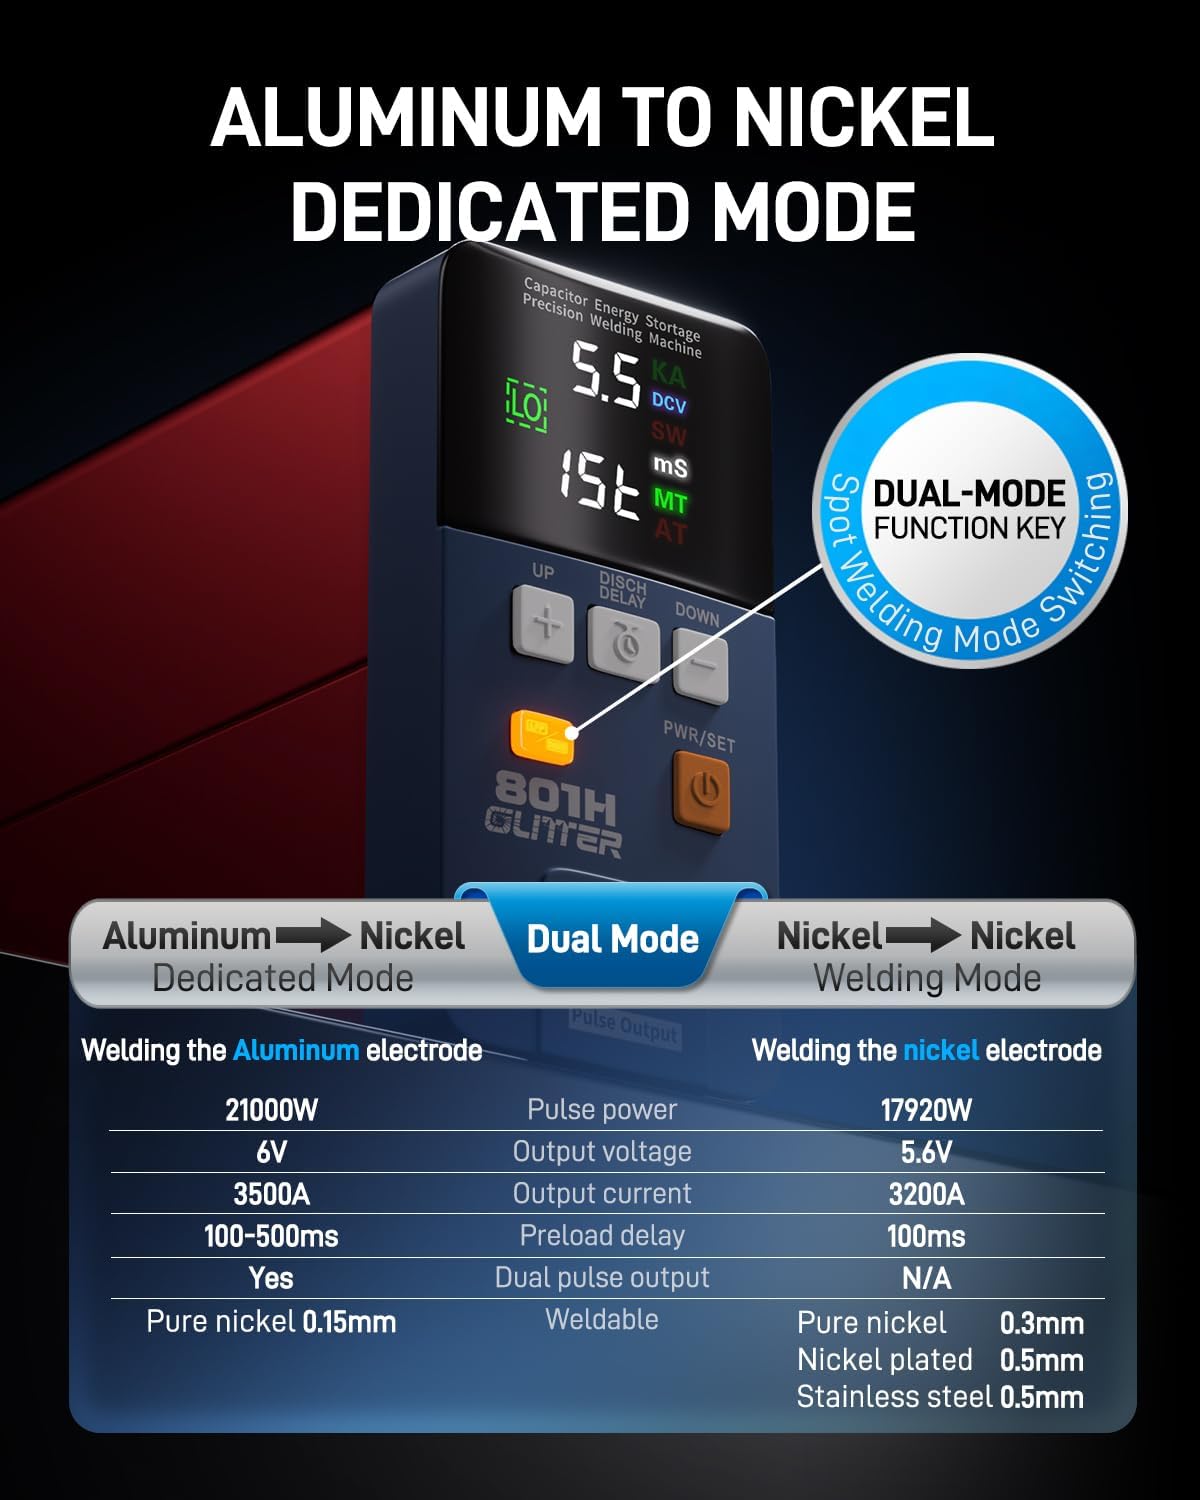
Image 5.3: Aluminum to Nickel dedicated mode settings.
- Preparation: Ensure the aluminum electrodes of the LiFePO4 battery are clean and free of oxidation. Use 0.3mm pure nickel strips for optimal results.
- Mode Activation: Press the dedicated "AL/NI" button on the welder. The red indicator light will illuminate, and the voltage will adjust to 6.0V.
- Energy Adjustment: Press "PWR/SET" to make the energy level flash. Use "UP" or "DOWN" to adjust the energy (up to 99 gears).
- Preload Delay: Press "DISCH DELAY" to adjust the preload delay from 100ms to 500ms, depending on material and desired weld quality.
- Welding with Press-down Arm: Position the nickel strip on the battery electrode. Use the 73SA Press-down Welding Arm to apply consistent pressure and initiate the weld (in AT mode) or use the foot pedal (in MT mode).
Video 5.3.1: Demonstration of welding a 0.3mm pure nickel strip to a LiFePO4 battery's aluminum electrode using the spot welder.
Video 5.3.2: Demonstration of welding an aluminum nickel composite strip to an aluminum plate, showcasing consistent weld results.

Image 5.3.3: Adjustments for the press-down welding arm.
5.4. Stainless Steel Welding
The 801H can also be used for welding small stainless steel parts.
- Preparation: Ensure the stainless steel parts are clean.
- Tool Selection: Use the 75B Split Spot Welding Pen for this application.
- Settings: Adjust energy levels and preload delay as needed for stainless steel. Start with lower settings and gradually increase until desired weld strength is achieved.
- Welding: Apply the welding pen tips to the stainless steel parts and trigger the weld.
Video 5.4.1: Demonstration of welding small stainless steel parts together.
5.5. Copper Welding
The welder can join copper strips, often requiring flux for optimal results.
- Preparation: Clean the 0.15mm copper strips. Apply a small amount of flux to the welding area.
- Tool Selection: Use the 75B Split Spot Welding Pen.
- Settings: Adjust energy levels and preload delay. Copper requires higher energy due to its conductivity.
- Welding: Position the copper strips and apply the welding pen tips. Trigger the weld.
Video 5.5.1: Demonstration of welding two copper strips together.
6. Maintenance
Regular maintenance ensures optimal performance and longevity of your spot welder.
- Electrode Cleaning: Regularly clean the welding pins with fine-grit sandpaper or a specialized electrode cleaner to remove oxidation and debris. This ensures good conductivity and consistent welds.
- Electrode Replacement: Replace worn or damaged welding pins promptly. Use the provided hex key to loosen and tighten the pins.
- Ventilation: Keep the welder's ventilation openings clear of dust and obstructions to prevent overheating.
- Storage: Store the welder in a dry, clean environment away from direct sunlight and extreme temperatures.
- Power Cord Inspection: Periodically inspect the power cord and welding cables for any signs of damage.
7. Troubleshooting
If you encounter issues with your GLITTER 801H Spot Welder, refer to the table below for common problems and solutions.
| Problem | Possible Cause | Solution |
|---|---|---|
| Weak or inconsistent welds | Low energy setting, dirty/worn electrodes, poor contact, incorrect preload delay. | Increase energy setting, clean or replace electrodes, ensure firm contact, adjust preload delay. |
| No spark/No weld | Loose connections, power off, electrodes not making contact, safety feature engaged. | Check all cable connections, ensure welder is powered on, verify electrodes touch the workpiece, check for error codes on display. |
| Overheating | Blocked ventilation, prolonged continuous use at high settings. | Ensure vents are clear. Allow the unit to cool down. Reduce continuous operation time. |
| Display not working | Power issue, internal fault. | Check power connection. If problem persists, contact customer support. |
8. Specifications
| Feature | Specification |
|---|---|
| Model Number | 801H |
| Manufacturer | Glitter |
| Item Weight | 8 pounds |
| Product Dimensions | 2.6 x 7.1 x 5 inches |
| Color | Dark Blue and Red |
| Material | Aluminium alloy |
| Power Source | AC |
| Voltage | 5.8 Volts |
| Wattage | 21000 watts |
| Output Current | 3500A |
| Weldable Materials | Pure Nickel (up to 0.4mm), Aluminum to Nickel, Stainless Steel, Copper |
| Triggering Modes | Automatic (AT), Manual (MT) with foot pedal |
9. Warranty and Support
For warranty information, please refer to the documentation provided with your purchase or contact the manufacturer directly. If you require technical support or have questions not covered in this manual, please reach out to Glitter customer service through their official website or your point of purchase.
Ask a question about this manual
Ask about setup, troubleshooting, compatibility, parts, safety, or missing instructions. Manuals+ will review the question and use this page’s manual context to help answer it.