1. Introduction
This manual provides detailed instructions for the installation, operation, and maintenance of your Aublinto 7-inch Android 13 Car Radio Stereo. Please read this manual thoroughly before using the product to ensure proper functionality and safety. This unit is designed to enhance your driving experience with advanced features such as wireless CarPlay, Android Auto, GPS navigation, Bluetooth 5.2, and FM radio.
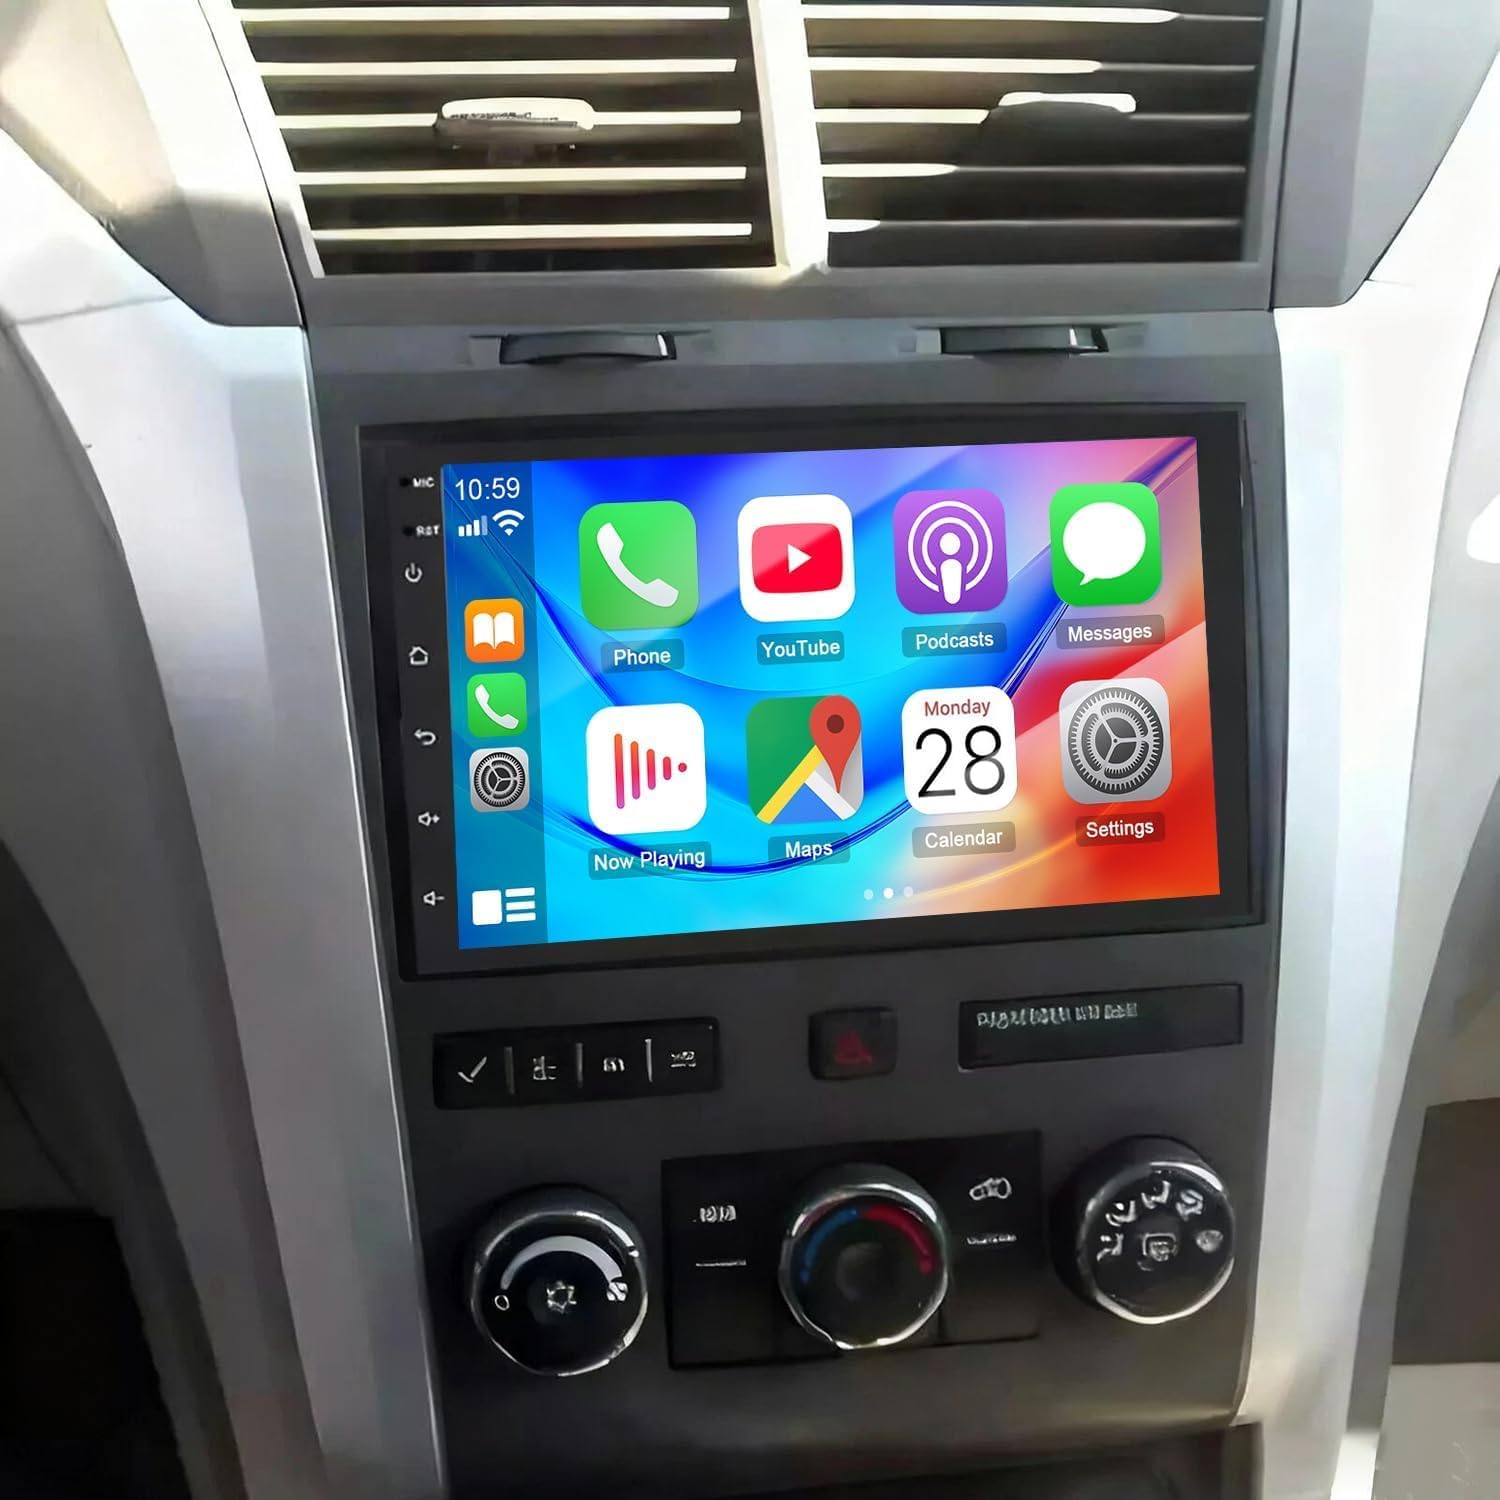
Image: The Aublinto 7-inch car radio stereo unit seamlessly integrated into a vehicle's dashboard, showcasing its vibrant CarPlay interface with various application icons.
2. Applicable Models
This car radio stereo is specifically designed for the following vehicle models and years:
- Chevrolet Traverse: 2009, 2010, 2011, 2012, 2013, 2014
- Saturn Vue: 2008, 2009, 2010
For optimal compatibility, it is recommended to verify your vehicle's dashboard and wiring harness configuration before installation. If unsure about model compatibility, share a clear image of the rear connectors on your center console and in-dash unit for confirmation.

Image: A visual guide listing compatible Chevrolet, GMC, and Buick models and their respective years, confirming the fitment for the car radio stereo.
3. What's in the Box
Upon opening the package, please ensure all the following components are present:
- 7-inch Car Radio Stereo Head Unit
- Power Cable
- RCA Input/Output Cables
- 2 USB Cables
- Camera Input Cable
- GPS Antenna
- Instruction Manual (this document)
- Sound Amplifier & Canbus (if applicable to your vehicle model)
- Radio Antenna Original USB Cable
- Rear Camera

Image: An exploded view of the Aublinto car radio stereo and all its included accessories, such as cables, antennas, and the rear camera.
4. Setup
4.1. Pre-Installation Check
Before beginning installation, ensure your vehicle is compatible with the unit. Disconnect the vehicle's battery to prevent electrical shorts. Prepare necessary tools such as screwdrivers, wire strippers, and electrical tape.
4.2. Installation Steps
- Carefully remove your vehicle's existing radio unit and dashboard trim. Refer to your vehicle's service manual for specific instructions.
- Connect the provided wiring harness to the car radio stereo and then to your vehicle's factory wiring harness. Ensure all connections are secure.
- Route the GPS antenna and USB cables to desired locations, ensuring they do not interfere with vehicle operation.
- Install the rear camera (if included) according to the wiring diagram in section 4.3.
- Mount the new Aublinto head unit into the dashboard opening.
- Reinstall the dashboard trim and reconnect the vehicle's battery.
- Test all functions of the new unit before finalizing the installation.

Image: A side-by-side comparison showing a vehicle's dashboard with the original radio unit (Before) and the same dashboard with the new Aublinto 7-inch car radio stereo installed (After).
4.3. Wiring Diagram
Refer to the following diagrams for proper wiring connections. Incorrect wiring can damage the unit or your vehicle's electrical system.

Image: A comprehensive diagram illustrating the various connections of the car radio stereo's wiring harness, including power, speakers, USB, and RCA.

Image: A visual guide detailing the wiring connections for the backup camera, showing how to connect it to the car radio stereo and the vehicle's reversing light circuit.
5. Operating Instructions
5.1. Power On/Off
Press and hold the power button on the unit or use the vehicle's ignition to turn the unit on or off. A short press typically mutes or unmutes the audio.
5.2. Touch Screen Interface
The unit features a responsive 7-inch HD IPS touchscreen. Navigate through menus and applications by tapping, swiping, and pinching gestures similar to a smartphone.
5.3. Wireless CarPlay & Android Auto
The unit supports both wired and wireless Apple CarPlay and Android Auto. This allows seamless integration of your smartphone for navigation, music, calls, and messaging.
- Wireless Connection: Enable Bluetooth on your smartphone and pair it with the car stereo. Open the Zlink application on the head unit to initiate the wireless connection. (Wireless CarPlay requires Bluetooth connection, iPhone only).
- Wired Connection: Connect your smartphone to the unit using a USB cable.

Image: The car radio stereo screen showing the main interface with icons for CarPlay, Android Auto, and other functions, demonstrating voice control activation.
5.4. GPS Navigation
The unit includes a GPS module for both offline and online navigation. You can use pre-installed offline maps or connect to WiFi to use online navigation applications like Google Maps, Waze, or others downloaded from the Play Store.

Image: The car radio stereo screen illustrating various navigation application icons and the process of connecting to WiFi for online services and app downloads.
5.5. Bluetooth 5.2
Built-in Bluetooth 5.2 with A2DP supports hands-free calling, phone book synchronization, and audio streaming.
- Pairing: Go to the Bluetooth settings on the head unit and your phone. Select the unit's name from your phone's Bluetooth device list to pair.
- Hands-Free Calling: Once paired, you can make and receive calls directly from the unit's screen.
- Audio Streaming: Play music from your phone through the car stereo speakers.

Image: Visual representation of Bluetooth 5.2 functionality, showing a phone call interface and music playback with connected device status.
5.6. FM/RDS Radio
Enjoy your favorite radio stations with the built-in FM/RDS tuner. The RDS (Radio Data System) feature displays station information where available.
- Tuning: Use the on-screen controls to scan for stations or manually tune to a specific frequency.
- Presets: Save your preferred stations for quick access.

Image: The car radio stereo displaying the FM/RDS radio interface, showing current frequency and options for tuning and station selection.
5.7. Steering Wheel Control (SWC)
The unit supports your vehicle's original steering wheel controls, allowing you to manage audio, calls, and other functions without taking your hands off the wheel.
- Configuration: Access the