1. Introduction
Thank you for choosing the Quansheng TK11 Multi-band Two-way Radio. This high-power 10W amateur walkie-talkie is designed for enthusiasts, outdoor activities, and hiking, offering full-band reception and multi-band transmission capabilities. This manual provides essential information for the safe and effective use of your device, including setup, operation, maintenance, and troubleshooting.
2. Safety Information
Please read and understand all safety precautions before operating the radio. Failure to do so may result in injury, damage to the radio, or voiding your warranty.
- Battery Safety: Do not use after soaking in water. Do not place in high temperatures. If swelling occurs, do not continue to use. Do not disassemble, strike, squeeze, or put into fire.
- Antenna: Do not touch the antenna during transmission.
- Power: Use only the specified charger and battery pack.
- Environment: Avoid exposing the radio to extreme temperatures, direct sunlight, dust, or moisture.
- Servicing: Do not attempt to service the radio yourself. Refer all servicing to qualified personnel.
3. Package Contents
Verify that all items listed below are included in your package. If any items are missing or damaged, please contact your retailer.

Figure 3.1: Complete Package Contents
- Quansheng TK11 Radio Unit
- High-Gain Antenna
- 2500mAh Lithium-ion Battery Pack
- Desktop Charger Base
- Power Adapter
- USB-C Charging Cable
- External Antenna Adapter (T-shaped)
- Lanyard
- Belt Clip (pre-installed or included separately)
4. Product Overview
Familiarize yourself with the various parts of your Quansheng TK11 radio.

Figure 4.1: Front View of the Radio
This image displays the front of the Quansheng TK11 radio, highlighting its large display screen, alphanumeric keypad, and integrated speaker/microphone area. The 'QUANSHENG' logo is visible at the top.

Figure 4.2: Radio Held in Hand
This image shows the Quansheng TK11 radio being held in a person's hand, providing a sense of its compact and ergonomic design. The display and keypad are clearly visible, indicating ease of use.

Figure 4.3: Side View
A side profile of the Quansheng TK11 radio, illustrating its slim design and the attachment point for the antenna. The volume/power knob is visible at the top.

Figure 4.4: Top View
This image provides a top-down view of the radio, emphasizing the antenna connector, the main control knob (likely for power and volume), and the sturdy build of the device.
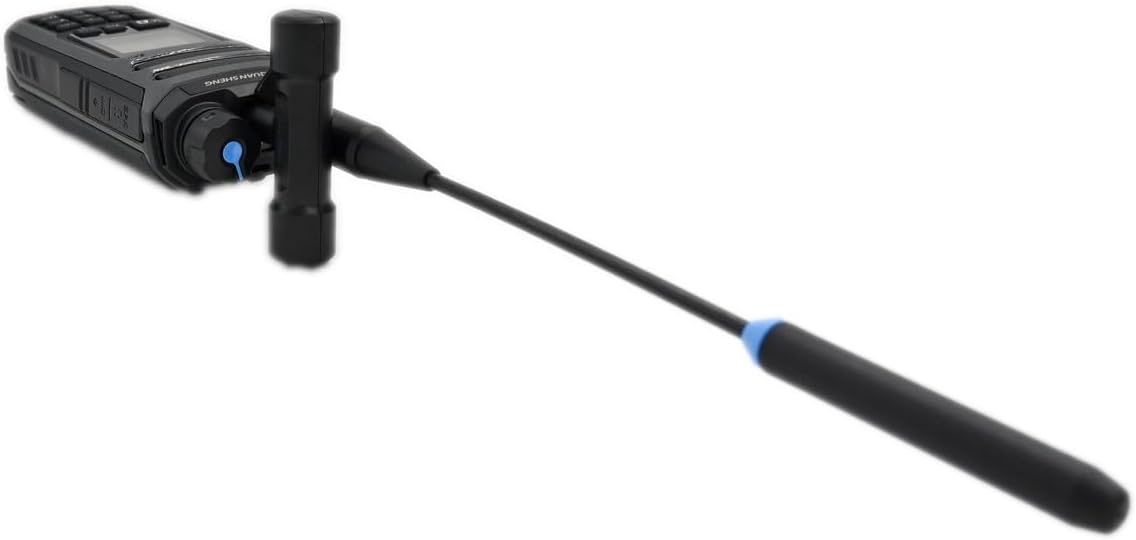
Figure 4.5: Back View and Battery Compartment
The back of the Quansheng TK11 radio is shown, with the battery removed to reveal the battery compartment and the product information label, including model number and FCC ID.
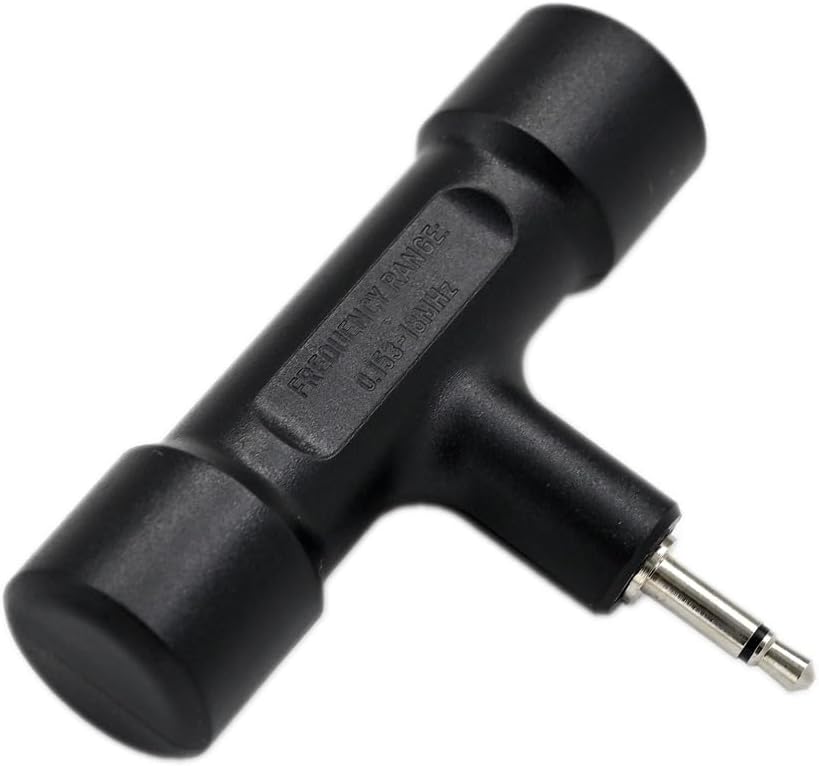
Figure 4.6: Radio with External Antenna Adapter
This image illustrates the Quansheng TK11 radio with the specialized T-shaped external antenna adapter connected to its antenna port, demonstrating an alternative antenna configuration.

Figure 4.7: External Antenna Adapter Close-up
A detailed close-up of the T-shaped external antenna adapter, showing its construction and connector type, designed for specific frequency ranges.
5. Setup
5.1 Battery Installation
- Align the battery pack with the grooves on the back of the radio.
- Slide the battery pack upwards until it clicks into place.
- To remove, push the battery release latch (if present) and slide the battery downwards.
5.2 Antenna Attachment
- Screw the provided high-gain antenna clockwise into the antenna connector on top of the radio until it is finger-tight. Do not overtighten.
- If using the external antenna adapter, connect it first, then attach your desired external antenna.
5.3 Charging the Battery
- Insert the power adapter into a standard AC outlet.
- Connect the power adapter cable to the desktop charger base.
- Place the radio with the battery installed into the charger base. Ensure the charging contacts align.
- The charging indicator light on the charger base will illuminate (typically red) during charging and change color (typically green) when fully charged.
- A full charge typically takes 3-4 hours.
6. Operating Instructions
6.1 Powering On/Off and Volume Control
- To power on, rotate the top knob clockwise until you hear a click.
- Continue rotating the knob to adjust the volume.
- To power off, rotate the knob counter-clockwise until it clicks off.
6.2 Frequency Selection (VFO/Memory Mode)
- Press the V/M button to switch between VFO (Variable Frequency Oscillator) mode for direct frequency input and Memory mode for recalling stored channels.
- In VFO mode, use the keypad to enter desired frequencies.
- In Memory mode, use the Up/Down arrow keys or the keypad to select a channel.
6.3 Transmitting and Receiving
- To transmit, press and hold the PTT (Push-To-Talk) button on the side of the radio. Speak clearly into the microphone.
- Release the PTT button to receive.
- Ensure you are on a clear frequency or channel before transmitting.
6.4 Menu Navigation
- Press the MENU button to access the radio's settings.
- Use the Up/Down arrow keys to navigate through menu options.
- Press MENU again to select an option, and use the Up/Down keys to change settings.
- Press EXIT to return to the previous screen or exit the menu.
6.5 Key Features Overview
- Spectrum Analyzer: Access this feature via the menu to visualize signal activity across frequencies.
- Magic Voice: Experiment with voice modulation effects (e.g., child/alien voice) for entertainment purposes.
- NOAA Weather Alerts: Tune into NOAA weather channels for real-time weather information and alerts (where available).
- Dual Reception: The radio can monitor two different frequencies simultaneously.
- Noise Reduction Function: Improves audio clarity in noisy environments.
- DTMF Select Call: Supports individual, group, and full calls using DTMF tones.
7. Maintenance
- Cleaning: Use a soft, damp cloth to clean the radio's surface. Do not use harsh chemicals or abrasive cleaners.
- Battery Care: To prolong battery life, avoid overcharging or completely discharging the battery. Store the battery in a cool, dry place when not in use for extended periods.
- Storage: When storing the radio for a long time, remove the battery pack.
8. Troubleshooting
| Problem | Possible Cause | Solution |
|---|---|---|
| Radio does not power on. | Battery is low or not installed correctly. | Charge the battery. Reinstall the battery pack securely. |
| Cannot transmit or receive. | Incorrect frequency/channel. Antenna not connected. | Verify frequency/channel settings. Ensure antenna is securely attached. |
| Poor audio quality. | Low signal strength. Squelch level too high. | Move to an area with better signal. Adjust squelch level in menu. |
| Battery drains quickly. | Frequent transmission. Battery nearing end of life. | Reduce transmission time. Consider replacing the battery. |
If the problem persists after trying these solutions, please contact customer support.
9. Specifications
| Feature | Specification |
|---|---|
| Brand | QUANSHENG |
| Model Number | TK11-5 |
| Color | Black |
| Output Power | 10W |
| Reception Frequency Band | 0.153-1160 MHz |
| Operating Frequency Range | 144-146 MHz (VHF) |
| Number of Channels | 999 |
| Battery Capacity | 2500 mAh (Lithium-ion) |
| Voltage | 7.4 Volts |
| Max Range | 10 Kilometers (line of sight) |
| Tuning Technology | UHF |
| Water Resistance Level | Waterproof |
| Dimensions (D x W x H) | 42 x 68 x 182 mm |
| Special Features | Emergency alarm, Dual-band, Long range, Battery saving mode, Rechargeable |
10. Warranty and Support
The Quansheng TK11 radio comes with a warranty covering manufacturing defects. Please retain your proof of purchase for warranty claims.
- Spare Parts Availability: Spare parts are guaranteed to be available for 2 years from the date of purchase.
For technical support, warranty inquiries, or service, please contact your original retailer or visit the official Quansheng website for contact information.


