
Introduction
This manual provides detailed instructions for the setup, operation, maintenance, and troubleshooting of your JamesDonkey J1 Low-Profile Wireless Mechanical Keyboard. Please read this manual thoroughly to ensure proper use and to maximize your keyboard's functionality.
Package Contents
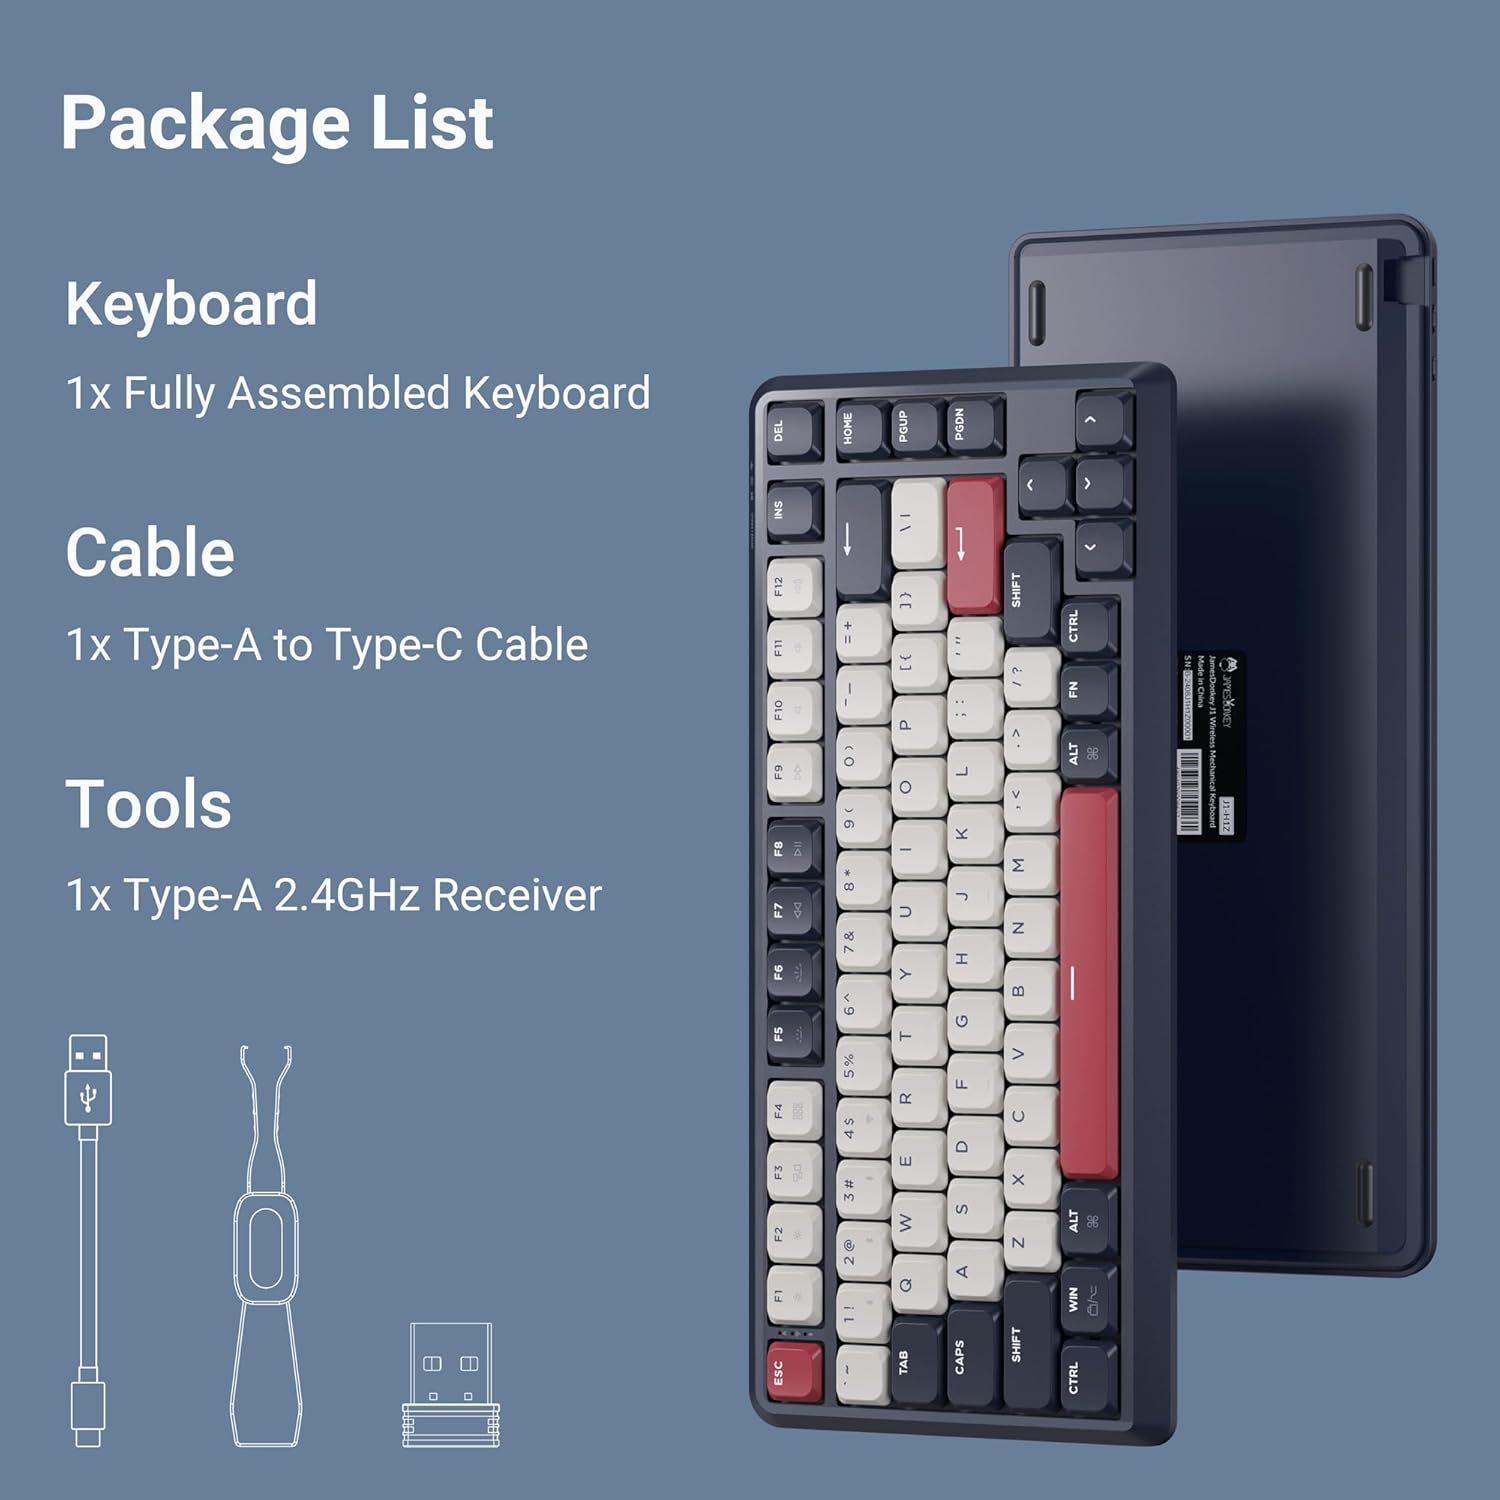
Verify that all items are present in your package:
- 1x Fully Assembled JamesDonkey J1 Low-Profile Wireless Mechanical Keyboard
- 1x Type-A to Type-C Cable
- 1x Type-A 2.4GHz Receiver
- 1x Keycap/Switch Puller Tool
Setup
1. Initial Charging
Before first use, connect the keyboard to a USB power source using the provided Type-A to Type-C cable. A full charge typically takes approximately 2 hours. The charging indicator will provide status.

2. Connectivity Modes
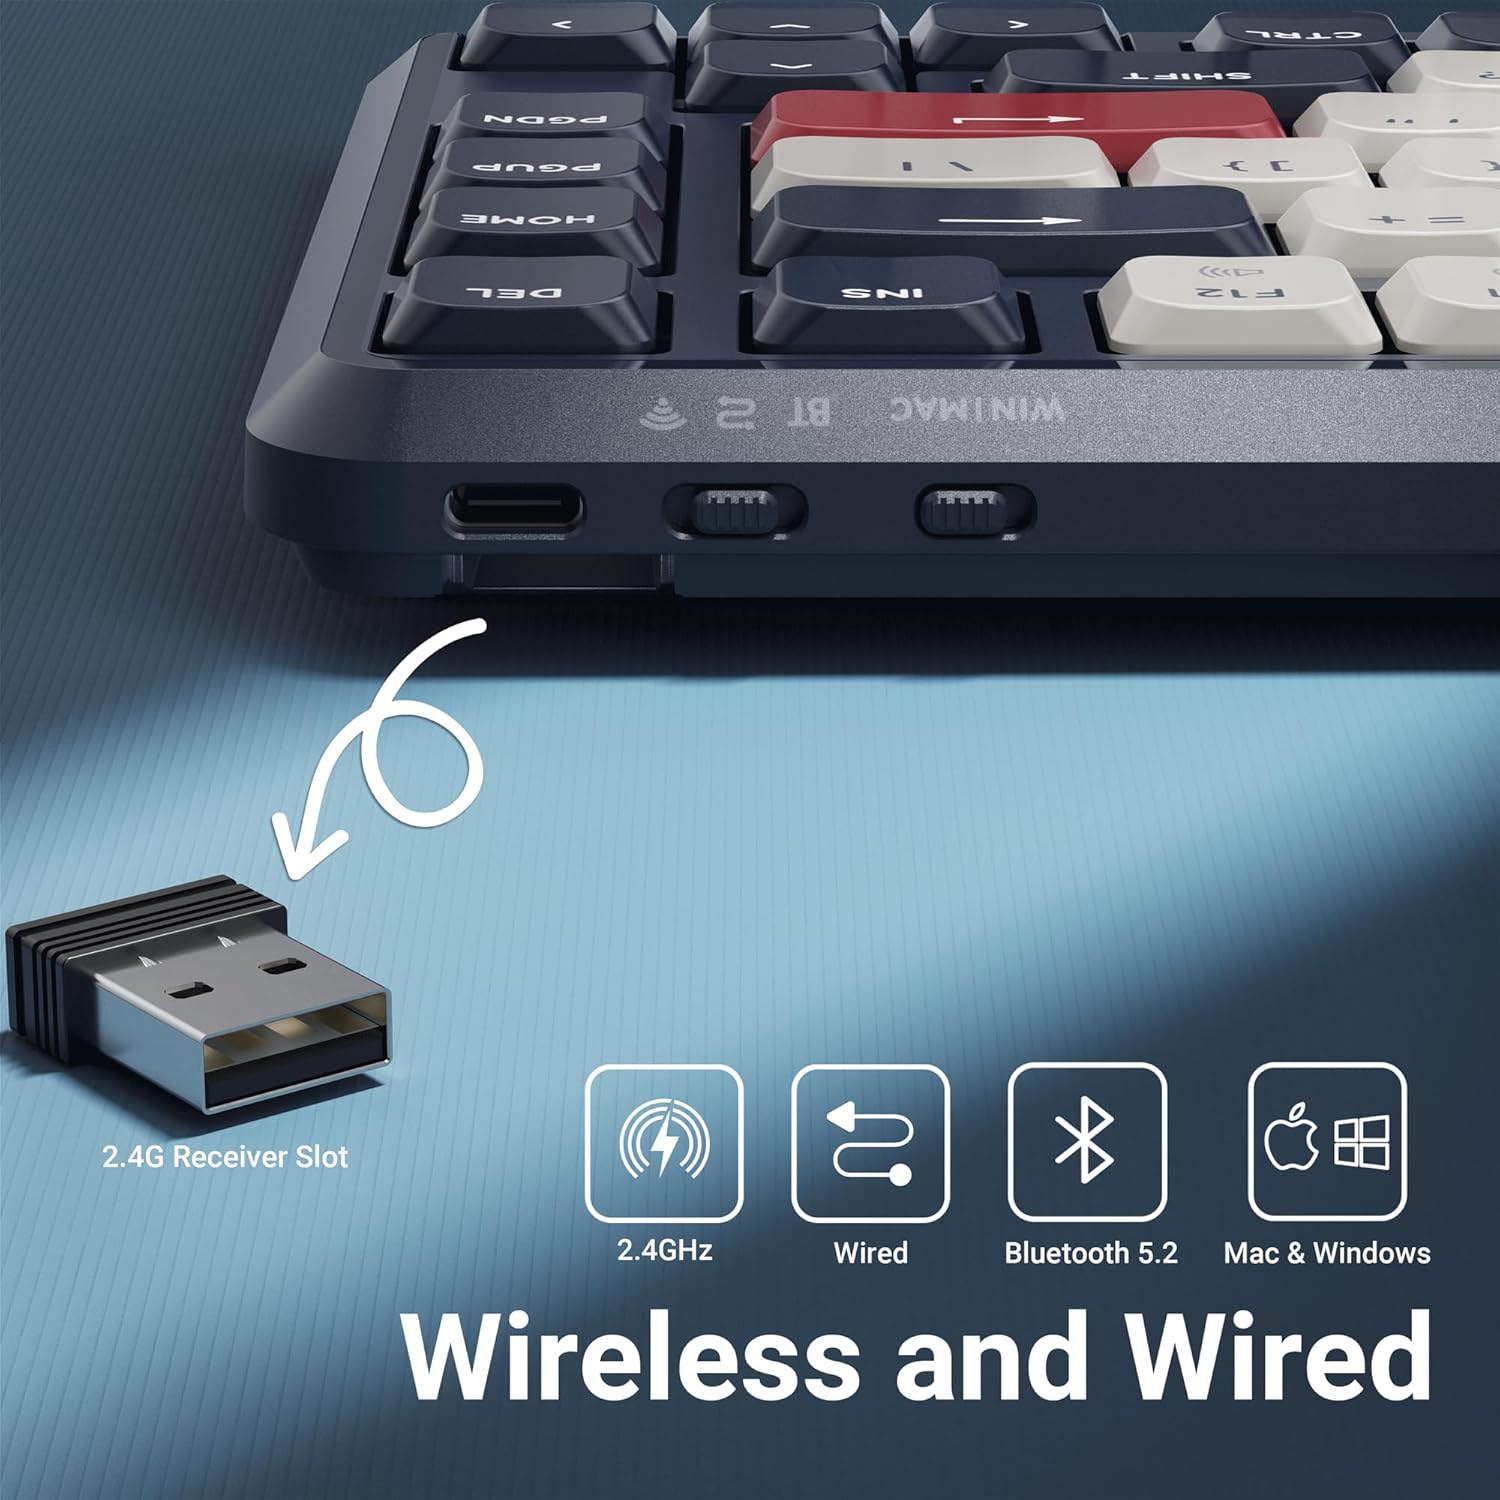
The JamesDonkey J1 supports three connection modes: 2.4 GHz Wireless, Bluetooth 5.2, and USB-C Wired.
2.1. 2.4 GHz Wireless Connection
- Locate the 2.4GHz receiver in the keyboard's storage slot or in the package.
- Plug the 2.4GHz receiver into an available USB-A port on your computer.
- On the keyboard's side, slide the mode switch to the '2.4G' position. The keyboard will automatically connect.
2.2. Bluetooth 5.2 Connection
The keyboard can connect to up to three Bluetooth devices.
- Slide the mode switch on the keyboard's side to the 'BT' position.
- Press and hold Fn + 1, Fn + 2, or Fn + 3 for 3 seconds to enter pairing mode for the desired slot. The indicator light will flash rapidly.
- On your device (computer, tablet, etc.), search for Bluetooth devices and select "JamesDonkey J1" to pair.
- To switch between paired Bluetooth devices, press Fn + 1, Fn + 2, or Fn + 3 briefly.
2.3. USB-C Wired Connection
- Connect the provided Type-A to Type-C cable from your computer to the keyboard's USB-C port.
- Slide the mode switch on the keyboard's side to the 'Wired' position. The keyboard will function as a wired device.
3. Operating System Selection
The JamesDonkey J1 is optimized for both macOS and Windows. Use the OS switch located on the side of the keyboard to select your operating system. This ensures correct key mapping for multimedia and special functions.
4. QMK/VIA Customization
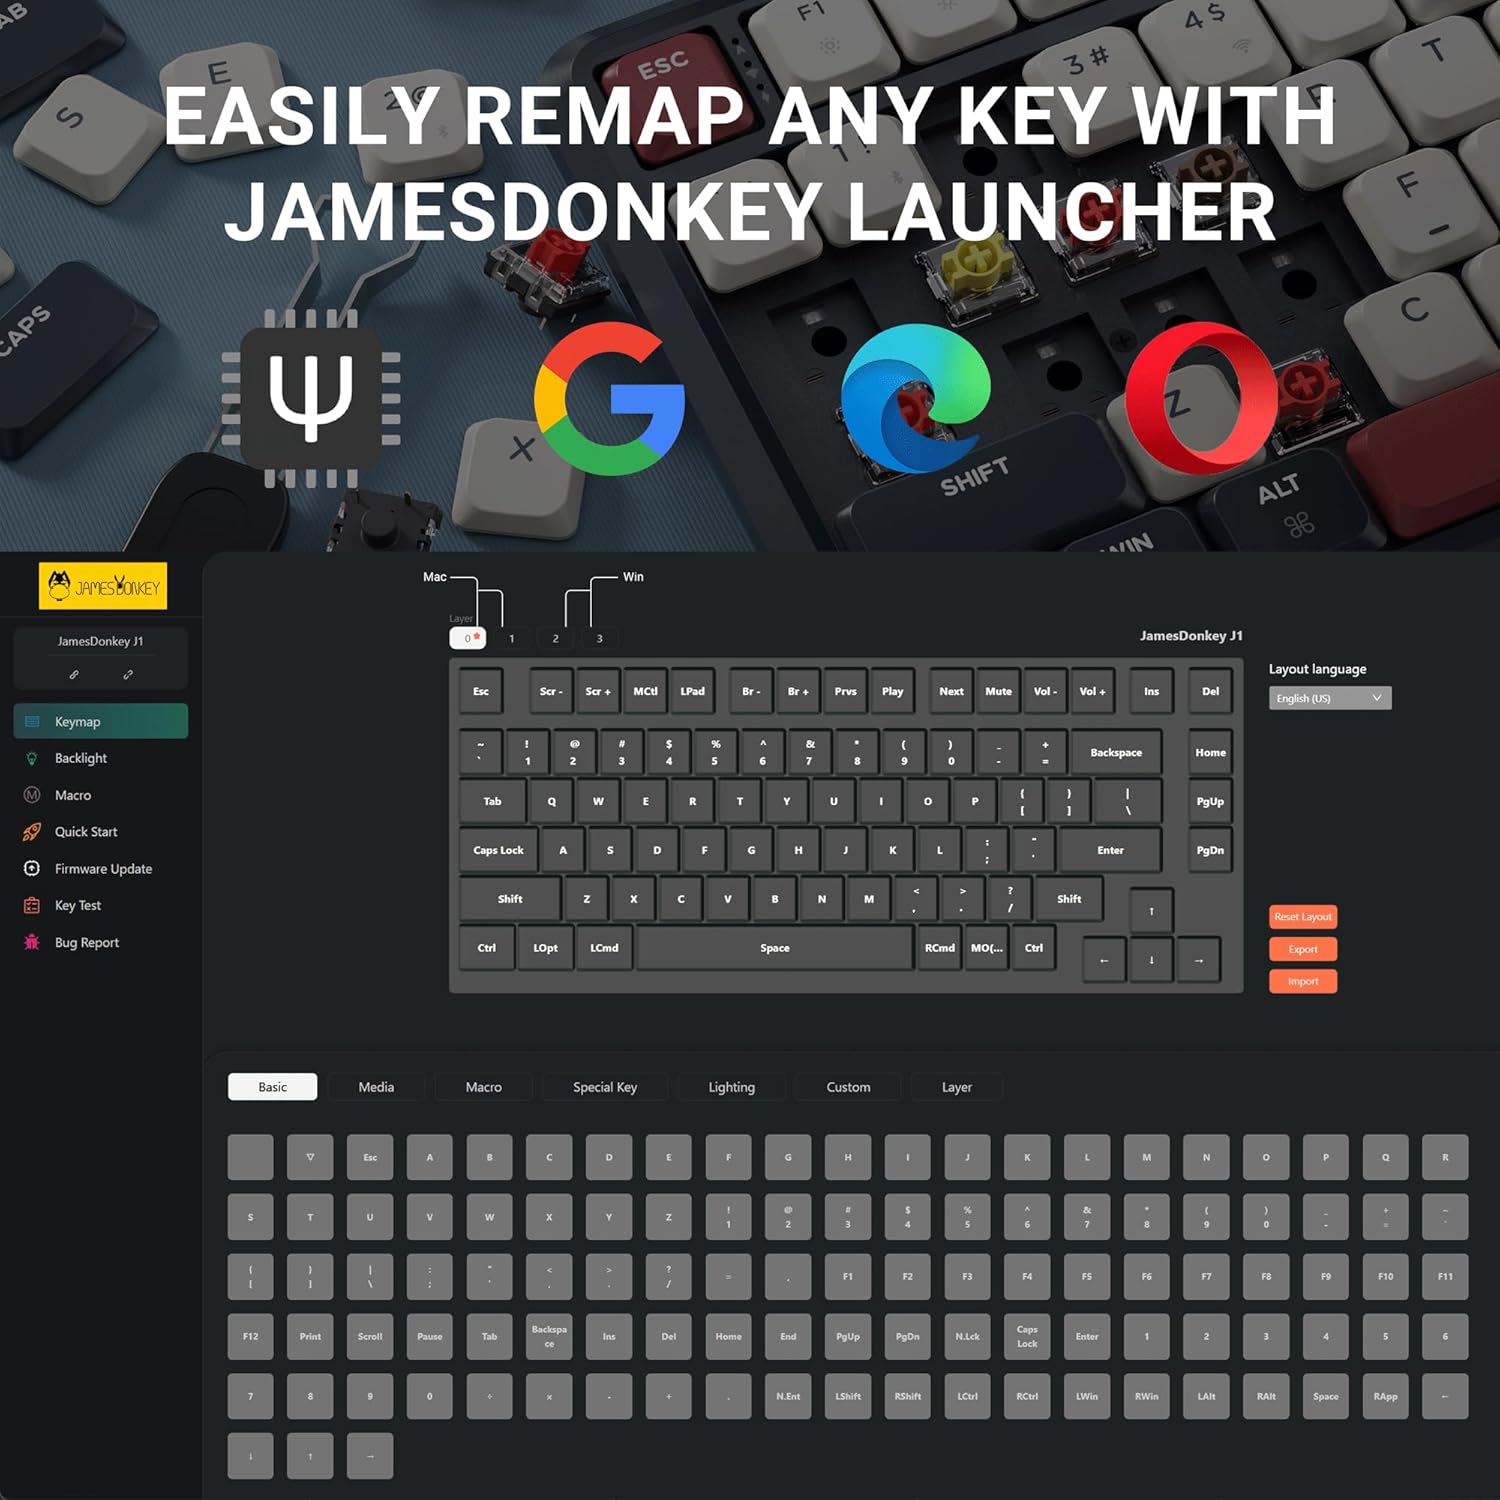
The keyboard supports QMK/VIA firmware for advanced customization. This allows you to remap keys, create macros, and adjust lighting effects.
- Connect the keyboard to your computer via USB-C wired mode.
- Access the QMK/VIA configurator through a web browser. Search for "QMK VIA Configurator" online.
- Follow the on-screen instructions to load the keyboard's layout and begin customization.
Operating the Keyboard
1. Basic Functions
The JamesDonkey J1 features a 75% layout, providing essential keys in a compact form factor.

2. RGB Backlighting Control
The keyboard features customizable RGB backlighting.
- Fn + Q: Cycle through backlight effects.
- Fn + W: Adjust backlight brightness.
- Fn + E: Adjust backlight speed.
- Fn + R: Change backlight color.

3. Hot-Swappable Switches
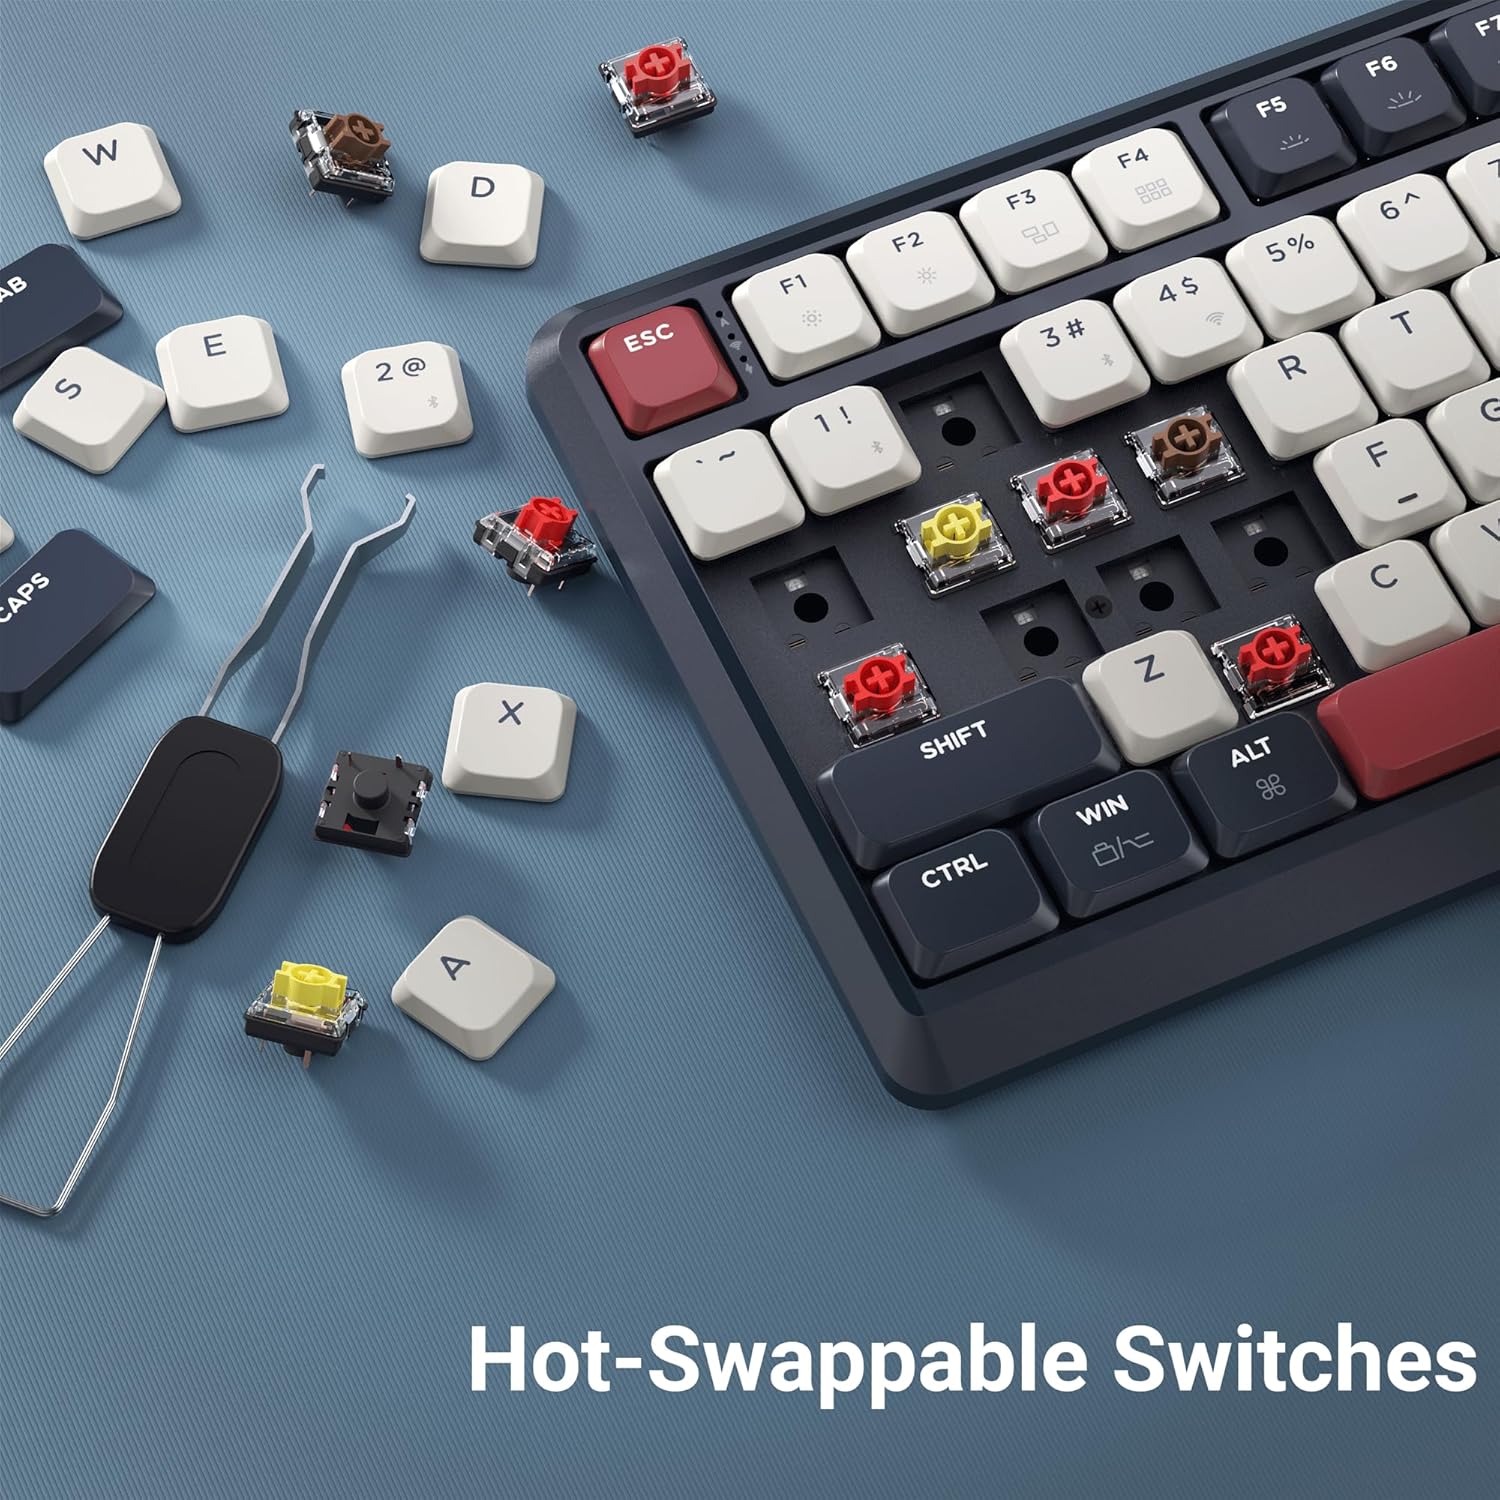
The JamesDonkey J1 features hot-swappable sockets, allowing you to change mechanical switches without soldering.
- Use the provided keycap puller tool to carefully remove the desired keycap.
- Use the switch puller tool to gently grip the switch from its top and bottom clips, then pull it straight up to remove it.
- Align the pins of the new switch with the holes on the PCB. Ensure the pins are straight.
- Gently press the new switch into place until it clicks. Do not force it.
- Reattach the keycap.
4. Key Remapping and Macros
Utilize the QMK/VIA software (as described in the Setup section) to remap any key, create custom macros, and personalize your typing experience.
Maintenance
1. Cleaning
- Disconnect the keyboard from all power sources before cleaning.
- Use a soft, lint-free cloth slightly dampened with water or a mild cleaning solution to wipe the keycaps and keyboard body.
- For deeper cleaning, remove keycaps using the keycap puller and use compressed air to clear debris from between switches.
- Avoid spraying liquids directly onto the keyboard.
2. Keycap and Switch Replacement
Refer to the "Hot-Swappable Switches" section under "Operating the Keyboard" for instructions on replacing keycaps and switches. Ensure compatible low-profile switches are used for replacement.

Troubleshooting
1. Connectivity Issues
- 2.4GHz/Bluetooth Not Connecting: Ensure the keyboard is in the correct mode (2.4G or BT) using the side switch. For Bluetooth, ensure the correct device slot (Fn+1/2/3) is selected and in pairing mode if connecting for the first time.
- Intermittent Connection: Ensure the keyboard is within range of your device. Avoid sources of interference (e.g., other wireless devices, large metal objects). Charge the keyboard if the battery is low.
- Wired Connection Not Working: Verify the USB-C cable is securely connected to both the keyboard and the computer. Ensure the keyboard is switched to 'Wired' mode. Try a different USB port or cable.
2. Keyboard Not Responding / Sleep Mode
The keyboard is designed to enter a sleep mode after a period of inactivity to conserve battery. To wake the keyboard, press any key. There might be a brief delay before it responds. If the keyboard remains unresponsive, ensure it is charged and try reconnecting it.
3. QMK/VIA Software Issues
- Keyboard Not Detected: Ensure the keyboard is connected via USB-C wired mode and the mode switch is set to 'Wired'. Close and reopen the QMK/VIA configurator.
- Customization Not Applying: After making changes in QMK/VIA, ensure you save and flash the new firmware to the keyboard as instructed by the software.
Specifications
| Feature | Detail |
|---|---|
| Model | JamesDonkey J1 |
| Connectivity Technology | 2.4 GHz, Bluetooth 5.2, USB-C |
| Keyboard Description | Mechanical |
| Layout | 75% |
| Switches | Hot-Swappable Low-Profile (Red Switch variant) |
| Keycaps | Double-Shot PBT |
| Backlighting | RGB |
| Compatible Devices | Laptop, PC, Tablet |
| Compatible OS | Windows, macOS, Linux |
| Battery | 1 Nonstandard Battery (included) |
| Item Weight | 2.1 pounds |
| Package Dimensions | 14.3 x 7.2 x 1.7 inches |

Warranty and Support
For warranty information and technical support, please refer to the official JamesDonkey website or contact their customer service directly. Keep your proof of purchase for warranty claims.