
Introduction
This manual provides detailed instructions for the assembly, operation, and maintenance of your Aoodor 10 x 12 ft Wooden Frame Gazebo. Please read all instructions carefully before beginning assembly and retain this manual for future reference. Proper assembly and care will ensure the longevity and safe use of your gazebo.
The Aoodor hardtop roof gazebo is designed to expand your outdoor living space, providing a comfortable and functional area for relaxation and entertainment. It features a durable wooden frame, a 2-tier galvanized metal hardtop roof, and an integrated charging socket for convenience.
Safety Information
WARNING: Failure to follow these safety instructions may result in serious injury or property damage.
- Always ensure the gazebo is assembled on a flat, stable surface.
- Do not use the gazebo in thunderstorms or high winds. Disassemble or secure the gazebo during severe weather conditions.
- Keep the gazebo clean and dry to prevent mold or mildew growth.
- Inspect the gazebo regularly for any damage or wear and tear. Replace damaged parts immediately.
- Always unplug the charging outlet when not in use and ensure its waterproof cover is securely closed.
- Keep children and pets away from the assembly area during installation.
- Use appropriate safety gear, such as gloves and eye protection, during assembly.
Package Contents
Before beginning assembly, verify that all parts listed in the included parts list are present and undamaged. If any parts are missing or damaged, contact customer service immediately.
Typical package contents include:
- Wooden frame components (posts, beams, braces)
- Galvanized metal roof panels (upper and lower tiers)
- Hardware kit (screws, bolts, washers, nuts, anchors)
- Integrated GFCI charging outlet with waterproof cover
- Assembly tools (basic wrenches, hex keys - specific tools may vary)
- Instruction manual
Refer to the detailed parts list provided in your product packaging for exact quantities and identification.
Setup and Assembly
Assembly requires at least two people, and some steps may require three or more for safety and ease. Ensure you have ample space and a level surface for assembly.
Tools Required (Not Included):
- Ladder or step stool
- Drill (for anchoring, if applicable)
- Measuring tape
- Level
- Rubber mallet
Assembly Steps:
- Prepare the Site: Choose a flat, level area for your gazebo. Clear any debris or obstacles. Ensure adequate clearance around the gazebo for safe use and maintenance.
- Unpack and Organize: Carefully unpack all components and lay them out. Group similar parts and hardware together. Refer to the parts list to identify each component.
- Assemble the Posts and Beams: Connect the wooden posts to the main support beams according to the illustrated instructions. Ensure all connections are secure but do not fully tighten bolts until the frame is upright.
- Erect the Frame: With assistance, carefully lift and position the assembled frame. Ensure the frame is square and level before proceeding. Secure the base of the posts to the ground using appropriate anchors (not always included, check local building codes).
- Install Roof Supports: Attach the roof support beams and braces to the main frame. These provide the structure for the hardtop roof.
- Assemble the Hardtop Roof: Assemble the galvanized metal roof panels. This typically involves attaching the lower tier panels first, followed by the upper tier. Ensure proper overlap and sealing to prevent water leakage.

Image: Detail of the 2-tier hardtop roof, highlighting the ventilation design.
The 2-tier design facilitates ventilation, reducing heat buildup and increasing stability against wind.
- Install the Charging Socket: Integrate the 15A/1875W GFCI charging outlet into the designated location on a post. Ensure the wiring is correctly connected and the waterproof cover is properly installed and sealed. Test the outlet for functionality.

Image: Integrated GFCI charging outlet with waterproof cover and LED indicator.
This outlet provides convenient power for outdoor devices. The LED indicator confirms safe operation.
- Final Tightening: Once all components are in place and aligned, progressively tighten all bolts and screws. Do not overtighten.
- Inspect: Perform a final inspection to ensure all connections are secure, the gazebo is stable, and there are no loose parts.
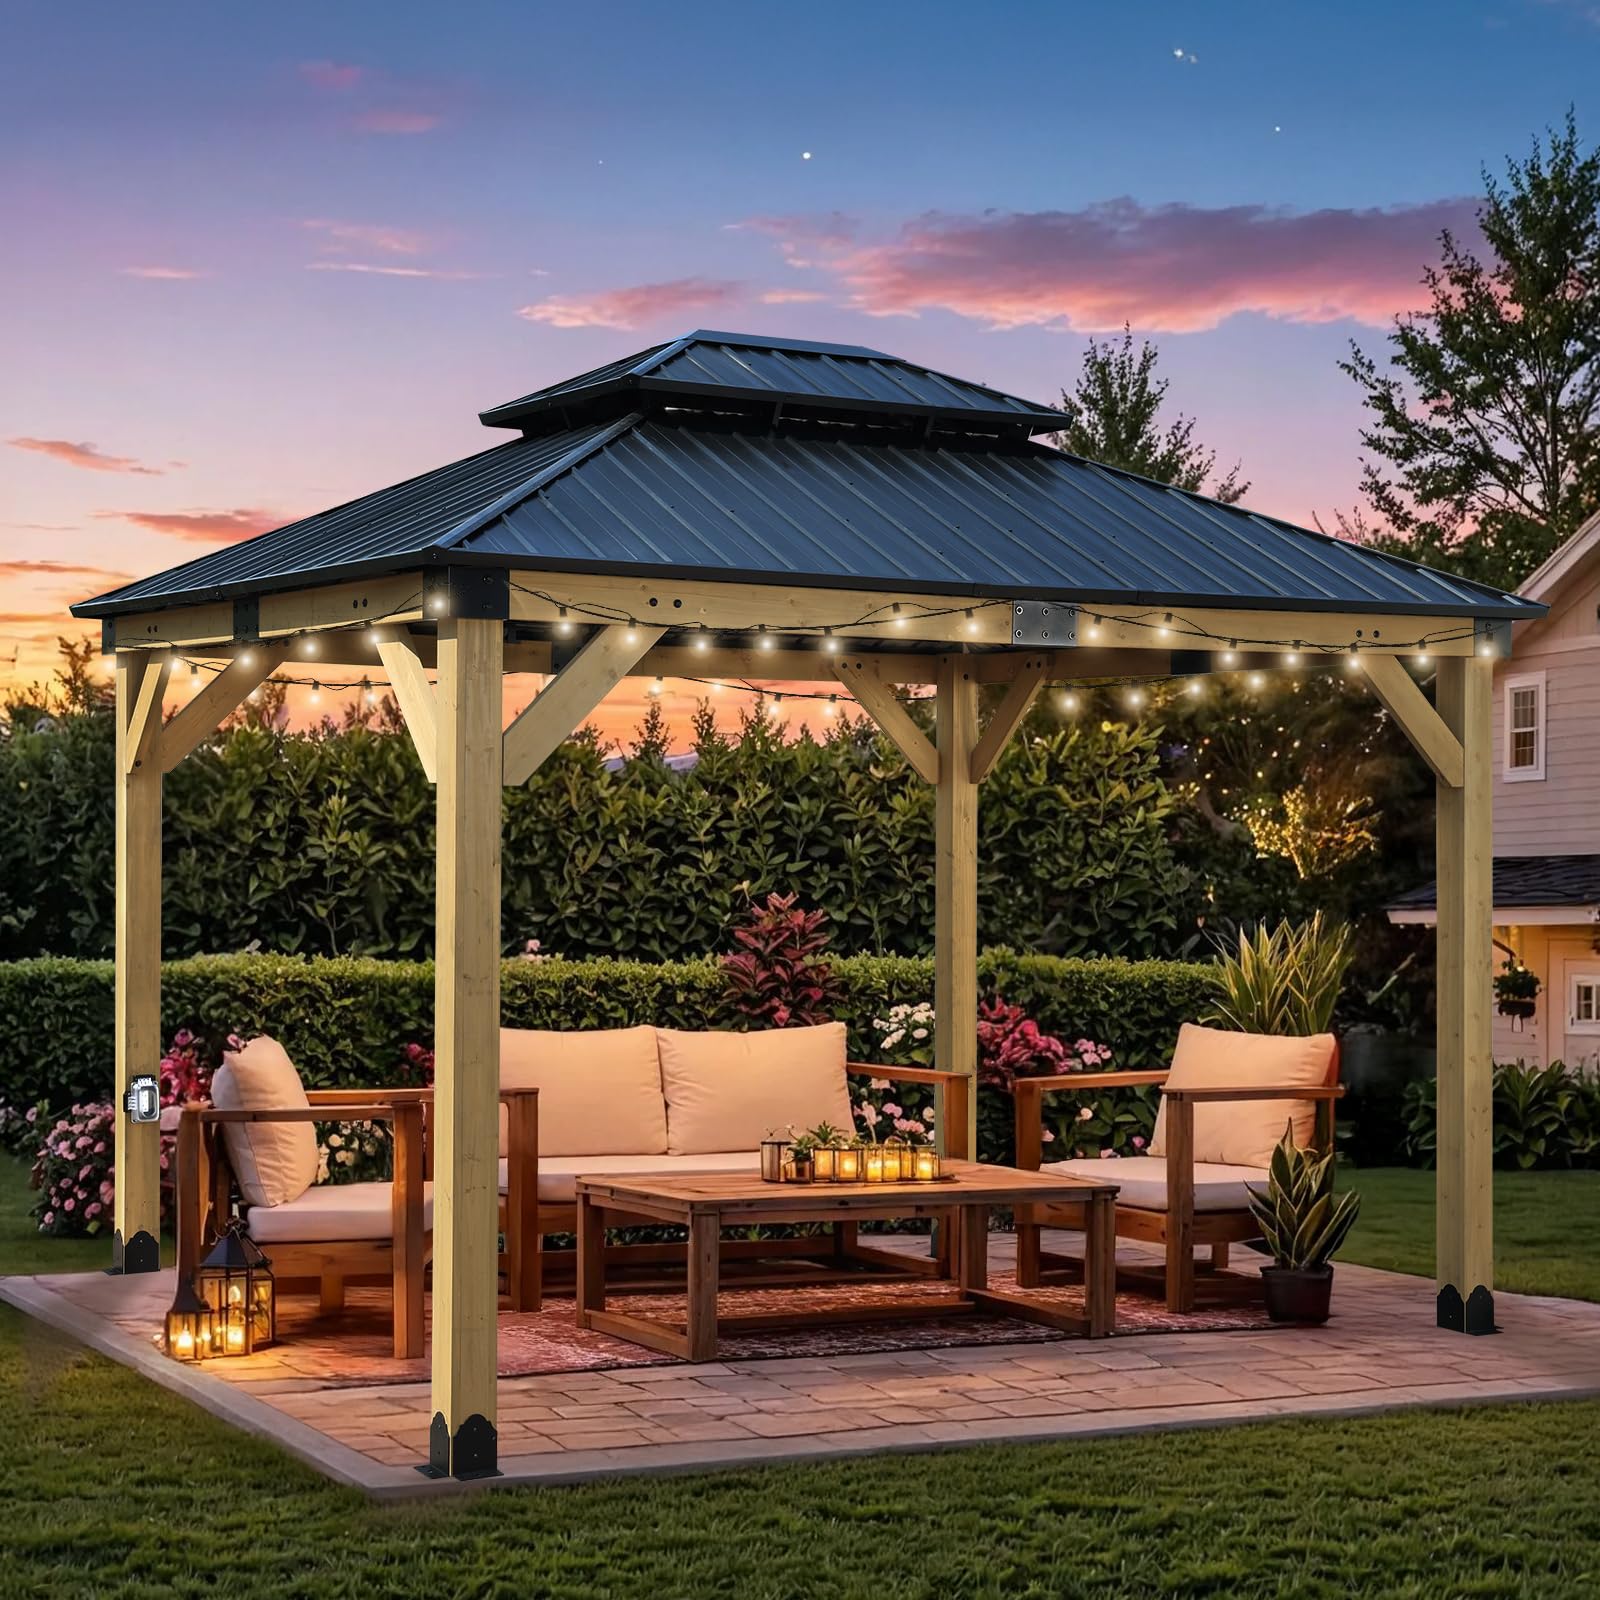
Image: Fully assembled Aoodor 10 x 12 ft Wooden Frame Gazebo.
This image shows the complete gazebo, ready for use, providing an outdoor living space.
Operating Instructions
Using the Charging Socket:
- Ensure the gazebo is properly grounded if required by local electrical codes.
- Open the waterproof cover of the GFCI outlet.
- Plug in your device. The LED indicator will light up to show power is available.
- After use, unplug your device and securely close the waterproof cover to protect the outlet from moisture and debris.
- The GFCI outlet features an automatic self-check function for safety. If the LED indicator is off, the outlet may not be receiving power or may have tripped. Press the "RESET" button if necessary.
General Use:
- The gazebo provides shade and protection from light rain.
- Avoid hanging heavy objects from the frame or roof.
- Do not use open flames or heating appliances directly under the gazebo roof.
Maintenance
Regular maintenance will extend the life and appearance of your Aoodor gazebo.
- Cleaning the Frame: Clean the wooden frame with a soft cloth and mild soap and water. Avoid harsh chemicals or abrasive cleaners that could damage the wood finish.
- Cleaning the Roof: The galvanized metal roof can be cleaned with water and a soft brush to remove leaves, dirt, and debris. Ensure proper drainage to prevent water accumulation.
- Wood Treatment: The spruce wood frame is coated with grey oil paint for moisture resistance. Periodically inspect the wood for signs of wear or fading. Reapply a suitable outdoor wood sealant or paint as needed to maintain protection, especially in harsh climates.
- Hardware Inspection: Annually, check all bolts, screws, and connections for tightness. Tighten any loose hardware to ensure structural integrity.
- Electrical Outlet: Keep the charging socket's waterproof cover clean and ensure it seals properly. Test the GFCI function monthly by pressing the "TEST" button, then "RESET".
- Winter Care: While the hardtop roof is designed to withstand heavy snow, it is advisable to remove excessive snow accumulation to prevent structural stress. In areas with extreme winter conditions, consider disassembling the roof panels or covering the gazebo for added protection.
Image: Gazebo demonstrating snow load resistance.
The gazebo is built to withstand significant snow loads (up to 2000 lbs) and winds (up to 55 mph), but regular inspection and care are recommended.
Troubleshooting
| Problem | Possible Cause | Solution |
|---|---|---|
| Gazebo feels unstable after assembly. | Loose hardware; uneven ground; improper anchoring. | Ensure all bolts and screws are fully tightened. Verify the ground is level. Use appropriate ground anchors for stability. |
| Roof panels do not align correctly. | Frame not square; panels installed out of sequence; manufacturing tolerance. | Double-check frame squareness and levelness. Review assembly instructions for correct panel sequence. Loosen adjacent panels, adjust, and retighten. |
| Water leakage from the roof. | Improperly sealed roof panels; damaged panels. | Ensure all roof panels are correctly overlapped and secured. Check for any gaps and apply silicone sealant if necessary. Inspect panels for damage and replace if found. |
| Charging socket not working. | GFCI tripped; no power to the outlet; faulty wiring. | Press the "RESET" button on the GFCI outlet. Check the main power supply. If issues persist, consult a qualified electrician. |
| Wood shows signs of weathering (cracking, fading). | Exposure to elements without sufficient protection. | Apply an outdoor wood sealant or paint to protect the wood from UV and moisture. Regular maintenance is key. |
Specifications
- Model: Aoodor 10 x 12 ft Wooden Frame Gazebo with 2-Tier Galvanized Metal Hardtop Roof
- Dimensions (L x W x H): 132.4" x 109.1" x 114.1" (10 x 12 ft nominal)
- Floor Area: 120 square feet
- Frame Material: Spruce Wood (coated with grey oil paint)
- Roof Material: Galvanized Metal (2-Tier)
- Item Weight: Approximately 306 pounds
- Water Resistance Level: Waterproof
- UV Protection: Yes
- Charging Socket: Integrated 15A/1875W GFCI outlet with waterproof cover
- Wind Resistance: Up to 55 mph
- Snow Load Capacity: Up to 2000 lbs

Image: Dimensional diagram of the Aoodor 10 x 12 ft Gazebo.
This diagram provides key measurements for planning your installation space.
Warranty and Customer Support
For warranty information, please refer to the documentation included with your purchase or contact Aoodor customer service directly. Aoodor is committed to providing quality products and support.
If you encounter any issues during assembly, operation, or maintenance, or if you require replacement parts, please contact Aoodor customer service. Have your model number and purchase date ready when contacting support.
Aoodor Customer Service:
- Visit the official Aoodor Store for contact information and FAQs: Aoodor Store on Amazon
- Refer to your purchase receipt for specific contact details.