1. Product Overview
The PARKVISION MTO1 is a versatile 2-in-1 device combining a high-definition bicycle camera with an integrated light. It is designed to record cycling footage clearly and enhance nighttime visibility for safety. This device supports loop recording, offers smartphone connectivity via Wi-Fi, and features a long-lasting battery.
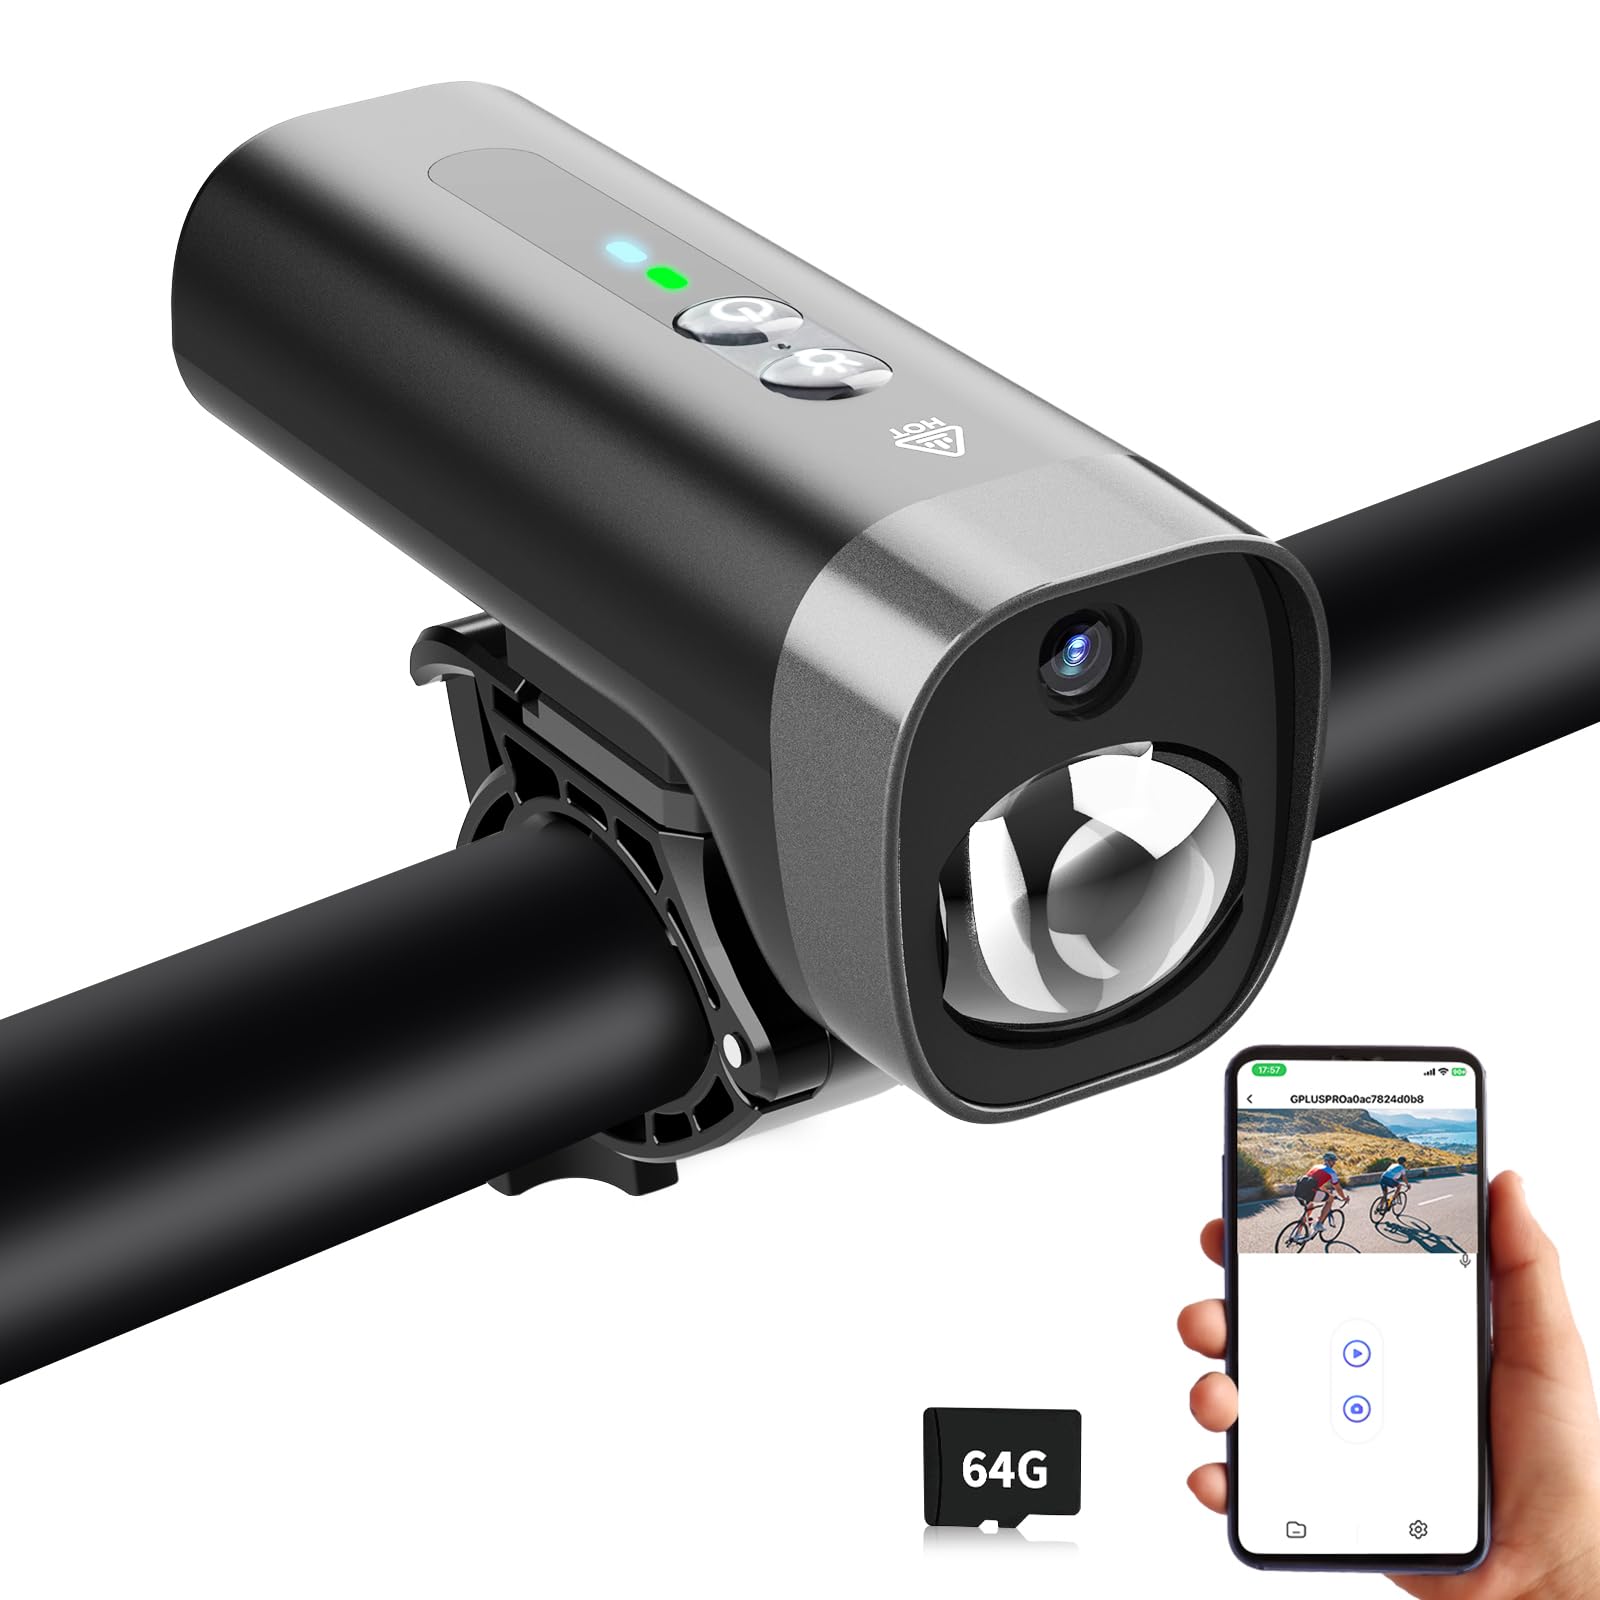
Figure 1: PARKVISION MTO1 Bike Camera with Lights

Figure 2: Key features of the PARKVISION MTO1 Bike Camera, including 1080P HD, Loop Recording, Adjustable Recording Duration, WiFi & APP Control, Time/Date Stamp, Audio Recording, and 2600mAh Battery.
2. What's in the Box
Upon opening the package, ensure all the following items are present:
- Camera Body
- Camera Mount
- USB Type-C Charging Cable
- User Manual
- 64GB SD Card (pre-installed or included separately)

Figure 3: Visual representation of the package contents, including the camera body, mount, charging cable, user manual, and 64GB SD card.
3. Safety Information
- Ensure the camera is securely mounted before each ride to prevent detachment.
- Do not look directly into the light beam, as it may cause temporary vision impairment.
- Keep the device away from extreme temperatures outside its operating range (-20℃ to 65℃).
- While the device is IPX5 waterproof, avoid submerging it in water.
- Use only the provided charging cable and compatible power sources.
4. Getting Started (Setup)
4.1. Mounting the Camera
The PARKVISION MTO1 is designed for minimalist installation on handlebars with a diameter of 1.9-2.8cm.
- Turn the handle to tighten the bracket onto your handlebar.
- Press the handle to secure the bracket firmly.
- Turn the camera body to attach it to the bracket by screwing it into the mount.
- Ensure installation is complete and secure.

Figure 4: Step-by-step guide for mounting the camera onto a bicycle handlebar.
Video 1: Demonstrates how to attach the Cycling Camera in 3 easy steps.
Video 2: A quick start guide showing 2 easy steps for installation.
4.2. Connecting to Smartphone (Viidure APP)
The camera features Wi-Fi connectivity for real-time control and footage management via the Viidure APP.
- Download the Viidure APP from your smartphone's app store.
- Power on the camera.
- Enable Wi-Fi on the camera (refer to the camera's buttons or manual for specific instructions).
- Connect your smartphone to the camera's Wi-Fi network (network name and password can be found in the user manual).
- Open the Viidure APP to view live footage, manage recordings, and customize settings.

Figure 5: The camera connected to a smartphone via Wi-Fi for real-time control and viewing.
Video 3: Instructions on how to connect the PARKVISION MTO1 Bike Camera to your smartphone.
5. Operating Instructions
5.1. Power On/Off
To power on the device, press and hold the power button located on the top. To power off, press and hold the power button again until the device shuts down.
5.2. Video Recording
The camera records in 1080P HD with a 110° wide-angle lens. It supports loop recording, automatically overwriting the oldest files when the memory card is full. Recording durations (1/2/3/5 minutes) can be preset via the Viidure APP (default: 2 minutes).
Figure 6: Illustrates the loop recording functionality with a 64GB card included, supporting up to 256GB.

Figure 7: Details the auto-loop recording feature with customizable durations and included 64GB TF card.

Figure 8: Compares 720P to Full HD 1080P, highlighting the smooth visuals and precise capture of the MTO1 camera.
5.3. Light Modes
The built-in 300-lumen light offers three modes for varying visibility needs:
- High Beam: For maximum illumination.
- Low Beam: For reduced brightness and extended battery life.
- Flashing: As a warning light to enhance visibility to others.
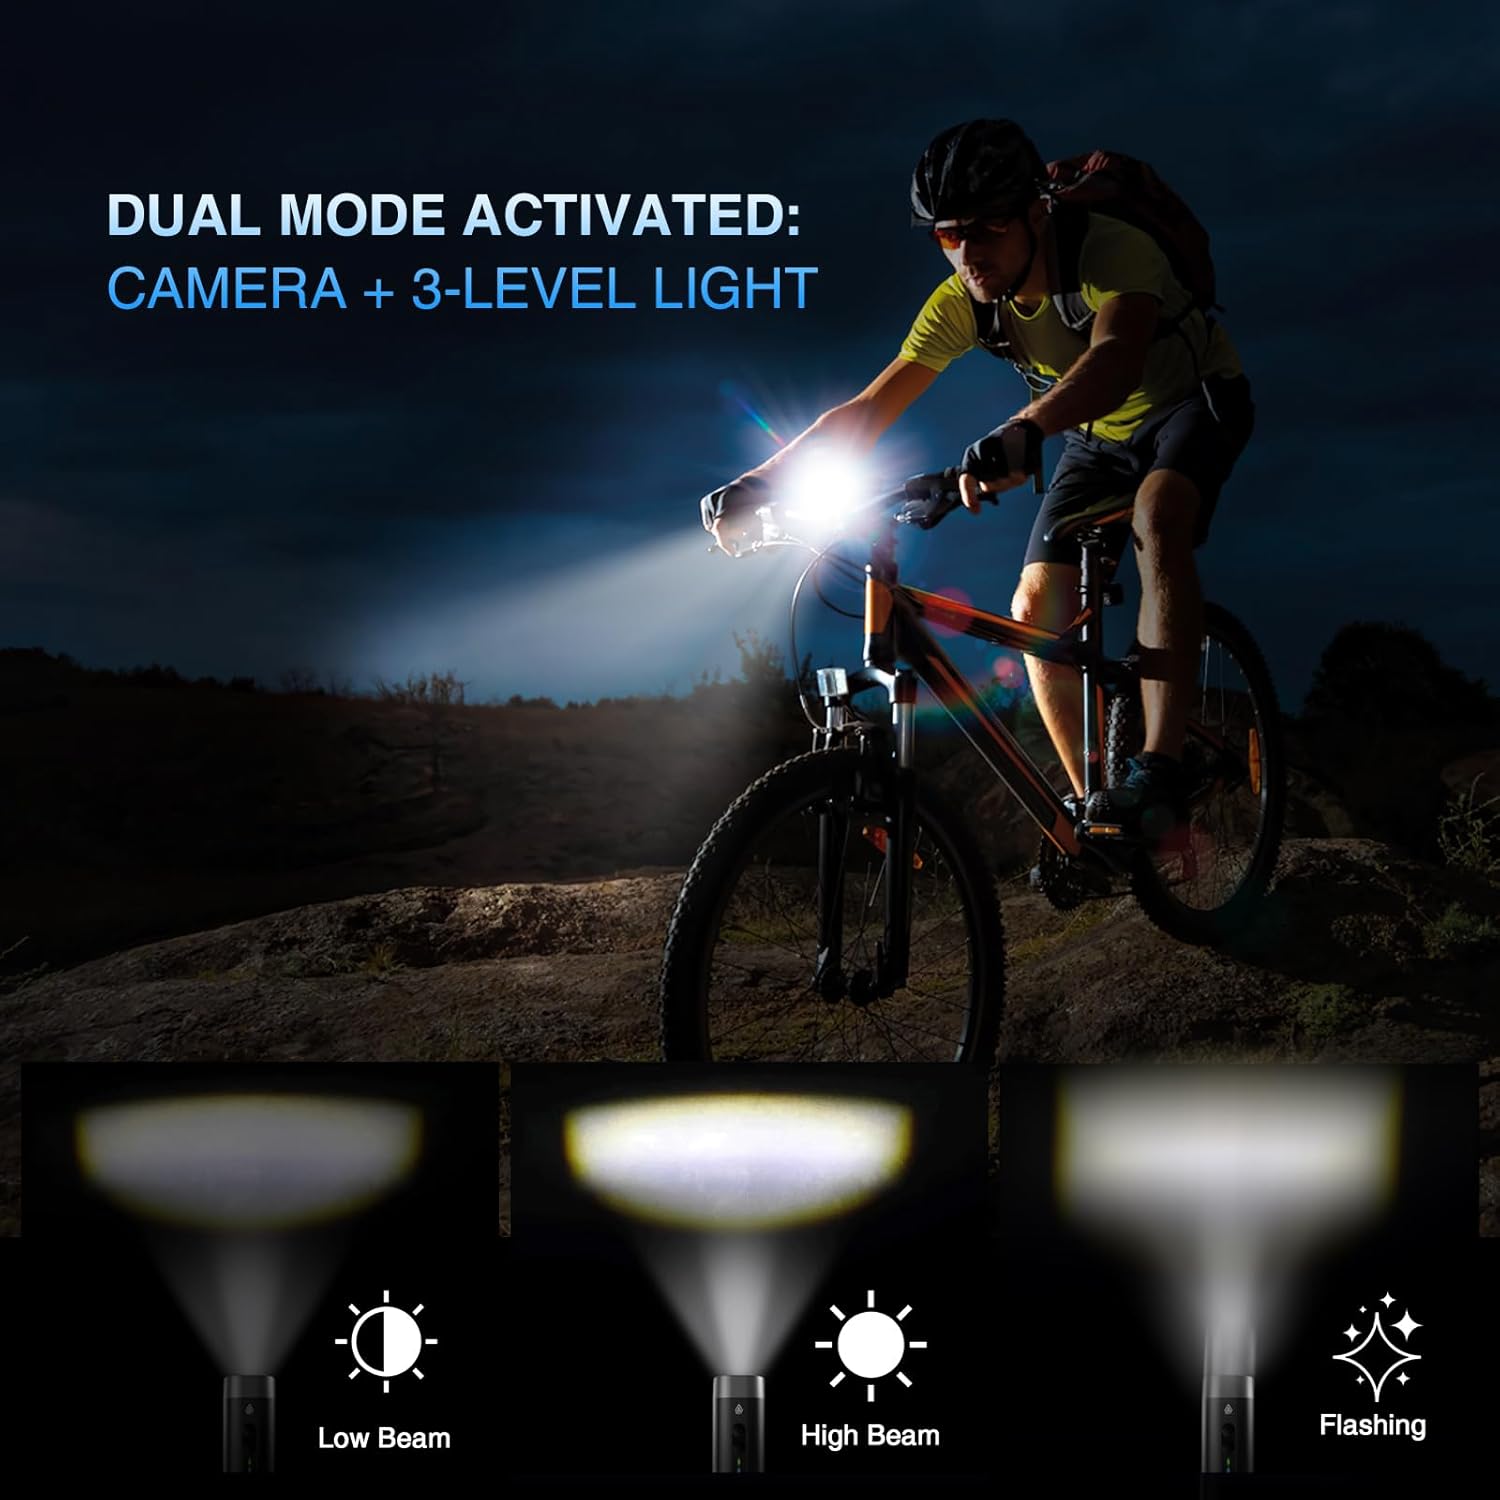
Figure 9: Demonstrates the three light modes: Low Beam, High Beam, and Flashing.

Figure 10: Shows the dual mode operation of the camera and 3-level light, enhancing safety during rides.
5.4. Battery Management
The 2600mAh battery provides extended operation:
- Up to 8 hours (video-only)
- 4-6 hours (light-only)
- 4 hours (dual mode)
A red charging indicator simplifies power management. The device supports Type-C charging and can be paired with a power bank for extended use.

Figure 11: Details the 2600mAh battery performance, offering up to 8 hours in standalone video mode and 4 hours in dual mode.
Figure 12: Illustrates the dual-mode rapid charging system with USB-C interface and power bank compatibility.
6. Maintenance
- Regularly clean the camera lens and light port with a soft, dry cloth.
- Ensure the Type-C port cover is securely closed to maintain IPX5 waterproofing.
- Store the device in a cool, dry place when not in use.
- Avoid dropping the device or subjecting it to strong impacts.
7. Troubleshooting
- Device not powering on: Ensure the battery is charged. Connect to a power source using the Type-C cable.
- Recording issues: Check if the SD card is properly inserted and has sufficient free space. Format the SD card if necessary (via APP settings).
- Wi-Fi connectivity problems: Ensure the camera's Wi-Fi is enabled and your smartphone is connected to the correct network. Restart both devices if issues persist.
- Poor video quality: Ensure the lens is clean and free from obstructions. Check the video resolution settings in the Viidure APP.
- Short battery life: Reduce light brightness or use video-only mode. Consider connecting a power bank for extended use.
8. Specifications
| Feature | Detail |
|---|---|
| Brand | PARKVISION |
| Model Name | MTO1 |
| Video Capture Resolution | 1080p |
| Connectivity Technology | Wi-Fi |
| Battery Capacity | 2600mAh |
| Light Output | 300 lumens (High/Low/Flashing modes) |
| Wide Angle Lens | 110° |
| Storage | 8-256GB Class 10+ high-speed TF cards (64GB included) |
| Waterproofing | IPX5 |
| Operating Temperature | -20℃ to 65℃ |
| Charging Port | Type-C |
| Dimensions | 13.4 × 12.6 × 5.3 cm |
| Item Weight | 9.9 ounces |


