Introduction
This manual provides essential information for the proper setup, operation, and maintenance of your KOORUI 24" 2K QHD Gaming Monitor (Model G2421V). Please read this manual thoroughly before using the product to ensure optimal performance and safety.
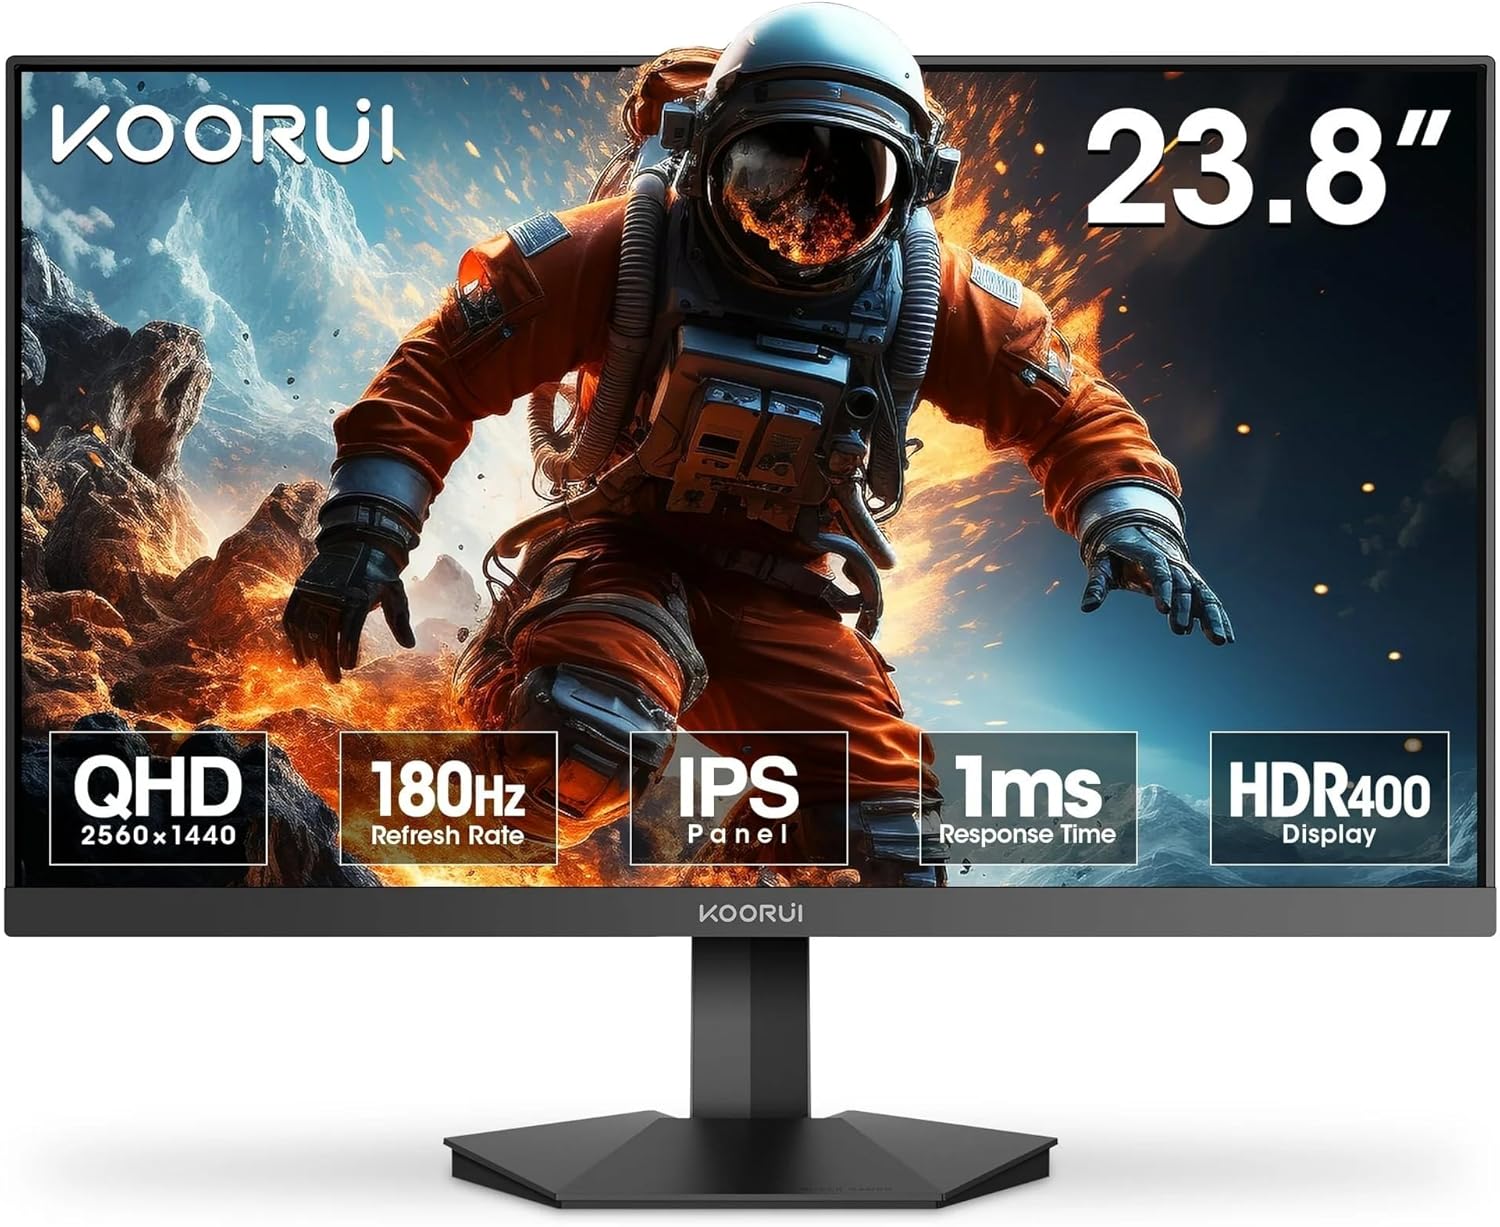
Image: The KOORUI G2421V monitor displaying a vibrant image of an astronaut, highlighting its QHD resolution, 180Hz refresh rate, IPS panel, 1ms response time, and HDR400 display capabilities.
Safety Information
- Ensure the monitor is placed on a stable, flat surface to prevent accidental falls.
- Do not block ventilation openings. Allow adequate space around the monitor for proper airflow.
- Use only the power adapter and cables provided by the manufacturer.
- Avoid exposing the monitor to extreme temperatures, humidity, or direct sunlight.
- Disconnect the power cord from the outlet before cleaning the monitor.
- Do not attempt to repair the monitor yourself. Refer all servicing to qualified personnel.
What's in the Box
Verify that all the following items are included in your package:
- KOORUI 24 inch Gaming Monitor (G2421V)
- DP Cable
- Power Cord
- User Manual
Setup
1. Assembling the Stand
- Carefully remove the monitor and stand components from the packaging.
- Attach the stand base to the stand neck, securing it with the provided screw.
- Connect the assembled stand to the back of the monitor until it clicks into place or is secured with screws (refer to specific model instructions if screws are required).
VESA Mounting: The monitor supports 75 x 75 mm VESA mounting. If using a VESA mount, remove the stand and attach the monitor to your VESA-compatible arm or wall mount.
2. Connecting Cables
- Power: Connect the power cord to the monitor's power input, then plug the other end into a power outlet.
- Video Input: Connect one end of the provided DP (DisplayPort) cable to the monitor's DP input and the other end to the DP output on your computer or gaming console. Alternatively, use an HDMI cable if your device supports it. The monitor supports up to 180Hz refresh rate via HDMI.
3. Initial Power-On
Press the power button located on the monitor. The power indicator light will illuminate, and the display will turn on. If no image appears, ensure all cables are securely connected and your input source is active.

Image: The KOORUI G2421V monitor demonstrating its wide viewing angles (178°) and flexible tilt adjustment range (-5° to 20°), allowing users to find an optimal viewing position.
Operating
1. On-Screen Display (OSD) Menu
The OSD menu allows you to adjust various monitor settings. Use the buttons on the back or bottom of the monitor to navigate and select options.
- Navigation: Typically, a joystick or a set of buttons (Menu, Up, Down, Enter, Exit) are used.
- Common Settings: Picture (Brightness, Contrast, Sharpness), Color (Color Temperature, Gamma), Input Source, OSD Settings, Gaming (Adaptive Sync, Response Time).
2. Picture Settings
- Brightness: Adjusts the overall luminance of the screen.
- Contrast: Controls the difference between the brightest and darkest areas of the image.
- Color Temperature: Selects preset color temperatures (e.g., Warm, Cool, User) or allows manual adjustment of RGB values.
3. Input Selection
If you have multiple devices connected, use the OSD menu or a dedicated input button to switch between HDMI and DP inputs.
4. Refresh Rate and Response Time
This monitor supports a 180Hz refresh rate and 1ms response time for smooth motion. Ensure your graphics card settings are configured to utilize the maximum refresh rate.

Image: A visual comparison illustrating the difference between 180Hz refresh rate with 1ms GTG response time and 60Hz with 5ms, emphasizing the smoother and faster visual experience provided by the KOORUI G2421V monitor.
5. Eye Care Features
The monitor includes flicker-free technology and a blue light filter to reduce eye strain during prolonged use. These settings can typically be adjusted within the OSD menu.

Image: The KOORUI G2421V monitor showcasing its QHD 2560x1440 resolution for highly detailed visuals and the inclusion of an Eye Care Mode to enhance user comfort during extended viewing.
6. Adaptive Sync
Adaptive Sync technology synchronizes the monitor's refresh rate with your graphics card's frame rate, eliminating screen tearing and stuttering for a smoother gaming experience. Enable this feature in the OSD menu and ensure it is also enabled in your graphics card control panel.

Image: A dynamic visual illustrating the effect of Adaptive Sync on the KOORUI G2421V monitor, showing a clear, smooth image on one side and a torn, stuttering image on the other, highlighting the benefit of the technology.
Maintenance
1. Cleaning the Screen
- Turn off the monitor and unplug the power cord.
- Gently wipe the screen with a soft, lint-free cloth. For stubborn marks, lightly dampen the cloth with water or a specialized screen cleaner (do not spray directly onto the screen).
- Avoid using abrasive cleaners, alcohol, or ammonia-based solutions.
2. General Care
- Keep the monitor away from direct heat sources and excessive dust.
- Do not place heavy objects on the monitor or its cables.
Troubleshooting
| Problem | Possible Solution |
|---|---|
| No image on screen |
|
| Image is blurry or distorted |
|
| Screen flickering |
|
| No sound (if monitor has speakers/audio out) |
|
Specifications
| Feature | Detail |
|---|---|
| Model Number | G2421V |
| Screen Size | 24 Inches |
| Resolution | 2560 x 1440 (QHD) |
| Aspect Ratio | 16:9 |
| Refresh Rate | 180Hz (via HDMI) |
| Response Time | 1ms (GTG) |
| Panel Type | IPS |
| Brightness | 350 Candela |
| VESA Mounting | 75 x 75 mm |
| Tilt Adjustment | -5° to 20° |
| Product Dimensions | 8.42 x 21.26 x 20.32 inches |
| Item Weight | 15.4 pounds |
Warranty and Support
This KOORUI monitor is backed by a 3-year warranty, providing assurance for your purchase. For technical support, warranty claims, or further assistance, please visit the official KOORUI store or contact their customer service.
Official KOORUI Store: Visit KOORUI Store on Amazon