1. Introduction
This manual provides detailed instructions for the installation, operation, and maintenance of your D3LX0Z1 CAMGEET 1001 10-Port HDMI KVM Switch. This device allows you to control up to 10 computers from a single console, consisting of one HDMI monitor, a keyboard, a mouse, and other USB 3.0 devices. It features EDID simulation for stable video output and audio support.
2. Key Features
- Control up to 10 computers with one set of keyboard, mouse, and monitor.
- HDMI 2.0 compatible, supporting resolutions up to 4K.
- USB 3.0 ports for high-speed data transfer and peripheral sharing.
- EDID simulation to maintain display settings and prevent resolution changes.
- Audio input/output for integrated sound.
- Multiple switching methods: front panel buttons, wired remote, keyboard hotkeys.
- Supports various operating systems.
3. Product Overview
Front and Rear Panel Layout
Familiarize yourself with the ports and indicators on your KVM switch.

Image Description: This image displays the D3LX0Z1 CAMGEET 1001 10-Port HDMI KVM Switch from a slightly elevated front-right angle. The top panel shows the "10 PORT HD KVM SWITCH" label, an LED display for the active port, and buttons for port selection (1-10). The front panel includes an ON/OFF switch, a wired remote port, an audio output, and a USB 3.0 port. The rear panel features ten sets of HDMI input ports (HD), USB 3.0 input ports (USB 3.0), and PC input ports (PC 1-10), along with a DC 12V power input and an HDMI output for the monitor. A separate wired remote control with 10 numbered buttons is also shown in the foreground.
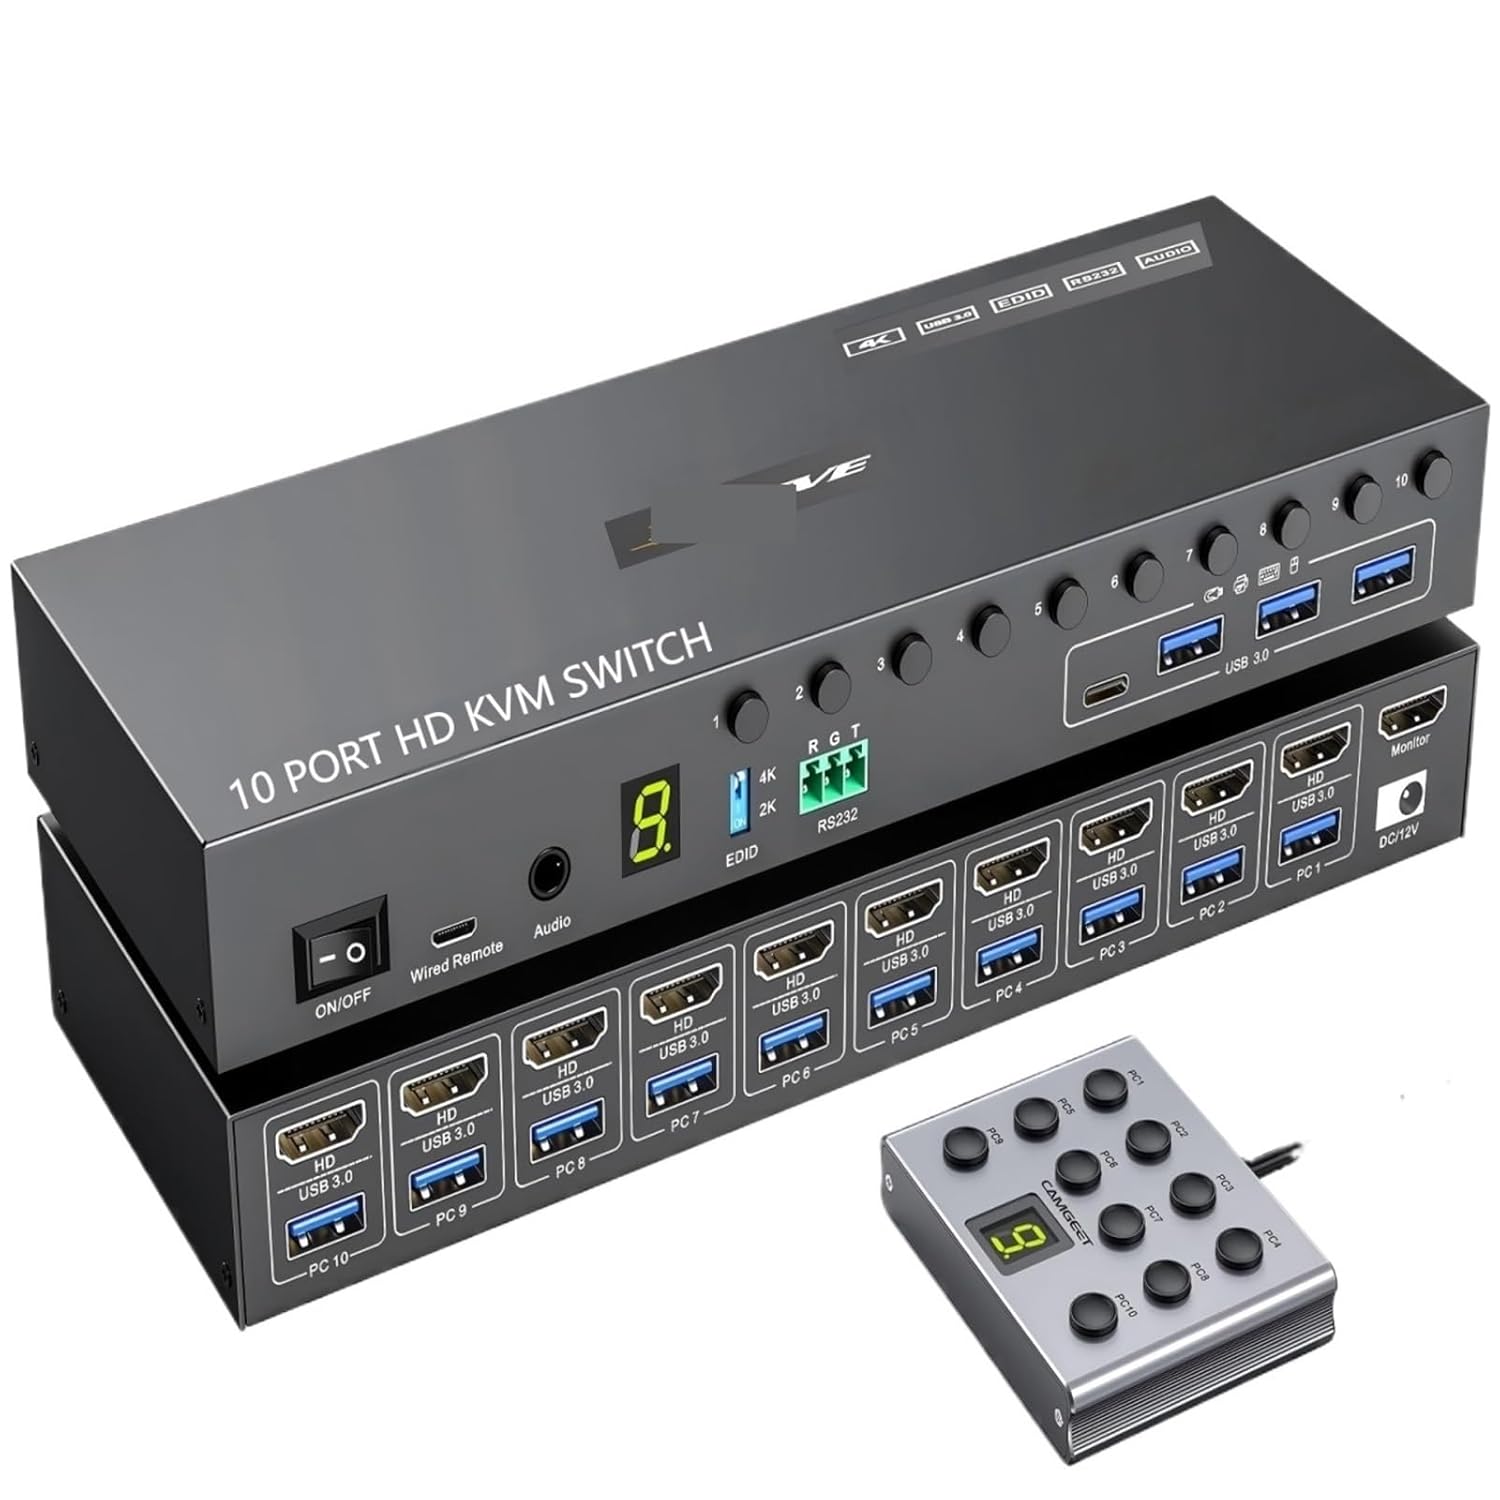
Image Description: This image presents another view of the D3LX0Z1 CAMGEET 1001 10-Port HDMI KVM Switch, similar to the first but with a slightly different perspective. It highlights the various input and output ports, including the ten HDMI and USB 3.0 input pairs for connecting up to ten computers, the single HDMI output for a monitor, and the USB 3.0 ports for shared peripherals. The front panel controls and indicators are clearly visible, along with the wired remote control.

Image Description: This image shows two D3LX0Z1 CAMGEET 1001 10-Port HDMI KVM Switches positioned vertically, side-by-side, emphasizing their compact design. The front panel of one unit is visible, displaying the ON/OFF switch, wired remote port, audio output, LED display, and port selection buttons. The side of the other unit shows the HDMI and USB 3.0 input ports for multiple PCs, along with the HDMI output and DC 12V power input. Labels for 4K, EDID, RS232, and Audio are also visible on the side.
4. Setup Instructions
Step 1: Power Off All Devices
Before beginning installation, ensure all computers and the monitor are powered off and unplugged from their power sources.
Step 2: Connect Monitor
Connect your HDMI monitor to the "Monitor" HDMI output port on the KVM switch.
Step 3: Connect Keyboard and Mouse
Connect your USB keyboard and mouse to the dedicated USB 3.0 ports on the front or rear panel of the KVM switch.
Step 4: Connect Computers
For each computer (up to 10) you wish to connect:
- Connect an HDMI cable from the computer's HDMI output to an "HD" input port (e.g., PC1 HD) on the KVM switch.
- Connect a USB 3.0 cable from the computer's USB port to the corresponding "USB 3.0" input port (e.g., PC1 USB 3.0) on the KVM switch.
- If using audio, connect an audio cable from the computer's audio output to the corresponding "Audio" input on the KVM switch.
Step 5: Connect Power Adapter
Plug the provided 12V DC power adapter into the "DC 12V" port on the KVM switch, then plug the adapter into a power outlet.
Step 6: Power On
Power on the KVM switch using the ON/OFF switch. Then, power on your monitor and all connected computers.
5. Operating Instructions
Switching Between Computers
The KVM switch offers several methods to switch between connected computers:
- Front Panel Buttons: Press the numbered buttons (1-10) on the front panel to directly select the desired computer. The LED display will indicate the active port.
- Wired Remote Control: Use the wired remote control to select the desired computer by pressing its corresponding numbered button.
- Keyboard Hotkeys: Press the `Scroll Lock` key twice quickly, then press the number corresponding to the desired PC (e.g., `Scroll Lock`, `Scroll Lock`, `1` for PC1).
Audio Switching
Audio output will automatically switch to the currently selected computer.
USB 3.0 Device Sharing
Any USB 3.0 devices connected to the KVM switch's shared USB ports will be accessible by the currently selected computer.
6. Troubleshooting
No Display on Monitor
- Ensure all HDMI cables are securely connected between the KVM switch, monitor, and computers.
- Verify the monitor is powered on and set to the correct input source.
- Check if the KVM switch is powered on and the correct PC port is selected.
- Try restarting the KVM switch and the connected computers.
Keyboard or Mouse Not Responding
- Ensure the keyboard and mouse are connected to the dedicated USB ports on the KVM switch.
- Verify the USB cables from the computers to the KVM switch are securely connected.
- Try connecting the keyboard/mouse directly to a computer to confirm their functionality.
- Restart the KVM switch.
Audio Issues
- Check all audio cable connections between computers, KVM switch, and speakers/headphones.
- Ensure the audio output on the selected computer is enabled and the volume is turned up.
- Verify the KVM switch's audio output is connected to your speakers/headphones.
EDID Simulation Issues
The KVM switch features EDID simulation to maintain display settings. If you experience display resolution issues, ensure the KVM switch is powered on before the connected computers.
7. Specifications
| Feature | Detail |
|---|---|
| Model | CAMGEET 1001 |
| Brand | D3LX0Z1 |
| Input Ports | 10 x HDMI, 10 x USB 3.0, 10 x Audio |
| Output Ports | 1 x HDMI (Monitor), 4 x USB 3.0 (Shared), 1 x Audio |
| Video Resolution | Up to 4K |
| USB Standard | USB 3.0 |
| Switching Methods | Front Panel Buttons, Wired Remote, Keyboard Hotkeys |
| EDID Simulation | Yes |
| Power Supply | DC 12V |
| Certifications | CE, FCC, RoHS |
| Package Dimensions | 0.39 x 0.39 x 0.39 inches; 1.76 ounces |
8. Maintenance
Cleaning
Use a soft, dry cloth to clean the exterior of the KVM switch. Do not use liquid cleaners or aerosols, as they may damage the device.
Storage
Store the device in a cool, dry place away from direct sunlight and extreme temperatures when not in use for extended periods.
9. Warranty and Support
For warranty information and technical support, please refer to the contact details provided with your purchase or visit the official D3LX0Z1 website. Keep your proof of purchase for warranty claims.


