
1. Product Overview
The AutoSky 4K Dash Cam Pro is a dual-camera system designed to record vehicle activity. It features a front camera capable of 4K resolution and a rear camera with 1080P resolution. Key functionalities include built-in GPS for route tracking, WiFi for app control, a G-Sensor for emergency video locking, night vision capabilities, continuous loop recording, and a 24/7 parking mode. A 64GB SD card is included for immediate use.
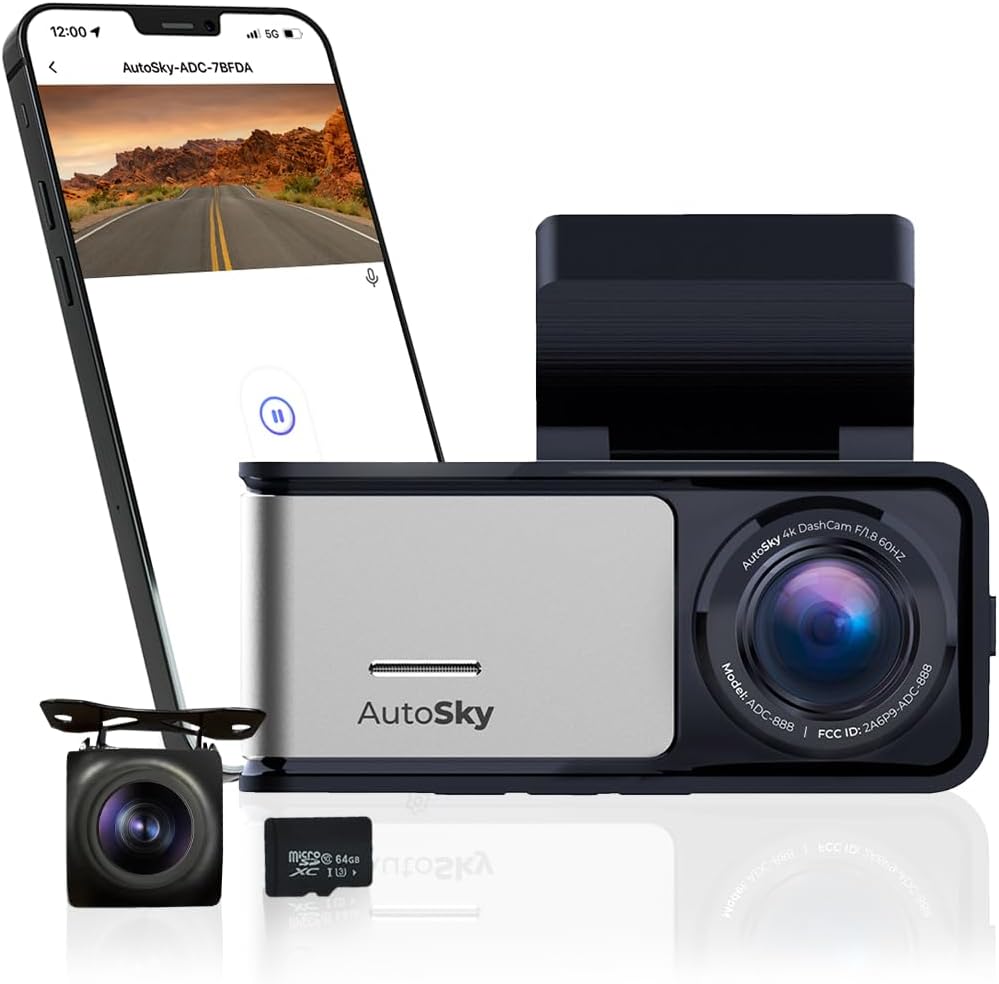
Image 1.1: AutoSky 4K Dash Cam Pro components including the main unit, rear camera, and included SD card, shown alongside a smartphone displaying the companion app interface.
2. Package Contents
Verify that all items are present in the package:
- AutoSky 4K Dash Camera (Front Unit)
- 1080P Rear Camera
- Suction Mount
- Car Charger (Power Cable)
- Cable Clips
- 64GB Micro SD Card
- User Manual

Image 2.1: All accessories included in the AutoSky 4K Dash Cam Pro package, laid out for inspection.
3. Setup and Installation
3.1 Inserting the SD Card
- Ensure the dash cam is powered off.
- Locate the Micro SD card slot on the dash cam.
- Insert the included 64GB Micro SD card with the gold contacts facing the back of the camera until it clicks into place.
- For optimal performance, format the SD card within the camera's settings menu upon first use and periodically thereafter.
3.2 Front Camera Installation
- Clean the windshield area where the dash cam will be mounted to ensure proper adhesion.
- Attach the suction mount to the front camera.
- Mount the camera on the windshield, ideally behind the rearview mirror, to avoid obstructing your view. Adjust the lens angle to capture the road ahead clearly.
- Connect the car charger to the dash cam's power input and plug the other end into your vehicle's 12V power outlet.
- Route the power cable neatly along the windshield edge and dashboard using the provided cable clips.

Image 3.1: The front dash camera mounted on a vehicle's windshield, capturing the road view.
3.3 Rear Camera Installation
- Connect the rear camera cable to the main dash cam unit.
- Route the rear camera cable from the front unit to the rear of the vehicle. This typically involves tucking the cable under the headliner, along the A-pillar, and then along the side panels to the rear windshield.
- Mount the rear camera on the rear windshield, ensuring a clear view of the road behind.
- Adjust the rear camera's angle for optimal coverage.
4. Operation
4.1 Powering On/Off
- Automatic: The dash cam will automatically power on and begin recording when your vehicle's ignition is turned on (and power is supplied to the 12V outlet). It will power off automatically when the ignition is turned off.
- Manual: Press and hold the power button on the dash cam to manually turn it on or off.
4.2 Recording Modes
- Loop Recording: The dash cam continuously records video in short segments (e.g., 1, 3, or 5 minutes). When the SD card is full, the oldest unlocked files are overwritten by new recordings.
- G-Sensor (Emergency Recording): In the event of a sudden impact or collision, the built-in G-Sensor detects the event and automatically locks the current video segment, preventing it from being overwritten by loop recording.
- Parking Mode: When enabled, the dash cam will automatically start recording if it detects motion or impact while your vehicle is parked and the ignition is off. This feature requires a continuous power supply (e.g., hardwire kit, sold separately, or a dedicated power bank).

Image 4.1: Visual representation of the dash cam's 24/7 parking surveillance capability.
4.3 Night Vision
The dash cam is equipped with night vision technology to enhance video clarity in low-light conditions, ensuring details are captured even at night.

Image 4.2: Example of 4K clear image quality at night, highlighting license plate readability.
4.4 GPS Functionality
The built-in GPS module records your vehicle's speed and location data. This information can be viewed during video playback using the dedicated mobile application.
4.5 WiFi and App Control
The dash cam features integrated WiFi, allowing you to connect it to your smartphone via the Vidure Dash Cam App. This app enables you to:
- View live footage from both cameras.
- Download recorded videos directly to your phone.
- Adjust camera settings.
- Track routes with GPS data.
Download the Vidure Dash Cam App from your smartphone's app store (iOS App Store or Google Play Store).
5. Maintenance
5.1 SD Card Management
- Formatting: It is recommended to format the Micro SD card every 2-4 weeks to maintain optimal recording performance and prevent data corruption. This can be done through the camera's settings menu.
- Replacement: If the SD card shows signs of degradation (e.g., recording errors, corrupted files), replace it with a new high-endurance Class 10 or U3 Micro SD card (up to 128GB supported).
5.2 Cleaning the Camera
- Use a soft, dry cloth to clean the camera lens and body.
- Avoid using abrasive cleaners or solvents, as these can damage the lens or casing.
6. Troubleshooting
| Issue | Possible Solution |
|---|---|
| Camera does not power on. | Check the power cable connection to the camera and the 12V outlet. Ensure the vehicle's ignition is on. Test the 12V outlet with another device. |
| Camera stops recording or shows an SD card error. | Format the SD card via the camera settings. Ensure the SD card is a high-endurance Class 10 or U3 card. Replace the SD card if the issue persists. |
| Video footage is blurry or unclear. | Clean the camera lens. Ensure the protective film has been removed from the lens. Check if the camera is securely mounted and not vibrating. |
| WiFi connection issues with the app. | Ensure WiFi is enabled on the dash cam and your smartphone. Be within close proximity to the dash cam. Restart both the camera and your phone. Reinstall the app if necessary. |
| G-Sensor is too sensitive or not sensitive enough. | Adjust the G-Sensor sensitivity setting in the camera's menu. Lower sensitivity for fewer false triggers, higher for more detection. |
7. Specifications
| Feature | Detail |
|---|---|
| Model Number | ADC-888 |
| Front Camera Resolution | 4K Ultra HD |
| Rear Camera Resolution | 1080P |
| Connectivity | Wi-Fi, GPS |
| Special Features | G-Sensor, Night Vision, Loop Recording, Parking Mode, App Control |
| Included Storage | 64GB Micro SD Card |
| Field of View | 140 Degrees |
| Mounting Type | Dashboard Mount (Suction Cup) |
| Product Dimensions | 1.5 x 3.75 x 1.75 inches |
| Item Weight | 12.7 ounces |
8. Warranty and Support
8.1 Warranty Information
AutoSky products are covered by a limited warranty against defects in materials and workmanship. Please refer to the warranty card included in your package or visit the official AutoSky website for detailed warranty terms and conditions.
8.2 Customer Support
For technical assistance, troubleshooting, or any questions regarding your AutoSky 4K Dash Cam Pro, please contact AutoSky customer support. Contact information can typically be found on the AutoSky website or in the product packaging.