
Introduction
This manual provides detailed instructions for the assembly, operation, and maintenance of your HAPPYGRILL Wooden Garden Arch. This garden arch, measuring 55" x 24" x 85" (L x W x H), is designed to support climbing plants and serve as an elegant decorative feature for various outdoor settings, including gardens, patios, and special events.

Image: The HAPPYGRILL Wooden Garden Arch, showcasing its design and potential for decoration with climbing plants.
Safety Information
Please read and understand all safety warnings before assembly and use. Failure to follow these instructions may result in injury or damage to the product.
- Always insert the wooden legs into the soil carefully to ensure stability and prevent injury.
- Be cautious of sharp edges and points when handling the product components during assembly.
- Do not exceed the structural load capacity of the product when decorating with plants, hanging baskets, or other items. Overloading can compromise stability and cause damage.
- Ensure the arch is placed on a level and stable surface. If placing on soft ground, consider additional anchoring for windy conditions.
Package Contents
Verify that all components are present before beginning assembly.
- 1 x Wooden Garden Arch (all necessary wooden components)
- 1 x Hardware Pack (screws, metal connectors, etc.)
- 1 x User’s Manual (this document)
Setup and Assembly
Assembly is designed to be straightforward. It is recommended to have two people for easier and safer installation. A Phillips head screwdriver and possibly a rubber mallet may be required (not included).
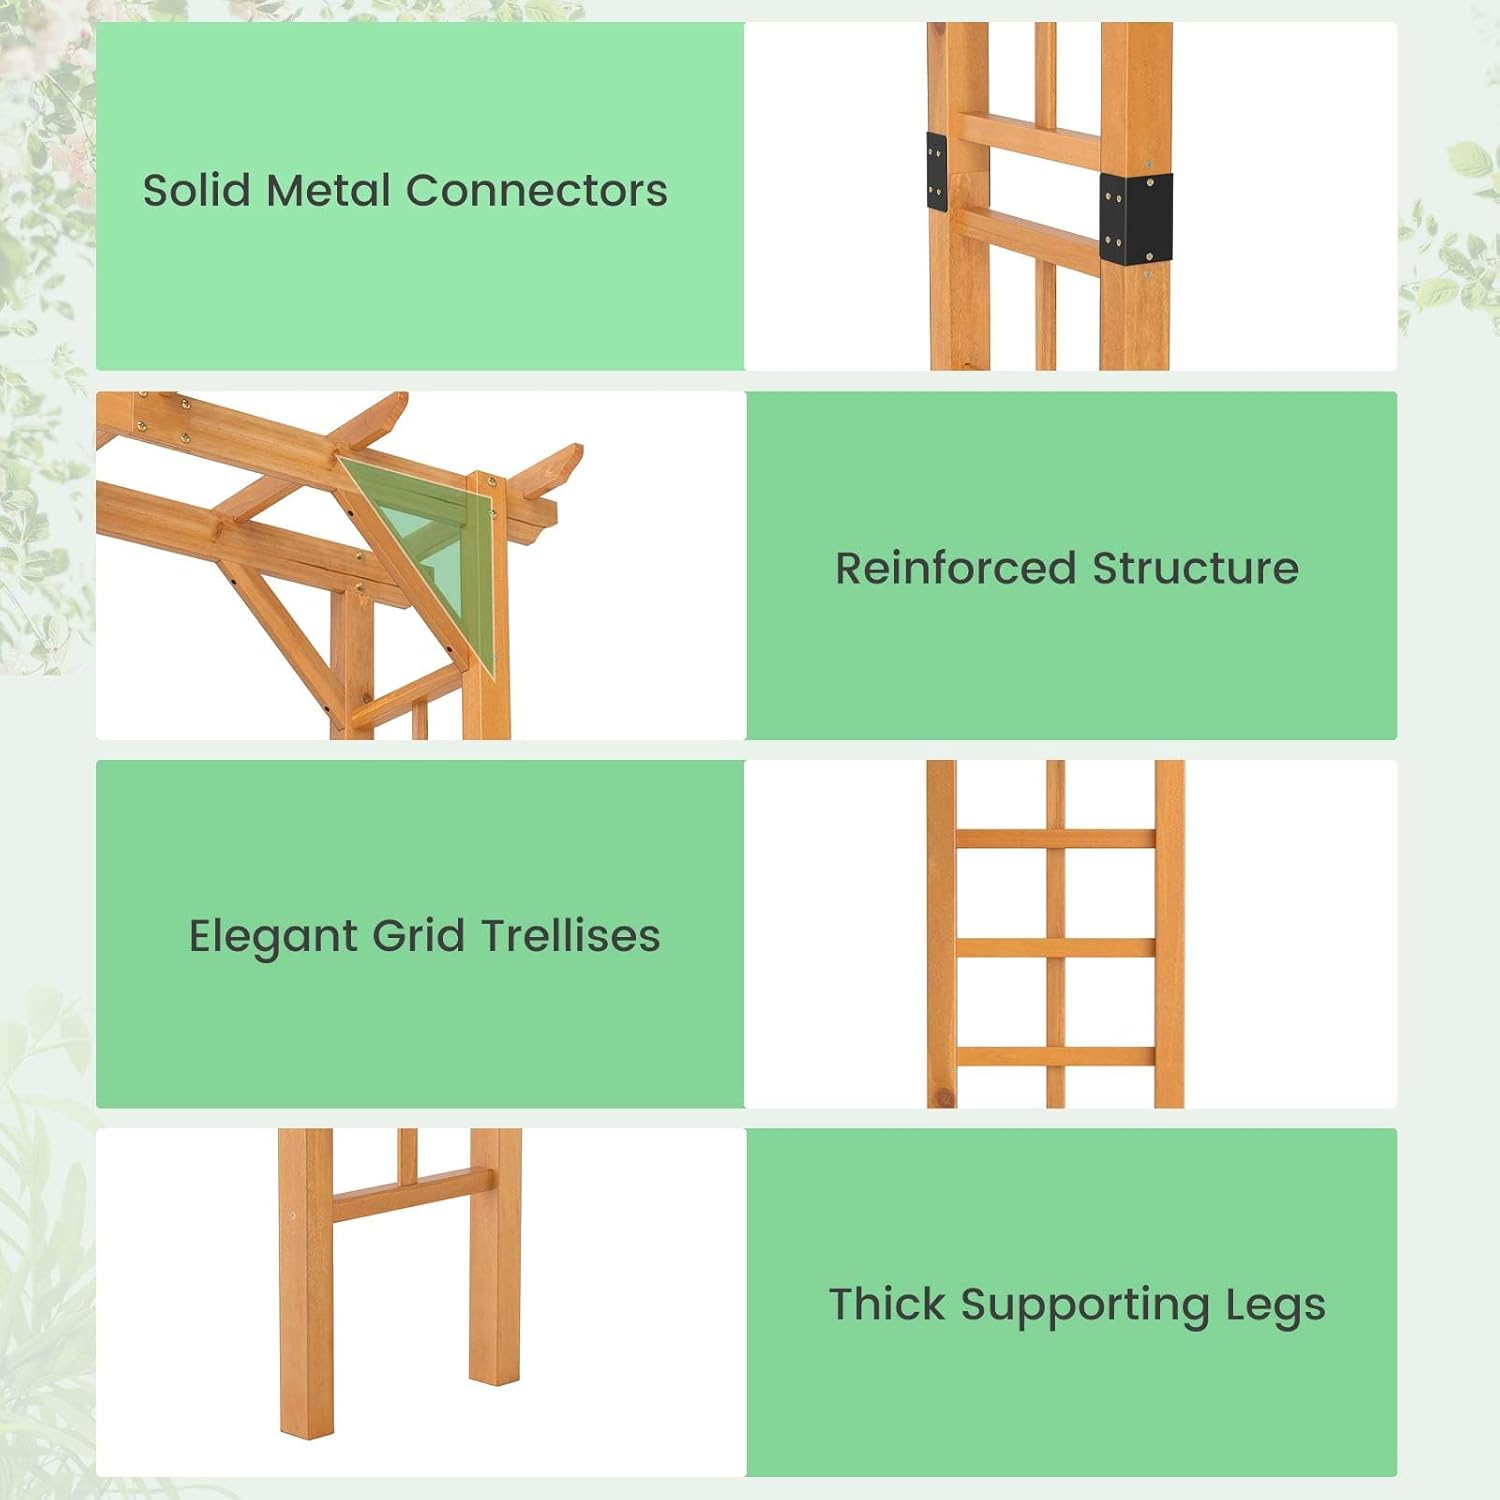
Image: Product dimensions, including height, width, and depth, for planning placement.
Assembly Steps:
- Unpack and Identify Components: Carefully remove all parts from the packaging. Lay them out and compare them against the parts list (if provided separately, or refer to diagrams). Identify the main vertical posts, horizontal crossbeams, roof slats, and side trellis pieces.
- Attach Side Trellises: Secure the side trellis panels to the vertical posts using the provided screws and metal connectors. Ensure the panels are oriented correctly, with the grid facing outwards.
- Assemble the Top Structure: Connect the horizontal crossbeams and roof slats to form the top section of the arch. Use the designated screws and ensure all connections are tight.
- Connect Top to Sides: With assistance, carefully lift the assembled top structure and align it with the top of the vertical side posts. Secure these connections using the remaining screws and metal connectors. Ensure all joints are firm and stable.
- Position and Anchor: Once fully assembled, carefully move the arch to its desired location. For optimal stability, especially in outdoor environments, insert the thick supporting legs into the soil. The depth of insertion should be sufficient to prevent tipping.

Image: Detailed view of key structural components, including metal connectors and trellis design.
Operating and Usage
The HAPPYGRILL Wooden Garden Arch is versatile and can be used in various ways to enhance your outdoor space.
Supporting Climbing Plants:
The integrated side trellises and flat/arched roof provide ample support for climbing plants such as roses, vines, morning glories, and ivy. Guide young plants along the trellis grids to encourage upward growth and create a lush, green entryway or focal point.

Image: The arch providing support for climbing plants and space for hanging decorations.
Decoration Options:
Beyond plants, the arch can be adorned with various decorative items to suit different occasions or personal aesthetics. Consider:
- Hanging Baskets: Small flower baskets or lanterns can be hung from the roof structure.
- Lights: String lights or LED garlands can be woven around the arch for evening ambiance.
- Fabrics and Ribbons: For events like weddings or parties, drape wedding tulle, ribbons, or other fabrics.
- Balloons and Wreaths: Attach balloons, wreaths, or other festive decorations.

Image: Various decoration possibilities for the garden arch, including climbing plants and festive elements.

Image: The arch serving as an elegant backdrop for a wedding ceremony.
Maintenance
Proper maintenance will extend the lifespan and preserve the appearance of your wooden garden arch.
- Cleaning: Regularly wipe down the wooden surfaces with a damp cloth to remove dirt, dust, and debris. Avoid harsh chemicals that could damage the wood finish.
- Protective Coating: The wood surface is coated with protective painting. To maintain its longevity and resistance to weather elements, inspect the coating periodically. Reapply a suitable outdoor wood sealant or paint as needed, especially if signs of wear or fading appear.
- Hardware Check: Periodically check all screws and metal connectors to ensure they remain tight. Tighten any loose hardware to maintain structural integrity.
- Winter Storage (Optional): In regions with harsh winters, consider disassembling and storing the arch indoors or covering it to protect it from extreme weather conditions.
Troubleshooting
Here are solutions to common issues you might encounter:
- Arch feels unstable after assembly:
Ensure the legs are inserted deeply enough into firm soil. If the ground is soft or uneven, consider using additional ground anchors (not included) or concrete footings for enhanced stability. Verify all screws and connectors are securely tightened. - Wood splitting during screw insertion:
While pre-drilled holes are provided, wood can sometimes split if screws are forced or if the wood is dry. If you encounter resistance, gently pre-drill a slightly larger pilot hole (smaller than the screw thread) before inserting the screw. Avoid over-tightening screws. - Difficulty aligning parts during assembly:
Ensure you are working on a flat, level surface. Sometimes, loosening previously tightened screws slightly can provide enough play to align new parts, then re-tighten all connections once aligned.
Specifications
| Brand | HAPPYGRILL |
| Model Number | CA-HG3464 |
| Product Dimensions (L x W x H) | 55" x 24" x 85" (140 x 60 x 215 cm) |
| Material | Fir Wood, Metal |
| Color | Orange |
| Item Weight | 26.5 lbs (12 kg) |
| Finish Type | Painted |
Warranty
Specific warranty details are not provided in the product information. Please retain your proof of purchase for any potential warranty claims. For information regarding returns or defects, refer to the retailer's return policy or contact HAPPYGRILL customer support directly.
Support
For further assistance, product inquiries, or to explore other HAPPYGRILL products, please visit the official HAPPYGRILL store: