1. Introduction
The TOOLTOP DY4100A and DY4100B are advanced digital earth resistance testers designed for precise measurement of ground resistance and soil resistivity. These instruments are essential for electricians and professionals requiring accurate electrical grounding system evaluations. Featuring a large, clear display, high precision, and robust overload protection, these testers ensure reliable and safe operation in various environments.
2. Safety Information
Always adhere to the following safety precautions to prevent electric shock, injury, or damage to the instrument:
- Read and understand this manual completely before using the instrument.
- Do not operate the tester if it appears damaged or is not functioning correctly.
- Ensure all test leads and probes are in good condition before use.
- Always wear appropriate personal protective equipment (PPE), such as insulated gloves and safety glasses.
- Avoid contact with live circuits. The tester is designed for measuring earth resistance, not live voltage.
- Do not use the instrument in wet or explosive environments.
- Disconnect all test leads from the circuit before changing the function switch.
- Replace batteries promptly when the low battery indicator appears to ensure accurate readings.
3. Package Contents
Verify that all items listed below are included in your package:
- TOOLTOP DY4100A or DY4100B Digital Earth Resistance Tester
- Test Leads (various colors and lengths)
- Auxiliary Earth Spikes
- Carrying Bag
- User Manual

Figure 3.1: Included accessories for DY4100A and DY4100B models.
4. Product Overview
4.1 Key Features
- Large Digital Display: Provides clear, easy-to-read measurements, enhancing efficiency.
- High Precision: Ensures accurate and rapid detection of earth resistance and voltage.
- Multi-Gear Measurement: Offers three-gear position measurement (2Ω, 20Ω, 200Ω, 2000Ω ranges) suitable for diverse testing scenarios.
- Overload Protection: Features double protection for enhanced safety during measurements.
- Durable Design: Equipped with a protective cover made from thick, drop-resistant, and dust-proof material.
- Voltage Measurement: Capable of measuring AC voltage to ground (up to 600V) and photovoltaic DC voltage (up to 1500V).
- Automatic Safety System: Integrated for user protection.
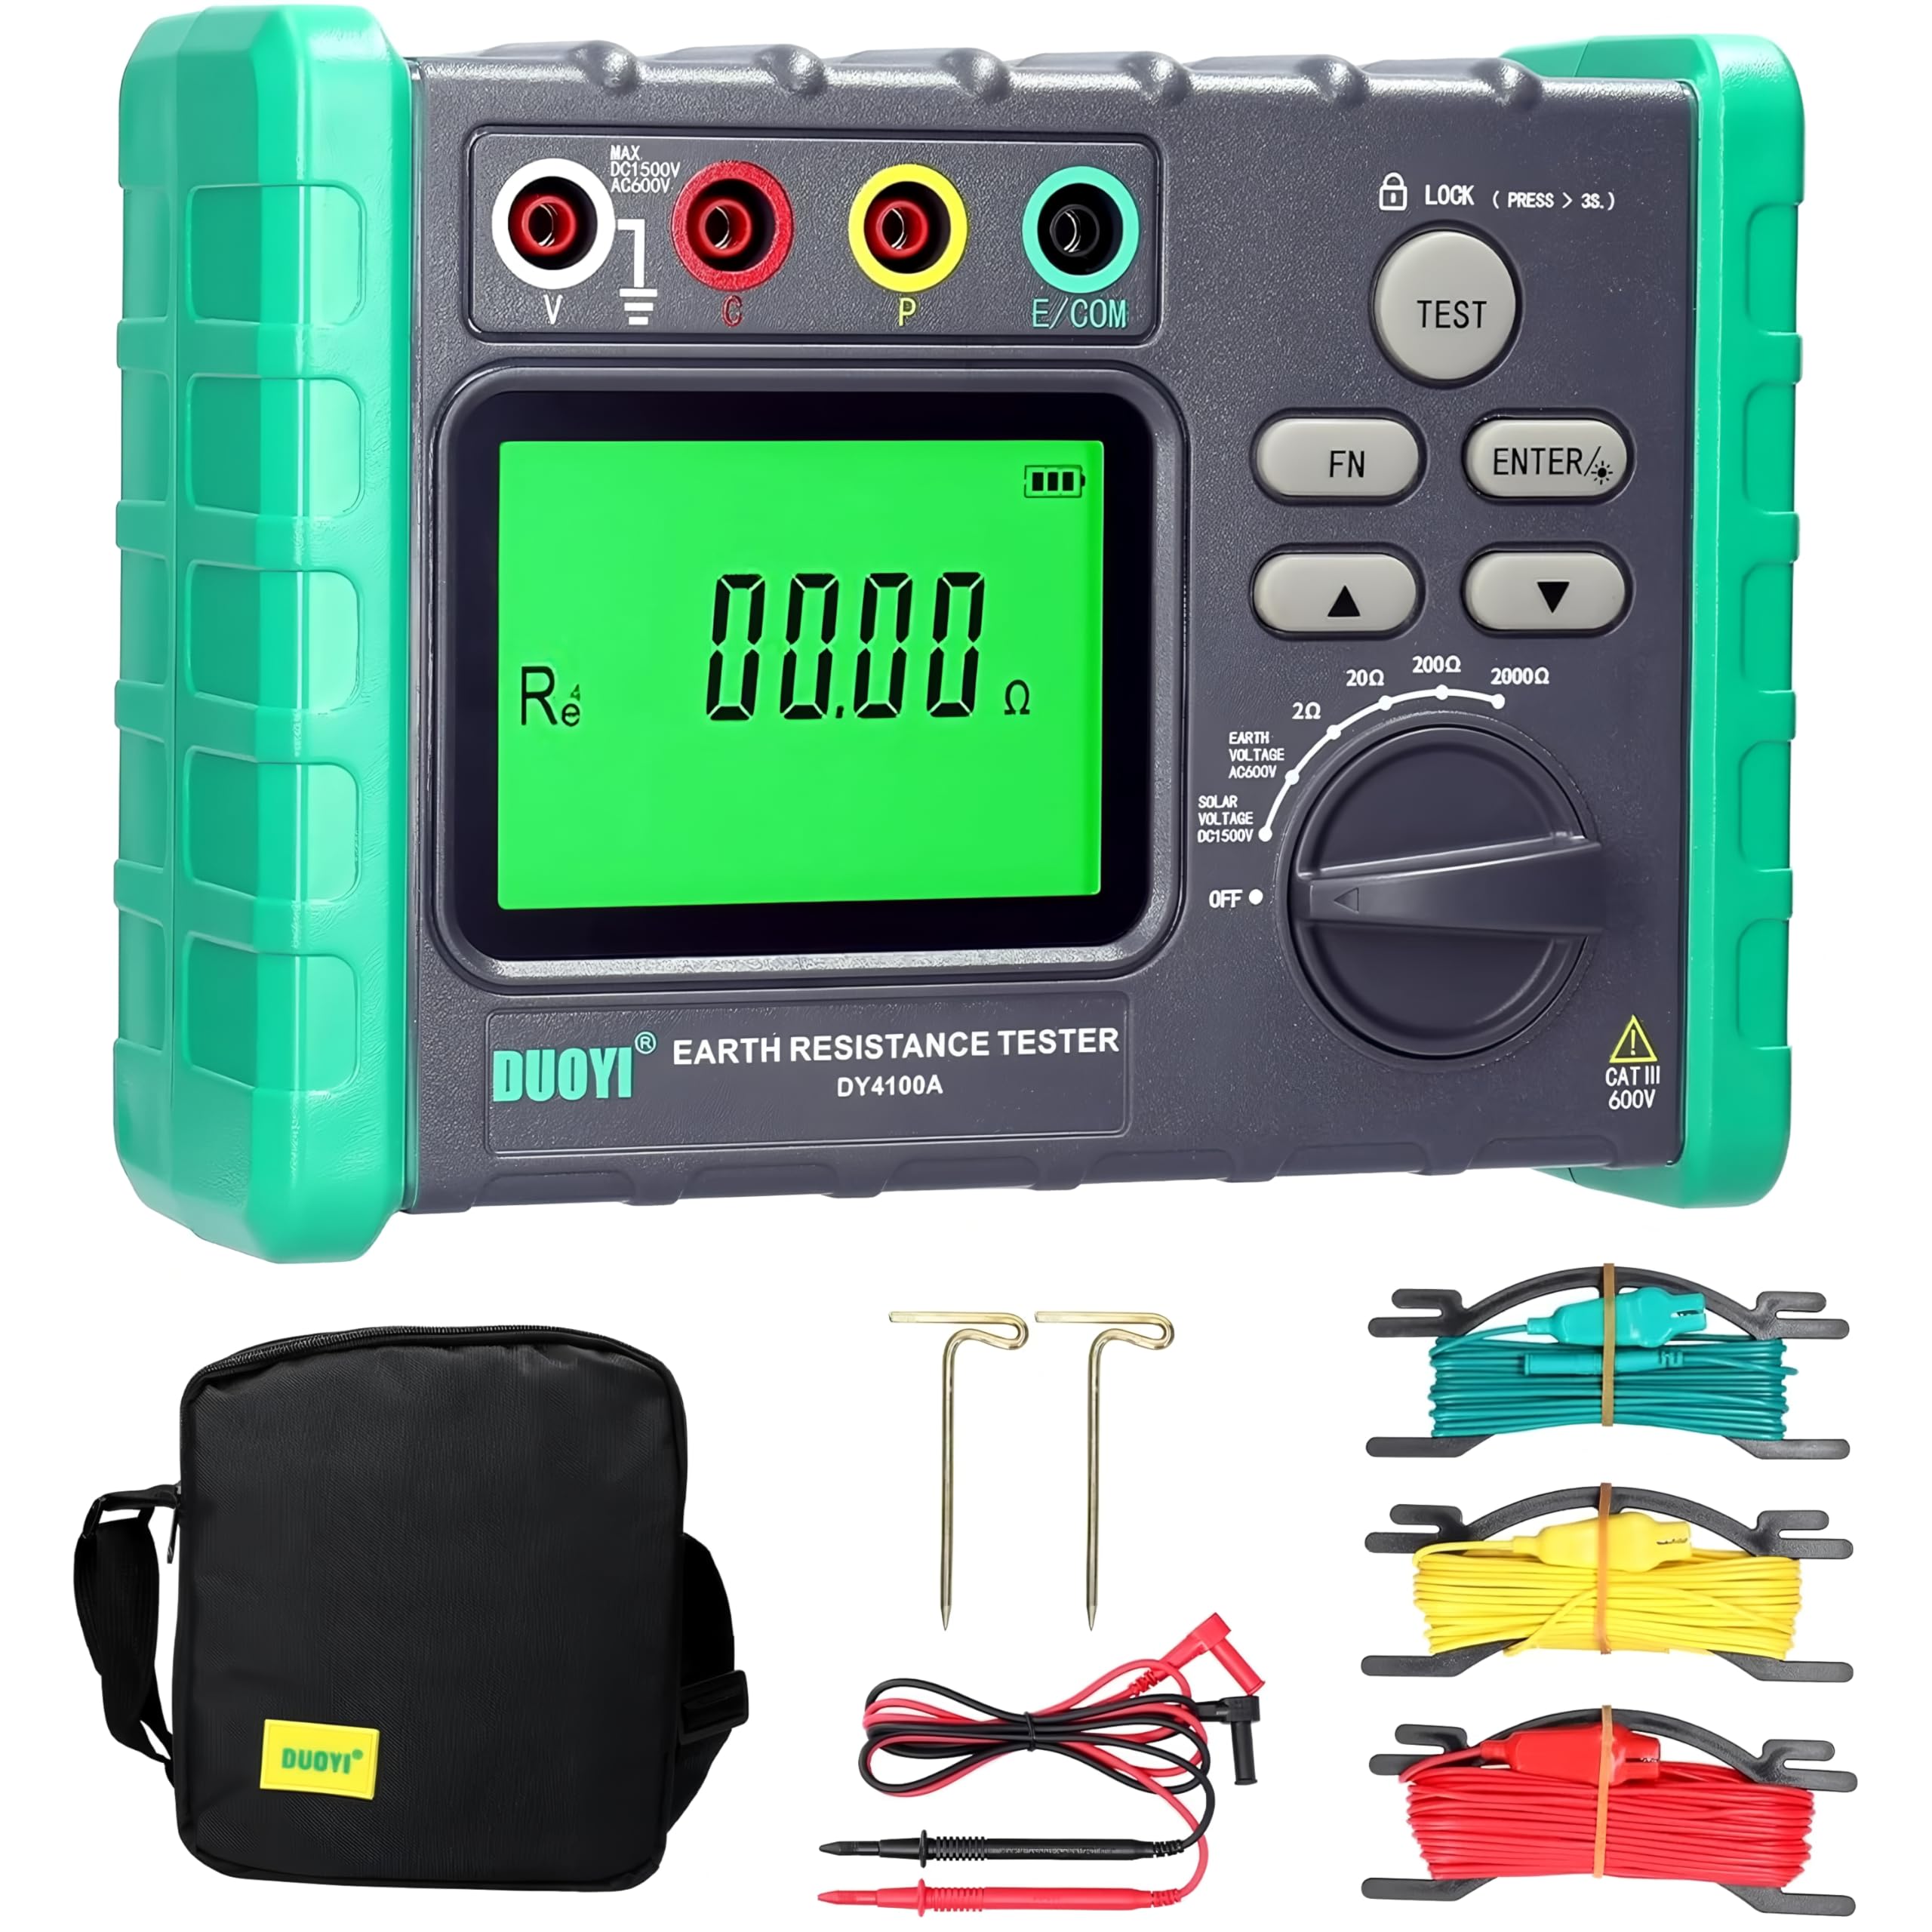
Figure 4.1: Key features of the DY4100A model.
4.2 Device Layout
Familiarize yourself with the main components and controls of the tester:
- LCD Display: Shows measurement readings, units, and indicators.
- Function Dial: Selects measurement ranges (2Ω, 20Ω, 200Ω, 2000Ω) and OFF position.
- Input Terminals: Connect test leads for V, S, ES, E/COM measurements.
- TEST Button: Initiates the measurement process.
- FN Button: Function button for additional settings or modes.
- ENTER Button: Confirms selections.
- Battery Compartment: Located at the rear for battery installation.

Figure 4.2: Detailed view of the display, function dial, and input terminals.
5. Setup
5.1 Battery Installation
The DY4100A/B requires 6 x AA (No. 5) batteries (not included). To install:
- Locate the battery compartment cover on the back of the instrument.
- Use a screwdriver to open the cover.
- Insert 6 AA batteries, ensuring correct polarity (+/-).
- Replace the battery compartment cover and secure it with the screw.
5.2 Connecting Test Leads and Earth Spikes
For accurate earth resistance measurements, proper connection of test leads and auxiliary earth spikes is crucial. Refer to the specific measurement method in the operating instructions for detailed connection diagrams.
6. Operating Instructions
6.1 General Measurement Steps
- Ensure the instrument is clean and in good working condition.
- Install fresh batteries.
- Select the desired measurement function using the rotary dial.
- Connect the test leads and auxiliary earth spikes according to the specific measurement method.
- Press the TEST button to initiate the measurement.
- Read the measurement value on the LCD display.
- After measurement, turn the rotary dial to the OFF position.
6.2 Earth Resistance Measurement (2-pole or 3-pole method)
The DY4100A/B supports 2-pole and 3-pole earth resistance measurements. For 3-pole measurement, connect the test leads as follows:
- Connect the green lead to the 'E/COM' terminal and to the earth electrode under test.
- Connect the yellow lead to the 'S' terminal and to the potential auxiliary earth spike (P1).
- Connect the red lead to the 'ES' terminal and to the current auxiliary earth spike (C1).
- Ensure the auxiliary earth spikes are driven into the ground at appropriate distances from the earth electrode under test (typically 5-10 meters apart).
- Select the appropriate resistance range (e.g., 20Ω, 200Ω, 2000Ω) using the function dial.
- Press the TEST button. The measured earth resistance will be displayed.
6.3 Soil Resistivity Measurement (DY4100B only)
The DY4100B model is capable of measuring soil resistivity (ρ). This typically involves the Wenner method using four earth spikes.
- Connect the four test leads to the 'V', 'S', 'ES', and 'E/COM' terminals and to four equally spaced earth spikes (A, B, C, D) driven into the ground.
- Ensure the spacing 'a' between the spikes is consistent.
- Select the soil resistivity function on the dial.
- Input the spike spacing 'a' if required by the instrument (refer to specific DY4100B manual for input method).
- Press the TEST button. The soil resistivity (ρ) will be calculated and displayed.
6.4 Voltage Measurement
The instrument can measure AC voltage to ground and photovoltaic DC voltage.
- AC Voltage to Ground: Connect the test leads to the 'V' and 'E/COM' terminals. Select the AC voltage function. The voltage will be displayed.
- Photovoltaic Voltage: Connect the test leads to the 'V' and 'E/COM' terminals. Select the DC voltage function. The photovoltaic open circuit voltage will be displayed. The DY4100A/B offers a wide range up to 1500V for photovoltaic measurements.

Figure 6.1: Photovoltaic voltage measurement in progress.
6.5 Series Interference Voltage Warning
When testing ground resistance and soil resistivity, the instrument automatically detects series interference voltage. If an abnormal test result is detected due to interference, a warning will be displayed.

Figure 6.2: Series interference voltage warning on the display.
7. Maintenance
7.1 Cleaning
- Wipe the instrument's casing with a soft, damp cloth. Do not use abrasive cleaners or solvents.
- Ensure no moisture enters the instrument.
7.2 Storage
- When not in use for extended periods, remove the batteries to prevent leakage.
- Store the instrument in its carrying bag in a cool, dry place, away from direct sunlight and extreme temperatures.
8. Troubleshooting
If you encounter issues with your DY4100A/B tester, refer to the following common problems and solutions:
- No Display/Power On: Check battery installation and ensure batteries are not depleted. Replace if necessary.
- Inaccurate Readings:
- Ensure test leads are securely connected and not damaged.
- Verify auxiliary earth spikes are properly driven into the ground and at correct distances.
- Check for strong electrical interference in the testing area.
- Ensure the correct measurement range is selected.
- "OL" or Overload Indication: The measured value exceeds the selected range. Switch to a higher range or check for open circuits.
- Low Battery Indicator: Replace all batteries with new ones.
If the problem persists, contact customer support.
9. Specifications
The following table details the technical parameters and general specifications for the TOOLTOP DY4100A/DY4100B Digital Earth Resistance Tester:

Figure 9.1: Technical Parameters for DY4100A/DY4100B.
| Parameter | Value |
|---|---|
| Model Number | TT-DY4100A |
| Brand | TOOLTOP |
| Color | Multicolor |
| Product Weight | 1 Kilogram |
| Package Dimensions | 20 x 15 x 10 cm |
| Compliance | CE, RoHS |
| Spare Parts Availability (EU) | 1 Year |
9.1 Dimensions

Figure 9.2: Physical dimensions of DY4100A and DY4100B.
10. Warranty and Support
For warranty information, technical support, or service inquiries, please refer to the contact information provided with your purchase or visit the official TOOLTOP website. Keep your purchase receipt as proof of purchase for warranty claims.


