1. Introduction
This manual provides detailed instructions for the operation and maintenance of your RODEDIO V519/V539 OBD2 Scanner. This professional-grade diagnostic tool is designed to assist in identifying and resolving vehicle engine issues by providing comprehensive diagnostic capabilities for OBDII protocol vehicles manufactured since 1996. Please read this manual thoroughly before using the device to ensure proper and safe operation.
2. Product Overview
The RODEDIO V519/V539 OBD2 Scanner is a robust and user-friendly device equipped with a 2.8-inch color display and intuitive navigation buttons. It offers a wide range of diagnostic functions to help monitor vehicle performance and troubleshoot engine warning lights.
2.1 Key Features
- Comprehensive OBD2 Modes: Supports all OBD2 modes for thorough vehicle diagnostics.
- Extensive DTC Library: Contains a vast database of 35,901 Diagnostic Trouble Codes for accurate identification.
- Real-Time Data Stream: Displays live engine parameters and sensor readings.
- Battery Voltage Test: Monitors vehicle battery health.
- Faster Processing Chip: Ensures quick and efficient diagnostics.
- I/M Readiness Function: Helps prepare for emissions testing.
- Multi-Language Support: Supports 10 languages including English, German, French, Spanish, Russian, Dutch, Chinese, Japanese, Portuguese, and Italian.
2.2 Device Components
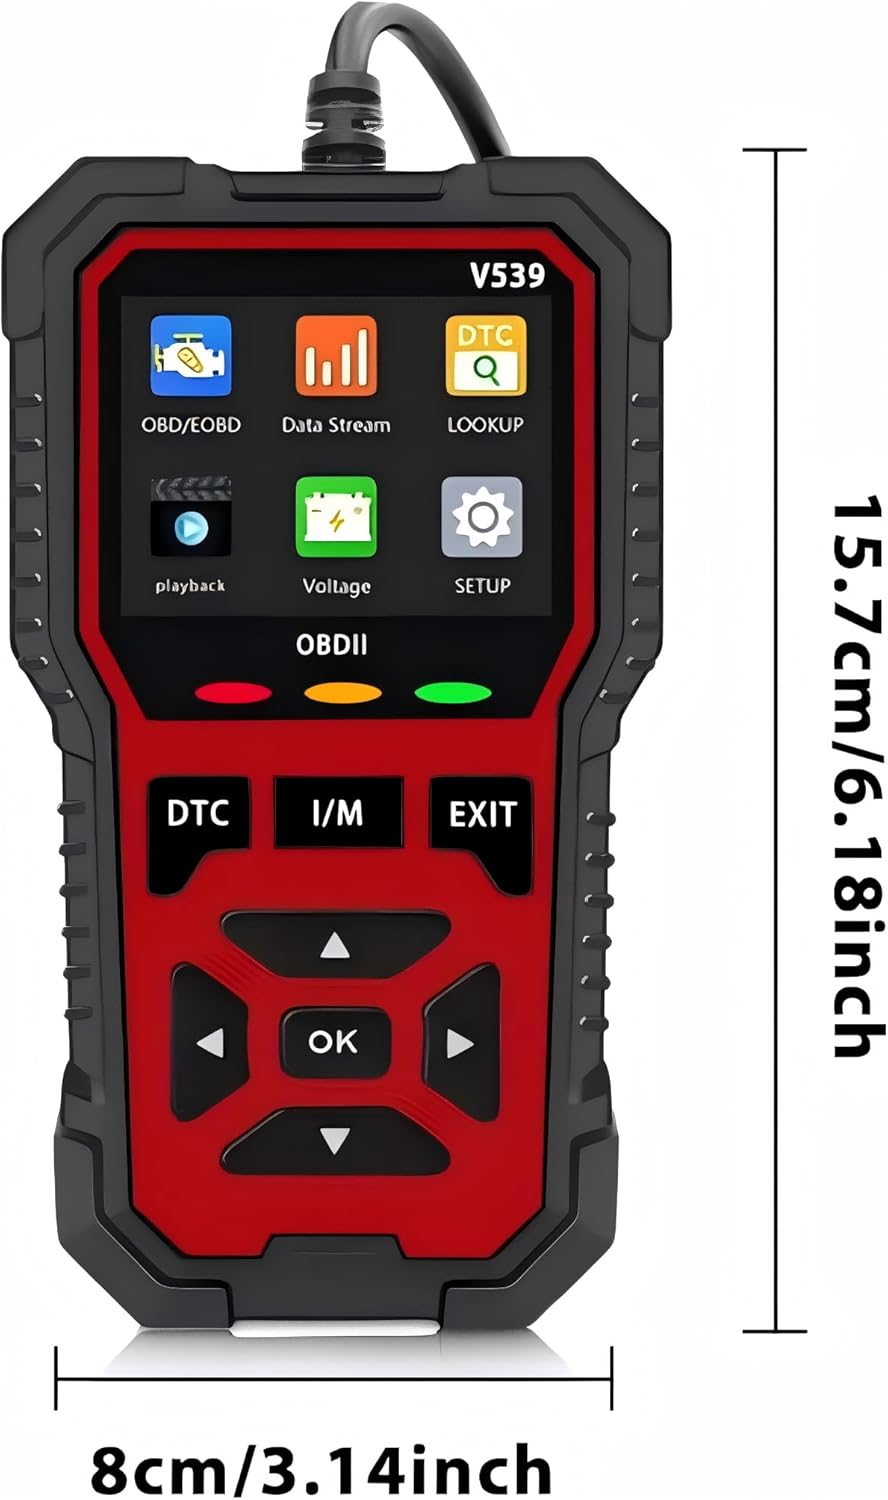
This image displays the front of the V519/V539 OBD2 scanner, highlighting its 2.8-inch color screen, navigation buttons (DTC, I/M, EXIT, directional arrows, OK), and the OBDII status indicator lights (Red, Yellow, Green).

This image illustrates the V519/V539 OBD2 scanner connected via its 16-pin interface, pointing out the 2.4-inch color screen (note: product description says 2.8-inch, I will use 2.8-inch as per product description), and the meaning of the Red (Read fault code), Yellow (Connection failed), and Green (Connection successful) indicator lights.

This image shows the physical dimensions of the V519/V539 OBD2 scanner, indicating a height of 15.7 cm (6.18 inches) and a width of 8 cm (3.14 inches).
3. Setup and Connection
The V519/V539 OBD2 Scanner is designed for plug-and-play operation, powered directly by your vehicle's OBDII port.
3.1 Connecting the Scanner
- Locate the vehicle's 16-pin Data Link Connector (DLC). This is typically found under the dashboard on the driver's side.
- Ensure the vehicle's ignition is in the "OFF" position.
- Firmly plug the scanner's OBDII connector into the vehicle's DLC.
- Turn the vehicle's ignition to the "ON" position (engine can be off or running, depending on the test). The scanner will power on automatically.
- Observe the indicator lights on the scanner:
- Green LED: Indicates a successful connection.
- Yellow LED: Indicates connection failed or an issue with communication.
- Red LED: Indicates a fault code has been read.
4. Operating Instructions
Navigate the scanner's menu using the directional arrows and the "OK" button. The "DTC" button provides quick access to Diagnostic Trouble Codes, "I/M" for I/M Readiness, and "EXIT" to return to the previous screen or main menu.
4.1 Main Menu Functions

This image shows the main menu of the V519/V539 scanner, displaying options such as OBD/EOBD, Data Stream, DTC Lookup, Playback, Voltage, and Setup.

This image provides a visual summary of the comprehensive OBDII functions supported by the scanner, including Read Codes, Erase Codes, Live Data, I/M Readiness, Freeze Frame, O2 Sensor Test, On-board Monitor Test, Vehicle Information, and Evap System.
4.2 Diagnostic Functions
- Read Codes (DTC): Retrieves Diagnostic Trouble Codes (DTCs) from the vehicle's computer. These codes indicate specific issues detected by the vehicle's onboard diagnostic system.
Figure 4.2.1: Example of engine fault diagnosis. This image shows the V519/V539 scanner next to a car's dashboard, illustrating its ability to quickly read current fault codes and clear the engine failure light.
- Erase Codes: Clears DTCs from the vehicle's computer and turns off the Malfunction Indicator Lamp (MIL). Note: Clearing codes does not fix the underlying problem. Ensure the issue is resolved before clearing codes.
- Live Data Stream: Displays real-time data from the vehicle's sensors and modules. This can include engine RPM, vehicle speed, oxygen sensor readings, coolant temperature, and more.
- I/M Readiness: Checks the status of the emission-related monitoring systems to determine if they are ready for an emissions test.
- Freeze Frame Data: Records a snapshot of vehicle operating conditions at the moment a DTC is set. This data can help identify the conditions under which the fault occurred.
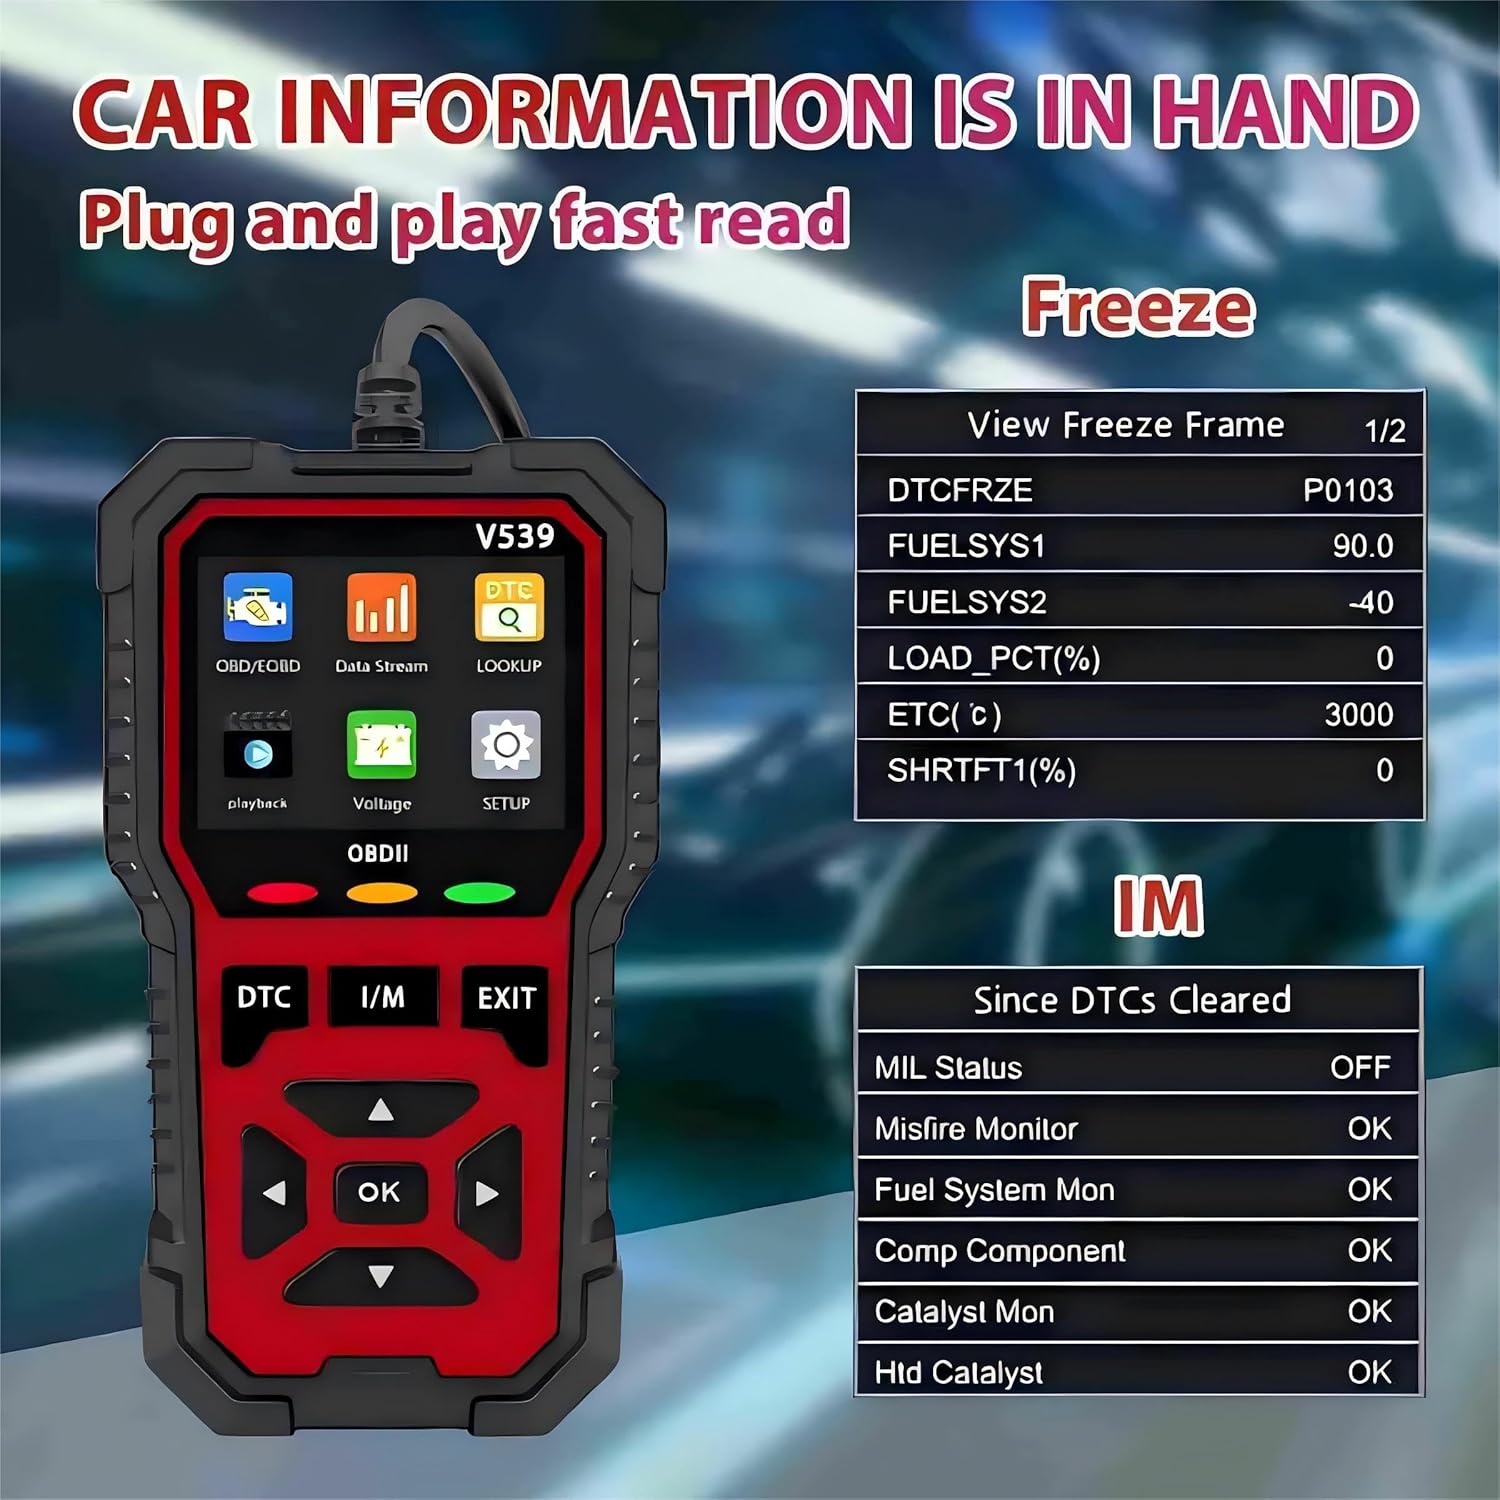
Figure 4.2.2: Display of Freeze Frame and I/M Readiness data. This image illustrates how the scanner displays vehicle information, including Freeze Frame data (e.g., DTCFRZE, FUELSYS1, FUELSYS2, LOAD_PCT, ETC, SHRFT1) and I/M Readiness status (e.g., MIL Status, Misfire Monitor, Fuel System Mon).
- O2 Sensor Test: Retrieves oxygen sensor monitor test results for the most recently completed tests from the vehicle's onboard computer.
- On-board Monitor Test: Retrieves test results for emission-related powertrain components and systems that are not continuously monitored.
- Vehicle Information: Displays the Vehicle Identification Number (VIN), Calibration ID (CALID), and Calibration Verification Number (CVN) of the vehicle.
- EVAP System Test: Initiates a test of the Evaporative Emission Control System.
- Battery Voltage Test: Monitors the vehicle's battery voltage in real-time.
- DTC Lookup: Allows you to search for definitions of Diagnostic Trouble Codes directly on the device.

Figure 4.2.3: Accessing the extensive fault code library. This image highlights the scanner's built-in fault code library, which contains 35,901 DTC definitions, allowing users to quickly query fault code meanings.
5. Maintenance
5.1 General Care
- Keep the scanner clean by wiping it with a soft, dry cloth.
- Avoid exposing the device to extreme temperatures, moisture, or direct sunlight.
- Do not drop the scanner or subject it to strong impacts.
- Store the device in a safe place when not in use.
5.2 Software Updates
The V519/V539 scanner supports firmware upgrades to ensure compatibility with newer vehicles and to add new features. Refer to the manufacturer's website for the latest update procedures and software downloads. The device features a "Print/upgrade function" as indicated in the product features.
6. Troubleshooting
| Problem | Possible Cause | Solution |
|---|---|---|
| Scanner does not power on. | No power from vehicle's DLC; loose connection. | Check vehicle's ignition is ON. Ensure the OBDII connector is firmly plugged in. Check vehicle's fuse for the OBDII port. |
| Yellow LED (Connection Failed). | Communication error; vehicle not OBDII compliant; faulty cable. | Verify vehicle is OBDII compliant (1996 or newer). Re-plug the connector. Try on another OBDII compliant vehicle if possible. |
| Cannot read DTCs. | No fault codes present; communication issue. | Ensure the vehicle's ignition is ON. Confirm the scanner is properly connected (Green LED). If no codes are present, the system is functioning normally. |
| Screen is blank or frozen. | Software glitch; power interruption. | Disconnect and reconnect the scanner. If the issue persists, check for available software updates. |
7. Specifications
| Feature | Detail |
|---|---|
| Brand | RODEDIO |
| Model | V519 (also referred to as V539 in some descriptions) |
| Product Dimensions (L x W x H) | 5.1" x 1.5" x 7.8" (15.7 cm x 8 cm as per image) |
| Item Weight | 6.4 ounces |
| Display Resolution | 128 x 64 LCD (2.8-inch color display) |
| Automotive Fit Type | Universal Fit (for OBDII Protocol Vehicles Since 1996) |
| Power Source | USB Powered (via OBDII port) |
| DTC Library | 35,901 codes |
| Supported Languages | English, German, French, Spanish, Russian, Dutch, Chinese, Japanese, Portuguese, Italian |
8. Warranty and Support
For warranty information, technical support, or service inquiries, please contact RODEDIO customer service. Refer to the product packaging or the official RODEDIO website for contact details.
Manufacturer: Rodedio
Seller: Rodedio (via Amazon)

This image displays various certificates of conformity, indicating that RODEDIO products meet certain quality and safety standards.


