
1. Introduction
Thank you for choosing the HoneyGuaridan A25D Automatic Cat Food Dispenser. This device is designed to provide consistent and scheduled meals for your pets, ensuring their well-being even when you are away. It features a 3.5L capacity, dual feeding bowls, programmable meal settings, a voice recording function, and a reliable dual power supply system.
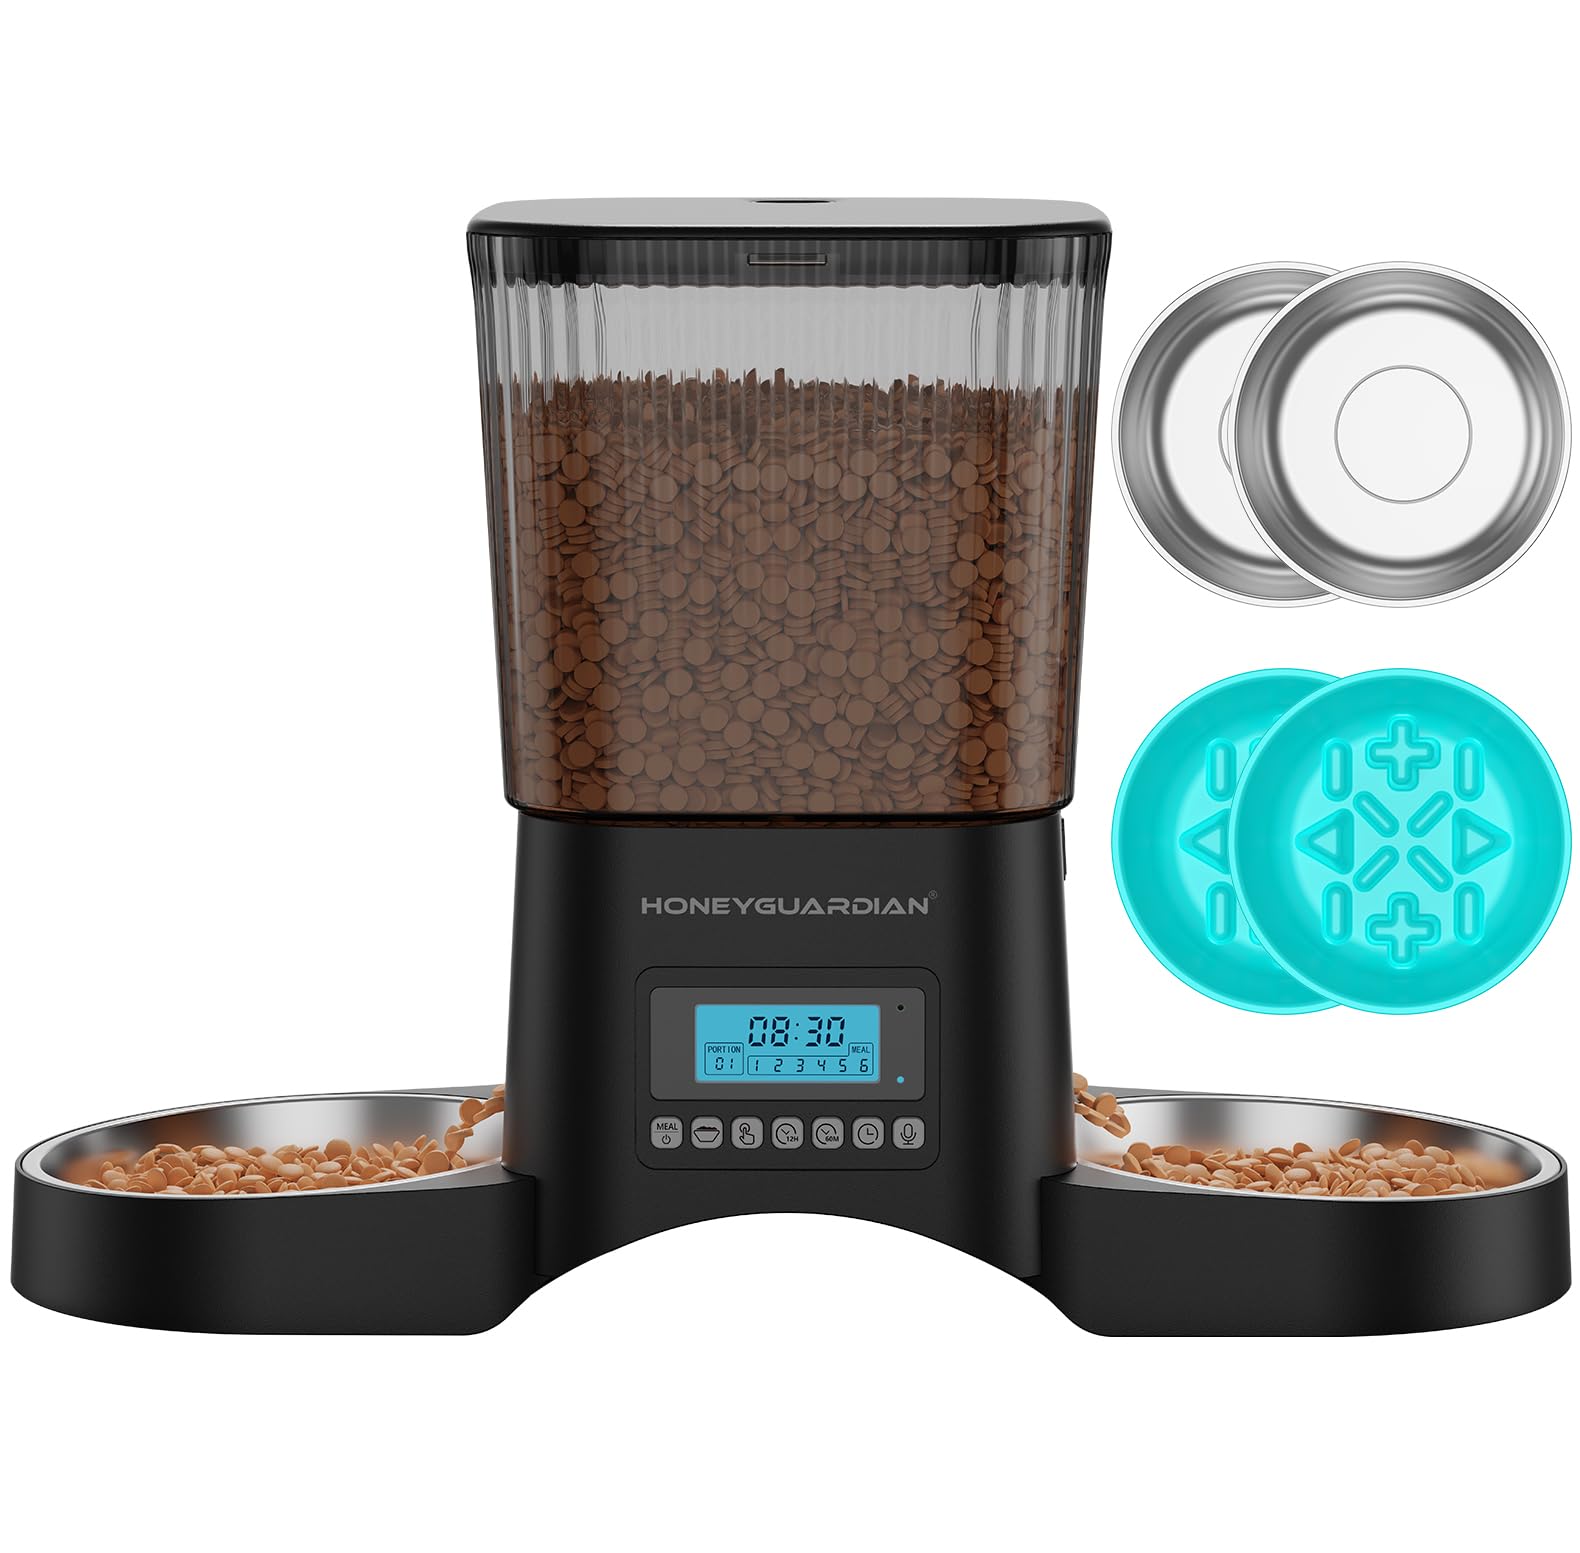
Image 1.1: Overview of the HoneyGuaridan A25D Automatic Cat Food Dispenser.
2. Safety Information
- Read all instructions carefully before use.
- This appliance is intended for indoor use only.
- Do not immerse the main feeder base in water or any other liquid. Wipe clean with a damp cloth only.
- Ensure the power adapter cable is not damaged and is placed where pets cannot chew on it.
- Use only dry pet food with this dispenser. Do not use wet food, canned food, or treats.
- Keep out of reach of children.
- Always ensure the lid is securely closed to maintain food freshness and prevent spills.
3. Package Contents
Verify that all items are present in the package:
- 1 x HoneyGuaridan A25D Automatic Cat Food Dispenser Unit
- 2 x Stainless Steel Bowls
- 2 x Slow Feeder Bowls (optional use)
- 1 x Power Adapter (5V)
- 1 x Desiccant Bag
- 1 x User Manual
4. Setup
4.1 Assembly
- Place the main feeder unit on a stable, flat surface. The anti-slip feet provide stability.
- Attach the desired feeding bowls (stainless steel or slow feeder) to the designated slots on either side of the dispenser base.
- Open the top lid of the food container. Insert the desiccant bag into its compartment under the lid to maintain food freshness.

Image 4.1: Illustration of the sealing system components, including the silicone seal strip, desiccant bag, and sealing rotor, designed to keep food fresh.
4.2 Power Supply
The dispenser supports dual power options:
- Adapter Power: Connect the 5V power adapter to the dispenser and plug it into a wall outlet. This is the primary power source.
- Battery Backup: For backup power during outages, install 4 AA alkaline batteries (not included) into the battery compartment at the bottom of the unit. The device will automatically switch to battery power if the main power is interrupted.

Image 4.2: The feeder supports dual power, automatically switching to battery backup during power outages to ensure continuous feeding.
4.3 Filling the Food Container
- Open the top lid of the food container.
- Pour dry kibble into the container. The transparent design allows you to monitor the food level easily.
- Close the lid securely to activate the sealing system.

Image 4.3: The transparent food container allows for easy monitoring of kibble levels, ensuring timely refills.

Image 4.4: The anti-clog design ensures smooth food dispensing. Recommended kibble sizes are shown for optimal performance.
5. Operating Instructions
5.1 Setting the Current Time
Refer to the display and control buttons on the front of the feeder. Use the appropriate buttons (usually 'SET' and arrow keys) to set the current time and date.
5.2 Programming Meals
The dispenser allows you to program up to 6 meals per day with adjustable portion sizes.
- Press the 'SET' button to enter programming mode.
- Use the arrow keys to navigate through meal numbers (P1-P6) and set the desired feeding times for each meal.
- Adjust the portion size for each meal, ranging from 1 to 24 portions. Each portion is approximately 6g (15mL).
- Confirm settings by pressing 'SET' or waiting for the display to exit programming mode automatically.

Image 5.1: The display shows programmable meal settings, allowing up to 6 meals and 24 portions per meal.
5.3 Voice Recording Function
Record a 10-second voice message to call your pets at meal times.
- Locate the record button (often labeled 'REC' or with a microphone icon).
- Press and hold the record button, then speak your message. Release the button when finished.
- The recorded message will play automatically at each scheduled meal. You can usually toggle this feature on/off or adjust volume via the control panel.

Image 5.2: The voice recording feature allows you to record a 10-second message to call your pets at mealtime.
5.4 Manual Feeding
To dispense food immediately outside of scheduled meals:
- Press and hold the manual feed button (often labeled 'MANUAL' or with a food icon) for a few seconds until food is dispensed.
- This will dispense one portion of food. Repeat as needed.

Image 5.3: The dual bowl design allows two pets to eat simultaneously, promoting fair feeding and reducing conflict.
6. Maintenance
6.1 Cleaning
Regular cleaning ensures hygiene and proper functioning.
- Unplug the feeder and remove any batteries before cleaning.
- Disassemble the food container, lid, and bowls. These parts can be washed with soap and water.
- Important: Do not wash the main feeder base. Wipe it clean with a damp cloth only. Ensure all parts are completely dry before reassembly.

Image 6.1: The feeder is designed for easy disassembly, allowing for thorough cleaning of all food-contact parts. Remember not to wash the base unit.
6.2 Desiccant Bag Replacement
Replace the desiccant bag every 1-2 months to maintain optimal food freshness and prevent moisture buildup.
6.3 Refilling Food
Monitor the food level through the transparent container. Refill as needed to ensure your pets never run out of food.
7. Troubleshooting
- Food Not Dispensing: Check if the food container is empty. Ensure the kibble size is appropriate for the dispenser (refer to Image 4.4). Check for any clogs in the dispensing mechanism. Verify power supply.
- Incorrect Portions: Re-check your programmed portion settings. Ensure the food type is consistent.
- No Power/Display Off: Ensure the power adapter is securely plugged in. If using batteries, check if they are correctly installed and not depleted.
- Voice Message Not Playing: Ensure the voice recording feature is enabled in the settings. Re-record the message if necessary.
- Feeder Tipping Over: Ensure the feeder is placed on a stable, flat surface. The anti-slip feet are designed to prevent tipping.

Image 7.1: The stable design with reinforced silicone feet makes the feeder difficult to tip over.
8. Specifications
| Feature | Specification |
|---|---|
| Model Number | A25D |
| Capacity | 3.5 Liters |
| Dimensions (L x W x H) | 18.5 x 17 x 22 cm |
| Net Weight | 1.4 kg |
| Material | ABS Plastic |
| Power Supply | 5V DC Adapter, 4 x AA Alkaline Batteries (not included) |
| Programmable Meals | Up to 6 meals per day |
| Portion Size | 1-24 portions per meal (approx. 6g/15mL per portion) |
| Special Features | Anti-slip, Portable, Programmable, Voice Recording, Timer |

Image 8.1: Detailed specifications including capacity, weight, power, and dimensions of the feeder.
9. Warranty and Support
9.1 Warranty Information
This product is subject to standard consumer warranty laws. For specific return policies, please refer to the retailer's terms and conditions. Generally, products can be returned within 30 days of receipt if you change your mind. For defective or damaged products, consult the retailer's help page for assistance.
9.2 Customer Support
For further assistance, product inquiries, or technical support, please visit the official HoneyGuaridan store or contact their customer service through the retailer's platform.
HoneyGuaridan Store: HoneyGuaridan Italia Store