1. Introduction
Thank you for choosing the Gallagher 7 Inch Touchscreen Monitor. This portable IPS display offers a 1024x600 resolution, 5-point capacitive touch functionality, and integrated dual speakers, making it an ideal companion for various devices including Raspberry Pi, Windows PCs, and gaming consoles. This manual provides detailed instructions for setup, operation, and maintenance to ensure optimal performance and longevity of your device.

Image 1.1: Gallagher 7 Inch Touchscreen Monitor. This image displays the monitor from an angled perspective, highlighting its touchscreen capabilities and built-in dual speakers.
2. Product Features
- Eye Protection IPS Display: Features a 7-inch IPS LCD screen with 1024x600 HD resolution. The advanced glossy screen supports a 178° full viewing angle, providing accurate and vibrant colors while effectively reducing blue light radiation and flickering for extended comfortable viewing.
- Wide Compatibility: Designed for Raspberry Pi (PI5/PI4/PI3B+/PI3/PI2/ZERO), Octo Pi, BB Black, Banana Pi, Retro Pi, game consoles (XBOX/PS4/PS5), computers, and TV boxes. Compatible with Windows, Raspbian, Noobs, Kali-linux, Debian, Ubuntu, and Kodi. Note: Touch functionality is disabled on iOS systems.
- Integrated Audio: Equipped with portable stereo dual speakers and a 3.5 mm headphone jack for an enhanced audio experience. A single dial switch allows for easy adjustment of both volume and brightness settings.
- Versatile Display Modes: Supports Expansion mode, Copy mode, and Second Screen display mode for flexible usage scenarios.
- Responsive Touch Control: Offers 5-point capacitive touch with intuitive gestures for smooth interaction, including sliding, scrolling, selecting, zooming, and cursor movement.
- Plug and Play: Connects via HDMI for video and a USB cable for touch functionality. No additional drivers are required for Windows 10/8/7 systems.
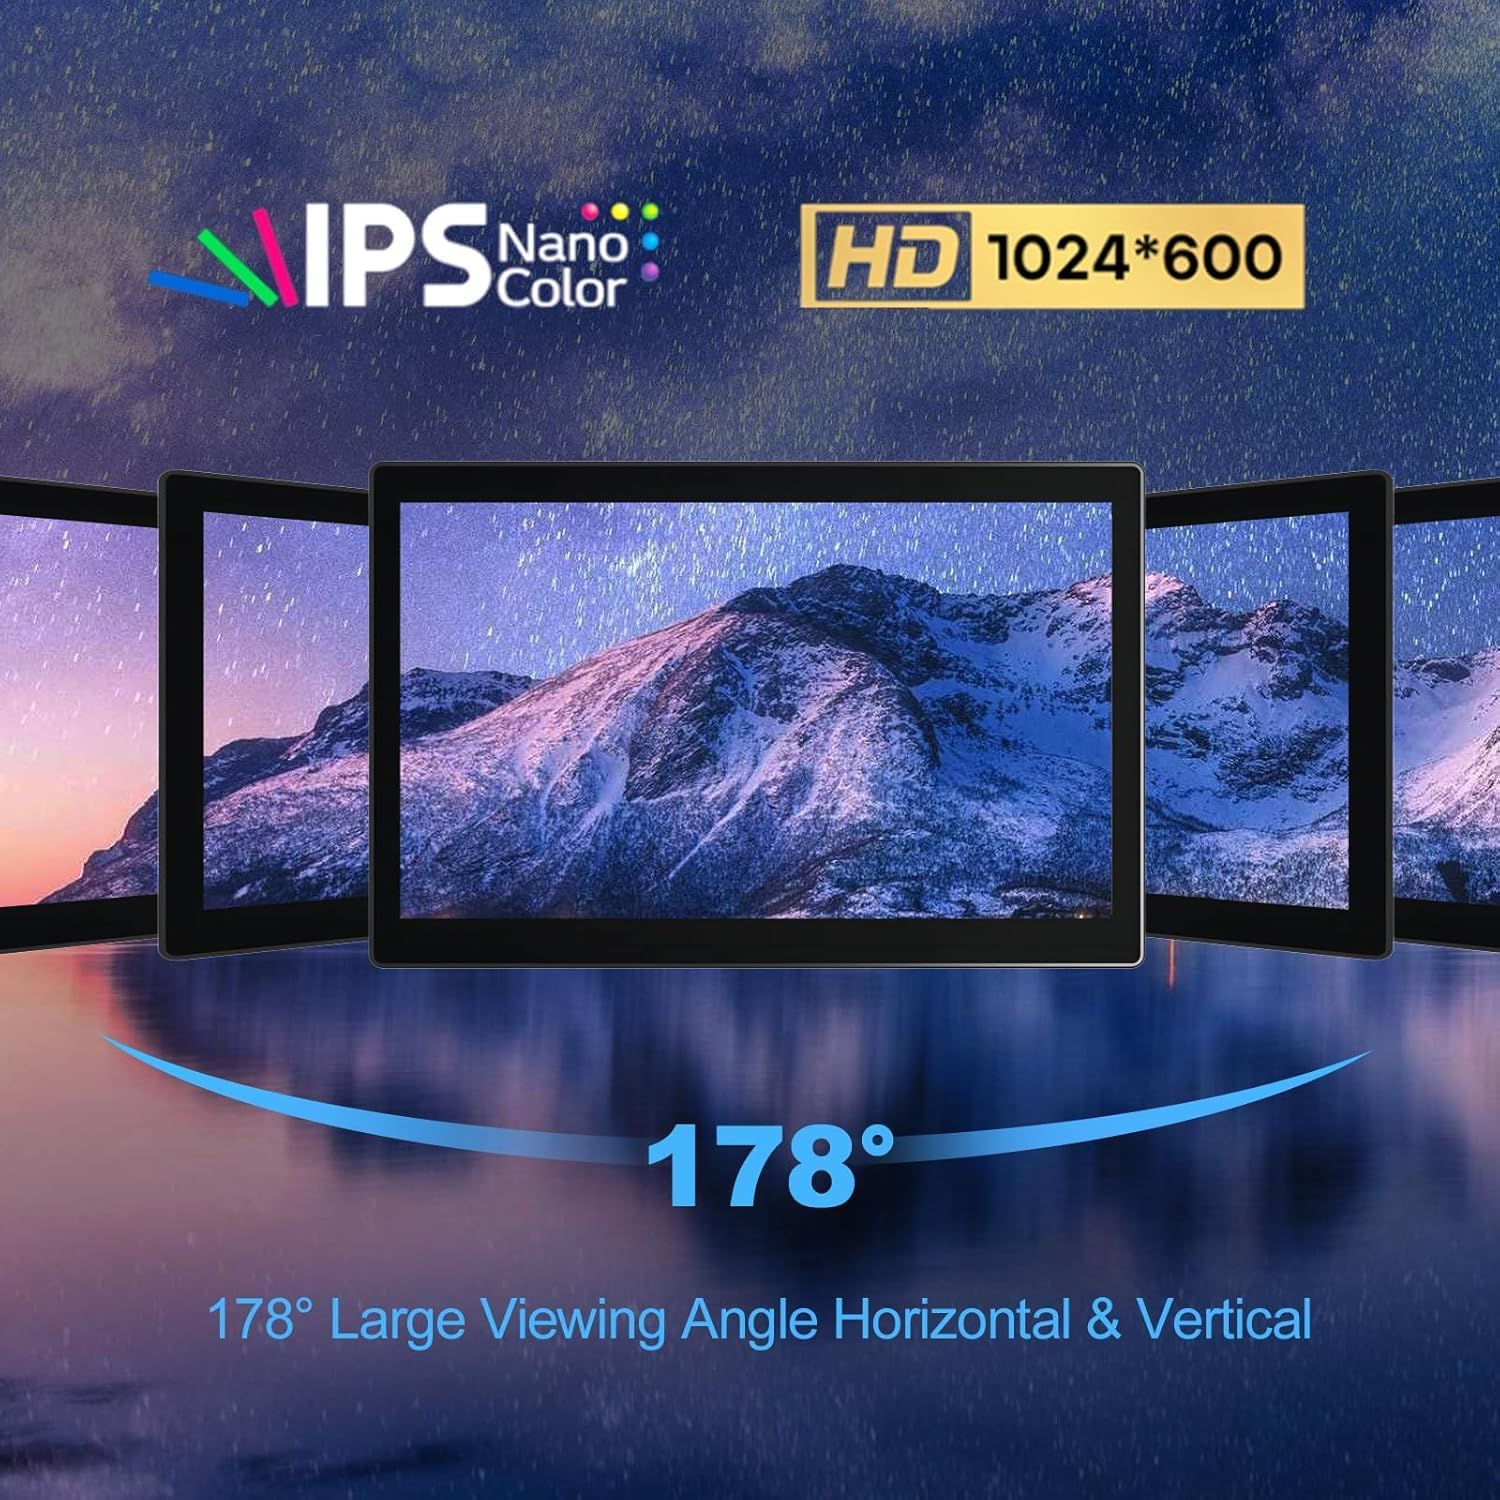
Image 2.1: IPS Display with 178° Viewing Angle. This image illustrates the wide viewing angles and high-definition clarity of the monitor's IPS panel.
3. Package Contents
Please verify that all items are present in your package:
- Gallagher 7 Inch Touchscreen Monitor (Model 7" 1024*600-B)
- HDMI Cable (for video connection)
- USB Cable (for touch functionality and power)
- Power Adapter (for monitor power)
- Mounting Hardware (if applicable for Raspberry Pi integration)
4. Setup Instructions
4.1. Connecting to Raspberry Pi
- Prepare Raspberry Pi: Ensure your Raspberry Pi is powered off.
- HDMI Connection: Connect the provided HDMI cable from the Raspberry Pi's HDMI port to the monitor's HDMI input. Note that Raspberry Pi 3 typically uses HDMI-A, while Raspberry Pi 4 uses HDMI-D.
- Touch Functionality: Connect the USB cable from a USB port on your Raspberry Pi to the USB touch input port on the monitor. This enables the touchscreen features.
- Power Supply: Connect the monitor to its dedicated power adapter. For optimal performance and to avoid display flickering, it is recommended to power the monitor separately from the Raspberry Pi, especially during initial setup.
- Power On: Power on the monitor, then power on your Raspberry Pi. The display should show the Raspberry Pi's output.

Image 4.1: Raspberry Pi Integration. This image demonstrates how a Raspberry Pi can be integrated into the monitor's casing, showing the internal connections.
4.2. Connecting to Laptop/PC
- HDMI Connection: Connect the provided HDMI cable from your laptop's or PC's HDMI output to the monitor's HDMI input.
- Touch Functionality: Connect the USB cable from a USB port on your laptop/PC to the USB touch input port on the monitor. This enables the touchscreen features.
- Power Supply: Connect the monitor to its dedicated power adapter.
- Power On: Power on the monitor. Your laptop/PC should detect the new display. For Windows systems (10/8/7), the monitor is typically plug-and-play, requiring no additional drivers.

Image 4.2: Laptop Connection and Display Modes. This image illustrates connecting the monitor to a laptop and demonstrates the three supported display output modes: Duplicate, Extend, and Second Screen.
5. Operating Instructions
5.1. Power On/Off
Press the power button located on the side or back of the monitor to turn it on or off.
5.2. Adjusting Volume and Brightness
Use the dial switch on the monitor to adjust the volume of the integrated speakers or the brightness of the display. Rotate the dial to increase or decrease the respective setting.
5.3. Touchscreen Functionality
The monitor supports 5-point capacitive touch. You can interact with the display using standard touch gestures such as tapping, swiping, pinching to zoom, and dragging to move items or scroll. Ensure the USB cable for touch is connected to your host device.
5.4. Display Modes
When connected to a compatible device (e.g., Windows PC), you can configure the display mode:
- Duplicate Mode: The monitor mirrors the content of your primary display.
- Extend Mode: The monitor acts as an extension of your primary display, allowing you to have more screen real estate.
- Second Screen Mode: The monitor functions as the sole display, with the primary display turned off.
These settings are typically configured within your operating system's display settings.
6. Compatibility
The Gallagher 7 Inch Touchscreen Monitor is designed for broad compatibility:
- Single Board Computers: Raspberry Pi (PI5/PI4/PI3B+/PI3/PI2/ZERO), Octo Pi, BB Black, Banana Pi, Retro Pi, Jetson Nano.
- Operating Systems: Windows 11/10/8/7, Raspbian, Noobs, Kali-linux, Debian, Ubuntu, Kodi.
- Gaming Consoles: XBOX, PS4, PS5, Nintendo Switch.
- Other Devices: Laptops, Desktop PCs, TV boxes, CCTV systems, Industrial microscopes.
Important Note: Touch functionality is not supported on iOS systems.
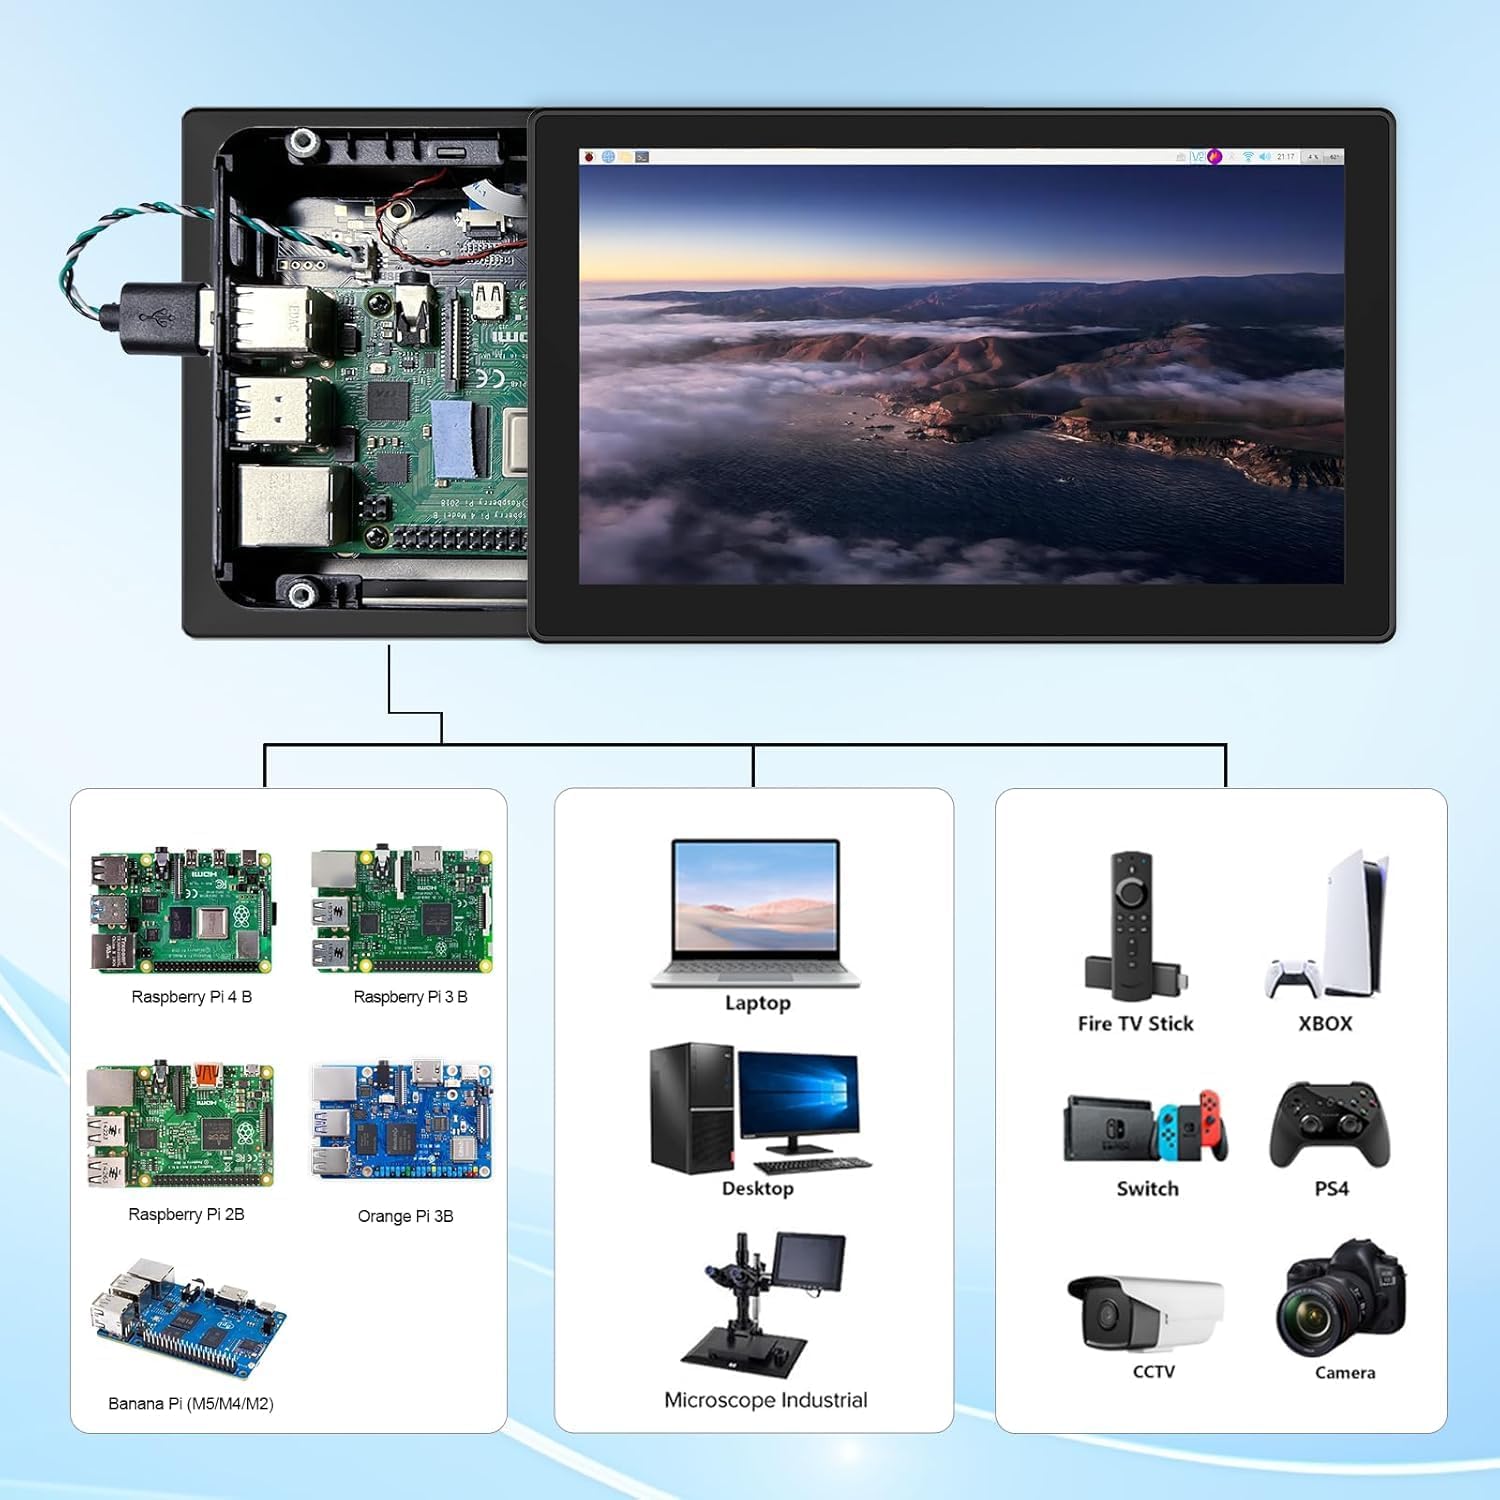
Image 6.1: Broad Device Compatibility. This image illustrates the wide range of devices that can be connected to the monitor, including various Raspberry Pi models, laptops, desktops, and gaming consoles.
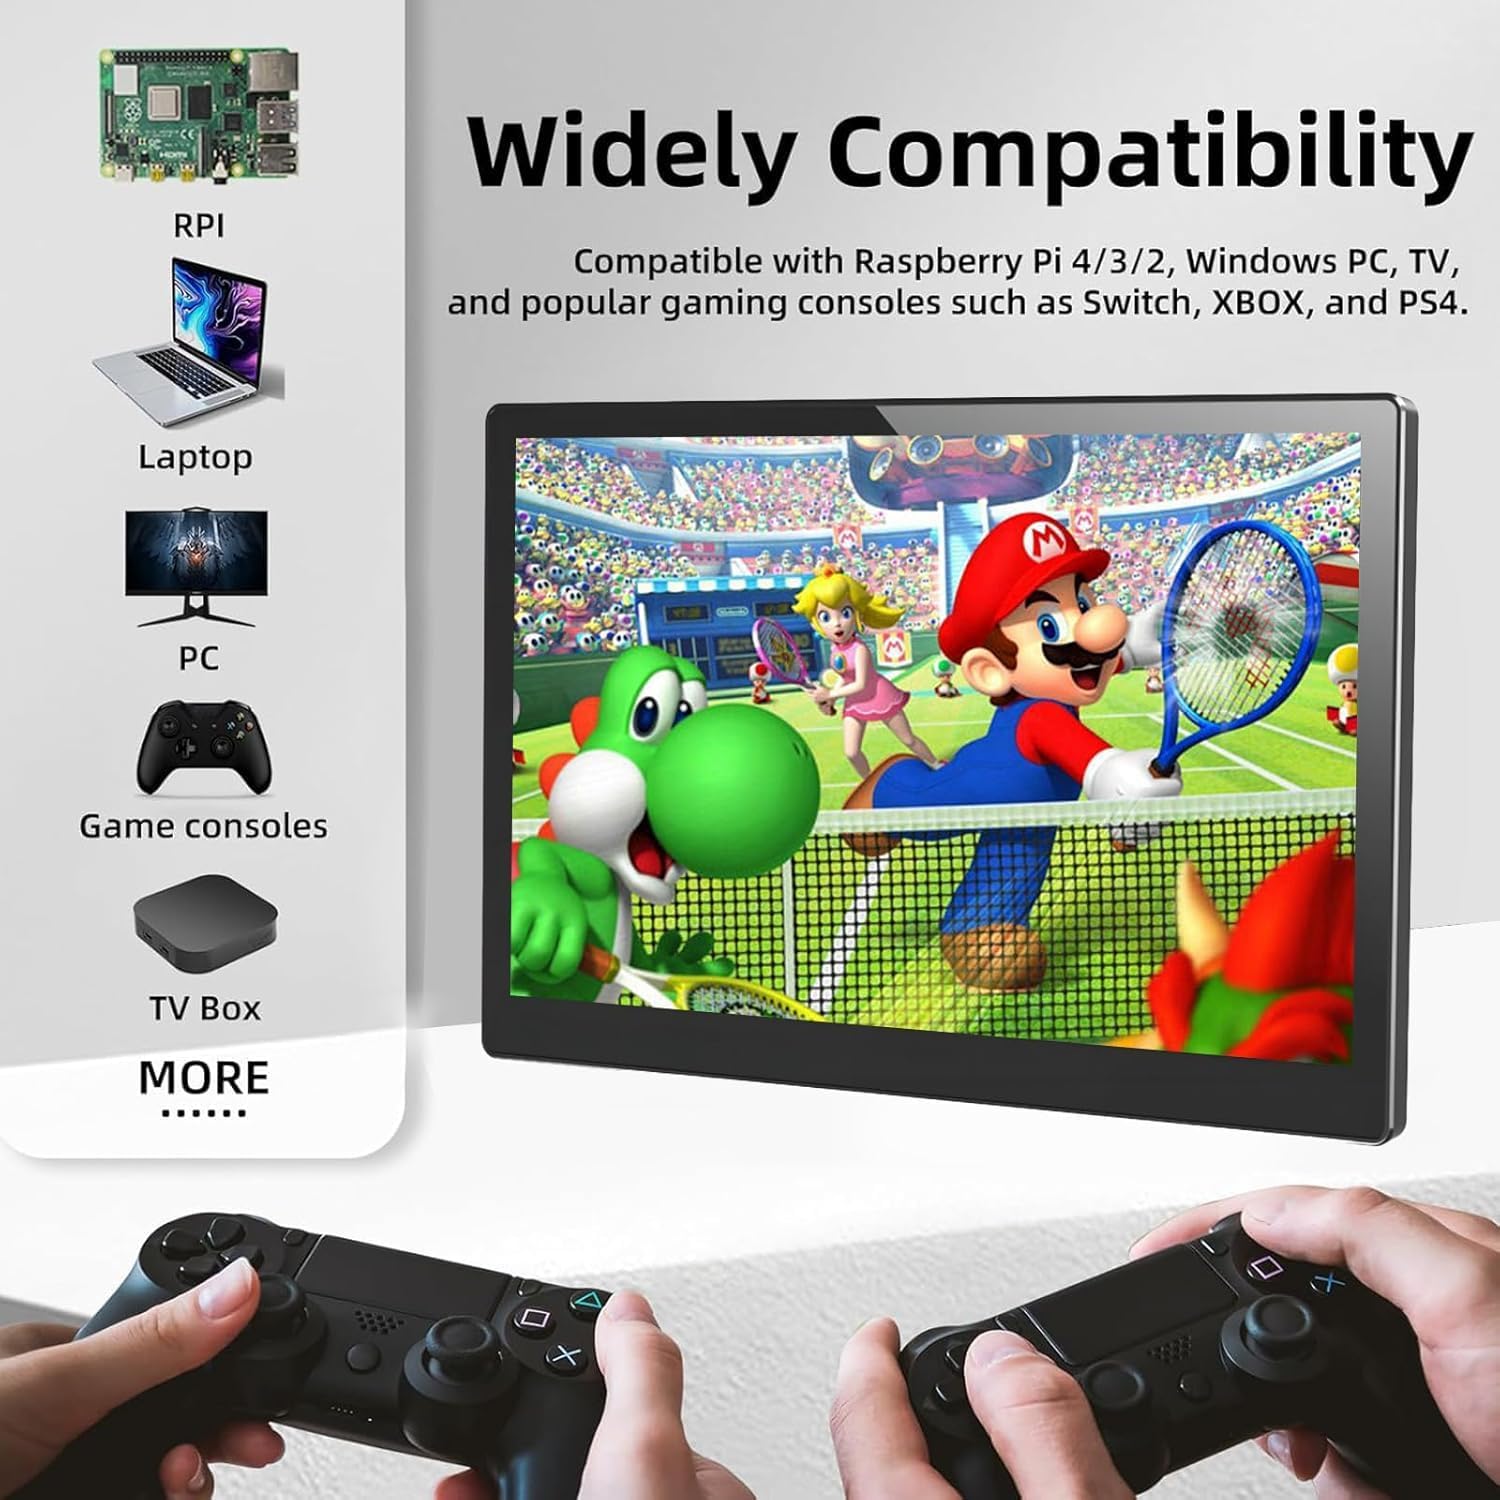
Image 6.2: Gaming Console Compatibility. This image highlights the monitor's compatibility with popular gaming consoles, showing a game displayed on the screen and game controllers.
7. Maintenance
To ensure the longevity and optimal performance of your monitor, follow these maintenance guidelines:
- Cleaning the Screen: Use a soft, lint-free cloth slightly dampened with water or a screen-cleaning solution. Avoid harsh chemicals, abrasive materials, or excessive moisture.
- Cleaning the Casing: Wipe the monitor casing with a soft, dry cloth.
- Avoid Extreme Conditions: Do not expose the monitor to extreme temperatures, direct sunlight for prolonged periods, or high humidity.
- Storage: When not in use for an extended period, store the monitor in a cool, dry place, preferably in its original packaging or a protective case.
- Handle with Care: Avoid dropping the monitor or subjecting it to strong impacts.
8. Troubleshooting
If you encounter issues with your Gallagher 7 Inch Touchscreen Monitor, please refer to the following common problems and solutions:
- No Signal Displayed:
- Ensure the HDMI cable is securely connected to both the monitor and the host device.
- Verify that the monitor is powered on and receiving adequate power from its dedicated adapter. If using with Raspberry Pi, ensure the monitor is powered separately from the Pi.
- Check the display settings on your host device to ensure the external monitor is detected and configured correctly.
- Touch Functionality Not Working:
- Confirm that the USB cable for touch is securely connected from the monitor to the host device.
- Verify that your operating system supports touch input for external displays.
- Remember that touch functionality is disabled on iOS systems.
- No Audio from Speakers:
- Check the volume level using the dial switch on the monitor.
- Ensure the audio output settings on your host device are configured to send audio to the external HDMI display.
- If using the 3.5mm headphone jack, ensure headphones are properly plugged in and the volume is adjusted.
- Flickering Screen:
- Ensure the monitor is receiving stable power from its dedicated power adapter. Insufficient power can cause flickering.
- Check the HDMI cable for damage or loose connections.
If these steps do not resolve your issue, please contact customer support for further assistance.
9. Specifications
| Feature | Specification |
|---|---|
| Screen Size | 7 Inches |
| Resolution | 1024 x 600 |
| Display Type | IPS LCD |
| Aspect Ratio | 16:9 |
| Viewing Angle | 178° |
| Touchscreen | 5-Point Capacitive |
| Audio | Dual Speakers, 3.5mm Headphone Jack |
| Input Interfaces | HDMI, USB (for touch) |
| Product Dimensions | 0.8 x 15.6 x 8 inches |
| Item Weight | 1.83 pounds |
10. Warranty and Support
The Gallagher 7 Inch Touchscreen Monitor comes with a manufacturer's defective warranty, free for one year from the date of purchase.
For any questions regarding the product or technical assistance, please contact our customer support team via email. Our dedicated R&D team is available to answer your technical questions. We aim to reply to emails within five minutes during our support hours, every evening from 8 PM to 12 PM.


