Introduction
This manual provides detailed instructions for the assembly, operation, and maintenance of your Bellemave Queen Loft Bed with Desk and Stairs. Please read all instructions carefully before beginning assembly and retain this manual for future reference. Ensure all parts are present and undamaged before proceeding.
Important Safety Information
- Do not exceed the maximum weight capacity of 350 lbs for the bed.
- Exercise caution around the desk edges to prevent injury.
- Ensure all connections are securely fastened before use. Regularly check and tighten fasteners.
- Keep children away from the assembly area until the bed is fully assembled.
Product Overview
The Bellemave Queen Loft Bed is designed to maximize space and functionality in any room. It features a robust metal frame, an integrated L-shaped desk, storage stairs, a wardrobe, LED lighting, and convenient USB charging ports.
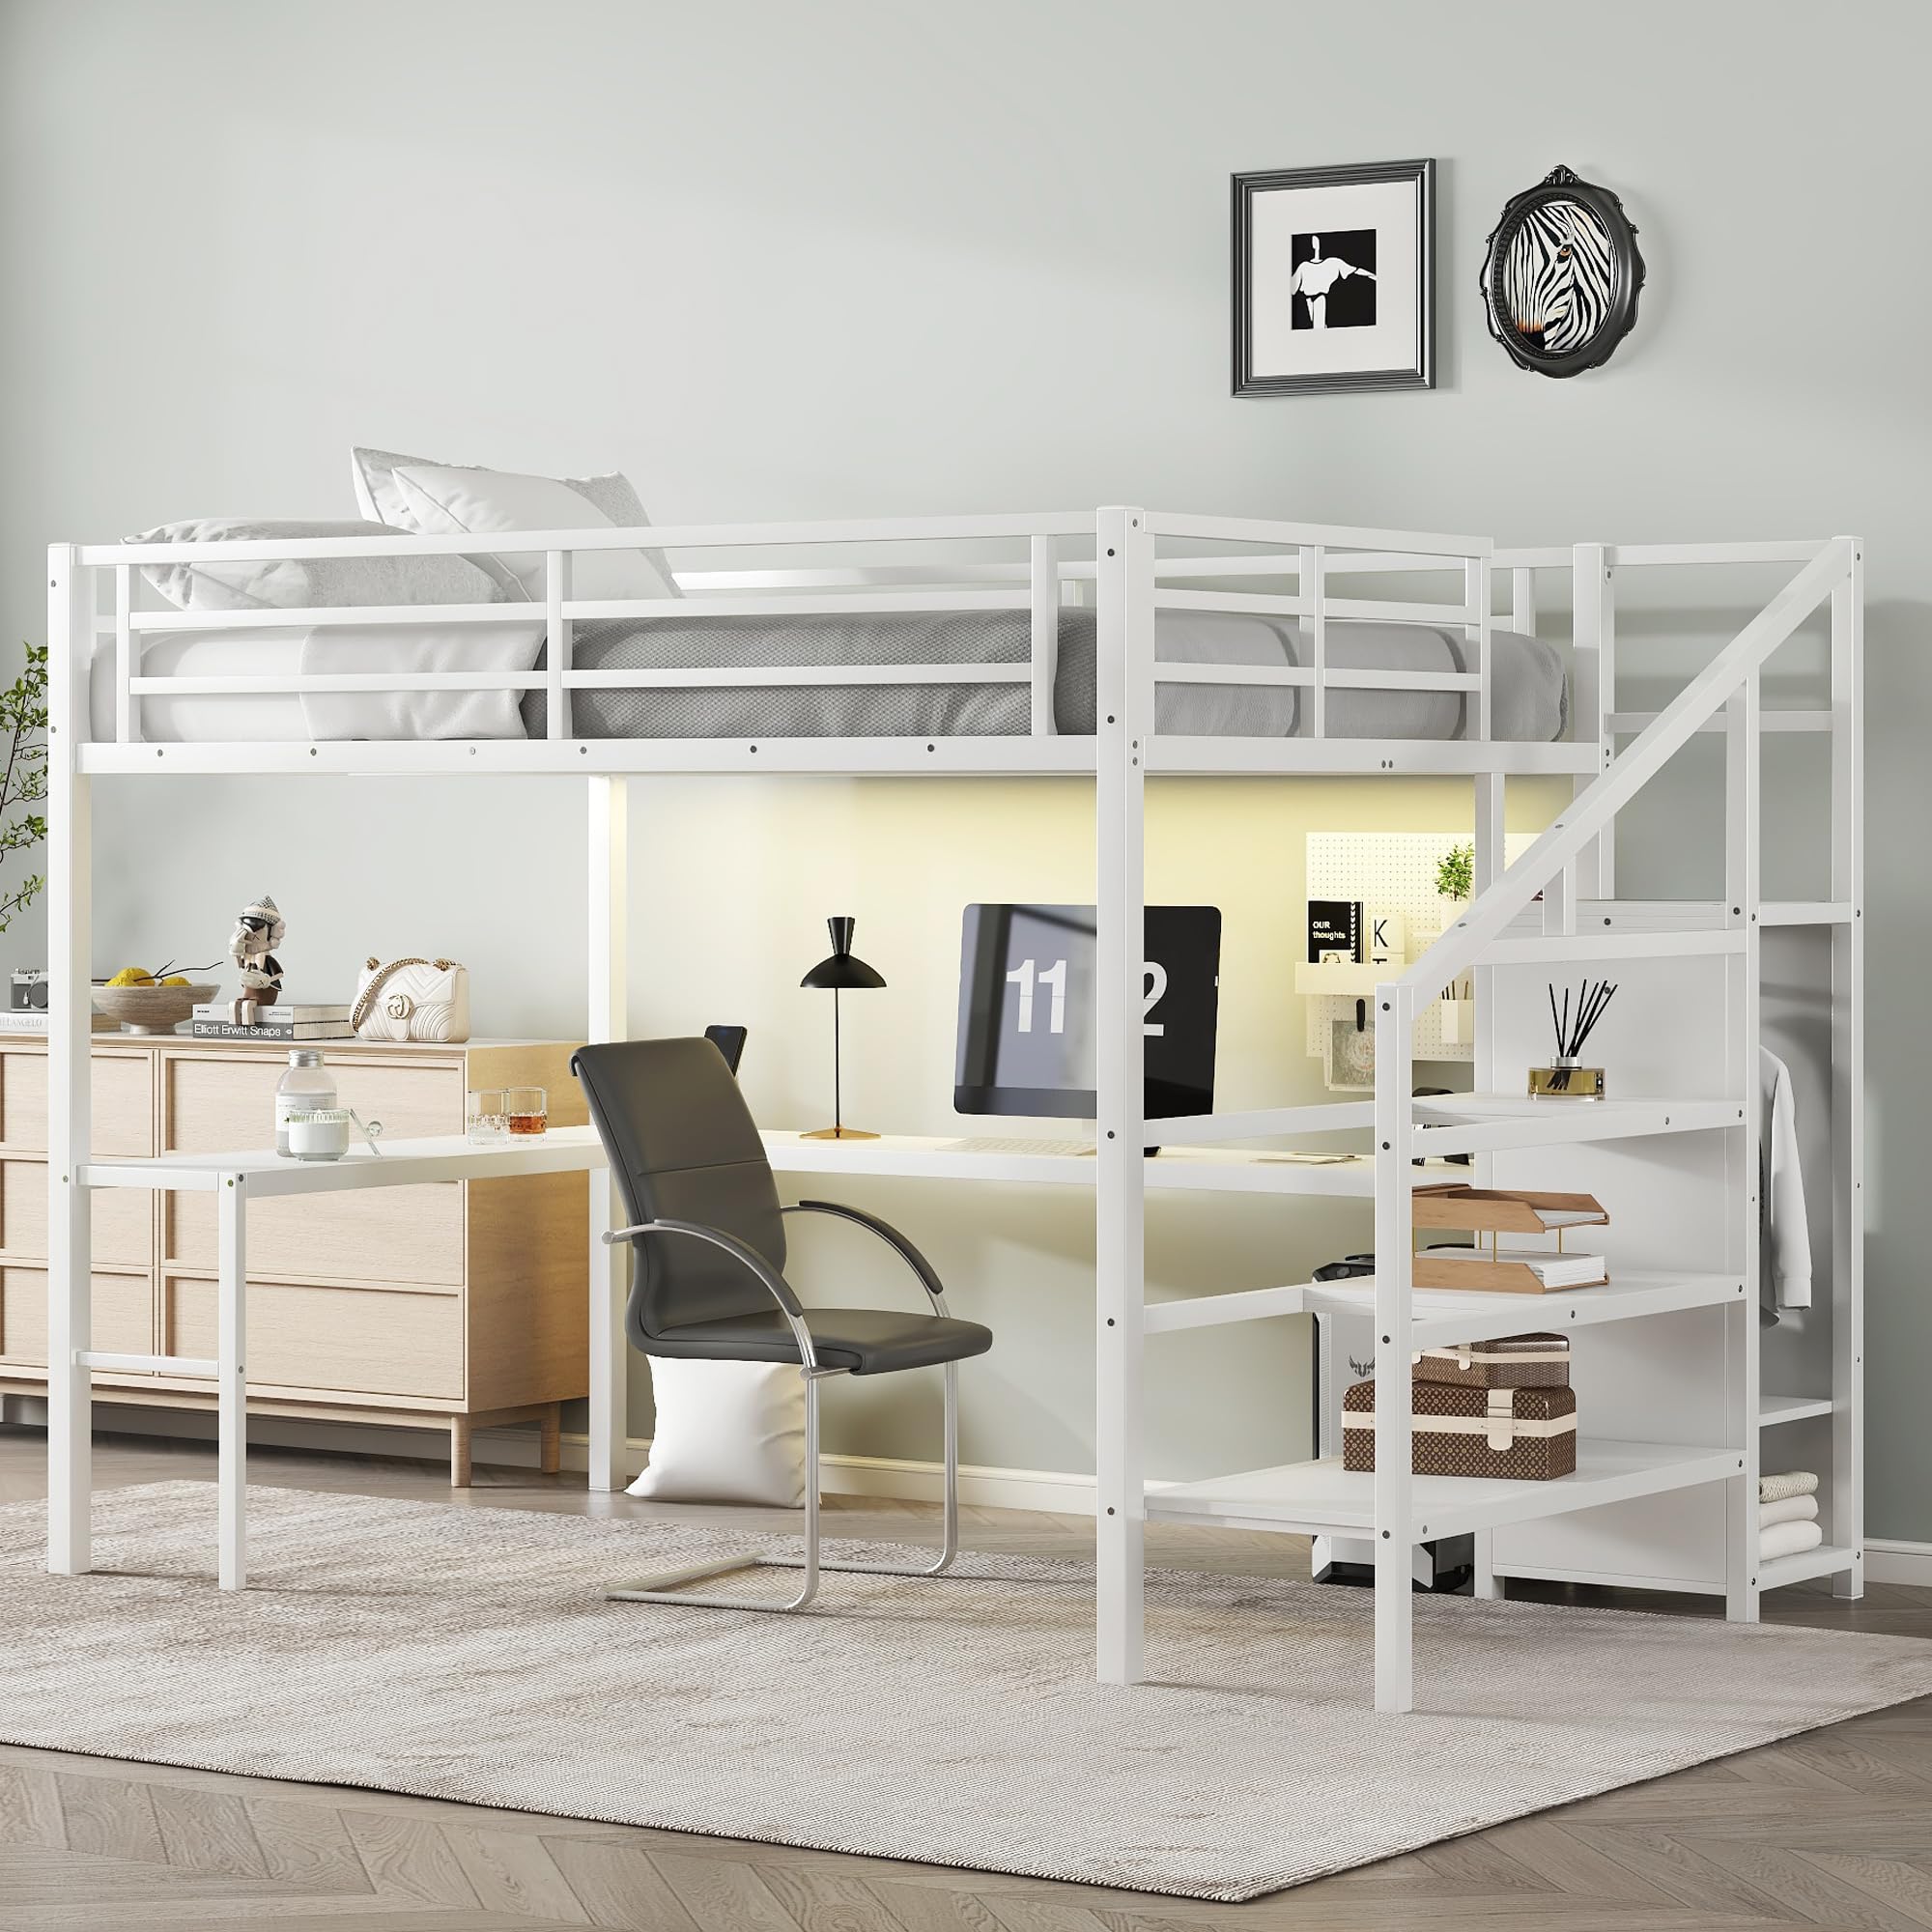
Figure 1: Overview of the Bellemave Queen Loft Bed with Desk and Stairs.
Key Features:
- Space-Saving Design: An L-shaped desk fits neatly under the bed, providing a dedicated area for work or study.
- Integrated Storage: Stairs double as storage shelves, and a built-in wardrobe includes a clothes rod and adjustable divider.
- Modern Amenities: Features LED lights with 16 color options and a remote control, plus a charging station with USB ports and outlets.
- Durable Construction: Constructed with a heavy-duty steel frame, full-length guardrails, and reinforced slats for stability and safety.
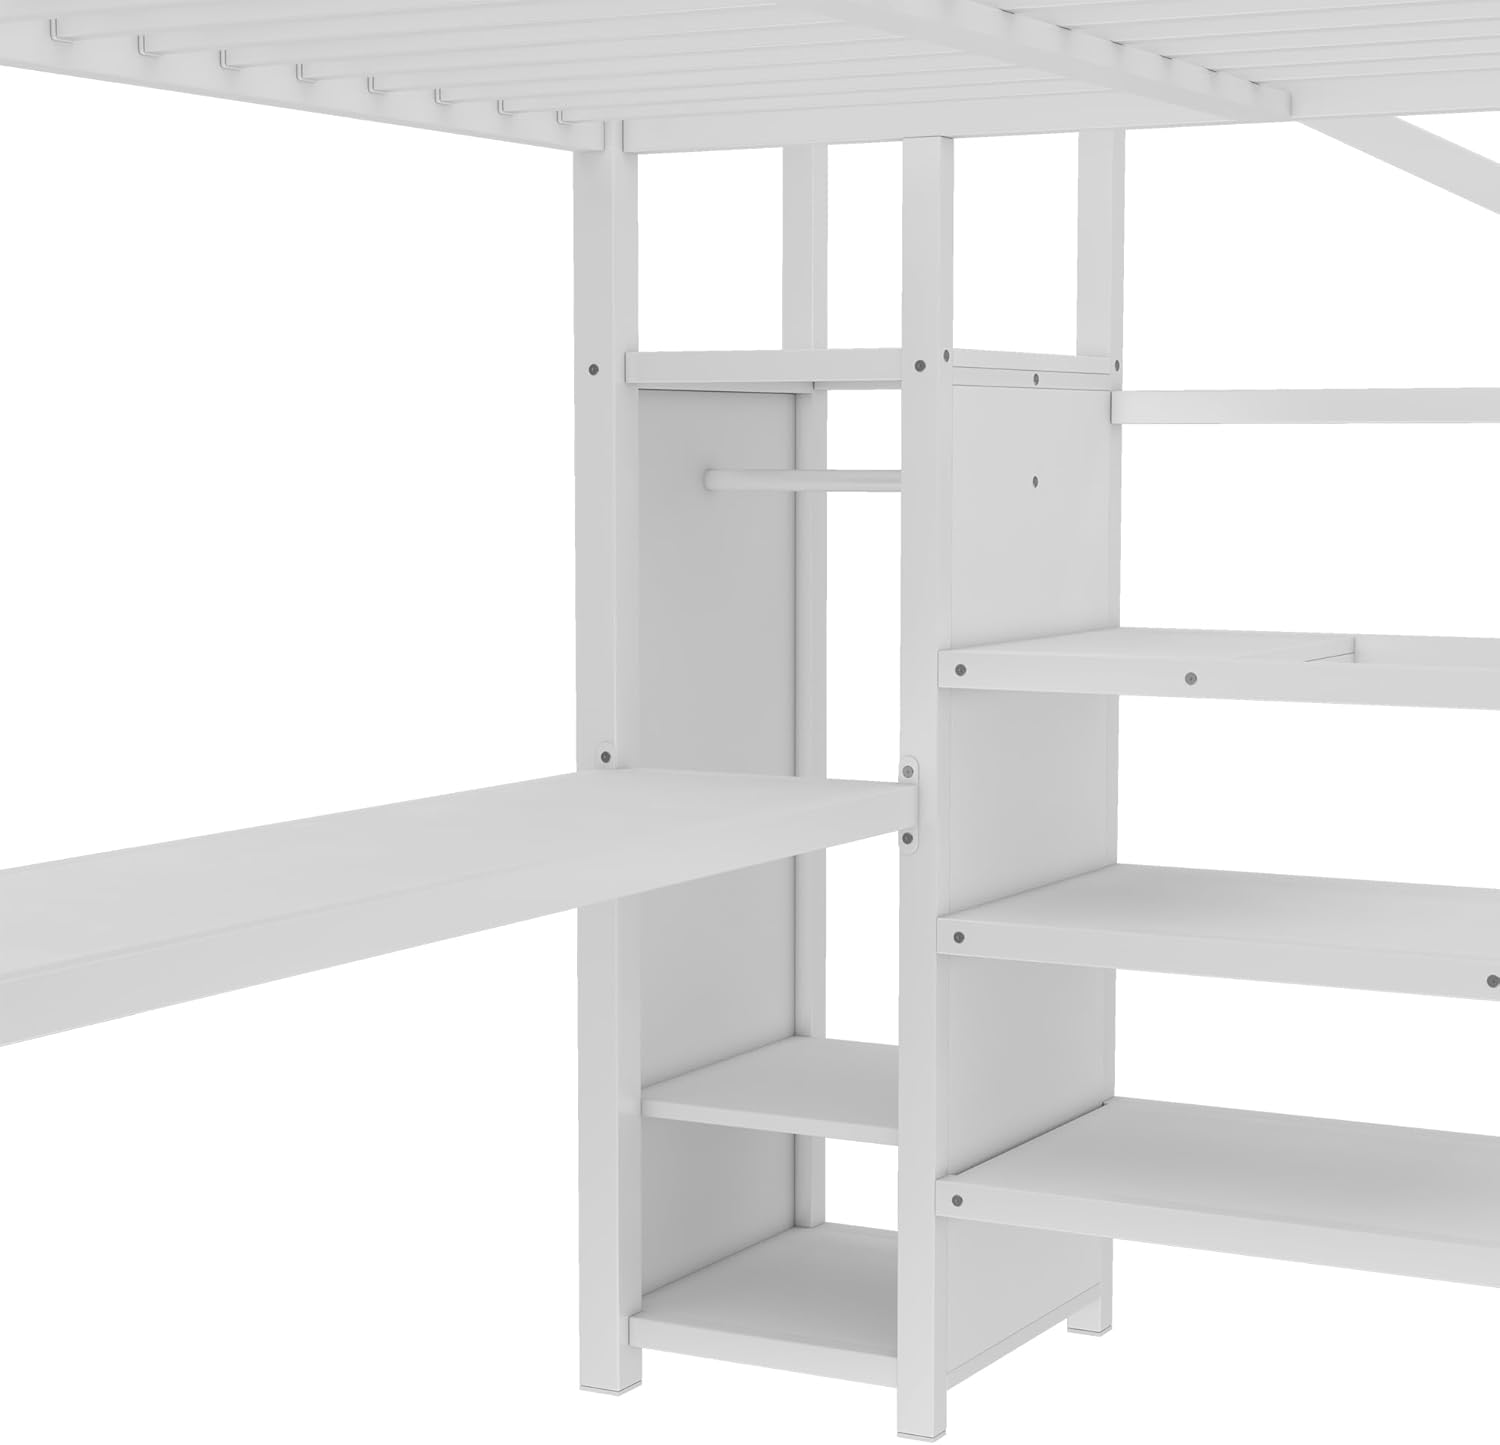
Figure 2: Detailed dimensions of the Bellemave Queen Loft Bed.
Parts List
All necessary parts, tools, and hardware are included for assembly. Each part is labeled for easy identification. Please refer to the included assembly diagrams for a complete visual parts list.
Before starting assembly, lay out all components and verify against the parts list to ensure nothing is missing or damaged. If any parts are missing or damaged, please contact customer support.
Setup / Assembly Instructions
Assembly of the Bellemave Queen Loft Bed is designed to be straightforward with labeled parts and clear instructions. It is recommended to have at least two adults for assembly.
General Assembly Tips:
- Assemble the bed in the room where it will be used.
- Do not fully tighten screws until all components are loosely assembled.
- Use a soft cloth or cardboard underneath parts to prevent scratching during assembly.
Assembly Steps:
- Assemble the Bed Frame Base: Begin by connecting the main horizontal and vertical support beams of the bed frame. Ensure all connections are aligned before securing.
- Install Bed Slats and Guardrails: Attach the bed slats to the frame. Secure the full-length guardrails to the perimeter of the bed platform.
- Construct the Desk Frame: Assemble the L-shaped desk frame components. Pay attention to the orientation of the desk sections.
- Integrate the Desk: Attach the assembled desk frame to the main bed frame supports.
- Assemble the Storage Stairs: Construct the storage stairs, ensuring the shelves and wardrobe components are correctly placed. The wardrobe includes a clothes rod and adjustable divider.
- Attach the Stairs: Securely attach the completed storage stairs unit to the main bed frame.
- Install LED Lights and USB Charging Station: Mount the LED light strip under the bed platform and connect the USB charging station to the designated area on the desk.
- Final Tightening: Once all components are in place and aligned, fully tighten all screws and fasteners.
Assembly Videos:
Video 1: 3D demonstration of loft bed installation. This video provides a visual guide to the assembly process.
Video 2: Assembly guide for the metal loft bed with stairs and shelf. This video offers a step-by-step visual for construction.
Operating Instructions
LED Lights:
The integrated LED lights feature 16 color options and are controlled via a remote. Point the remote at the light strip to change colors, adjust brightness, or select lighting modes.
USB Charging Station:
The desk includes a built-in charging station with USB ports and standard electrical outlets. Simply plug your devices into the appropriate port to charge. Ensure the bed is connected to a power source for the charging station to function.
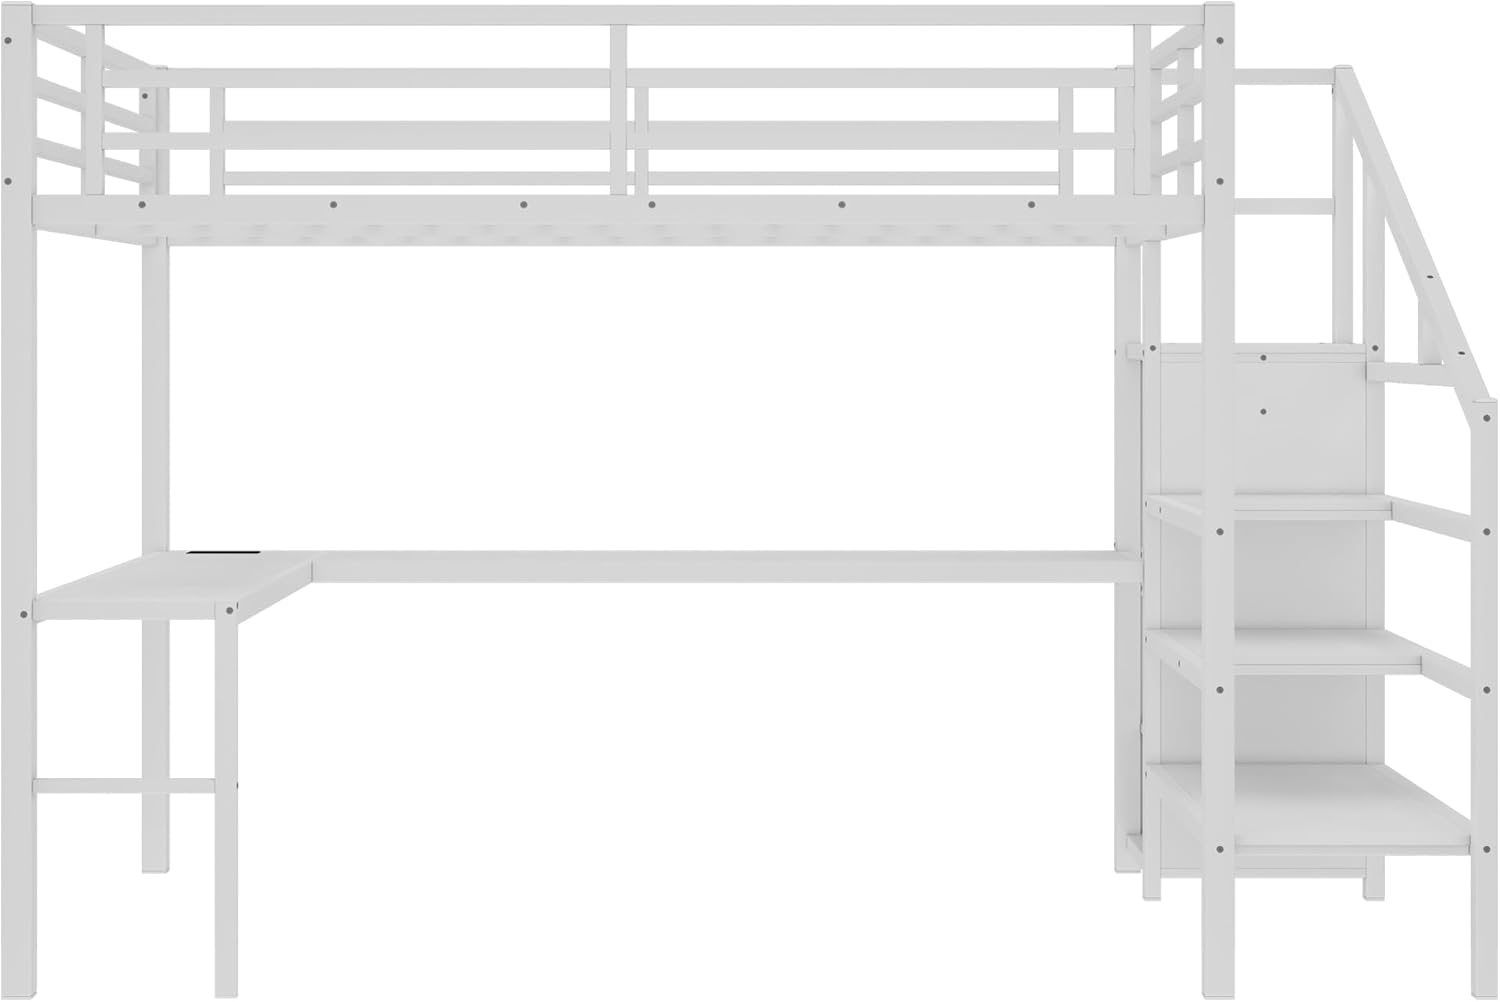
Figure 3: Close-up of the integrated USB charging station and outlets on the desk.
Maintenance
Cleaning:
- Wipe down metal surfaces with a soft, damp cloth. Avoid abrasive cleaners.
- For wooden surfaces (stairs, desk), use a furniture cleaner suitable for painted finishes.
- Regularly dust all surfaces to prevent buildup.
Inspection:
- Periodically check all bolts and fasteners to ensure they are tight. Re-tighten as necessary.
- Inspect the bed frame, slats, and guardrails for any signs of wear or damage.
- Ensure the LED lights and charging station are functioning correctly.
Troubleshooting
Common Issues and Solutions:
- Bed feels wobbly: Check all assembly bolts and ensure they are fully tightened. Verify that the bed is on a level surface.
- LED lights not working: Ensure the power adapter is securely plugged into an outlet and the light strip. Check the remote control battery.
- USB ports/outlets not charging: Confirm the bed's power cord is plugged into a functional wall outlet. Test the outlet with another device.
- Missing parts during assembly: Refer to the parts list and contact customer support immediately for replacements.
Specifications
| Feature | Detail |
|---|---|
| Brand | Bellemave |
| Model Number | B0F5HFCX7V |
| Size | Queen |
| Product Dimensions | 98.43"L x 62.99"W x 68.9"H |
| Material | Metal |
| Color | White |
| Weight Capacity | 350 lbs |
| Special Features | L-shaped Desk, Storage Stairs, Wardrobe, LED Lights, USB Ports |
| Assembly Required | Yes |
Warranty and Support
For any questions, missing parts, or concerns regarding your Bellemave Queen Loft Bed, please contact Bellemave customer support. Refer to your purchase documentation for specific warranty details. Customer satisfaction is our top priority.
Contact Information: Please refer to the contact details provided with your purchase or visit the official Bellemave website for support.


