
GODOX TT520III
Contents
Godox TT520III Camera Flash Instruction Manual
Model: TT520III | Brand: GODOX
1. Introduction
The Godox TT520III is a versatile camera flash designed to provide reliable and powerful lighting for various photographic scenarios. Featuring a 433MHz wireless triggering system, adjustable flash head, and multiple operating modes, this unit offers precise control over your lighting. This manual provides essential information for the safe and effective use of your TT520III flash.

Image: The Godox TT520III camera flash unit, its wireless trigger, and a mini stand.
2. Safety Information
- Do not disassemble or modify the product.
- Keep the product dry. Do not handle with wet hands or immerse in water.
- Keep out of reach of children.
- Do not use in the presence of flammable gases or liquids.
- Remove batteries when not in use for extended periods.
- Avoid direct eye exposure to the flash light.
3. What's in the Box
Verify that all items are present in your package:
- Camera TT520III Flash x1
- Mini Stand x1
- RT Transmitter x1
- Storage Bag x1
- Instruction Manual x1
- Description Of Applicable Models x1
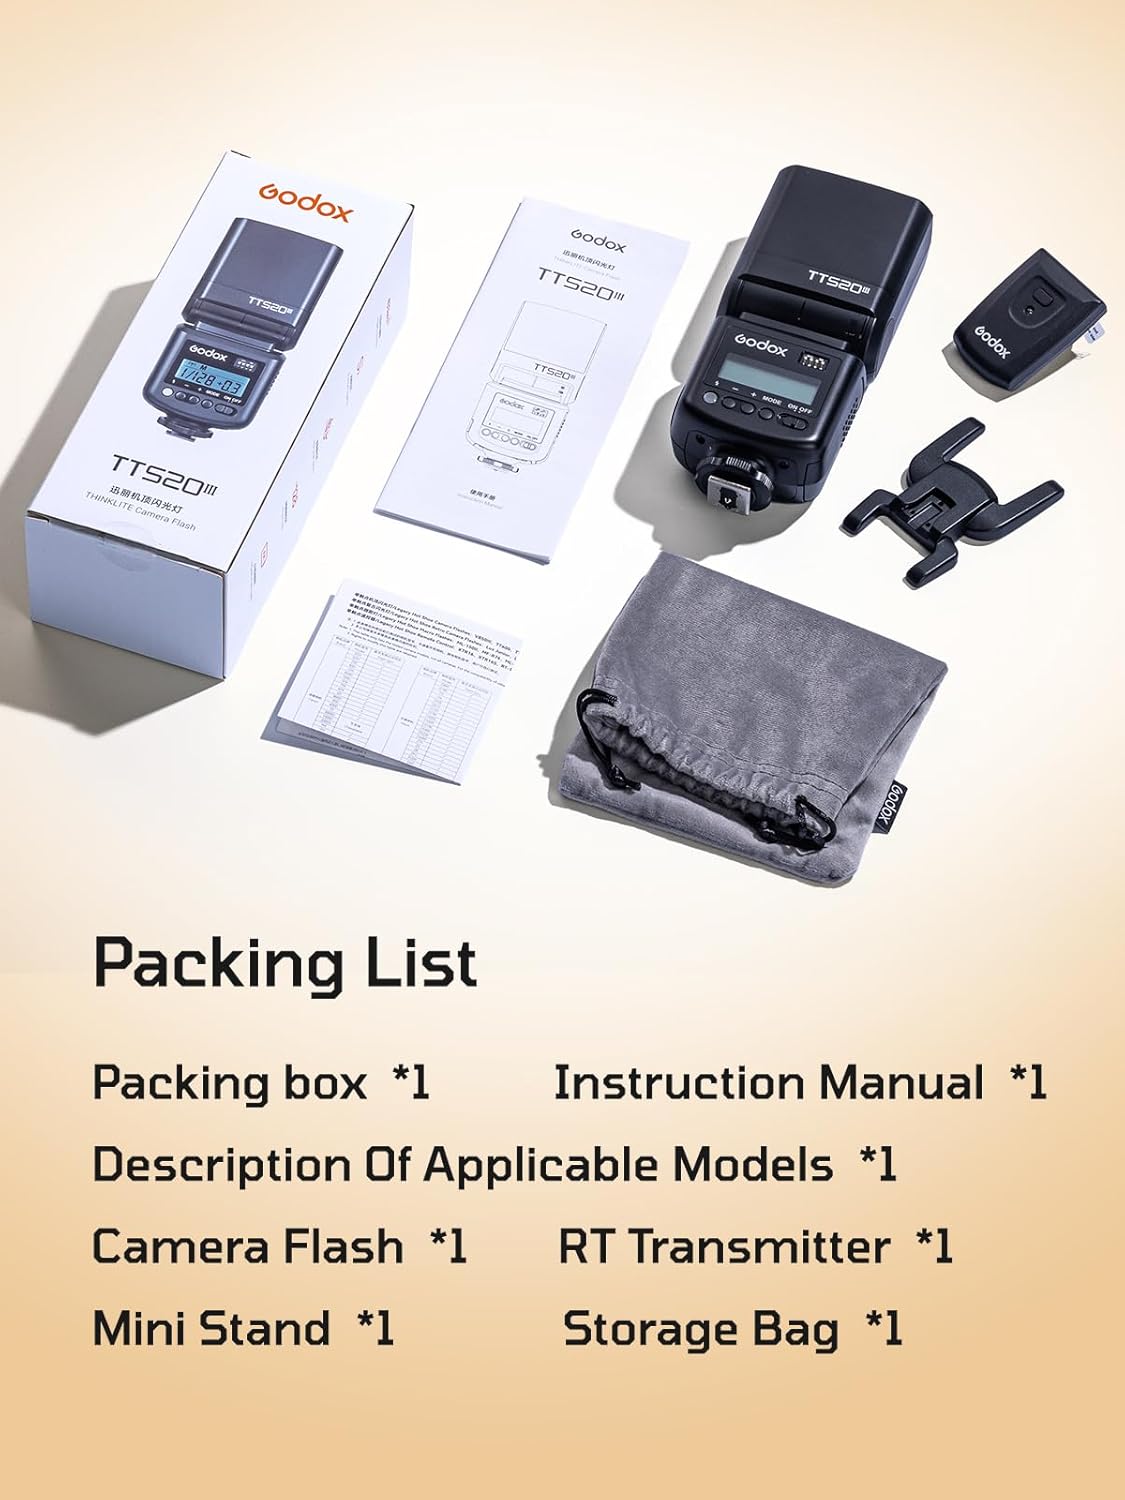
Image: A flat lay of the Godox TT520III package contents, showing the flash, wireless trigger, mini stand, storage bag, and documentation.
4. Product Overview
The Godox TT520III features a clear display, integrated light modifiers, and a flexible flash head for diverse lighting needs.

Image: The Godox TT520III flash unit with icons illustrating its key features: 433MHz wireless, 400 full-power flashes, universal hotshoe, multi-angle lighting, and S1/S2 photocell triggering.
Key Components:
- Flash Head: Rotates 330° horizontally and 127° vertically. Includes a built-in reflector and wide-angle diffuser.
- LCD Display: Shows current settings, including power level and mode.
- Control Buttons: For power, mode selection, and power adjustment.
- Hotshoe: Universal single-contact hotshoe for camera mounting.
- Battery Compartment: Holds 4 AA batteries.
- Quick-Charge Port: For optional external power pack (PB960, sold separately).
- PC Sync Port: For wired triggering.
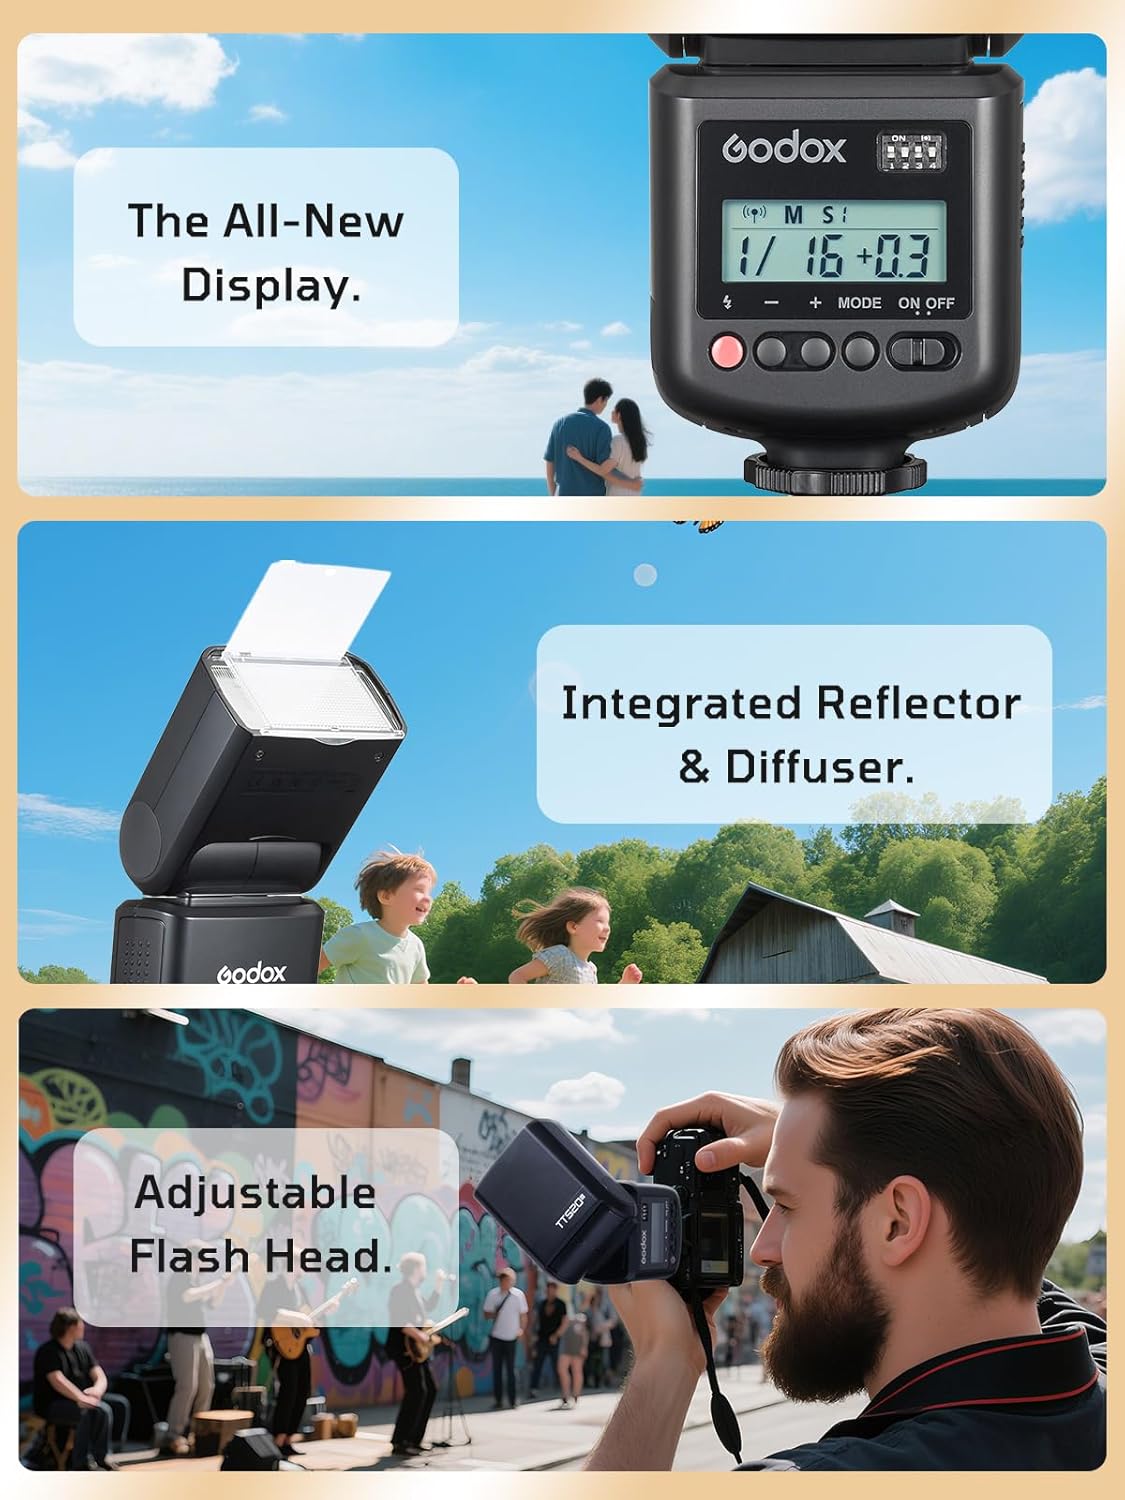
Image: Detailed views of the TT520III's display, the integrated reflector and diffuser pulled out from the flash head, and a user adjusting the flash head on a camera.
5. Setup
5.1 Battery Installation
- Open the battery compartment cover on the back of the flash unit.
- Insert four (4) AA batteries, ensuring correct polarity (+/-). NiMH batteries are recommended for optimal performance and recycle times.
- Close the battery compartment cover securely.
For extended shooting sessions and faster recycle times, an optional PB960 power box (sold separately) can be connected to the quick-charge port.

Image: A close-up showing a hand inserting AA batteries into the battery compartment of the Godox TT520III flash.
5.2 Mounting the Flash
On-Camera Mounting:
- Slide the flash's hotshoe onto your camera's hotshoe mount.
- Tighten the locking ring or lever on the flash to secure it to the camera.
Off-Camera Mounting:
Use the included mini stand to place the flash on a flat surface, or mount it onto a light stand via its 1/4" tripod socket.
6. Operating Instructions
6.1 Power On/Off
Press the ON/OFF button to power the flash on or off.
6.2 Manual Power Adjustment
The TT520III operates in manual mode, allowing precise control over flash output.
- Press the MODE button until 'M' (Manual) is displayed.
- Use the + and - buttons to adjust the power output from 1/128 to full power (1/1) in 1/3 stop increments.
The flash delivers approximately 400 full-power bursts on NiMH batteries with a recycle time of about 1.8 seconds.

Image: A photographer using the Godox TT520III flash on a camera, with text indicating its bright output, 400 full-power flashes on NiMH, and 1.8-second recycle time.
6.3 Flash Head Adjustment
The flash head can be rotated and tilted to direct light for bounce flash or direct illumination.
- Horizontal Rotation: Up to 330 degrees.
- Vertical Tilt: Up to 127 degrees.
Pull out the built-in reflector for catchlights or the wide-angle diffuser for softer light.
6.4 Wireless Triggering (433MHz)
The TT520III features an integrated 433MHz receiver for wireless synchronization with the included RT Transmitter.
- Attach the RT Transmitter to your camera's hotshoe.
- Ensure both the flash and transmitter are set to the same channel (1-16). Adjust channels using the DIP switches on the flash and transmitter.
- Keep the RT Transmitter within 50 feet (15m) of the camera flash for reliable signal synchronization.

Image: A woman posing for a photo, with a camera on a tripod and the Godox TT520III flash on a light stand, illustrating the 433MHz wireless triggering capability.
6.5 Optical Slave Modes (S1/S2)
The flash supports optical slave modes for triggering by another flash unit.
- S1 Mode: Triggers the flash upon sensing the first flash from a master unit. Suitable for manual flash.
- S2 Mode: Ignores the pre-flash of a master unit and triggers on the main flash. Useful for TTL master flashes.
7. Compatibility
The TT520III features a single-contact hotshoe, ensuring broad compatibility with most camera brands.
- Compatible Mountings: Canon, Nikon, Sony (excluding specific models), Fujifilm (excluding specific models), Olympus, and other cameras with a standard hotshoe.
- PC Sync Port: Retained for wired control (PC sync cord sold separately).
Important Compatibility Notes:
- NOT compatible with: Sony ZV-1F, Sony A9iii, A99, A77, A57, A350.
- NOT compatible with: Fuji X-A3, X100F, X100T.
- NOT compatible with: Canon 200Dii.
- Not compatible with other cameras without a hotshoe mount.

Image: A diagram illustrating the universal hotshoe design of the TT520III and a chart showing compatibility with Canon, Nikon, Sony, Fujifilm, Panasonic, and Olympus, alongside a list of incompatible Sony and Fuji models.
8. Optional Accessories
Enhance the functionality of your TT520III flash with various optional accessories (sold separately):
- S/S2 Brackets: For mounting Bowens-mount light modifiers.
- S-R1/S-R2 Adapters: For Godox AK-R1 magnetic accessories, allowing for creative light shaping.
- PB960 Power Box: External power source for faster recycle times and extended battery life.

Image: A visual guide to versatile accessories, showing how S/S2 brackets can be used with reflectors and softboxes, and S-R1/S-R2 adapters with AK-R1 magnetic accessories for light shaping.
9. Specifications
| Feature | Specification |
|---|---|
| Guide Number (GN) | 33 (ISO 100) |
| Wireless Triggering | 433MHz, 16 Channels |
| Wireless Range | Up to 15m (50 feet) |
| Flash Modes | Manual (M), S1, S2 |
| Power Adjustment | 8 levels (1/128 to 1/1) in 1/3 stop increments |
| Recycle Time | Approx. 1.8 seconds (with NiMH batteries) |
| Full Power Flashes | Approx. 400 (with NiMH batteries) |
| Flash Duration | 1/510s to 1/31,000s |
| Flash Sync Speed | 1/200s |
| Vertical Rotation Angle | 0 to 90 degrees |
| Horizontal Rotation Angle | 0 to 270 degrees |
| Power Source | 4x AA batteries (NiMH or Alkaline) |
| Dimensions | 8.7 x 3.31 x 2.99 inches |
| Weight | 15.8 ounces (without batteries) |
10. Troubleshooting
- Flash not firing: Check battery levels. Ensure the flash is powered on and securely mounted. Verify wireless channel settings if using the transmitter.
- Inconsistent flash output: Ensure batteries are fully charged or replaced. Check for obstructions between the flash and subject.
- Wireless triggering issues: Confirm the transmitter and flash are on the same channel. Ensure they are within the effective operating range (15m). Replace transmitter battery if applicable.
- Flash not recycling: Allow sufficient time for recycling. If using an external power pack, ensure it is properly connected and charged.
11. Maintenance
- Cleaning: Use a soft, dry cloth to clean the flash unit. For stubborn dirt, a slightly damp cloth can be used, followed by a dry cloth. Do not use solvents or abrasive cleaners.
- Storage: Store the flash in a cool, dry place away from direct sunlight and extreme temperatures. Remove batteries if storing for an extended period to prevent leakage.
- Handling: Avoid dropping the flash or subjecting it to strong impacts.
12. Warranty and Support
For warranty information, technical support, or service inquiries, please refer to the warranty card included with your product or contact Godox customer service through their official website or your point of purchase. Keep your proof of purchase for warranty claims.
Ask a question about this manual
Ask about setup, troubleshooting, compatibility, parts, safety, or missing instructions. Manuals+ will review the question and use this page’s manual context to help answer it.