
1. Important Safety Information
Please read this entire manual before assembly and use of the OLAKIDS 6V Kids ATV. Keep these instructions for future reference. Failure to follow these safety instructions could result in serious injury or death.
- Adult Supervision Required: This product is intended for children aged 18 months and older. Constant adult supervision is mandatory during operation.
- Weight Limit: Do not exceed the maximum weight capacity of 44 lbs (20 kg).
- Protective Gear: Always ensure the child wears appropriate safety gear, including a helmet, knee pads, and elbow pads.
- Safe Operating Environment: Use on flat, dry surfaces away from roads, cars, steep inclines, swimming pools, or other water bodies. Avoid loose dirt, mud, sand, or gravel.
- Battery Safety: Only use the provided charger. Do not short-circuit the battery terminals. Keep the battery away from heat and open flames.
- Remote Control: The parental remote control can override manual operation. Use the emergency brake (P button) on the remote control to prevent accidents. (Note: 2 x 1.5V AAA batteries for remote control are not included).
- Assembly: Adult assembly is required. Ensure all parts are securely fastened before use.
- Compliance: This product complies with US. CPSIA and ASTM Requirements, made of non-toxic materials, free from harmful substances.
2. Product Overview
The OLAKIDS 6V Kids ATV is designed to provide an engaging and safe riding experience for toddlers. It features a realistic ATV design with LED headlights, a spray function with colorful lights, and a functional storage trunk. The ATV can be operated manually by the child or via a parental remote control.
Key Features:
- Spray Function: Adds an interactive element with water mist and colorful lights.
- 6V Motor: Powered by a 6V 4.5AH rechargeable battery with a 15W motor, reaching speeds up to 1.24 mph.
- Dual Control Modes: Manual operation by child or parental remote control.
- Entertainment Features: Built-in music, horn, USB port for external audio, and power display.
- Storage Trunk: Convenient space for toys or small items.
- Safety Features: Slow start function, durable wear-resistant wheels with rear suspension, and a 3-point seat belt.
Components:
Familiarize yourself with the main components of your OLAKIDS ATV.

Image: The OLAKIDS 6V Kids ATV in red, showcasing its overall design, including the remote control, LED headlights, and rear storage trunk with spray effect.

Image: Close-up of the ATV's dashboard, highlighting the music, horn, USB port, and power display functions for interactive play.

Image: Demonstration of the ATV's spray function, showing water being poured into the storage box and the mist effect with colorful lights.
3. Package Contents
Ensure all items are present before beginning assembly:
- 1 x Ride on Car (Main Body)
- 1 x Remote Control
- 1 x Instruction Manual (This document)
- 1 x Charger
- Wheels (Quantity as per model)
- Axles and Fasteners
- Handlebar
- Front Bumper
- Rear Storage Box
- Other small assembly parts (e.g., caps, screws)
4. Assembly Instructions
Adult assembly is required. Please follow these steps carefully. Refer to the assembly video for visual guidance.
Assembly Video:
Video: Official OLAKIDS assembly guide for the Kids Ride on Car. This video demonstrates the step-by-step process of putting together the ATV, including wheel installation, handlebar attachment, and battery connection.
Step-by-Step Guide:
- Install Rear Wheels:
Attach the rear wheels to the axle. Secure them with the provided washers and nuts. Ensure they spin freely but are firmly attached.

Image: Close-up of the wear-resistant rear wheels, showing their robust design suitable for various terrains.
- Install Front Wheels:
Attach the front wheels to the front axle, securing them with the appropriate fasteners. Connect the motor to the front wheel assembly if applicable.
- Attach Handlebar:
Insert the handlebar into the designated slot on the main body. Secure it with the provided screws and cap.
- Install Front Bumper:
Attach the front bumper to the front of the ATV using the provided screws.
- Install Rear Storage Box:
Attach the rear storage box to the back of the ATV. Secure it with screws. This box also houses the spray function mechanism.
- Connect Battery:
Lift the seat to access the battery compartment. Connect the red battery terminal to the corresponding red wire, and the black terminal to the black wire. Ensure all connections are secure. Replace the seat and fasten it.
5. Operating Instructions
5.1 Manual Operation (Child Control)
- Power On: Locate the power switch on the dashboard and turn it to the "ON" position.
- Direction: Use the forward/reverse switch to select the desired direction.
- Acceleration: Press the foot pedal to accelerate. Release the pedal to brake.
- Steering: Turn the handlebar left or right to steer the ATV.
- Horn & Music: Use the buttons on the steering wheel to activate the horn or play built-in music. The USB port allows for playing external audio.
5.2 Parental Remote Control
The remote control allows parents to safely guide the ATV and intervene if necessary. It requires 2 x 1.5V AAA batteries (not included).
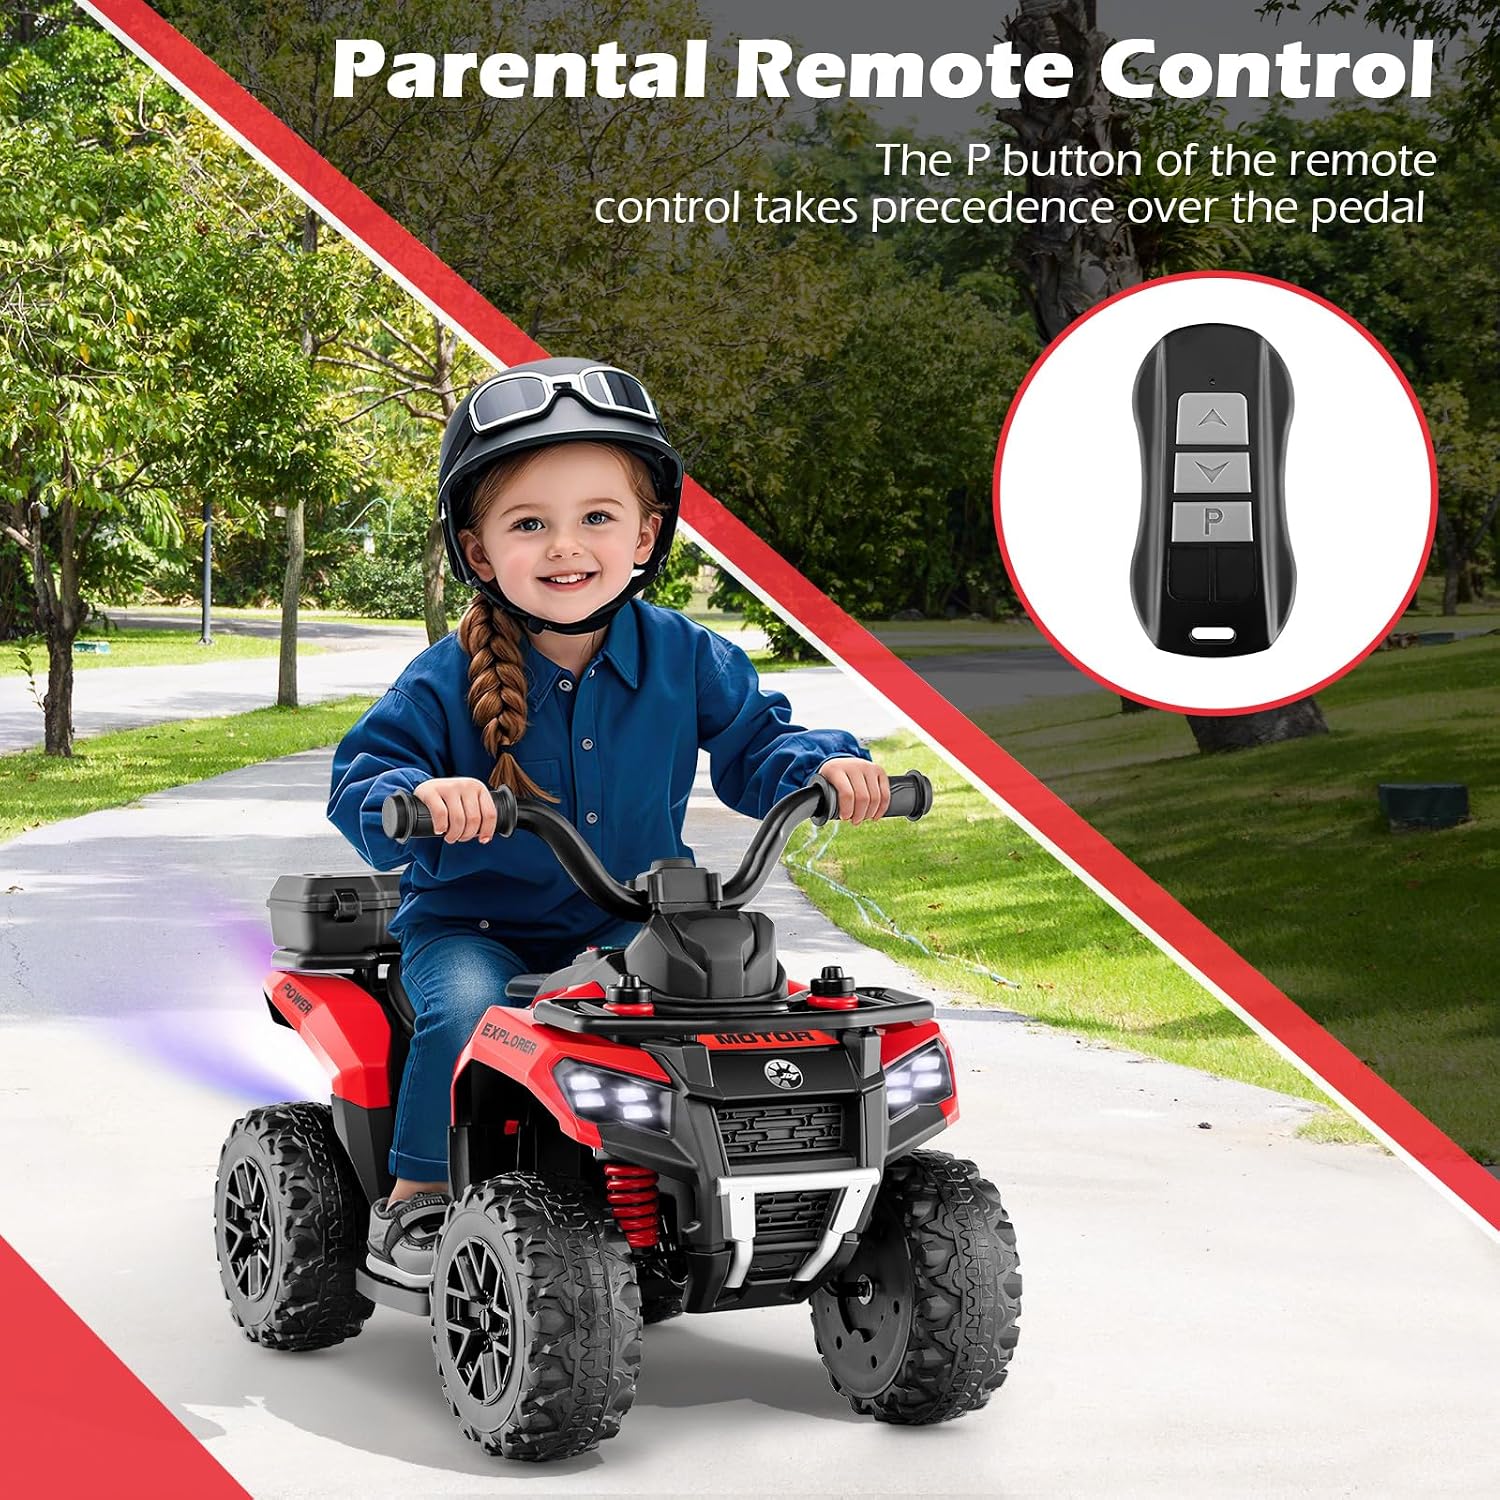
Image: The parental remote control, showing buttons for forward, backward, and the emergency brake (P button).
- Pairing: Follow the instructions in the remote control's separate manual (if provided) to pair it with the ATV.
- Directional Control: Use the arrow buttons to move the ATV forward or backward.
- Emergency Brake (P button): Press the "P" button to immediately stop the ATV. This function overrides manual control.
5.3 Spray Function
- Fill Water: Open the lid of the rear storage box. Use the provided funnel to pour 20-60ml of clean water into the designated port.
- Activate: Close the lid. Locate the atomization switch on the dashboard and turn it on. The ATV will emit water mist with colorful lights.
6. Charging the Battery
The ATV is powered by a 6V 4.5AH rechargeable battery. A full charge provides approximately 45 minutes of play time.
- Charging Port: Locate the charging port on the ATV (usually near the battery compartment or under the seat).
- Connect Charger: Plug the charger into the charging port, then plug the charger into a standard wall outlet.
- Charging Time: Charge for 6-8 hours for a full charge. Do not overcharge.
- Indicator: The charger may have an indicator light to show charging status (refer to charger manual for details).
- Disconnect: Once fully charged, disconnect the charger from the ATV and the wall outlet.
7. Maintenance
- Cleaning: Wipe the ATV with a soft, damp cloth. Do not use abrasive cleaners or solvents. Avoid spraying water directly onto electrical components.
- Storage: Store the ATV in a dry, cool place away from direct sunlight and moisture. If storing for extended periods, charge the battery fully every 3 months to prolong its lifespan.
- Battery Care: Regularly check battery terminals for corrosion. Keep the battery compartment dry.
- Inspection: Periodically check all screws, nuts, and connections to ensure they are tight and secure. Inspect wheels and tires for wear.
8. Troubleshooting
| Problem | Possible Cause | Solution |
|---|---|---|
| ATV does not move | Battery is low or not connected; Power switch is off; Foot pedal not pressed. | Charge the battery; Check battery connections; Turn on power switch; Ensure foot pedal is fully pressed. |
| Remote control not working | Remote batteries are dead or not installed; Remote not paired. | Replace remote batteries; Refer to remote manual for pairing instructions. |
| Spray function not working | Water tank is empty; Atomization switch is off. | Refill water tank; Turn on atomization switch. |
| ATV moves slowly | Battery is low; Overloaded (exceeds weight limit); Operating on uneven terrain. | Charge the battery; Reduce load; Use on flat surfaces. |
9. Specifications
| Feature | Detail |
|---|---|
| Battery | 6V 4.5AH |
| Motor | 15 W |
| Speed | Up to 1.24 Mph (2 km/h) |
| Material | PP (Polypropylene) |
| Net Weight | 11.8 Lbs (5.35 kg) |
| Charge Time | 6-8 Hours |
| Play Time | Approx. 45 Minutes |
| Weight Capacity | 44 Lbs (20 kg) |
| Suitable Age | 18 Months+ |
| Overall Dimension | 27” x 14” x 17” (L x W x H) |
| Remote Control Batteries | 2 x 1.5V AAA (not included) |

Image: Visual representation of the ATV's dimensions, including length, width, height, seat size, and storage box size.
10. Warranty and Support
For warranty information or technical support, please refer to the contact details provided on the product packaging or the official Olakids website. Keep your purchase receipt as proof of purchase.