
1. Introduction
Thank you for choosing the Bonsenkitchen VS5100 Food Vacuum Sealer. This appliance is designed to preserve food freshness for longer periods, reduce food waste, and prepare ingredients for Sous Vide cooking. Please read this manual thoroughly before operating the machine to ensure safe and efficient use. Keep this manual for future reference.
2. Important Safety Instructions
- Read all instructions before use.
- Do not immerse the appliance, power cord, or plug in water or other liquids.
- This appliance is not intended for use by persons (including children) with reduced physical, sensory, or mental capabilities, or lack of experience and knowledge, unless they have been given supervision or instruction concerning use of the appliance by a person responsible for their safety.
- Unplug from outlet when not in use and before cleaning.
- Do not operate any appliance with a damaged cord or plug, or after the appliance malfunctions or has been damaged in any manner.
- Use only manufacturer-recommended attachments.
- Do not use outdoors.
- Do not place on or near a hot gas or electric burner, or in a heated oven.
- Always ensure the lid is properly closed and locked before operating.
- Exercise extreme caution when handling hot sealing strip.
3. Product Overview
The Bonsenkitchen VS5100 features a robust design with intuitive controls for efficient food preservation.
3.1 Components

Image Description: An exploded diagram of the Bonsenkitchen VS5100 vacuum sealer, highlighting its key components. These include (1) the control panel with buttons, (2) external accessory port, (3) bag clip, (4) integrated cutter, (5) internal bag roll storage, and (6) the vacuum chamber.
- Control Panel: Contains various buttons for different sealing modes and power.
- External Accessory Port: For connecting external vacuum hoses for containers.
- Bag Clip: Holds the vacuum bag in place during operation.
- Integrated Cutter: For custom-sizing vacuum bags from a roll.
- Bag Roll Storage: Internal compartment for storing a vacuum bag roll.
- Vacuum Chamber: Area where air is removed from the bag.
- Sealing Strip: Heats to create a secure seal.
- Easy-Lock Handle: For securing the lid with one hand.
3.2 Control Panel Functions
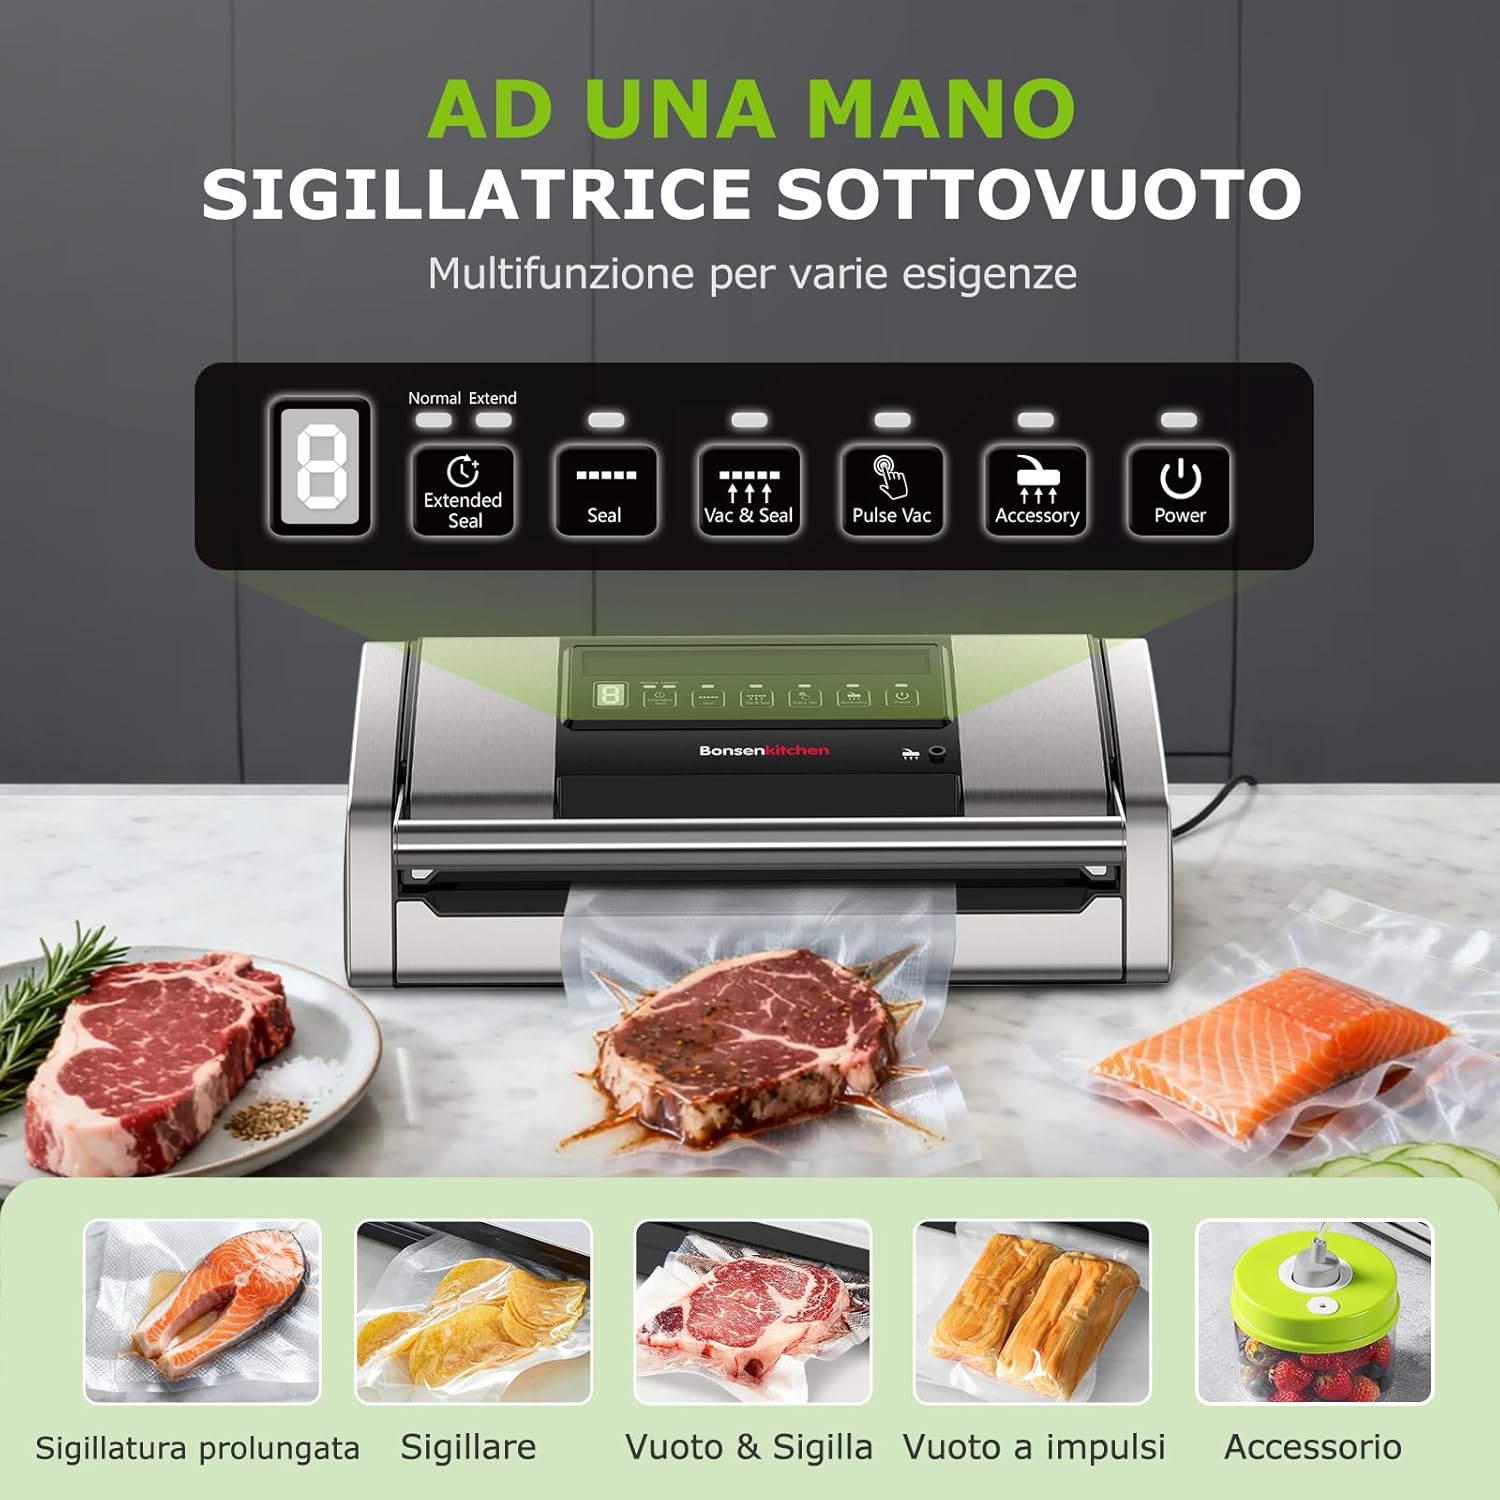
Image Description: A close-up view of the Bonsenkitchen VS5100 control panel, displaying buttons for 'Extended Seal', 'Seal', 'Vac & Seal', 'Pulse Vac', 'Accessory', and 'Power'. An LED display shows a number '8'.
- Extended Seal: Extends the sealing time for thicker bags or wet items.
- Seal: Creates a seal without vacuuming, useful for making bags from a roll.
- Vac & Seal: Automatically vacuums and seals the bag. Ideal for dry foods.
- Pulse Vac: Allows manual control over the vacuum process, suitable for delicate or moist foods.
- Accessory: Activates the vacuum function for external containers.
- Power: Turns the machine on/off.
4. Setup
4.1 Unpacking and Initial Inspection
- Carefully remove the vacuum sealer and all accessories from the packaging.
- Check for any signs of damage. Do not use if the appliance or cord is damaged.
- Wipe the exterior of the machine with a damp cloth. Ensure the sealing strip and vacuum chamber are clean and dry.
4.2 Loading a Vacuum Bag Roll

Image Description: The Bonsenkitchen VS5100 vacuum sealer is shown alongside its complete starter kit. This includes one roll of vacuum bags (28cm x 600cm), ten pre-cut vacuum bags (20cm x 30cm), an air suction tube, three external interfaces, a bag clip, and a user manual.
- Open the lid of the vacuum sealer.
- Place the vacuum bag roll into the internal storage compartment (5).
- Pull out a sufficient length of bag material.
- Use the integrated cutter (4) to cut the bag to the desired length.
- Place one end of the cut bag over the sealing strip. Close the lid and press the 'Seal' button to create the bottom seal of your custom bag.
4.3 Power Connection
Plug the power cord into a standard electrical outlet. The machine is now ready for operation.
5. Operating Instructions
5.1 General Vacuum Sealing Steps

Image Description: This image illustrates the ease of use of the Bonsenkitchen VS5100 vacuum sealer. It shows a user initiating the vacuum and seal process with a single button press and demonstrating the convenient one-hand operation of the device.
- Place the food item into a vacuum sealer bag, leaving at least 7-10 cm (3-4 inches) of space from the top edge.
- Ensure the open end of the bag is clean, dry, and free of food particles or wrinkles.
- Open the lid of the vacuum sealer. Place the open end of the bag into the vacuum chamber (6), ensuring it lies flat over the sealing strip. Use the bag clip (3) to hold it in place.
- Close the lid and press down firmly on the Easy-Lock handle until it clicks into place.
- Select the appropriate mode based on your food type (see 5.2 Operating Modes).
- The machine will automatically vacuum and seal (for 'Vac & Seal') or perform the selected function.
- Once the process is complete, the indicator light will turn off. Press the release buttons on the sides to open the lid and remove the sealed bag.
5.2 Operating Modes

Image Description: This graphic details the five primary functions of the vacuum sealer, showing examples of food suitable for each mode. 'Extended Seal' is for items like salmon, 'Seal' for snacks like chips, 'Vac & Seal' for meats and nuts, 'Pulse Vac' for delicate items like bread and grapes, and 'Accessory' for vacuuming bottles or containers.
- Vac & Seal (Automatic Vacuum & Seal): Press this button for automatic vacuuming and sealing of dry foods.
- Pulse Vac (Manual Vacuum Control): Press and hold this button to manually control the vacuum process. Release the button when the desired vacuum level is reached, then press 'Seal' to complete the process. This is ideal for delicate foods (e.g., bread, pastries) or moist foods where over-vacuuming could crush or extract liquids.
- Seal (Manual Seal): Use this button to create a seal without vacuuming. This is useful for making custom-sized bags from a roll or for sealing bags that do not require vacuuming.
- Extended Seal: If you are sealing bags with a lot of moisture or thicker bags, press this button to increase the sealing time, ensuring a stronger, more secure seal.
- Accessory: Connect the external vacuum hose to the accessory port (2) and to a compatible vacuum container or bottle stopper. Press this button to begin vacuuming the container.
6. Maintenance and Cleaning
6.1 Cleaning the Vacuum Sealer
- Always unplug the appliance before cleaning.
- Wipe the exterior of the machine with a soft, damp cloth. Do not use abrasive cleaners or solvents.
- Clean the vacuum chamber (6) and sealing strip with a damp cloth after each use, especially if any liquids or food particles have entered. Ensure these areas are completely dry before storing or next use.
- Do not immerse the appliance in water or any other liquid.
6.2 Storage
Store the vacuum sealer in a dry, clean place. For optimal performance and to prevent deformation of the sealing strip, it is recommended to store the machine with the lid unlatched or slightly open.
7. Troubleshooting
- Machine does not turn on: Ensure the power cord is securely plugged into a working outlet. Check if the power button has been pressed.
- Machine vacuums but does not seal: Ensure the bag is placed correctly over the sealing strip. Check if the sealing strip is clean and free of debris. The sealing strip may be too hot from continuous use; allow it to cool down for a few minutes.
- Vacuum is weak or incomplete: Check for wrinkles in the bag inside the vacuum chamber. Ensure the lid is properly closed and locked with the Easy-Lock handle. Inspect the bag for any punctures or tears. Ensure the foam gaskets around the vacuum chamber are clean and intact.
- Air leaks into the bag after sealing: The seal might be incomplete. Try using the 'Extended Seal' mode. Ensure the bag material is suitable for vacuum sealing. Check for sharp edges on food items that might have punctured the bag.
- Bag melts during sealing: The sealing strip might be too hot. Allow the machine to cool down between seals. For thinner bags, consider using a shorter sealing time if available, or ensure you are not using 'Extended Seal' unnecessarily.
8. Specifications
| Feature | Specification |
|---|---|
| Brand | Bonsenkitchen |
| Model | VS5100 |
| Material | Stainless Steel |
| Color | Silver |
| Power Source | Corded Electric |
| Operation Mode | Semi-automatic |
| Vacuum Power | 15 L/min |
| Wattage | 125 Watts |
| Dimensions (Approx.) | 41 cm (Length) x 22 cm (Width) x 12 cm (Height) |
9. Warranty and Support
This Bonsenkitchen VS5100 Food Vacuum Sealer includes three years of technical support from the manufacturer. For any questions, troubleshooting assistance, or warranty claims, please contact Bonsenkitchen customer service through their official website or the retailer where the product was purchased. Please have your model number (VS5100) and proof of purchase ready when contacting support.


