1. Overview
The ChunHee Wireless Emergency Call Button System (Model CC19) is designed to provide reliable assistance and enhance safety for seniors and individuals requiring care. This system ensures quick connectivity for assistance, improving safety within the home environment.
Key features include:
- Reliable Assistance: Caregivers do not need to be constantly present; a simple button press alerts them.
- Wide Range: Up to 100 meters indoors for the pendant button and 60 meters for the wristband, overcoming distances and noise in multi-story homes.
- Adjustable Volume & Ringtones: Five volume settings (0-110 dB) and 55 distinct ringtones.
- Low Battery Warning: Transmitters flash continuously 5 times when battery levels are low.
- IP55 Water Resistance: Splash-proof design allows use in bathrooms and showers (do not immerse in water).
- Easy to Use: Simple operation, even for individuals with reduced hand functionality.
- Expandable System: Supports pairing with multiple receivers and transmitters to suit specific needs.

Figure 1: Providing support for elderly care and safety. The image illustrates the benefit of the ChunHee system, showing an elderly person comfortably pressing a call button for assistance, contrasted with scenarios of an elderly person falling or experiencing distress without immediate help.
2. Package Contents
Your ChunHee Wireless Emergency Call Button System package includes the following components:
- 2 x Receivers (Plug-in units)
- 2 x Transmitters (Call Buttons, wearable as pendant or attachable)
- 1 x Bracelet Transmitter (Wearable wristband call button)
- User Manual (This document)
- Adhesive pads for mounting transmitters
- Lanyards for pendant transmitters
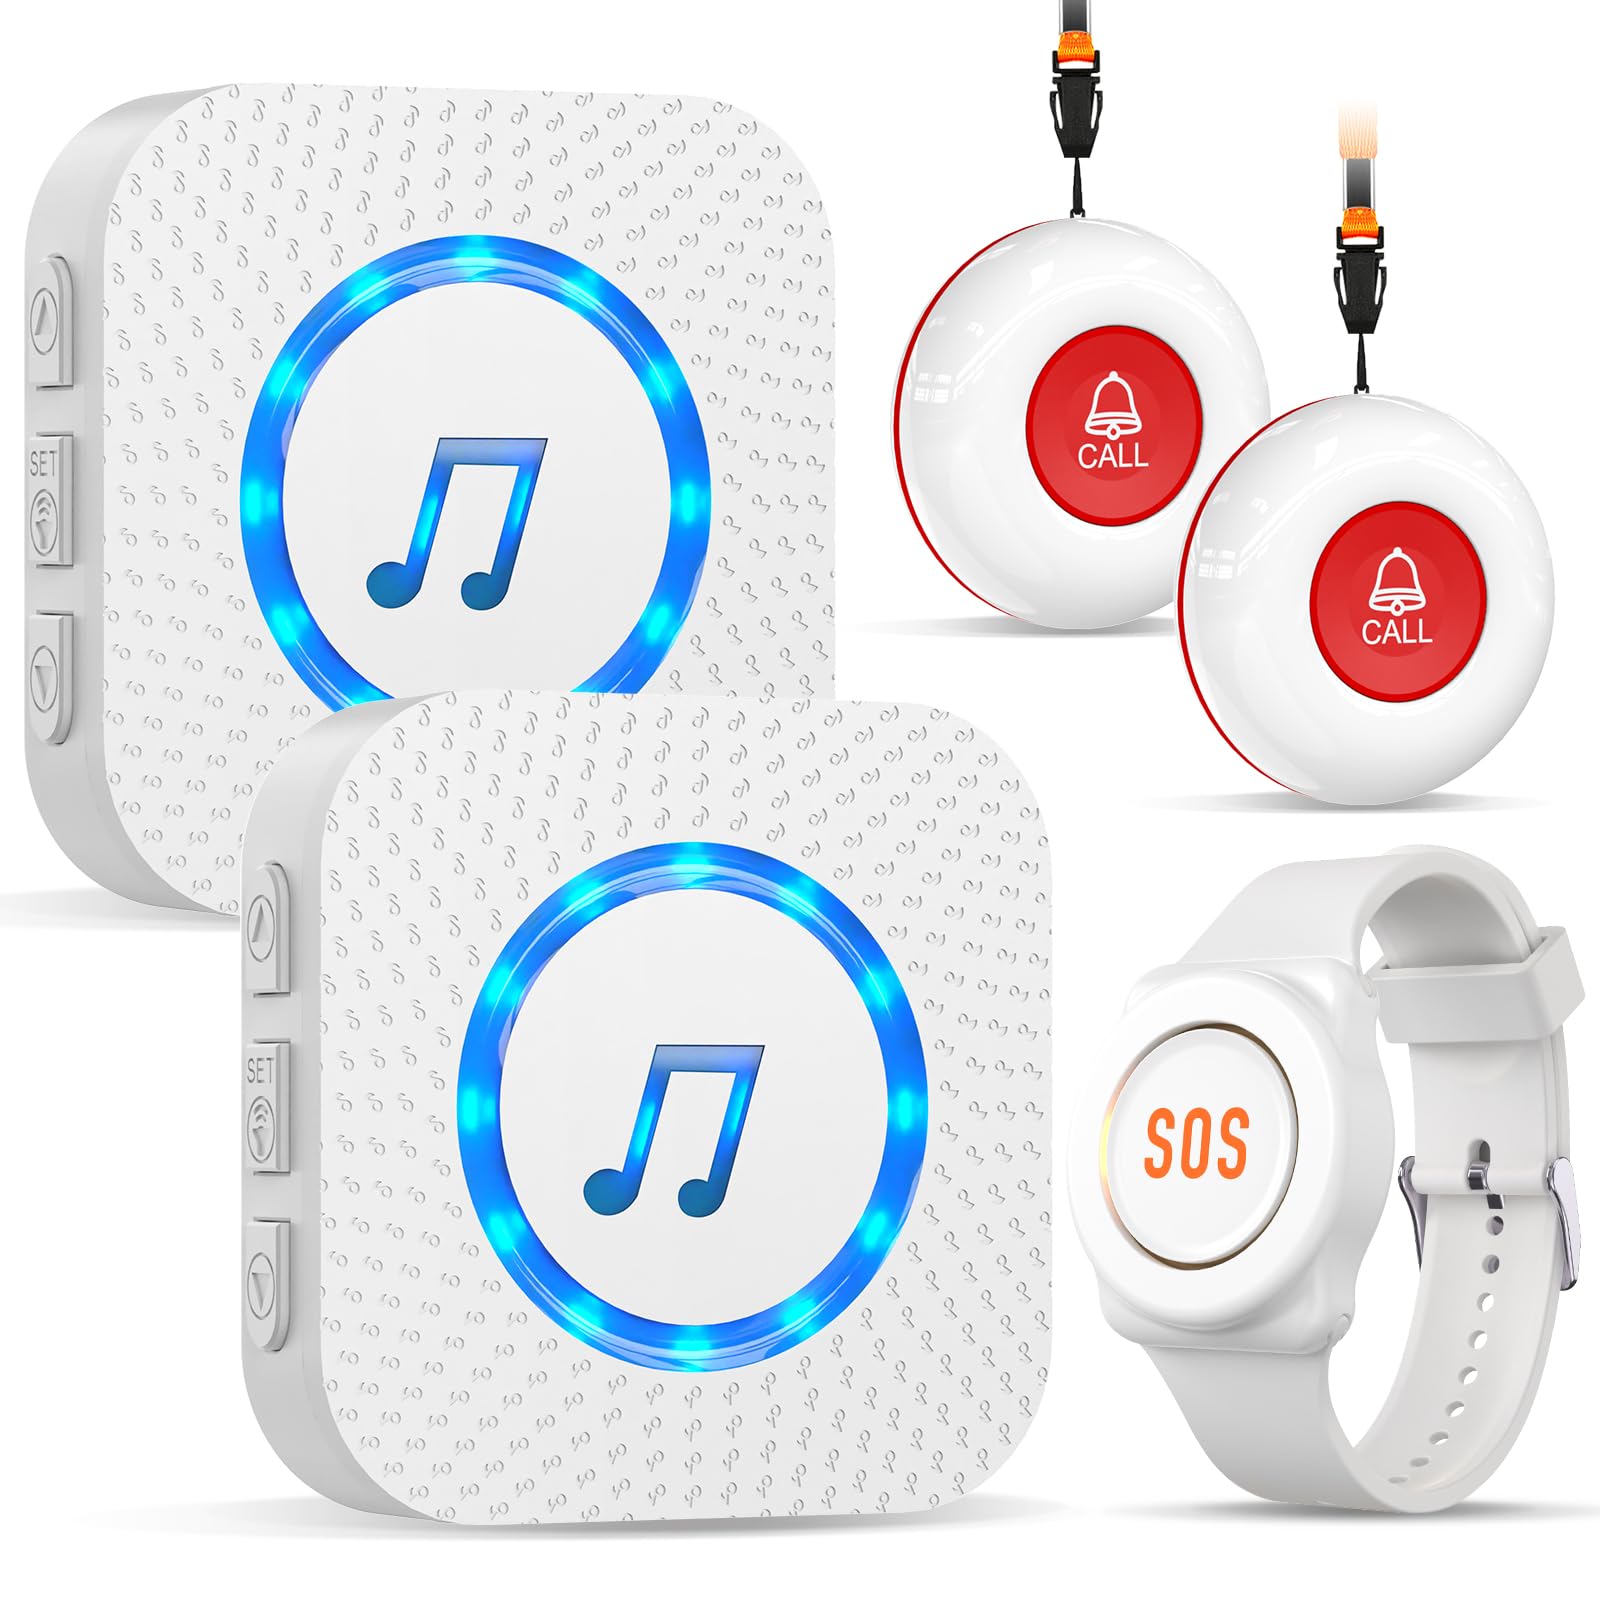
Figure 2: All components included in the ChunHee Wireless Emergency Call Button System. This image displays the two plug-in receivers, two red call buttons (transmitters) with lanyards, and one white SOS wristband (bracelet transmitter).
3. Setup Instructions
The ChunHee system is designed for easy plug-and-play setup. Most units come pre-configured. Follow these steps to set up your system:
3.1 Receiver Installation
- Identify suitable locations for your receivers. Place them in areas where the alert sound needs to be heard, such as a caregiver's bedroom, living room, or kitchen.
- Plug each receiver directly into a standard electrical wall outlet. The receiver will power on automatically.
3.2 Transmitter (Call Button & Bracelet) Placement
- Pendant/Clip-on Transmitters:
- Attach the provided lanyard to the transmitter for wearing around the neck.
- Alternatively, use the included adhesive pads to mount the transmitter on a flat surface, such as a bedside table, bathroom wall, or near a chair. Ensure it is within easy reach.
- Bracelet Transmitter:
- Wear the bracelet transmitter comfortably on the wrist. Ensure it is not too tight or too loose.

Figure 3: Simple and easy to operate. This diagram illustrates the main components: the plug-in receiver with its speaker, LED indicator, ringtone selection buttons, and volume control, alongside the SOS bracelet and a call button.

Figure 4: Example setup for a single-floor home. This image shows a receiver plugged into a wall outlet in a central area and a call button placed in a bedroom, demonstrating how the system provides coverage.

Figure 5: Example setup for a multi-floor home. This image demonstrates how two receivers can be strategically placed on different floors to ensure comprehensive coverage throughout a larger residence.
3.3 Pairing Additional Transmitters (If Needed)
If you purchase additional transmitters or need to re-pair a device, follow these general steps:
- Plug in the receiver.
- Press and hold the volume button on the receiver for approximately 3-5 seconds until the LED indicator flashes. This puts the receiver into pairing mode.
- Within 10 seconds, press the call button on the transmitter you wish to pair. The receiver will emit a sound or flash to confirm successful pairing.
- Repeat for any other transmitters.
- To exit pairing mode, press the volume button again or wait for 10 seconds.
4. Operating Instructions
4.1 Making an Emergency Call
To activate the emergency alert, simply press the large call button on any of the transmitters (pendant, clip-on, or bracelet). The receiver(s) will immediately sound an alarm and flash its LED indicator.

Figure 6: Senior Emergency Call Bracelet. This image shows an elderly man pressing the SOS button on his wristband, highlighting its ease of use and precise activation.

Figure 7: Emergency Call Button for Seniors. This image illustrates diverse applications of the call button, such as in the bathroom, bedroom, during night duty, and for individuals with disabilities or maternity care, emphasizing 24/7 monitoring.
4.2 Adjusting Volume and Ringtones
The receiver features buttons to customize the alert sound:
- Volume Control: Use the dedicated volume button on the receiver to cycle through 5 different volume levels, from silent to 110 dB.
- Ringtone Selection: Use the "Ringtone Forward" and "Ringtone Backward" buttons to choose from 55 available melodies.

Figure 8: Loud 110-dB Alarms - Unmistakable. This diagram visually represents the system's effective range (100m from room to room, 50m from floor to floor) and the powerful 110 dB alarm sound.
4.3 Low Battery Alert
When the battery level of a transmitter (call button or bracelet) is low, the device's indicator light will flash continuously 5 times to remind you to replace the battery. This ensures the system remains operational.
5. Maintenance
5.1 Water Resistance
The transmitters are rated IP55 waterproof, meaning they are protected against water splashes from all directions. They can be used in the shower or mounted on a bathroom wall. Do not immerse the transmitters in water.
5.2 Battery Replacement
The transmitters (call buttons and bracelet) operate on replaceable batteries. When the low battery alert is triggered, replace the battery promptly to ensure continuous functionality. The specific battery type is typically a common alkaline button cell, easily found for replacement.

Figure 9: Button Update. This image highlights the extended battery life of ChunHee buttons, lasting up to two years or 10,000 presses, and shows the visual indicator for a low battery warning.
6. Troubleshooting
| Problem | Possible Cause | Solution |
|---|---|---|
| Receiver does not sound alarm when button is pressed. |
|
|
| Alarm sound is too quiet or too loud. | Volume setting needs adjustment. | Use the volume control button on the receiver to adjust to the desired level. |
| Transmitter indicator light flashes 5 times. | Transmitter battery is low. | Replace the battery in the transmitter immediately. |
| Cannot change ringtone. | Incorrect button usage. | Ensure you are using the "Ringtone Forward" or "Ringtone Backward" buttons on the receiver. |
7. Product Specifications
| Feature | Detail |
|---|---|
| Model Number | CC19 |
| Brand | ChunHee |
| Power Source (Receiver) | Wired Electric (Plug-in) |
| Battery Type (Transmitters) | Alkaline (button cell, user replaceable) |
| Control Method | Touch (button press) |
| Noise Level (Alarm) | Up to 110 Decibels |
| Volume Settings | 5 levels |
| Ringtones | 55 melodies |
| Indoor Range (Pendant Transmitter) | Up to 100 meters (approx. 328 feet) |
| Indoor Range (Bracelet Transmitter) | Up to 60 meters (approx. 197 feet) |
| Water Resistance (Transmitters) | IP55 (Splash-proof) |
| Product Dimensions (Receiver) | Approx. 5 x 5 x 3 cm (2 x 2 x 1.2 inches) |
| Item Weight | 320 g (approx. 0.7 lbs) |
8. Warranty and Support
For warranty information, technical support, or any questions regarding your ChunHee Wireless Emergency Call Button System, please contact ChunHee customer service. Refer to the product packaging or the seller's information on the purchase platform for specific contact details.
You can often find support information by visiting the ChunHee Store on Amazon.


