
1. Introduction
This manual provides detailed instructions for the setup, operation, and maintenance of your Alupssuc 8 FT Christmas Inflatable Fireplace Countdown with LED. Please read this manual thoroughly before installation and use to ensure proper function and safety. This inflatable decoration features Santa, a Christmas tree, a fireplace with a countdown clock, and gift boxes, designed to enhance your holiday display.

Image 1.1: The Alupssuc 8 FT Christmas Inflatable featuring Santa, a Christmas tree, a fireplace with a countdown clock, and gift boxes.
2. Package Contents
Verify that all components are present in the package:
- 1 x 8 FT Christmas Inflatable Fireplace Countdown Unit
- 1 x Blower (pre-installed)
- 6 x Ground Stakes
- 2 x Ropes
- 1 x 3m Long Power Cord
- 1 x Instruction Manual (this document)
- 1 x Storage Box
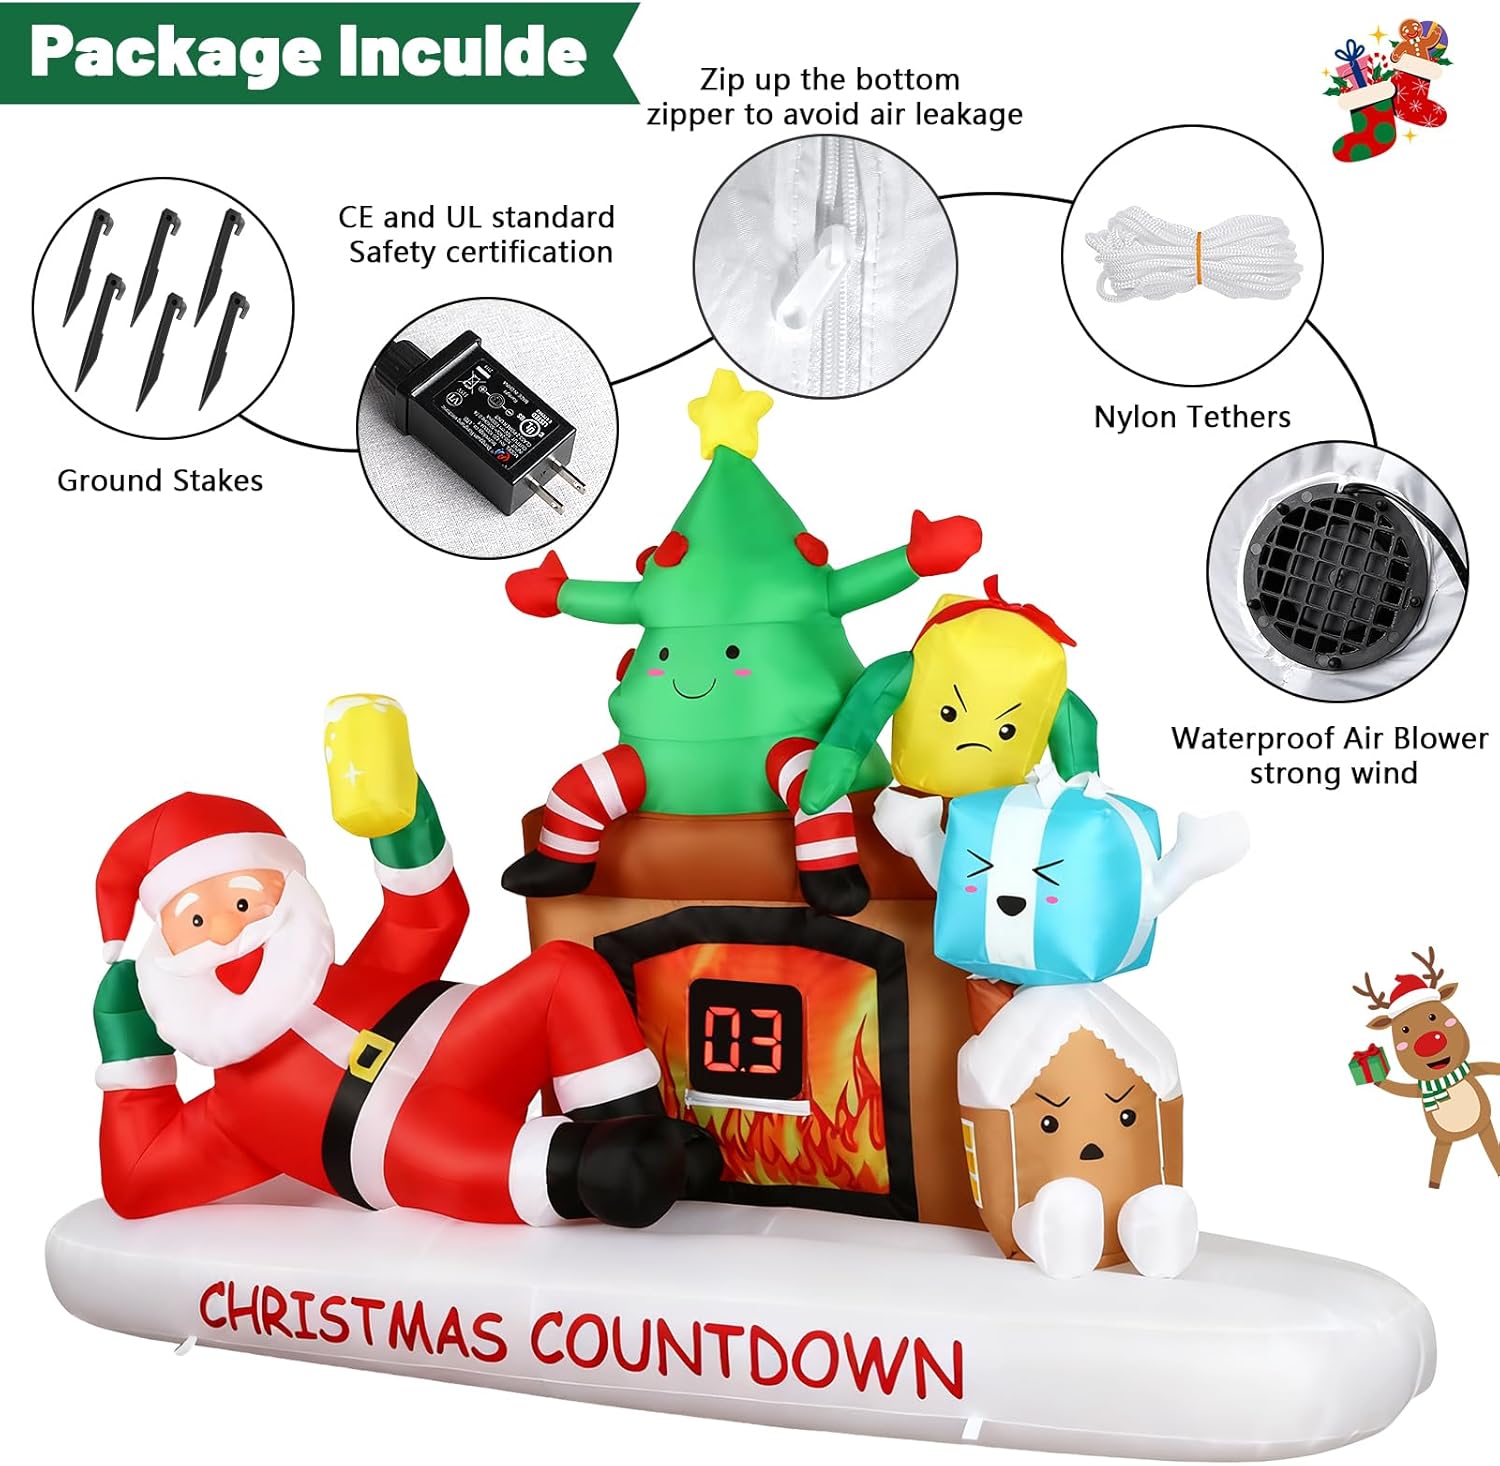
Image 2.1: Visual representation of the included package contents, including the inflatable, ground stakes, nylon tethers, power adapter, and waterproof air blower.
3. Safety Information
Adhere to the following safety guidelines to prevent injury or damage:
- Keep the inflatable away from heat sources, open flames, and flammable materials.
- Ensure proper ventilation around the blower to prevent overheating.
- Securely anchor the decoration using the provided stakes and ropes to prevent it from being dislodged by wind.
- Do not operate the inflatable in extreme weather conditions such as heavy rain, strong winds, or snow accumulation.
- Keep children and pets away from the blower and electrical components.
- Do not attempt to modify or repair the inflatable or its electrical components. Contact qualified personnel for service.
- Always unplug the inflatable when not in use or during severe weather.
4. Setup
4.1 Initial Placement
Choose a flat, clear area for placement, free from sharp objects or debris. The inflatable can be used both indoors and outdoors.

Image 4.1: The inflatable decoration positioned in an outdoor yard setting.
4.2 Inflation and Securing
- Unpack the inflatable and lay it flat on the chosen surface.
- Ensure the zipper on the bottom of the inflatable is fully closed to prevent air leakage.
- Connect the power cord to the inflatable's blower and then plug it into a standard electrical outlet.
- The inflatable will begin to inflate automatically. It should fully inflate within approximately one minute.
- Once fully inflated, use the provided ground stakes and ropes to secure the inflatable to the ground. Attach ropes to the designated loops on the inflatable and anchor them with stakes.

Image 4.2: An illustration demonstrating the simple two-step installation process: plug in for inflation and secure with stakes and ropes.
5. Operating Instructions
5.1 Countdown Clock Operation
The integrated LED countdown clock allows you to display the remaining days until Christmas. The countdown time can be set up to 99 days.
- Power On: Connect the transformer to the inflatable product. The countdown display will show "AA" when powered on, indicating the timer is connecting to the local server.
- Network Connection: Server connection takes approximately 18 seconds. During this time, the display will automatically switch from "AA" to alternating "EE" (no action needed, just wait). After a successful connection (approximately 18 seconds), the countdown days will appear on the screen.
- Time Zone Setup: The displayed countdown days use the 9 time zone as the default setting. If your time zone differs:
- Find your time zone code using a Local Time Zone Numeric Reference table.
- Press the "+" button on the back of the timer to adjust.
- Press the "+" button once to immediately display the current time zone number.
- Continue pressing the "+" button. Each press will cycle the time zone number sequentially. If your time zone code is -6, press until the display shows -6.
- Press and hold the "+" button for 3 seconds to confirm your selection. The -6 will flash twice, indicating successful setup. The screen will then show the correct countdown days for your time zone.

Image 5.1: Step-by-step visual guide for setting the countdown clock, including power-on, network connection, and time zone setup.
6. Maintenance
6.1 Cleaning
To clean the inflatable, wipe it with a damp cloth and mild soap. Do not use harsh chemicals or abrasive cleaners. Ensure the inflatable is completely dry before storing.
6.2 Storage
When not in use, deflate the unit completely. Fold it neatly and store it in the original storage box or a similar container in a cool, dry place, away from direct sunlight and pests. This will help preserve the material and extend the product's lifespan.

Image 6.1: The inflatable is made from heavy-duty waterproof polyester, designed to be durable, waterproof, snowproof, and windproof for all-weather use.
7. Troubleshooting
Refer to the table below for common issues and their solutions:
| Problem | Possible Cause | Solution |
|---|---|---|
| Inflatable does not inflate or inflates slowly. | Power cord not connected; Blower blocked; Zipper open; Puncture in fabric. | Ensure power cord is securely plugged in. Check if the blower intake is clear of obstructions. Verify the bottom zipper is fully closed. Inspect for tears and patch if necessary. |
| Inflatable falls over or is unstable. | Insufficient anchoring; Strong winds. | Ensure all stakes and ropes are properly secured. Add additional anchoring points if needed. Deflate during strong winds. |
| LED lights are not working. | Power issue; Damaged wiring. | Check power connection. Inspect wiring for visible damage. If damaged, discontinue use and contact support. |
| Countdown clock not displaying correctly. | Plastic insulating piece not removed; Incorrect time zone setting. | Remove the plastic insulating piece from the clock's battery compartment. Follow the 'Time Zone Setup' instructions in Section 5.1. |
8. Specifications
| Feature | Detail |
|---|---|
| Product Dimensions | 14.96 x 11.02 x 6.3 inches (packaged) |
| Inflated Height/Width | Approximately 8 FT wide (243cm) |
| Item Weight | 4.73 pounds |
| Model Number | AED15H-1201250VLSO8 |
| Material | Durable Polyester |
| Power Source | Plug-in Electric |
| Countdown Range | Up to 99 days |

Image 8.1: Diagram illustrating the approximate dimensions of the inflated product, showing a width of 8 FT (243cm) and a height of 5.60 FT (170cm).
9. Warranty and Support
For warranty information or technical support, please refer to the contact details provided at the point of purchase or visit the official Alupssuc store online. Keep your purchase receipt as proof of purchase for any warranty claims.
Visit the Alupssuc Store for more products and information.