
1. Introduction
Thank you for choosing the BSNANCA Automatic Intelligent Incubator. This device is designed to provide an optimal environment for hatching various poultry eggs, including chicken, duck, goose, and game bird eggs. Featuring automatic temperature control, egg turning, and humidity monitoring, this incubator simplifies the incubation process, making it suitable for household use, scientific experiments, and educational purposes. Please read this manual thoroughly before operation to ensure proper use and successful hatching results.

Image 1: The BSNANCA Automatic Intelligent Incubator, shown with eggs inside and the control panel visible.
2. Safety Instructions
- Always disconnect the power supply before cleaning, maintenance, or moving the incubator.
- Do not immerse the incubator or its electrical components in water or any other liquid.
- Ensure the power outlet matches the voltage requirements of the incubator.
- Keep the incubator out of reach of children and pets.
- Place the incubator on a stable, level surface to prevent accidental tipping.
- Avoid placing the incubator in direct sunlight, near heat sources, or in areas with extreme temperature fluctuations.
- Only use the provided power adapters and accessories.
3. Product Overview
The BSNANCA incubator is designed for ease of use and efficient hatching. Key features include:
- Automatic Temperature Control: Maintains a stable internal temperature for optimal embryo development.
- Automatic Egg Turning: Gently rotates eggs at regular intervals to prevent embryo adhesion and promote even development.
- Humidity Monitoring: Integrated probe detects and displays internal humidity levels.
- External Water Inlet: Allows for easy water addition without opening the lid, minimizing temperature loss.
- Built-in Egg Candler: A convenient light for observing embryo development.
- Dual Power Supply: Can operate on household AC power or a 12V DC battery, with automatic switching during power outages.
- Universal Egg Tray: Accommodates various egg sizes.

Image 2: Close-up view of the incubator's control panel, showing digital temperature and humidity displays, along with control buttons.
4. Setup
4.1 Unpacking
Carefully remove all components from the packaging. Inspect the incubator for any damage during transit. Retain packaging for future storage or transport.
4.2 Placement
Place the incubator on a flat, stable surface in a room with a consistent ambient temperature (ideally between 20-25°C / 68-77°F). Avoid locations with direct sunlight, drafts, or significant temperature fluctuations.
4.3 Power Connection
Connect the incubator to a standard household AC power outlet. For dual power supply models, you can also connect a 12V DC battery simultaneously. The incubator will automatically switch to battery power in case of an AC power outage and revert to AC power when it is restored.
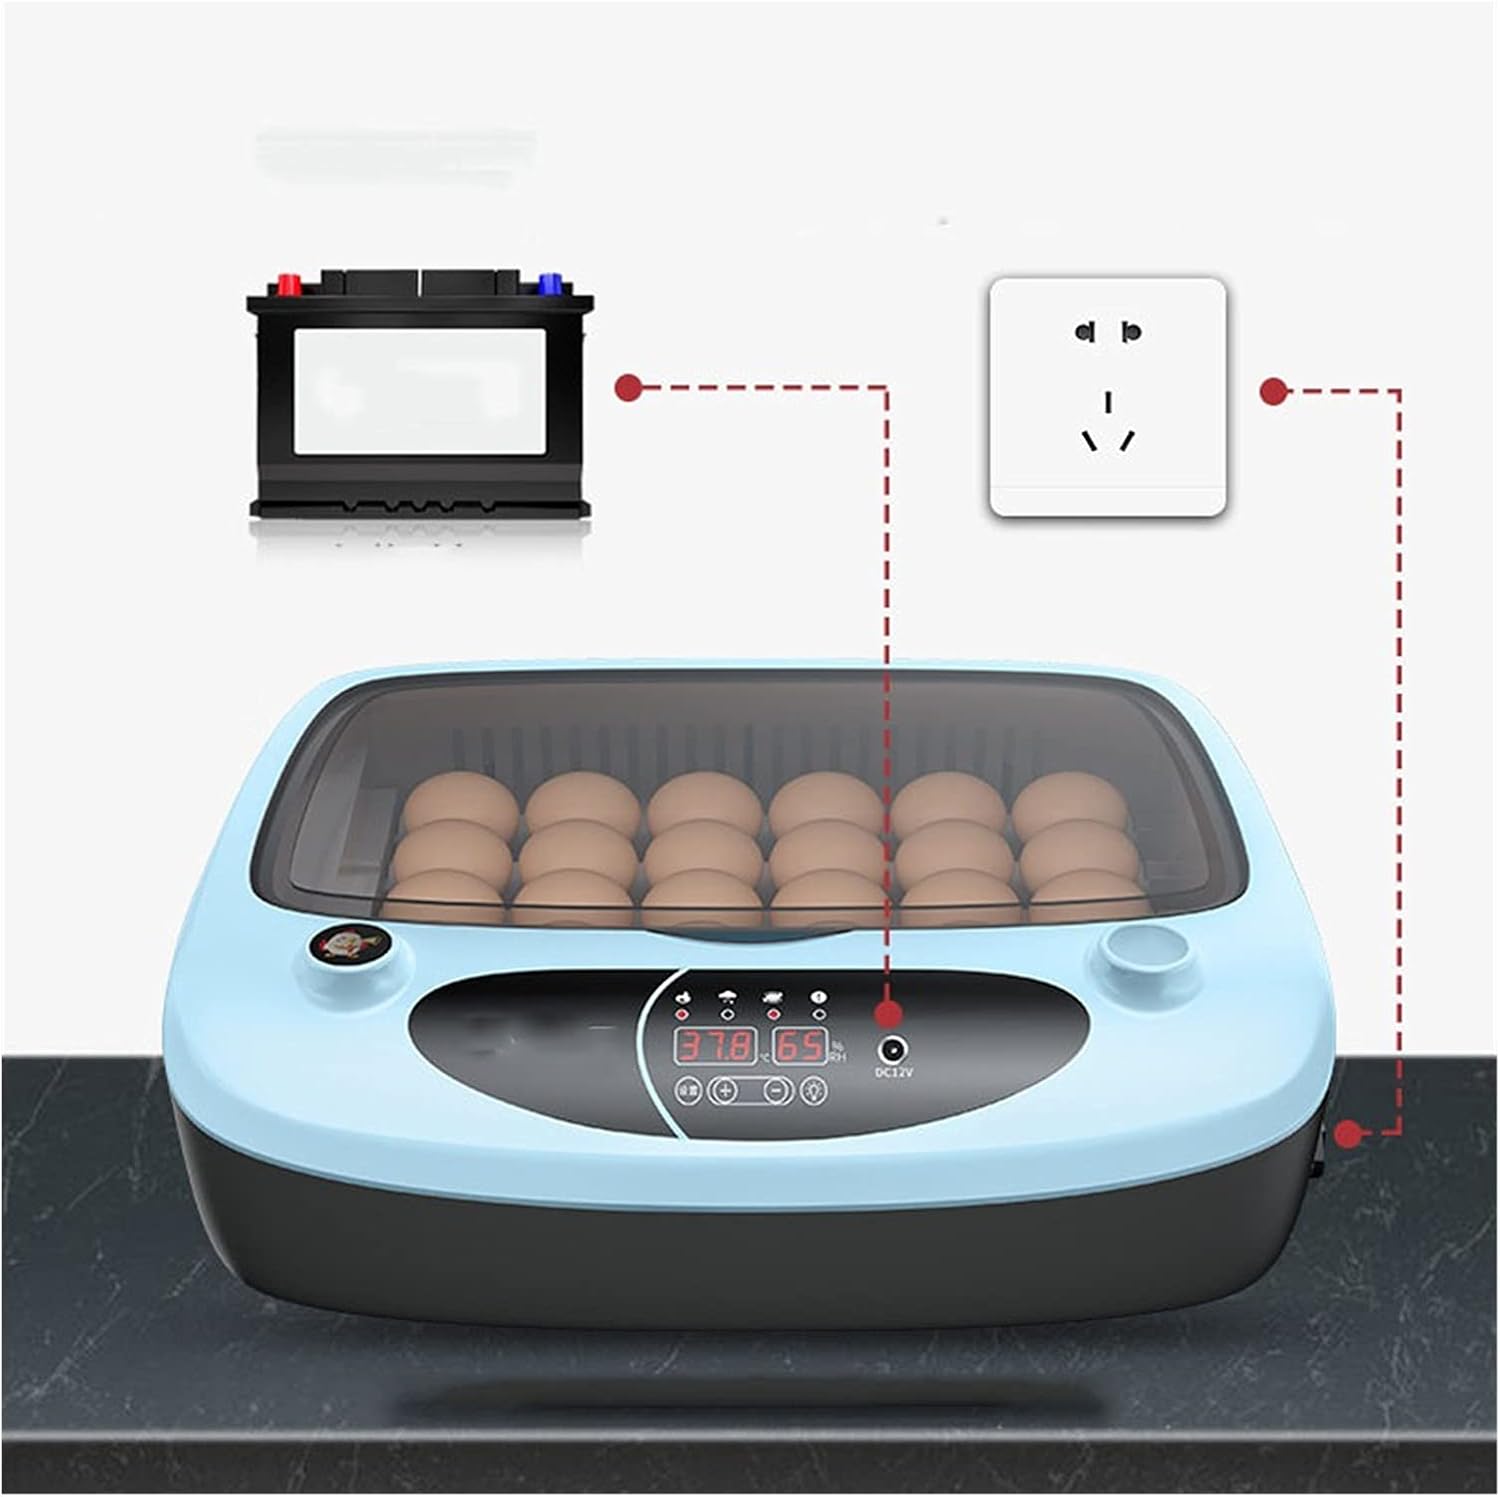
Image 3: Diagram illustrating the dual power connection options for the incubator, showing both AC household power and a 12V battery connection.
4.4 Adding Water for Humidity
Locate the external water inlet port. Use the provided water bottle to carefully add water into the humidity channels at the bottom of the incubator. Do not overfill. Maintain appropriate humidity levels as indicated on the display.

Image 4: A hand using a squeeze bottle to add water into the external water inlet of the incubator, demonstrating how to maintain humidity.
4.5 Pre-heating
After connecting power and adding water, allow the incubator to run for at least 20-30 minutes to stabilize the internal temperature and humidity before placing eggs inside.
5. Operating Instructions
5.1 Egg Selection
Successful hatching begins with proper egg selection:
- Fertilized Eggs: Hold the egg up to a light. If you observe opaque objects or a dark spot near the yolk, it is likely a fertilized egg.
- Freshness: For chickens, ducks, and similar poultry, use eggs laid within 7 days. For geese, use eggs laid within 10 days. Longer storage times can significantly reduce hatch rates.
- Quality: Select clean, undamaged eggs with normal shapes. Avoid deformed, cracked, or excessively dirty eggs. Do not wash eggs intended for incubation.

Image 5: The incubator displaying a variety of egg sizes and types, demonstrating its universal egg tray capability.
5.2 Placing Eggs
Carefully place the selected eggs onto the universal egg tray. Ensure they are positioned correctly for the automatic turning mechanism.
5.3 Monitoring Temperature and Humidity
The incubator automatically controls temperature. Monitor the digital display for current temperature and humidity readings. Refer to specific incubation requirements for your chosen poultry species for ideal ranges. The incubator will sound an alarm if abnormalities are detected.
5.4 Egg Candling
Use the built-in egg candler to periodically check the development of the embryos. This allows you to identify infertile eggs or those with arrested development, which can then be removed.

Image 6: The incubator with an egg being candled by the integrated light, allowing observation of the embryo inside.
5.5 Hatching Phase
As the hatching date approaches, it is often recommended to slightly increase humidity and cease egg turning (typically 3 days before hatch). Once chicks begin to hatch, avoid opening the incubator frequently to maintain stable conditions. Allow newly hatched chicks to dry completely within the incubator before transferring them to a brooder.

Image 7: The incubator with its lid open, revealing several newly hatched chicks and eggshells, indicating successful incubation.
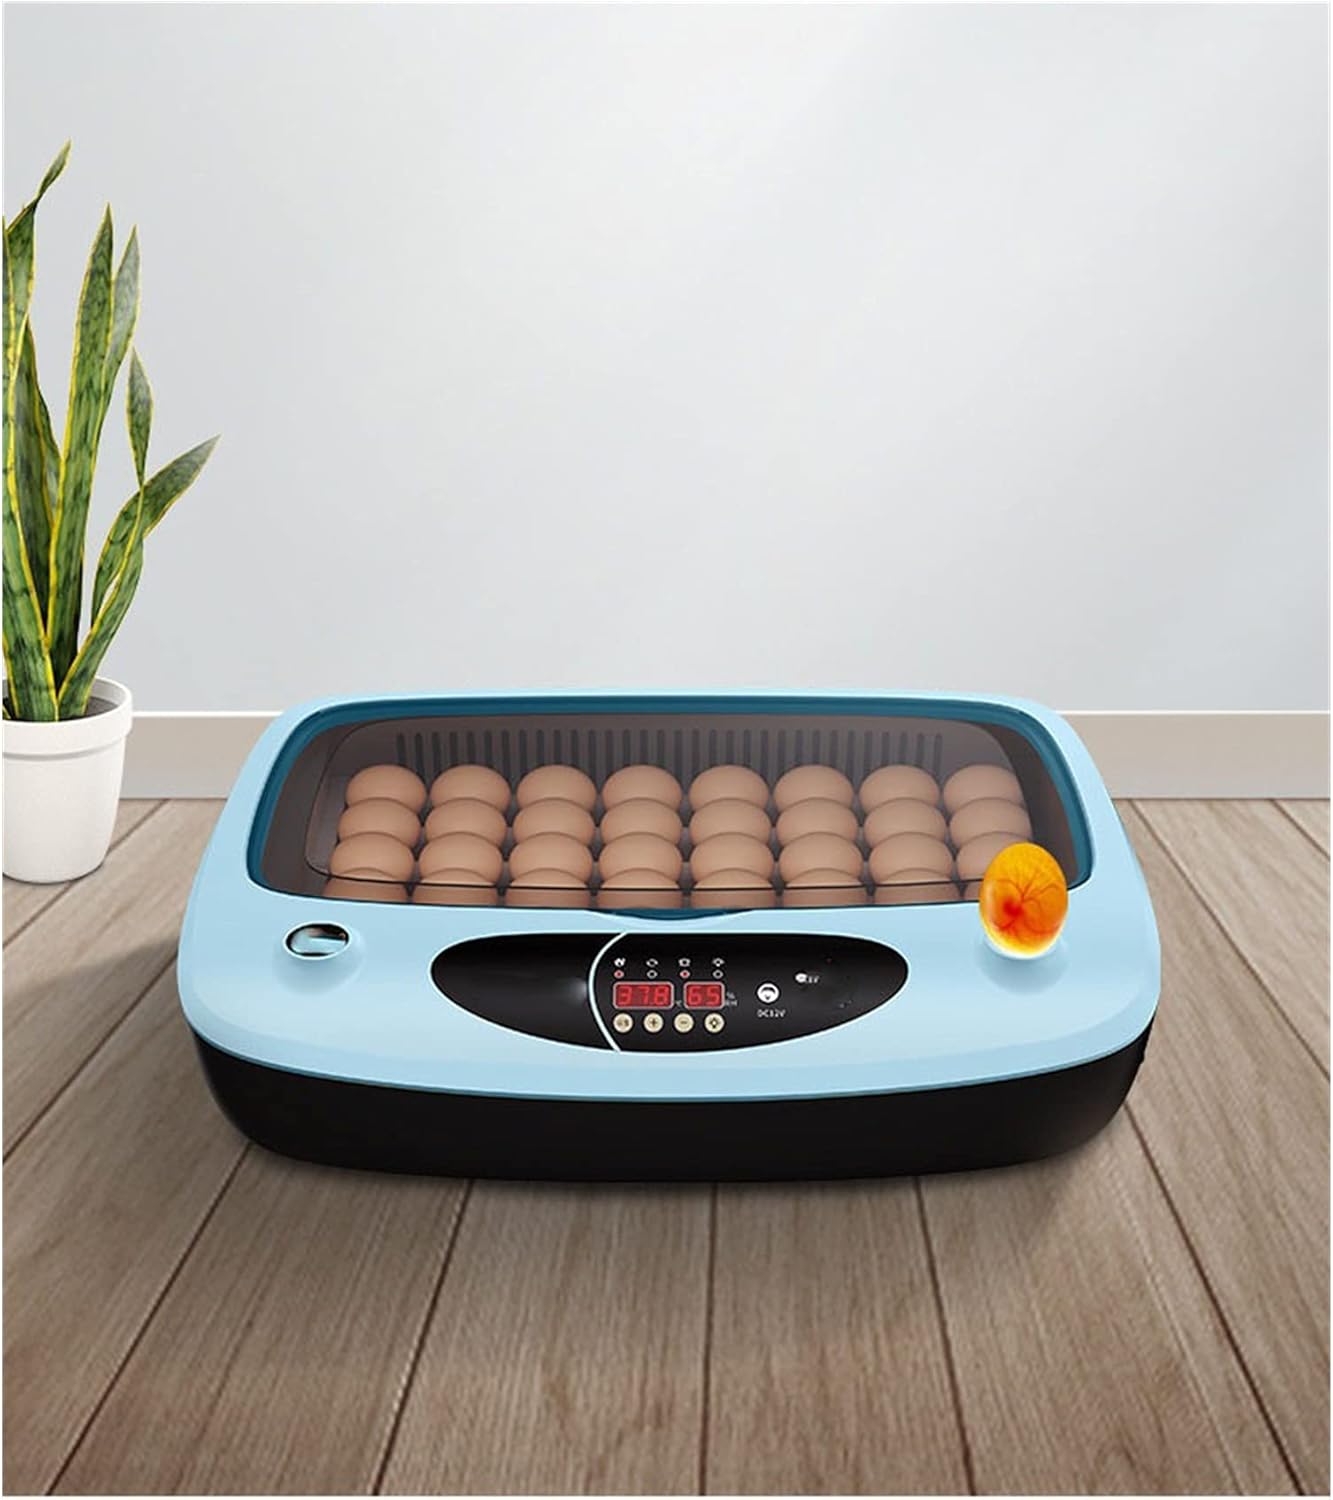
Image 8: The incubator shown with a newly hatched chick positioned next to it, highlighting the successful outcome of the incubation process.
6. Maintenance
6.1 Cleaning
After each hatch, or if the incubator becomes dirty, disconnect it from power. Remove the egg tray and clean all surfaces with a damp cloth. A mild disinfectant can be used, but ensure all residues are thoroughly rinsed off. Allow all parts to dry completely before reassembly or storage. Do not use abrasive cleaners or immerse electrical components in water.
6.2 Storage
When not in use, ensure the incubator is clean and dry. Store it in a cool, dry place, away from direct sunlight and extreme temperatures.
7. Troubleshooting
- No Power: Check if the power cord is securely plugged into both the incubator and the wall outlet. Verify the outlet is functional. If using battery power, ensure the battery is charged and properly connected.
- Temperature Fluctuations: Ensure the incubator is placed in a stable environment away from drafts or direct heat. Check that the lid is securely closed.
- Low Humidity: Add more water to the external inlet. Ensure the water channels are not dry.
- Poor Hatch Rate: Review egg selection criteria (freshness, fertility, quality). Ensure environmental factors (room temperature, humidity) are stable. Verify the automatic egg turning mechanism is functioning.
- Alarm Sounds: The alarm indicates an abnormal temperature or humidity reading. Check the display and address the issue (e.g., add water, check room temperature).
8. Specifications
- Model: B0F54J454T
- Capacity: Approximately 36 standard chicken eggs (capacity may vary with egg size)
- Power Supply: AC (Household) and DC 12V (Battery) with automatic switching
- Features: Automatic temperature control, automatic egg turning, humidity display, external water refill, built-in egg candler, abnormal alarm.
- Manufacturer: BSNANCA
9. Warranty and Support
Specific warranty information for this product is not provided in the available details. For any product inquiries, technical support, or warranty claims, please contact the seller or manufacturer directly through your purchase platform. Keep your purchase receipt as proof of purchase.