
1. Product Overview
This maXpeedingrods lift kit is designed to provide a 2.5-inch front lift and a 2-inch rear lift for Jeep Wrangler JK 2-Door and 4-Door models manufactured between 2007 and 2018. It enhances the vehicle's ground clearance and allows for the fitment of larger tires, improving both on-road and off-road capabilities while maintaining a smooth factory ride.

Image: Visual representation of the vehicle's stance before and after the installation of the 2.5" front and 2" rear lift kit, highlighting the increased ground clearance.
Key Features:
- Lift Height: Provides 2.5 inches of lift at the front and 2 inches at the rear.
- Compatibility: Specifically designed for Jeep Wrangler JK 2-Door & 4-Door models (2007-2018).
- Enhanced Capability: Increases ground clearance and allows for larger tire fitment (up to 33" recommended, 35" max).
- Ride Quality: Engineered to retain a smooth factory ride.
- Material: Constructed from durable alloy steel with a powder-coated surface for anti-corrosion.
- Components: Includes front coil spring spacers, rear steel lift coil spacers, shock extenders, and brake line relocation brackets.

Image: Illustrates the benefits of the lift kit, including increased ground clearance, improved off-road capability, and the ability to fit larger tires.
2. Package Contents
Verify that all components listed below are present and undamaged before beginning installation. If any parts are missing or damaged, contact maXpeedingrods customer support immediately.
- Front Coil Spring Spacers (2)
- Rear Steel Lift Coil Spacers (2)
- Shock Extenders (2)
- Brake Line Relocation Brackets (2)
- Necessary Mounting Hardware (bolts, washers, nuts)
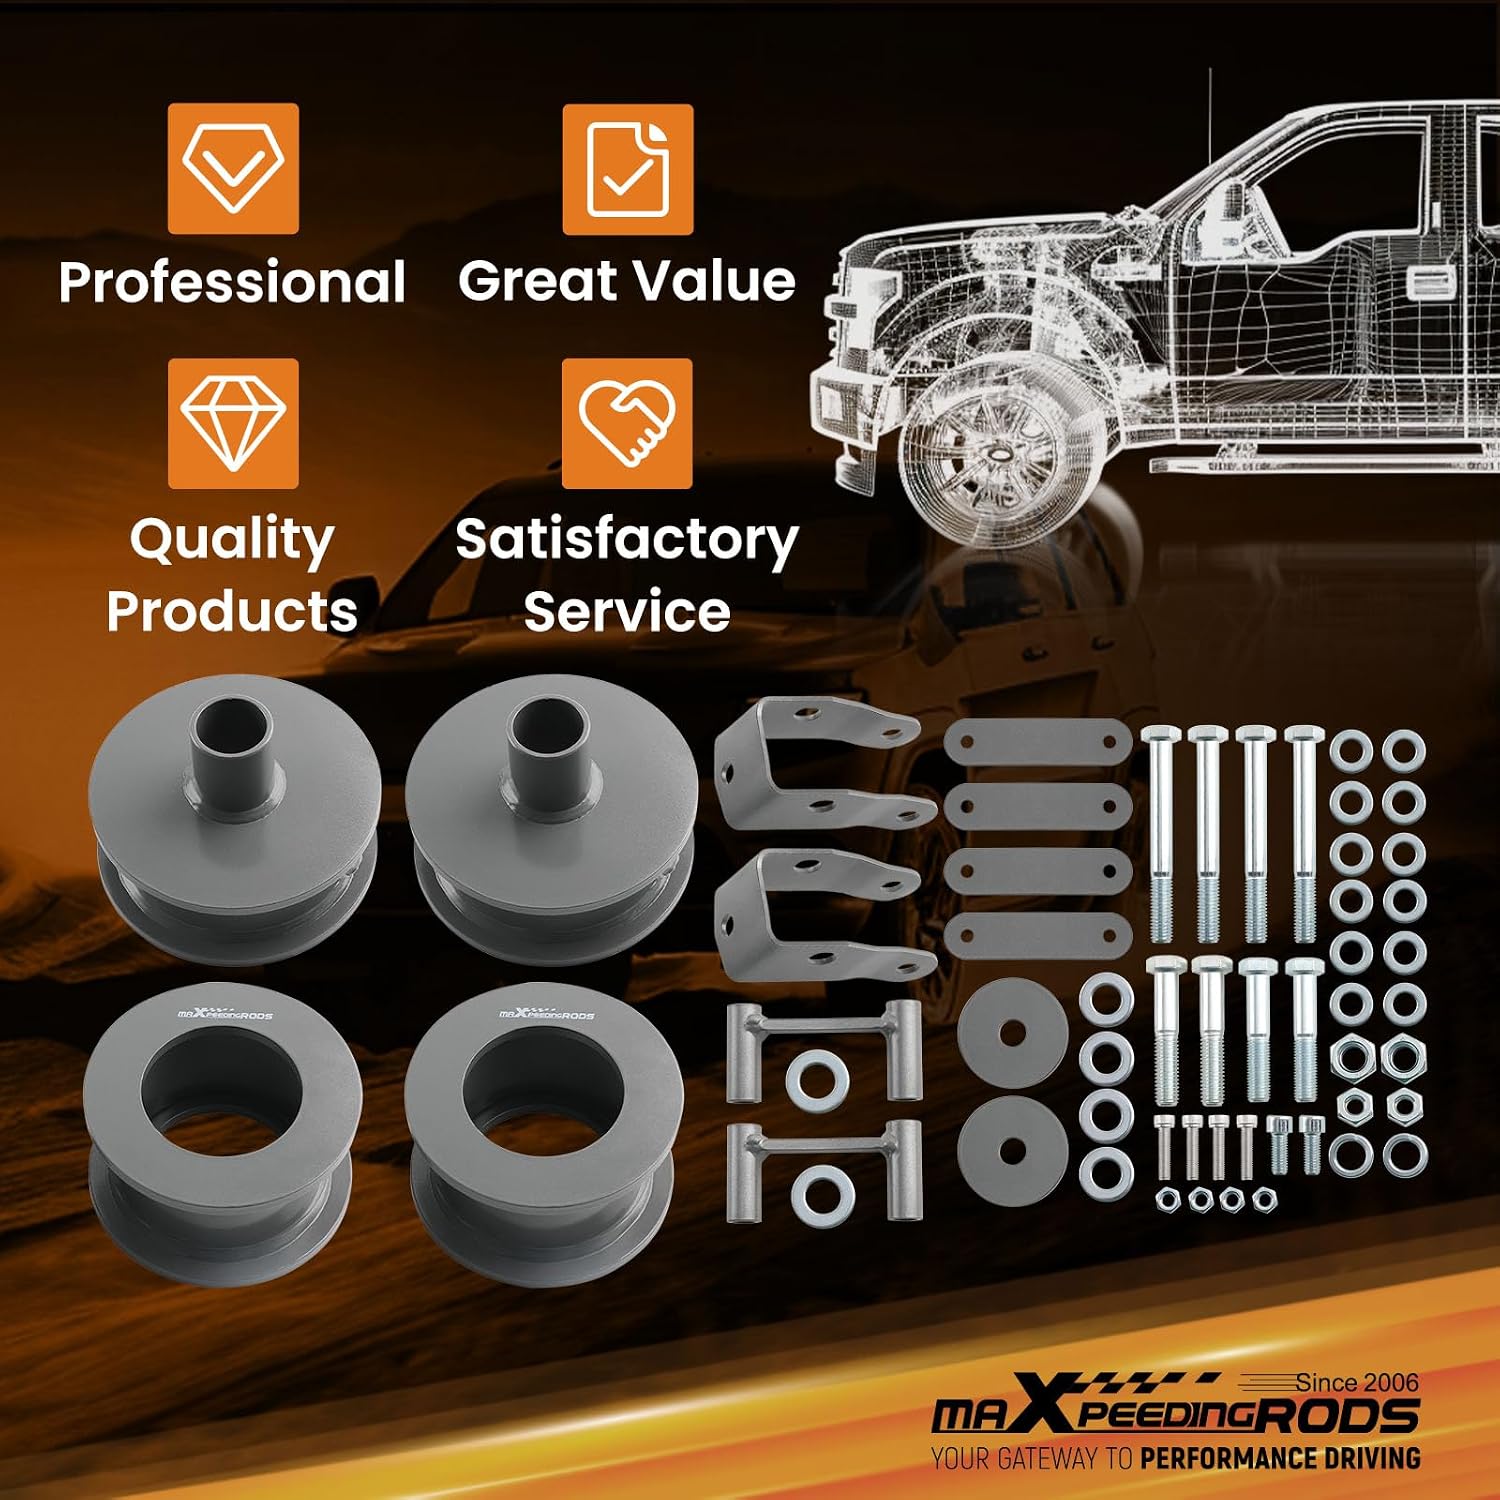
Image: A comprehensive view of all parts included in the lift kit, such as spacers, extenders, brackets, and hardware.
3. Important Notices Before Installation
Please read these important notices carefully before proceeding with the installation. Adherence to these guidelines is crucial for safety and proper function.
- It is highly recommended to prepare a spring compressor and a pry bar before beginning the installation process. These tools are essential for safe and efficient component removal and installation.
- An alignment of your vehicle's suspension is always recommended after altering its height. This ensures proper steering, tire wear, and vehicle handling.
- Professional installation is strongly recommended due to the complexity and safety requirements involved in suspension modifications.

Image: Highlights critical pre-installation advice, including necessary tools and the importance of wheel alignment after installation.
4. Installation Guide
This section provides a general overview of the installation process. Due to the technical nature of suspension modifications, professional installation is highly recommended. Always refer to a detailed service manual for your specific vehicle model for precise torque specifications and procedures.
General Steps (Professional Installation Recommended):
- Vehicle Preparation: Park the vehicle on a level surface, engage the parking brake, and block the rear wheels. Loosen the front lug nuts.
- Lift Vehicle: Safely lift the front of the vehicle using a jack and support it with jack stands under the frame. Remove the front wheels.
- Disconnect Components: Disconnect the sway bar links, brake lines (if necessary, use the relocation brackets), and shock absorbers. Carefully lower the axle to relieve tension on the coil springs.
- Remove Coil Springs: Using a spring compressor, carefully compress and remove the factory front coil springs.
- Install Front Spacers: Place the 2.5" front coil spring spacers on top of the coil spring mounts.
- Reinstall Coil Springs: Reinstall the coil springs (with spacers) and reconnect all previously disconnected components. Install the shock extenders.
- Repeat for Rear: Repeat the process for the rear axle, installing the 2" rear steel lift coil spacers and connecting the brake line relocation brackets.
- Final Assembly: Reinstall wheels, lower the vehicle, and torque lug nuts to factory specifications.
- Post-Installation: Drive the vehicle a short distance to allow the suspension to settle, then re-torque all fasteners. An alignment is mandatory after installation.

Image: Details the robust construction of the lift kit components, emphasizing the high-strength carbon steel and anti-corrosion powder coating.

Image: Showcases the high tensile strength Grade 8.8 bolts, ensuring a safer and more secure connection for the lift kit components.
5. Technical Specifications
| Specification | Detail |
|---|---|
| Brand | maXpeedingrods |
| Model | 2.5" Front & 2" Rear Lift Kit for Jeep Wrangler JK 2 Door 4 Door 2007-2018 |
| Manufacturer Part Number | SF93UE |
| ASIN | B0F53X3SLL |
| Auto Part Position | Front Lower, Rear Lower |
| Material | Alloy Steel |
| Maximum Lifting Height | Front: 2.5 Inches, Rear: 2 Inches |
| Included Components | Front Coil Spring Spacer, Rear Steel Lift Coil Spacer, Shock Extenders, Brake Line Relocation Brackets |
| Item Weight | 17.75 pounds |
| Product Dimensions | 12.6 x 8.66 x 5.51 inches |
| Automotive Fit Type | Vehicle Specific Fit (Jeep Wrangler JK 2 Door & 4 Door 2007-2018) |
| Recommended Tire Fitment | Up to 33" (Max 35" with specific wheel/offset) |

Image: A compatibility chart confirming the lift kit's fitment for Jeep Wrangler JK models from 2007 to 2018.
6. Care and Maintenance
Proper care and maintenance will ensure the longevity and performance of your maXpeedingrods lift kit components.
- Regular Inspection: Periodically inspect all components of the lift kit, including spacers, extenders, brackets, and all fasteners, for any signs of wear, damage, or looseness.
- Torque Check: Re-check the torque on all bolts and nuts after the first 500 miles of driving and then every 5,000-10,000 miles, or after any significant off-road use.
- Cleaning: Keep the components clean from excessive dirt, mud, and road salt, especially in harsh environments, to prevent corrosion. The powder-coated surface provides good protection, but regular cleaning helps.
- Alignment: Maintain proper wheel alignment as recommended after installation and if you notice any unusual tire wear or steering issues.
7. Troubleshooting
This section addresses common issues that may arise after installing a lift kit. If you encounter problems not listed here, please contact customer support.
| Issue | Possible Cause | Solution |
|---|---|---|
| Uneven Ride Height | Improper installation of spacers; suspension not settled; worn factory components. | Ensure spacers are seated correctly. Drive vehicle to allow suspension to settle. Inspect and replace worn factory springs or shocks if necessary. |
| Vibrations After Lift | Driveshaft angle issues; loose components; tire imbalance. | Check all fasteners for proper torque. Verify driveshaft angles (may require additional components for higher lifts, though less common with this mild lift). Balance tires. |
| Steering Issues / Pulling | Misalignment; loose steering components. | Perform a professional wheel alignment immediately. Check all steering and suspension components for looseness. |
| Clunking/Squeaking Noises | Loose bolts; components rubbing; worn bushings. | Inspect all installation points and re-torque bolts. Check for clearance issues. Lubricate or replace worn bushings. |
8. Warranty and Support
maXpeedingrods stands behind the quality of its products.
- Limited Warranty: This product comes with a 1-year limited warranty covering quality-related issues from the date of purchase.
- Technical Support: maXpeedingrods offers lifetime technical support for this product.
- Contact: For any questions, technical assistance, or warranty claims, please feel free to contact maXpeedingrods customer support. Refer to the contact information provided with your purchase or on the official maXpeedingrods website.