
1. Safety Information
WARNING: CHOKING HAZARD - Small parts. Not suitable for children under 37 months. The product contains small parts; keep children away when assembling. Always ensure adult supervision during operation. Read all instructions before use.
2. What's in the Box
- 12V Ride on Fire Truck (main body)
- Remote control
- Fire extinguisher
- Shovel
3. Assembly Instructions
Follow these steps carefully for proper assembly. Refer to the assembly video for visual guidance.
Video: ELEMARA Ride on Fire Truck Assembly Introduction. This video provides a comprehensive guide to assembling your new ride-on fire truck, including detailed steps for each component.
- Unpack and Verify Parts: Open the storage box at the rear of the fire truck to retrieve all installation accessories. Ensure all components listed in the 'What's in the Box' section are present and undamaged.
- Attach the Side Steps: Turn the vehicle upside down. Locate the two side steps and place one on each side of the vehicle. Secure each in place with five screws.
- Assemble the Rear Wheel Seat: Clip the rear wheel seat into the corresponding slot on the vehicle body. Secure it in place with seven screws.
- Attach the Front Bumper: Set the front bumper in place at the front of the vehicle. Fix it into place with the necessary screws.
- Attach the Front Axle: Place the front axle assembly near the front of the body, ensuring correct orientation. Fit the metal rods into the provided slots while sliding the drive shaft through the center hole. Add a washer and a lock nut to each end of the metal rods and tighten with the included wrench.
- Install the Front Wheels: Remove the lock nuts on each end of the front axle. Slide on a washer, a wheel, another washer, and a lock nut. Tighten the nut with the provided plastic wrench, ensuring the wheel spins freely. Snap on a wheel cap. Repeat for the other side.
- Install the Rear Wheels: Remove the locking nuts on each end of the rear axle rod. Slide the rod through the holes on the back of the vehicle's body. To each end of the rod, slide on a gearbox, ensuring wires are fed through the side into the battery compartment. Add a wheel, a washer, and a lock nut. Use both plastic wrenches to simultaneously tighten the two locking nuts by rotating them in opposite directions until snug. Snap on the wheel caps.
- Install the Lamp Shades: Turn the vehicle right side up. Locate the red and blue light covers. At the front, the red cover goes on the driver's left, and the blue goes on the right. At the back, the blue goes on the driver's left, and the red goes on the right. Cover the middle of the two front light covers with the gray light cover.
- Connect the Power: Locate the two white connectors and plug them together. Next, connect the battery to the wheel motors by linking together the black connectors from the wheels to the corresponding black connectors coming out of the battery. Power on the vehicle to check connections.
- Assemble the Seat: Clip the seat cushions into the base of the backrest. Slide the front of the seat cushion into the slots of the vehicle body and then secure it in place with one screw at the back.
- Attach the Steering Wheel: Remove the nut and bolt from the steering wheel. Connect the wires coming from the steering column to the wires on the steering wheel. Insert the steering wheel over the steering column and then secure it in place with the nut and bolt.
- Attach Accessories: Place the shovel in the corresponding hole on the side of the fire truck. The holder for the fire extinguisher locks into place on the other side.
4. Operating Instructions
Your ELEMARA Fire Truck offers various features for an engaging and safe play experience.
Driving Modes
- Parent Remote Control: Parents can control the vehicle remotely, which takes priority over manual operation, ensuring child safety.
- Kids Manual Drive: Children can operate the vehicle independently using the steering wheel and foot pedal.
Speed Settings
- Remote Control: Features 3 adjustable speeds.
- Kids Control: Offers 2 speeds for manual driving.
- Max Speed: Up to 3 MPH.
- Slow-Start Function: Designed to protect the child during acceleration, ensuring a smooth and safe start.

Image: A child happily driving the red fire truck, illustrating the speed and duration capabilities of the vehicle.
Battery & Charging
- Battery: Equipped with a 12V 7AH battery.
- Playtime: Provides 1.5 to 2 hours of continuous use on a full charge.
- Charging: Use the provided charger. It is recommended to charge the battery for 4-6 hours prior to first use. During charging, the vehicle enters a protected state and cannot be operated. Do not charge for more than 20 hours to prevent battery damage.
- Low Battery Warning: The vehicle features a low battery warning system to indicate when it's time to recharge.
Entertainment Features
- Built-in Music: Comes with 3 pre-programmed music tracks.
- Bluetooth: Connect your device wirelessly for custom music playback.
- Radio: Enjoy radio broadcasts.
- USB Input: Play music from a USB drive.
Special Features
- Walkie-Talkie Function: Experience realistic fire engine play with an integrated intercom.
- Siren & Flashing Lights: Authentic siren sounds and flashing lights enhance the firefighting experience.
- Fire Extinguisher: A functional fire extinguisher that sprays water for realistic play.
- Storage Box: A huge back storage box to easily hold toys and accessories.

Image: A child holding the walkie-talkie, demonstrating the interactive communication feature of the fire truck.
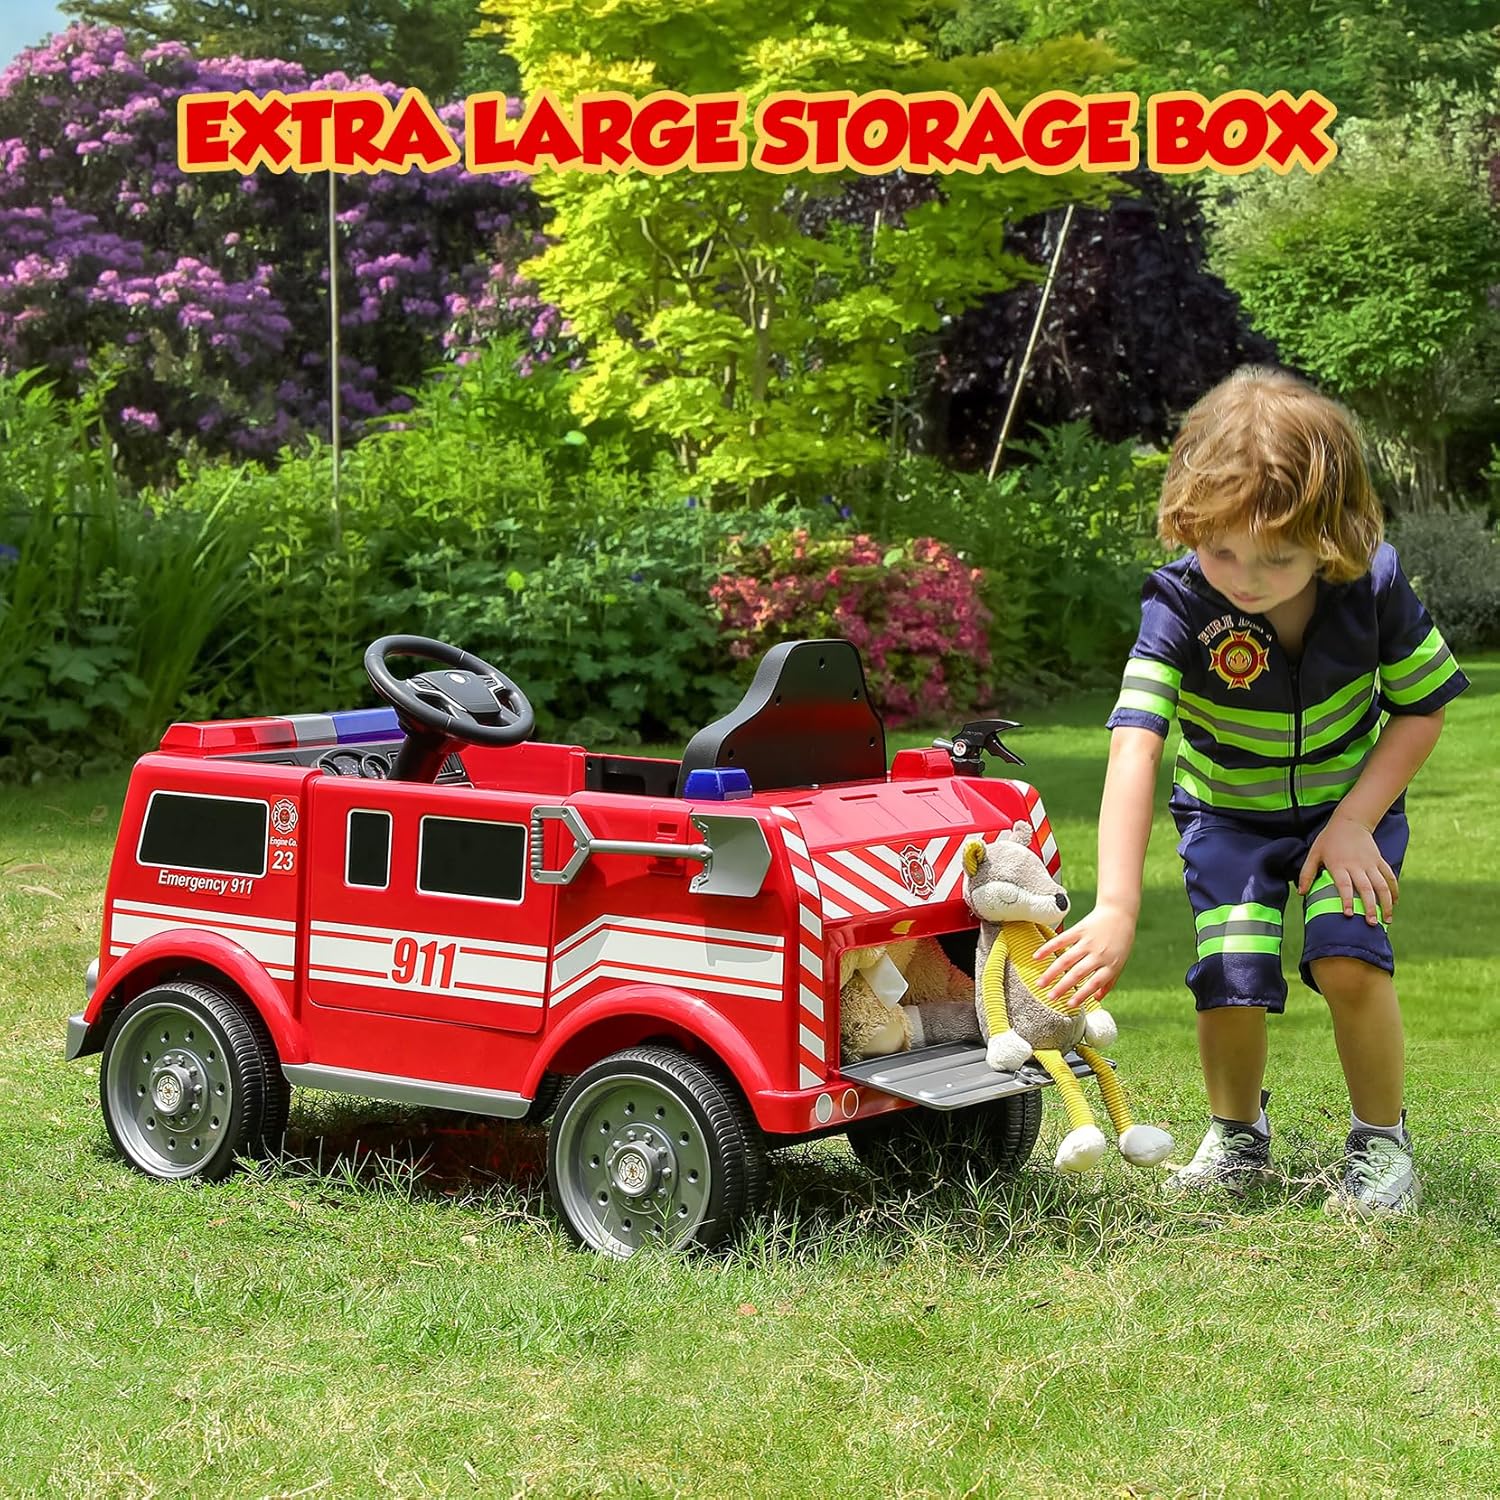
Image: A child reaching into the spacious rear storage compartment, highlighting its utility for toys and gear.
5. Maintenance
Regular maintenance ensures the longevity and safe operation of your fire truck.
- Cleaning: Wipe the vehicle with a damp cloth. Avoid using harsh chemicals or abrasive cleaners.
- Storage: Store the vehicle in a dry, cool place away from direct sunlight and moisture.
- Battery Care: Charge the battery regularly, even when not in use, to maintain its lifespan. Do not allow the battery to drain completely.
- Inspections: Periodically check all screws, nuts, and connections to ensure they are secure. Inspect wheels and axles for any wear or damage.
6. Troubleshooting
If you encounter issues, try these common troubleshooting steps.
- Vehicle Not Starting: Check battery connections. Ensure the battery is charged. Verify the power button is pressed.
- Reduced Power/Speed: Battery may be low; recharge it. Check for loose connections to the motors.
- Remote Control Not Working: Ensure batteries in the remote are fresh and correctly inserted. Re-pair the remote with the vehicle following the pairing instructions in the user manual.
- Unusual Noises: Inspect wheels and axles for debris or damage. Check for loose parts.
7. Specifications
- Product Dimensions: 37.2 x 22.8 x 23 inches
- Item Weight: 28 pounds
- Country of Origin: China
- Item Model Number: P17
- Manufacturer Recommended Age: 3 years and up
- Batteries: 1 x 12V battery required (included)
- Max Weight Capacity: 66 pounds
8. Warranty & Support
For warranty information or further support, please refer to the official ELEMARA website or contact their customer service directly. Keep your purchase receipt for any warranty claims.

