
1. Introduction
Thank you for choosing the Crelander HY310PRO Mini Projector. This portable smart projector is designed to deliver a high-quality viewing experience with native 1080P support, auto-focus, and advanced connectivity options like Wi-Fi and Bluetooth. This manual provides essential information for setting up, operating, and maintaining your projector to ensure optimal performance and longevity.

Image 1.1: The Crelander HY310PRO Mini Projector and its remote control, showcasing its compact design and user interface.

Image 1.2: Overview of key features including 0.8:1 ultra short throw, auto focus, dual band Wi-Fi 6 & BT5.4, native 1080P, 260 ANSI lumens, and 180° free projection.
2. Package Contents
Please check the package carefully to ensure all items are present and in good condition. If any items are missing or damaged, please contact customer support.

Image 2.1: Illustration of the items included in the product package: the projector unit, remote control, user manual, and power cord with adapter.
- Crelander HY310PRO Mini Projector
- Remote Control (Batteries not included)
- Power Cord and Adapter
- User Manual (This document)
Note: For transport safety reasons, batteries are not included in the remote control package. Please insert two AAA batteries (not supplied) before use.
3. Setup
- Power Connection: Connect the power adapter to the projector's power input port and then plug it into a power outlet.
- Placement: Place the projector on a stable, flat surface. Ensure there are no obstructions in front of the lens. The projector supports 180° free projection, allowing it to project onto walls, ceilings, or floors.
- Initial Power On: Press the power button on the projector or the remote control to turn on the device.
- Remote Control Setup: Insert two AAA batteries into the remote control. The remote combines traditional remote functions with a mouse pointer for easier navigation.
4. Operating Instructions
4.1. Auto Focus and Keystone Correction
The HY310PRO projector features automatic focus and keystone correction to ensure a clear and properly shaped image without manual adjustments.
- Auto Focus: The projector automatically adjusts the lens to achieve a sharp image. You do not need to manually adjust the focus.
- Auto Horizontal Keystone Correction: The projector automatically corrects horizontal image distortion.
- Four-Point Correction: For more precise adjustments, the projector offers four-point correction to fine-tune the image shape.
- Electronic Upper and Lower Trapezoid Correction: This feature allows for electronic adjustment of vertical image distortion.

Image 4.1: Visual representation of the auto horizontal keystone correction and four-point correction capabilities, demonstrating how the projector adjusts the image to a perfect rectangle.

Image 4.2: Diagram illustrating the electronic upper and lower trapezoid correction feature, which helps in rectifying vertical image distortions.
4.2. Connectivity
The projector supports both Wi-Fi and Bluetooth for versatile connectivity.
- Wi-Fi: Connect to your home network to access built-in streaming applications and online content. Navigate to the settings menu to configure Wi-Fi.
- Bluetooth: Pair with external Bluetooth speakers or headphones for enhanced audio. Access Bluetooth settings through the main menu.
4.3. Projection and Screen Size
The HY310PRO offers flexible projection options for various environments.
- Projection Ratio: Features a 0.8:1 ultra short throw ratio.
- Projection Size: Supports screen sizes from 40 to 260 inches.
- Projection Distance: Optimal projection distances range from 2 feet to 8.2 feet.
- 180° Free Projection: The projector's design allows for projection at various angles, including ceilings and floors, providing flexibility in placement.

Image 4.3: Chart illustrating the relationship between projection distance and screen size, showing examples for 40, 85, and 130-inch screens.

Image 4.4: Visual demonstration of the projector's 180-degree free projection feature, allowing it to project images onto various surfaces and angles.

Image 4.5: The projector positioned to project images onto a wall and a ceiling, highlighting its versatility in different room setups.
4.4. Built-in Applications
The projector comes with multiple built-in applications, providing seamless access to a wide range of video content. Ensure your software is up-to-date for the best experience.
- Software Updates: If your viewing software is outdated, visit the product's inbuilt software store to upgrade to the latest firmware.
5. Maintenance
- Cleaning the Lens: Use a soft, lint-free cloth specifically designed for optical lenses. Do not use abrasive cleaners or harsh chemicals.
- Cleaning the Exterior: Wipe the projector's exterior with a soft, dry cloth. Avoid using liquid cleaners directly on the device.
- Ventilation: Ensure the projector's ventilation ports are clear of dust and obstructions to prevent overheating.
- Storage: When not in use for extended periods, store the projector in a cool, dry place, away from direct sunlight and extreme temperatures.
6. Troubleshooting
| Problem | Possible Cause | Solution |
|---|---|---|
| No image projected | Power not connected, projector off, input source not selected. | Check power connection, turn on projector, select correct input source. |
| Image is blurry | Auto-focus issue, projector too close/far from screen. | Ensure projector is on a stable surface. If issue persists, restart the projector. |
| Image is distorted (trapezoid shape) | Projector not perpendicular to screen. | The projector has auto keystone correction. If manual adjustment is needed, check settings for four-point or electronic trapezoid correction. |
| No sound | Volume too low, external audio device not connected, Bluetooth not paired. | Increase volume, check audio cable connections, ensure Bluetooth device is paired and connected. |
| Remote control not working | Batteries dead or incorrectly inserted. | Replace batteries (AAA), ensure correct polarity. |
| Cannot connect to Wi-Fi | Incorrect password, router issue, out of range. | Verify Wi-Fi password, restart router, move projector closer to router. |
If you encounter issues not listed here or if the problem persists, please contact our Customer Support Centre for assistance.
7. Specifications
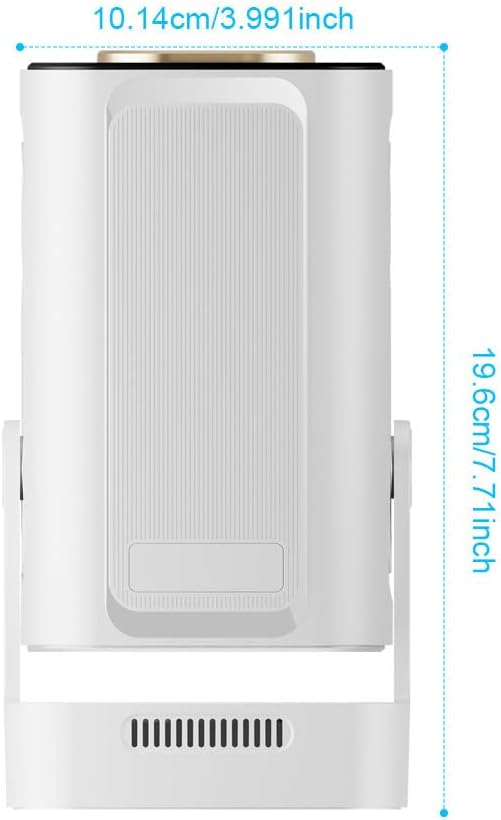
Image 7.1: Diagram showing the physical dimensions of the Crelander HY310PRO Mini Projector: approximately 10.14 cm (3.991 inches) in width and 19.6 cm (7.71 inches) in height.
| Feature | Detail |
|---|---|
| Brand | Crelander |
| Model | HY310PRO |
| Recommended Use | Home Cinema |
| Special Feature | Auto Focus |
| Connectivity Technology | Bluetooth, Wi-Fi (Dual Band Wi-Fi 6 & BT5.4) |
| Display Resolution | Native 1920 x 1080 (1080P) |
| Brightness | 260 ANSI Lumens |
| Contrast Ratio | 10,000:1 |
| Projection Ratio | 0.8:1 Ultra Short Throw |
| Projection Size | 40 to 260 inches |
| Projection Distance | 2 feet to 8.2 feet |
| Audio | Upgraded 5W Speakers |
| Keystone Correction | Auto Horizontal, Four-Point, Electronic Upper/Lower Trapezoid |
| Projection Angle | 180° Free Projection |
8. Warranty and Support
For any questions, technical assistance, or warranty inquiries, please do not hesitate to contact our Customer Support Centre. Refer to your purchase documentation for specific warranty terms and contact details.
We recommend checking the version of your viewing software regularly. If the version is outdated, please visit the product's inbuilt software store to upgrade to the latest firmware for the best viewing experience.