
1. Introduction
This manual provides detailed instructions for the installation, operation, and maintenance of your DIGITEN WTC1001 Wireless Thermostat Outlet. This device is designed to control heating and cooling appliances by maintaining a desired temperature, offering a convenient and energy-efficient solution for various environments.
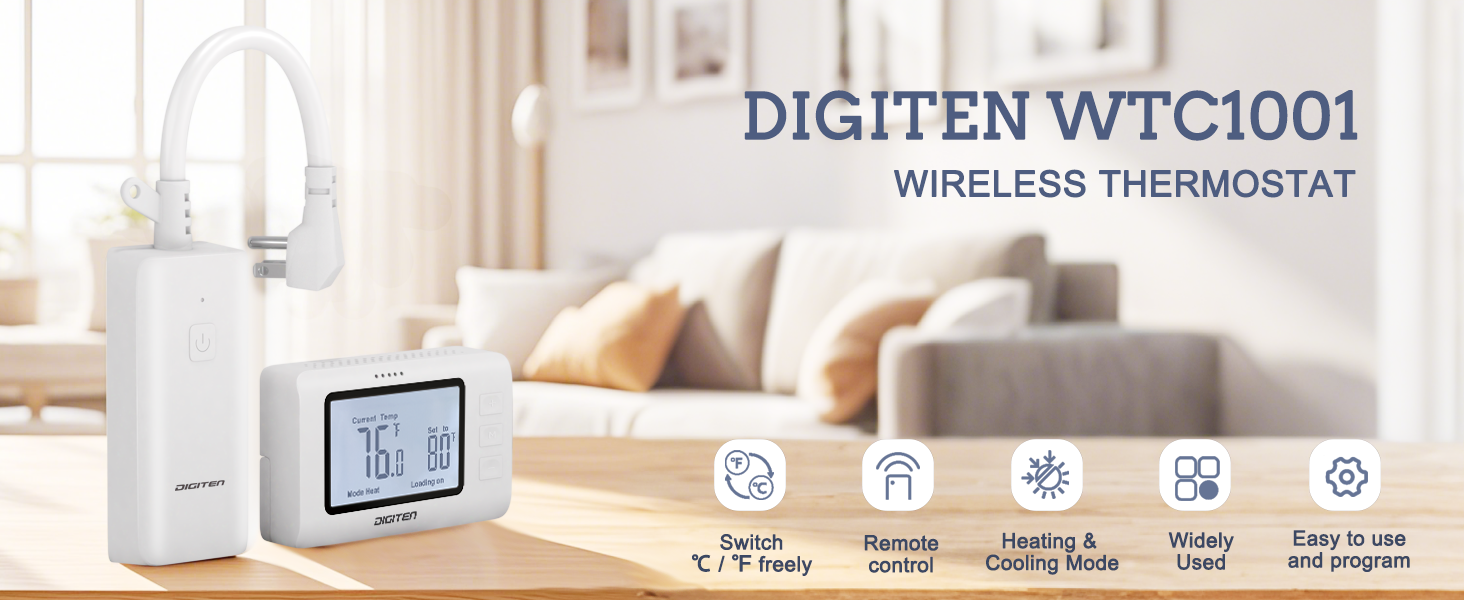
Image 1.1: The DIGITEN WTC1001 Wireless Thermostat Outlet and its remote control unit, highlighting key features like temperature unit switching, remote control, heating/cooling modes, wide applicability, and ease of use.
Key Features:
- Easy Operation: Simple setup with heating or cooling mode selection and target temperature adjustment.
- Space-Saving Design: Power cord plug design prevents blocking adjacent outlets.
- Integrated Sensor: Remote controller includes a high-precision temperature sensor for accurate readings.
- Versatile Application: Suitable for controlling various appliances in homes, greenhouses, and for pet care.
- Safety: Features a separate input and output socket design to reduce current temperature rise and protect circuits, and is FCC certified.
2. Package Contents
Verify that all items are present in the package:
- 1 x Wireless Thermostat Outlet Receiver
- 1 x Remote Controller with built-in temperature sensor
- 1 x Wall Mounted Panel for Remote Controller
- 1 x User Manual (this document)
Note: 2x AAA 1.5V batteries for the remote controller are not included and must be purchased separately.
3. Product Overview
3.1 Components

Image 3.1: The main components of the DIGITEN WTC1001 system: the wireless thermostat outlet receiver and the remote control unit.

Image 3.2: Detailed view of the receiver unit, showing the power plug with cord, the signal receive key, the power outlet, and the loading indicator light.
3.2 Remote Controller Display and Buttons
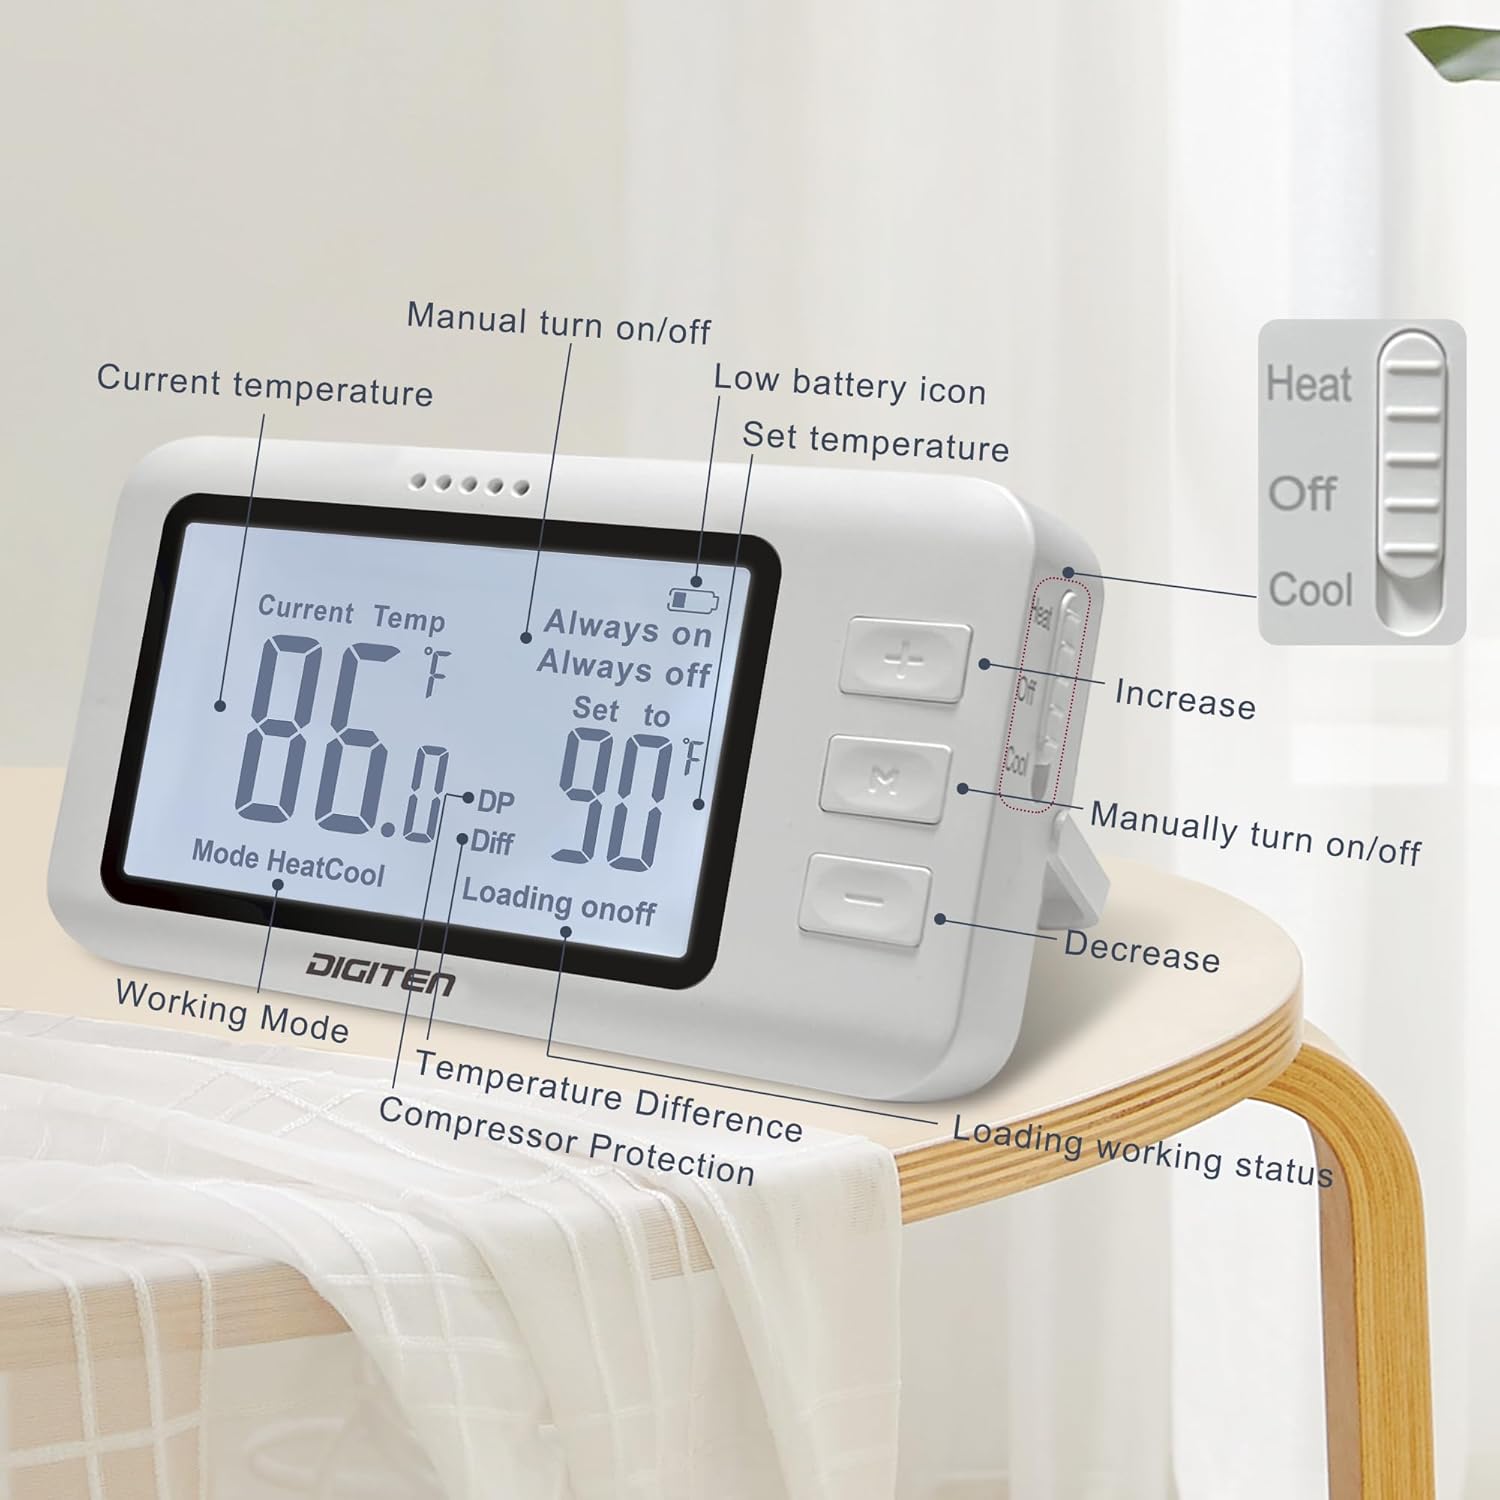
Image 3.3: The remote controller's LCD screen and buttons. Labels indicate Current Temperature, Set Temperature, Working Mode (Heat/Cool), Temperature Difference (Diff), Compressor Protection (DP), Loading Status (on/off), Low Battery Icon, Increase/Decrease buttons, and a Manual Turn On/Off button. A slide switch on the side selects Heat, Off, or Cool modes.
4. Setup and Installation
4.1 Installing Remote Controller Batteries
The remote controller requires 2x AAA 1.5V batteries (not included). Open the battery compartment on the back of the remote controller and insert the batteries, ensuring correct polarity.
Video 4.1: This video demonstrates how to install the batteries into the remote control unit and how to place it on a surface or mount it to a wall using the provided bracket.
4.2 Mounting the Remote Controller
The remote controller can be placed on any flat surface or mounted to a wall using the included wall-mounted panel.
- Surface Placement: Extend the kickstand on the back of the remote controller to stand it upright on a table or desk.
- Wall Mounting:
- Secure the wall-mounted panel to your desired wall location using screws (not included).
- Slide the remote controller onto the mounted panel until it clicks into place.
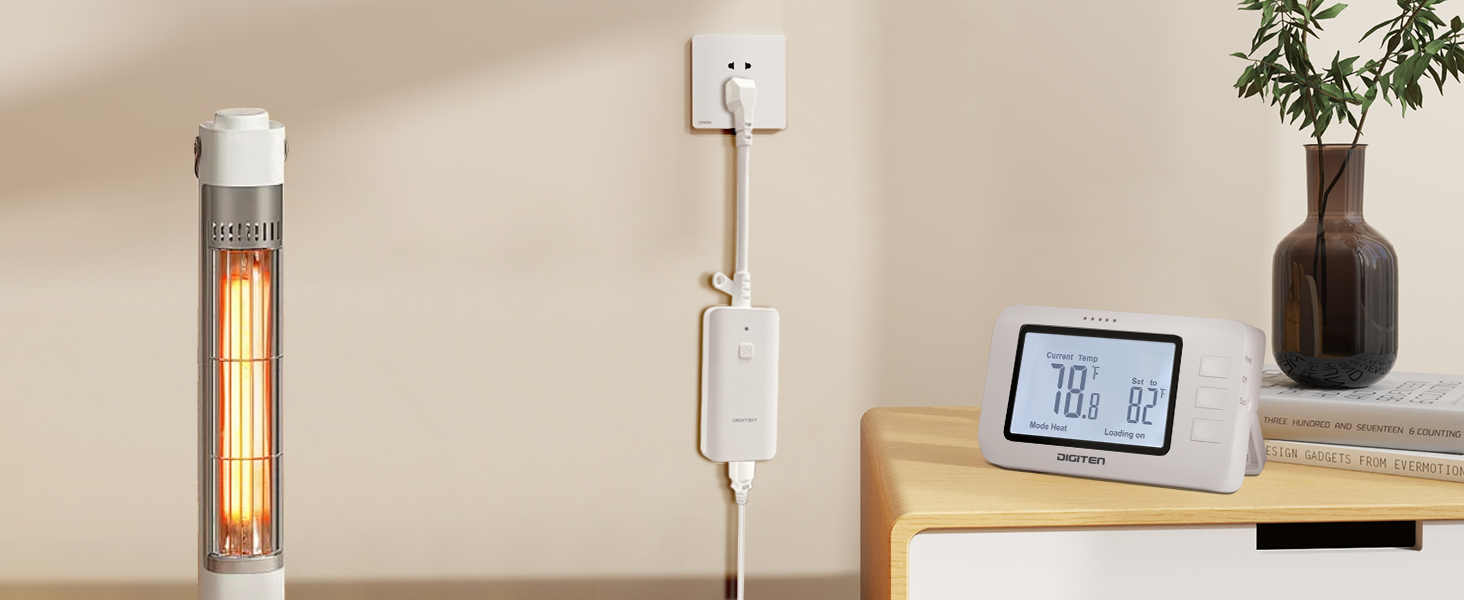
Image 4.2: Illustration showing the remote controller mounted on a wall, demonstrating the wall hanging option.
4.3 Connecting the Receiver
Plug the receiver unit into a standard 110V AC wall outlet. The unique power cord design ensures that adjacent outlets remain accessible.
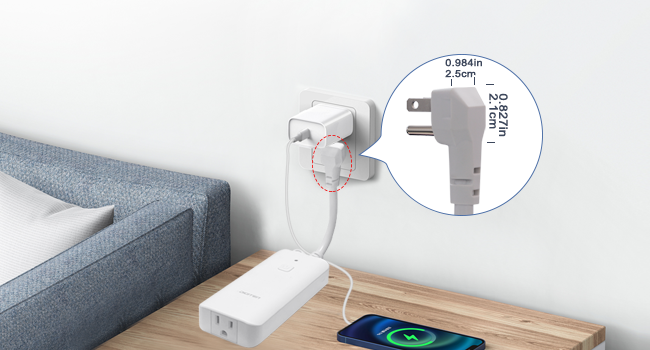
Image 4.3: Close-up view of the receiver's plug, illustrating its compact design that allows other devices to be plugged into adjacent wall sockets without obstruction.
Plug your heating or cooling appliance into the outlet on the receiver unit.
5. Operating Instructions
The DIGITEN WTC1001 is designed for straightforward operation. Follow these steps to control your appliance:
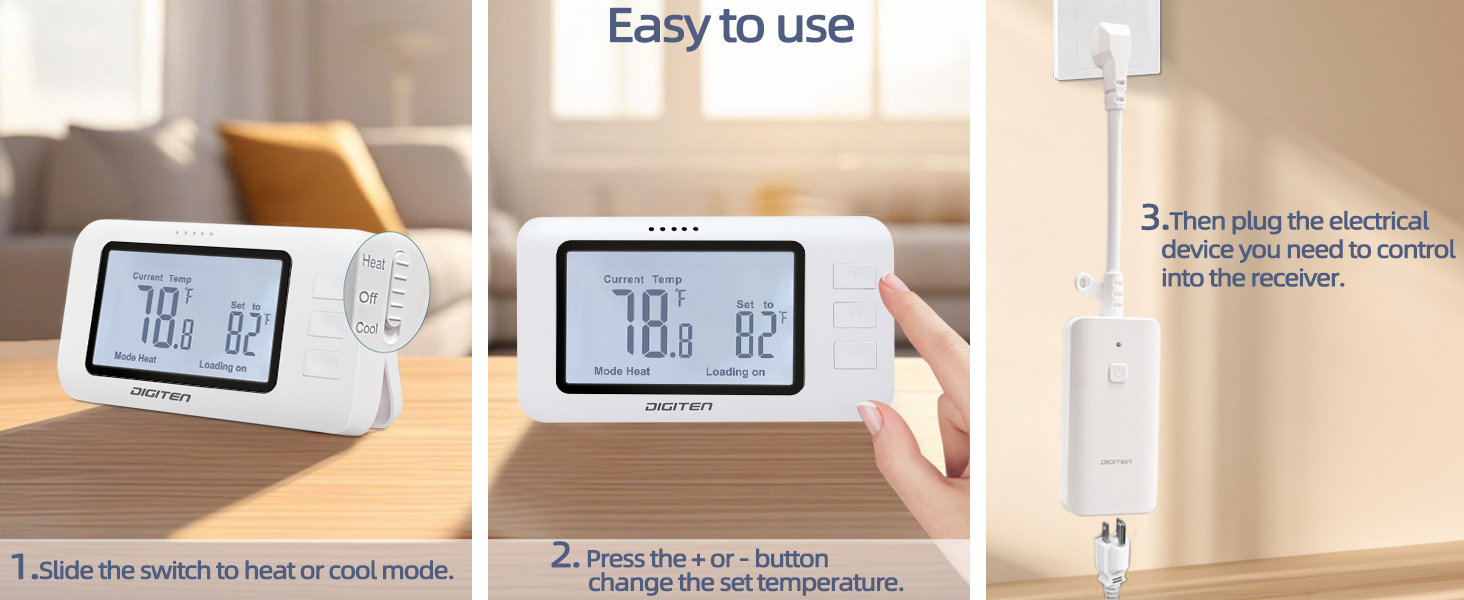
Image 5.1: Visual guide for basic operation: 1. Slide the switch to Heat or Cool mode. 2. Press the + or - buttons to change the set temperature. 3. Plug the electrical device into the receiver.
5.1 Selecting Operating Mode (Heat/Cool)
On the side of the remote controller, locate the slide switch. Move the switch to:
- Heat: For controlling heating appliances (e.g., space heaters).
- Cool: For controlling cooling appliances (e.g., fans, air conditioners).
- Off: To turn off temperature control.

Image 5.2: Examples of the thermostat in use, showing a space heater connected for heating mode and a fan connected for cooling mode.
5.2 Setting the Target Temperature
After selecting the mode:
- Press the + button to increase the target temperature.
- Press the - button to decrease the target temperature.
The remote controller will display the current temperature and the set target temperature. The receiver will automatically activate or deactivate the connected appliance to maintain the set temperature.
5.3 Switching Between Celsius (°C) and Fahrenheit (°F)
The remote controller allows you to switch between Celsius and Fahrenheit units. Refer to the remote controller's display details (Image 3.3) for the specific button or combination to toggle units.
5.4 Manual On/Off
The remote controller has a dedicated button (often labeled 'M' or a power icon) to manually turn the connected appliance on or off, overriding the temperature control temporarily.
6. Maintenance
6.1 Cleaning
Wipe the thermostat outlet and remote controller with a soft, dry cloth. Do not use abrasive cleaners or immerse the units in water.
6.2 Battery Replacement
When the low battery icon appears on the remote controller's display, replace the 2x AAA 1.5V batteries. Ensure correct polarity during replacement.
7. Troubleshooting
| Problem | Possible Cause | Solution |
|---|---|---|
| Appliance not turning on/off as expected. | Incorrect mode selected (Heat/Cool). Target temperature not set correctly. Remote controller out of range or low battery. | Verify the slide switch is in the correct mode. Adjust the target temperature using the + and - buttons. Move the remote controller closer to the receiver (within 100m/328ft open space). Replace remote batteries. |
| No display on remote controller. | Batteries are dead or incorrectly installed. | Replace batteries with new AAA 1.5V batteries, ensuring correct polarity. |
| Receiver indicator light not on. | Receiver not plugged in or no power to the outlet. | Ensure the receiver is securely plugged into a working wall outlet. Check the circuit breaker. |
| Temperature readings seem inaccurate. | Remote controller placed in an area with drafts, direct sunlight, or near heat sources. | Relocate the remote controller to a more stable temperature environment, away from direct influences. |
8. Specifications

Image 8.1: Detailed view of the product dimensions and key technical specifications for the receiver and remote control.
| General Specifications | |
|---|---|
| Brand | DIGITEN |
| Model Name | WTC1001 |
| Controller Type | RF (Radio Frequency) |
| Connectivity Technology | RF |
| Color | White |
| Material | Plastic |
| Display Type | LCD |
| Mounting Type | Wall Mount, Surface Mount |
| Item Weight | 11.3 ounces |
| Receiver Specifications | |
|---|---|
| Power Supply | 100-240V AC |
| Load Capacity | 15A, 1800W (at 110V AC) |
| Remote Controller Specifications | |
|---|---|
| Battery Requirement | 2 x 1.5V AAA (Not included) |
| Transmission Distance | Up to 100m / 328ft (open space) |
| Measuring Temperature Range | -10.0 °C to 80 °C (14 °F to 176.0 °F) |
| Control Temperature Range | 0 °C to 70 °C (32 °F to 158.0 °F) |
| Temperature Resolution | ±0.1 °C / °F |
| Control Accuracy | ±1 °C / °F |
| Refresh Frequency | 20 Seconds |
9. Warranty and Support
DIGITEN provides a one-year warranty for any product issues. For technical support or warranty claims, please contact DIGITEN customer service through the retailer where the product was purchased or visit the official DIGITEN website.
