
1. Introduction
This manual provides detailed instructions for the installation, operation, and maintenance of your TUGARD G34-EB002 Wireless WiFi Home Alarm System. This system is designed to provide comprehensive security for your home or property, featuring both WiFi and GSM/4G connectivity, and compatibility with smart home platforms like Alexa and Google Assistant. Please read this manual thoroughly before using the system to ensure proper functionality and safety.
2. Product Overview and Components
The TUGARD G34-EB002 alarm system is an integrated security solution. It includes a central control panel and various wireless sensors and accessories.
2.1 Included Components
- 1 x Control Panel (Host)
- 3 x Motion Sensors
- 8 x Door/Window Sensors
- 3 x RFID Cards
- 2 x Remote Controls
- 1 x Siren
- 1 x SOS Button
- 1 x Doorbell Button

Figure 2.1: Overview of the TUGARD G34-EB002 alarm system components, including the control panel, motion sensors, door/window sensors, RFID cards, remote controls, siren, SOS button, and doorbell button.
2.2 System Working Principle
The system operates by detecting intrusions through its various sensors. When a sensor is triggered while the system is armed, the control panel activates the siren and sends notifications via WiFi or GSM/4G to your registered contacts and the mobile application.

Figure 2.2: Illustration of the alarm system's operation, showing a door/window sensor detecting an opening, a motion sensor detecting movement, the main panel activating a siren, and remote notification via a mobile device.
3. Setup and Installation
3.1 Powering the Control Panel
Connect the control panel to a standard electrical outlet using the provided power adapter. The system operates on a Corded Electric power source (220 Volts). It also includes a backup battery (Lithium Ion) to ensure continuous operation during power outages.
3.2 Network Connectivity (WiFi & 4G GSM)
The system supports dual network connectivity via WiFi and 4G GSM. For GSM functionality, insert a compatible 4G SIM card into the designated slot on the control panel. This allows the system to send SMS alerts and make calls even if your internet connection is unavailable.

Figure 3.1: The control panel displaying its WiFi and 4G dual network capabilities, with an arrow indicating the SIM card insertion point for GSM connectivity.
3.3 Sensor Placement and Pairing
Place motion sensors in areas where intruders are likely to pass. Install door/window sensors on entry points. Refer to the control panel's interface or the mobile application for instructions on pairing each wireless sensor with the main host. The system supports up to 100 remote controls, RFID cards, and wireless detectors.
3.4 Mobile Application Setup
Download the recommended mobile application (e.g., Tuya or Smart Life) from your device's app store. Follow the in-app instructions to register an account and add your TUGARD G34-EB002 alarm system. The app allows for remote control, status monitoring, and configuration of system settings.
4. Operating Instructions
4.1 Arming and Disarming the System
The system can be armed or disarmed using several methods:
- Control Panel: Enter your PIN on the keypad.
- Remote Controls: Use the dedicated arm/disarm buttons.
- RFID Cards: Tap a registered RFID card on the control panel.
- Mobile Application: Use the app for remote arming and disarming.
- SMS Commands: Send specific SMS commands to the system's GSM number.
- Voice Commands: Utilize voice commands through compatible smart assistants (Alexa, Google Assistant).
4.2 Scheduled Arming and Disarming
You can configure schedules for automatic arming and disarming through the mobile application. This feature allows the system to arm or disarm at specific times, such as when you leave for work or return home.
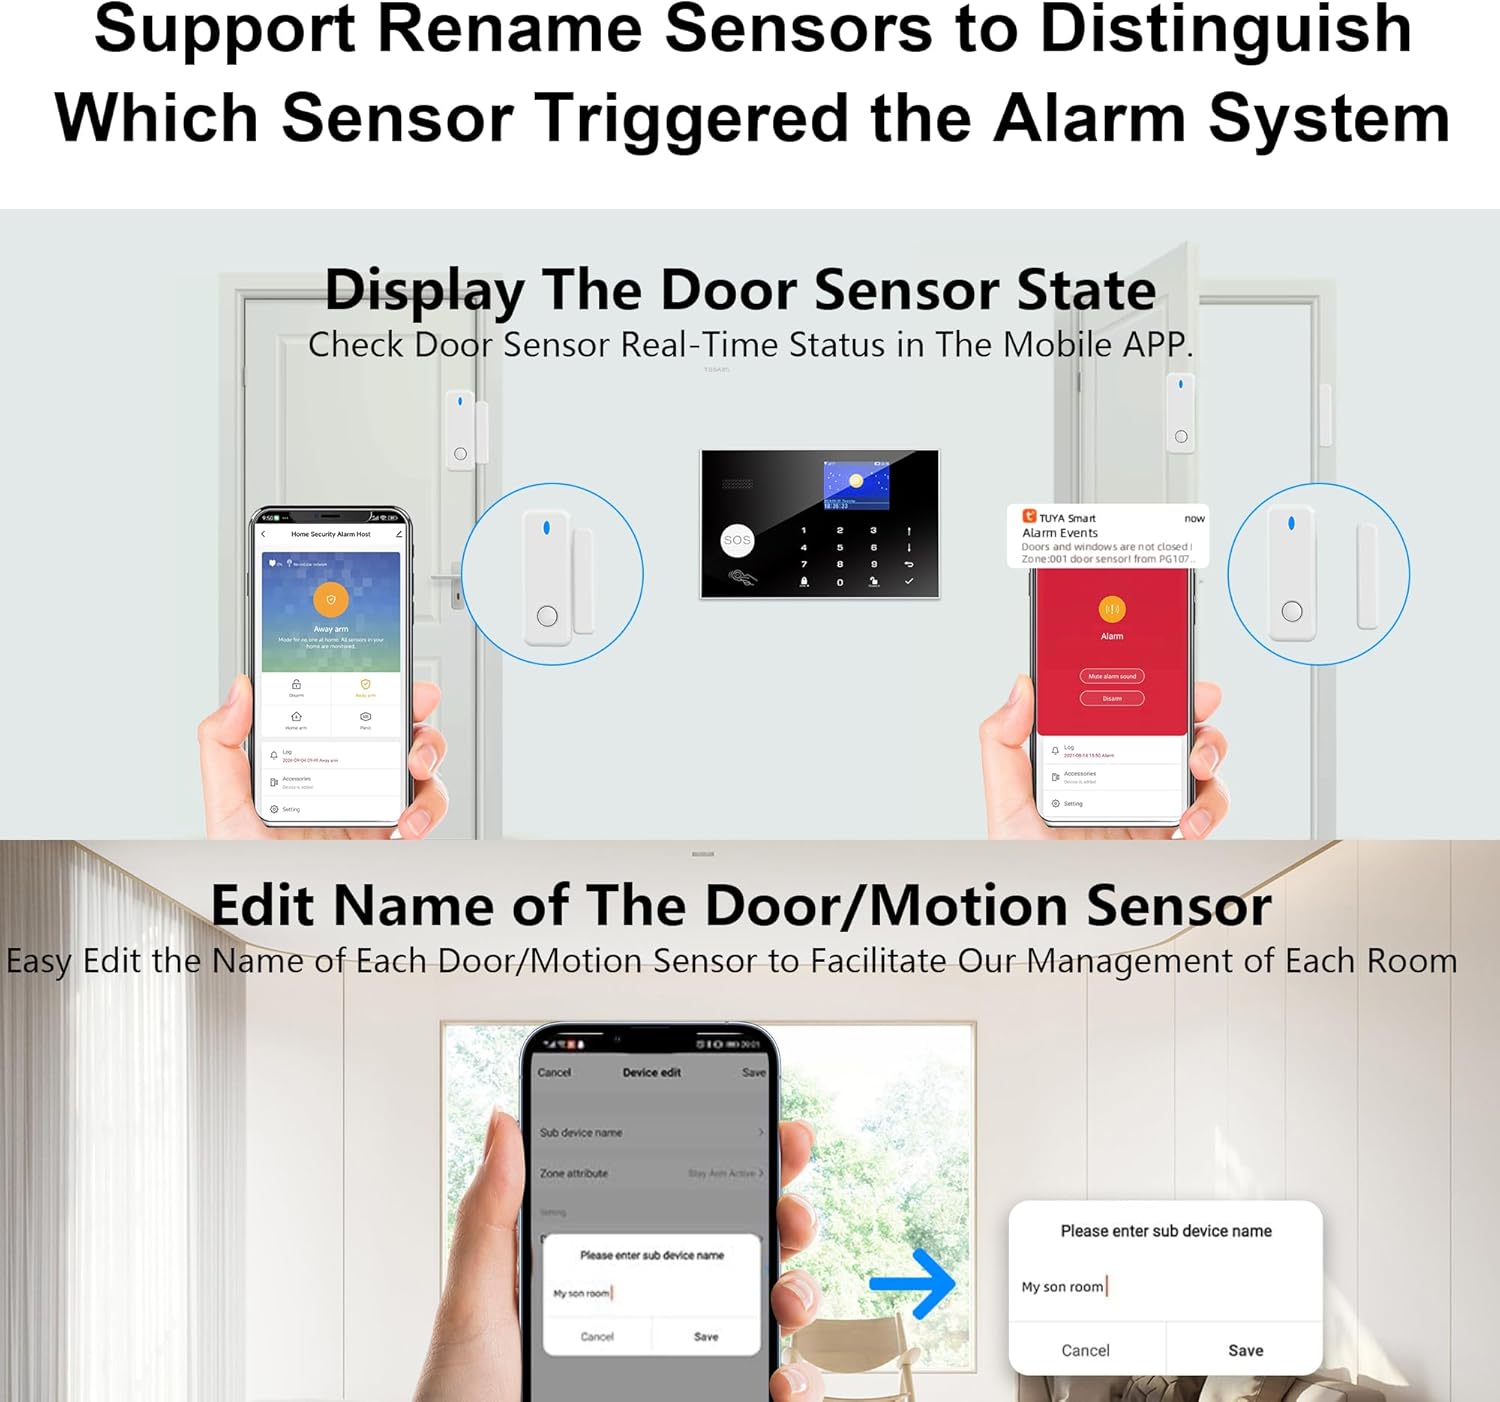
Figure 4.1: An example schedule for automatic arming and disarming, illustrating how the system can be set to arm when leaving and disarm when returning.
4.3 Sensor Management and Renaming
To easily identify which sensor has triggered an alarm, you can rename individual door/window and motion sensors within the mobile application. This allows for clear identification of the alarm source (e.g., "Front Door," "Living Room Motion"). The app also displays the real-time status of each sensor.

Figure 4.2: The mobile application interface demonstrating how to rename sensors and view their current status, facilitating easier management and identification of alarm triggers.
4.4 Alarm Notifications and Settings
The system supports multi-language menu display, voice prompts, and SMS alarm settings. You can preset up to 5 alarm call numbers and configure SMS and dialing switches for each. The system can record up to 20 seconds of alarm voice messages.
4.5 Advanced Alarm Functions
- Anti-Dismantling Alarm: Triggers if the control panel or certain sensors are tampered with.
- Low Voltage Sensor: Alerts when wireless sensor batteries are low.
- Extended Alarms: Supports alerts for main power failure, lack of backup battery, and anti-leverage events.
- Zone Settings: Configure various defense zones such as access area, interior area, perimeter area, 24-hour zone, and doorbell. You can name these zones for clarity (e.g., "Front Door," "Hall," "Room," "Water Leakage").
4.6 SOS Functionality
The included SOS button can be used to trigger an emergency alarm, immediately notifying pre-set contacts.

Figure 4.3: An individual wearing the SOS button, demonstrating its use for emergency situations.
5. Maintenance
5.1 Battery Replacement
The control panel has an internal backup battery with an estimated life of 3 years. Wireless sensors are powered by CR2032 batteries (1 CR2032 battery included per sensor). The system will alert you via the mobile app and control panel when sensor batteries are low. Replace batteries promptly to ensure continuous protection.
5.2 Cleaning
Wipe the control panel and sensors with a soft, dry cloth. Avoid using abrasive cleaners or solvents.
5.3 Firmware Updates
Periodically check the mobile application for available firmware updates for your control panel. Updates can improve performance, add new features, and enhance security.
6. Troubleshooting
- System not responding: Ensure the control panel is powered on and connected to a power source. Check the backup battery status.
- No network connection: Verify your WiFi network is active and the control panel is within range. If using GSM, ensure the SIM card is properly inserted and has an active plan.
- Sensor not triggering: Check the sensor's battery level. Ensure the sensor is correctly paired with the control panel and placed within its effective range.
- False alarms: Review sensor placement to avoid triggering by pets or environmental factors. Adjust sensitivity settings if available.
- App connectivity issues: Ensure your mobile device has an internet connection. Restart the app or reinstall it if problems persist.
For further assistance, refer to the mobile application's help section or contact TUGARD customer support.
7. Specifications
| Feature | Specification |
|---|---|
| Model Number | G34-EB002 |
| Brand | TUGARD |
| Connectivity Technology | Wireless (WiFi, 4G GSM) |
| Power Source | Corded Electric |
| Voltage | 220 Volts |
| Backup Battery Type | Lithium Ion (Control Panel) |
| Sensor Battery Type | CR2032 (included) |
| Control Method | App, Remote Control, Keypad, SMS, Voice |
| Compatibility | Alexa, Google Assistant |
| Included Components | 1 control panel, 3 motion sensors, 8 door/window sensors, 3 RFID cards, 2 remote controls, 1 siren, 1 SOS button, 1 doorbell button |
| Item Dimensions (L x W x H) | 7.09 x 4.53 x 0.87 inches |
| Item Weight | 2 Pounds |
| Noise Level (Siren) | 4 Sones (120dB) |
| Manufacturer | Shenzhen Smartrol Technology Limited |
8. Warranty and Support
Specific warranty information for the TUGARD G34-EB002 Wireless WiFi Home Alarm System is typically provided at the point of purchase or within the product packaging. Please retain your proof of purchase for warranty claims.
For technical support, troubleshooting assistance, or warranty inquiries, please contact TUGARD customer service through the contact information provided with your product or on the official TUGARD website.