1. Introduction
This manual provides detailed instructions for the installation, operation, and maintenance of your Zomolither 8257 Android 13 Car Stereo. This unit is specifically designed for Honda CRV models manufactured between 2007 and 2011. Please read this manual thoroughly before using the product to ensure proper function and safety.

Image 1.1: Zomolither Car Stereo installed in a Honda CRV dashboard, showing the main interface with various app icons.
2. Product Overview
The Zomolither 8257 Car Stereo is an advanced in-dash navigation and entertainment system featuring the Android 13 operating system. It offers a comprehensive suite of functions to enhance your driving experience.
- Operating System: Android 13
- Processor: 8-Core
- Memory: 4GB RAM + 64GB ROM
- Display: 9-inch IPS Touchscreen with 1280x720 resolution
- Connectivity: Wireless Apple CarPlay, Wireless Android Auto, Bluetooth 5.0, Wi-Fi, Mirror Link
- Audio: Digital Signal Processor (DSP) with 32-band Equalizer (EQ)
- Navigation: Built-in GPS with support for online and offline maps
- Radio: FM/RDS Tuner
- Additional Features: Support for AHD Backup Camera, Steering Wheel Control (SWC), Multiple User Interface (UI) themes.
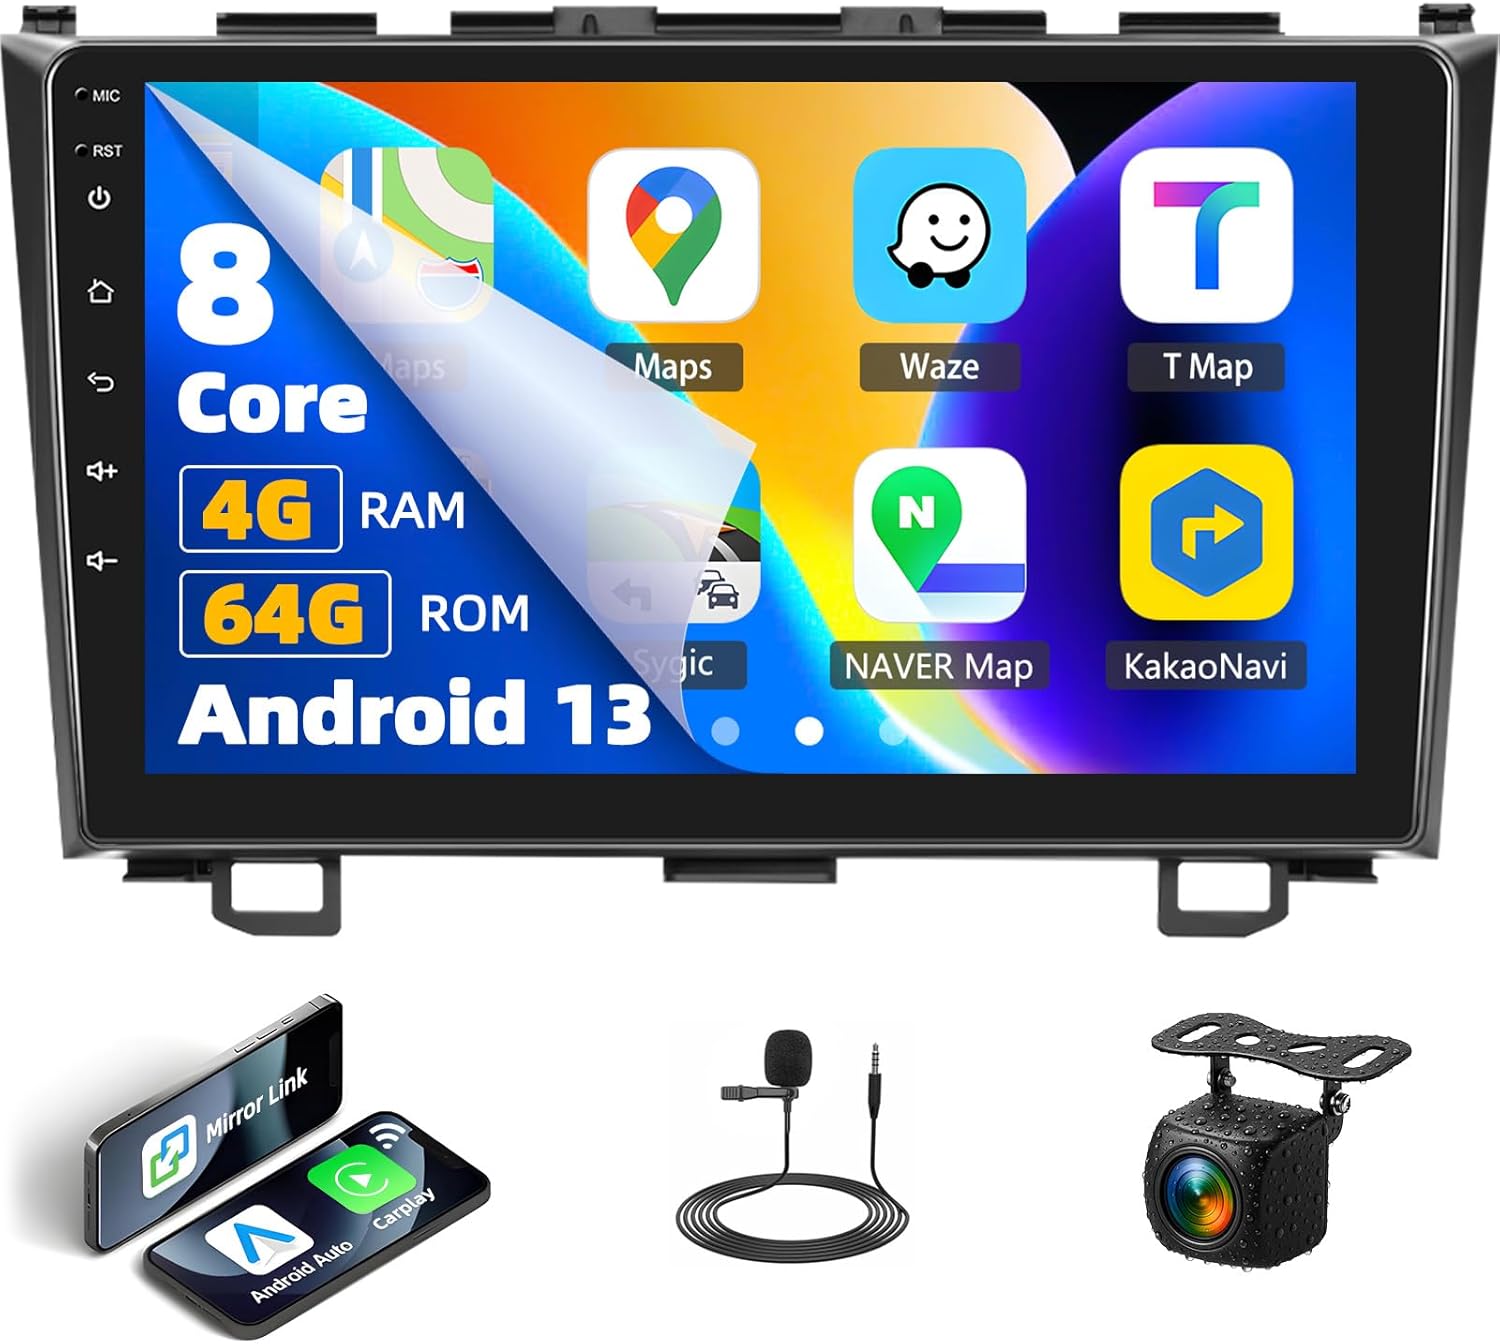
Image 2.1: Front view of the Zomolither 8257 Car Stereo, showcasing the 9-inch display and key specifications like 8-Core, 4GB RAM, 64GB ROM, and Android 13.

Image 2.2: Diagram illustrating the high-performance processor, highlighting Android 13, 4GB RAM, 64GB ROM, and 8-Core architecture.
3. Installation
The Zomolither 8257 Car Stereo is designed for direct fitment in Honda CRV models from 2007 to 2011. Professional installation is recommended to ensure correct wiring and functionality. Before installation, verify all components are present as listed in the package contents.
3.1 Package Contents
Refer to the diagram below for a visual representation of the included components:

Image 3.1: Package contents including the head unit, AHD rear camera, installation tool, microphone, RCA cable, power cable, USB cables, camera input cable, user manual, and GPS antenna.
3.2 Compatibility Check
Ensure your vehicle's dashboard configuration matches the compatible type. This unit is designed for Honda CRV models with a "Low Configuration" dashboard (as shown in Image 3.2, option A).

Image 3.2: Comparison of Honda CRV dashboard configurations. Option A (Low Configuration) is compatible, while Option B (High Configuration) is not.
3.3 General Installation Steps
- Disconnect Battery: Before starting, disconnect the vehicle's negative battery terminal.
- Remove Old Unit: Carefully remove the existing car stereo and dashboard trim.
- Connect Wiring Harness: Connect the provided wiring harness to the vehicle's factory harness. Ensure all connections are secure.
- Connect Peripherals: Connect the GPS antenna, microphone, backup camera (if applicable), and USB cables.
- Mount New Unit: Secure the Zomolither car stereo into the dashboard opening.
- Reconnect Battery: Reconnect the vehicle's negative battery terminal.
- Test Functionality: Power on the unit and test all functions (radio, audio, touchscreen, GPS, Bluetooth, etc.) before reassembling the dashboard trim.
4. Setup and Initial Configuration
4.1 First Power On
Upon first power-on, the system will boot into the Android 13 operating system. Follow any on-screen prompts for initial setup, such as language selection and time zone.
4.2 Wi-Fi Connection
To access online features, download apps, or use real-time traffic updates, connect the unit to a Wi-Fi network (e.g., a mobile hotspot).
- Go to Settings.
- Select Network & Internet.
- Turn on Wi-Fi and select your desired network.
- Enter the password if prompted.

Image 4.1: The car stereo display showing Wi-Fi connectivity and access to various applications like YouTube and social media platforms.
4.3 User Interface Customization
The unit supports 59 UI desktop themes. You can personalize the interface by selecting themes and rearranging app icons on the home screen.
- Navigate to Settings or the Themes application.
- Browse available themes and select your preference.
- To rearrange icons, long-press an app icon and drag it to the desired position.

Image 4.2: The 9-inch IPS screen displaying various UI themes and the split-screen feature, allowing two applications to run simultaneously.
5. Operating Instructions
5.1 Wireless Apple CarPlay & Android Auto
Connect your smartphone wirelessly via Bluetooth or USB for seamless integration with Apple CarPlay or Android Auto. This allows access to navigation, music, calls, and messages through the car stereo interface.
- Ensure Bluetooth is enabled on both your phone and the car stereo.
- On the car stereo, open the CarPlay or Android Auto application.
- Follow the on-screen instructions to pair your device. For wireless connection, select your phone from the list of available devices. For wired connection, connect your phone via a USB cable.
- Once connected, you can use voice commands (e.g., "Hey Siri" or "OK Google") to control functions.

Image 5.1: Visual representation of Wireless Apple CarPlay, Android Auto, and Mirror Link connections, showing phone integration with the car stereo.

Image 5.2: The car stereo screen demonstrating voice control capabilities for CarPlay and Android Auto, with examples of commands like "Hey Siri" and "OK Google".
5.2 GPS Navigation
The unit comes with pre-installed Google Maps. You can use it for navigation with real-time traffic updates when connected to Wi-Fi. Offline maps can be downloaded for navigation without an internet connection.
- Open the Maps application.
- Enter your destination.
- Select your preferred route and start navigation.
- To download offline maps: In the Maps app, go to Settings > Offline maps and select the area you wish to download.

Image 5.3: The car stereo screen displaying GPS navigation, illustrating support for both online and offline maps with various map applications.
5.3 Bluetooth 5.0
Bluetooth 5.0 provides stable connections for hands-free calling and music streaming.
- Go to Settings > Bluetooth.
- Turn on Bluetooth and make the device discoverable.
- On your phone, search for the car stereo and pair.
- Once paired, you can make/receive calls and stream audio.

Image 5.4: The car stereo screen demonstrating Bluetooth functionality, including incoming calls, phonebook access, and music playback.
5.4 FM/RDS Radio
Access local radio stations and receive real-time traffic updates via RDS.
- Open the Radio application.
- Use the scan function to find available stations or manually tune to a frequency.
- Save your favorite stations as presets for quick access.

Image 5.5: The car stereo's FM/RDS radio interface, showing frequency display, station presets, and RDS information.
5.5 DSP Audio (32-Band EQ)
Customize your audio experience with the built-in Digital Signal Processor (DSP) and 32-band equalizer.
- Open the DSP or Equalizer application.
- Adjust frequency bands to tailor the sound output.
- Select from various preset sound types or create custom profiles.

Image 5.6: The car stereo's DSP interface, illustrating the 32-band equalizer for detailed audio customization.
5.6 Mirror Link
Mirror Link allows you to cast your smartphone's screen to the car stereo display via Wi-Fi or USB.
- Open the Mirror Link application on the car stereo.
- Follow the on-screen instructions to connect your iOS (via Wi-Fi) or Android (via Wi-Fi or USB) device.

Image 5.7: The car stereo screen demonstrating Mirror Link, showing a smartphone's display mirrored onto the larger car stereo screen.
6. Backup Camera Operation
The unit supports an AHD backup camera, which provides a clear, wide-angle view of the area behind your vehicle when reversing. The screen automatically switches to the camera feed when the vehicle is put into reverse gear.
- AHD Image: High-definition video quality.
- Waterproof Design: Ensures durability in various weather conditions.
- 170-degree Wide Angle: Provides a broad view to minimize blind spots.
- Night Vision: Enhanced visibility in low-light conditions.

Image 6.1: The car stereo screen displaying the backup camera feed with dynamic parking guidelines, alongside icons indicating AHD, waterproof, 170-degree wide angle, and night vision features.

Image 6.2: A visual representation of the backup camera's view, highlighting its 1080p Full HD resolution, waterproof design, night vision, and wide-angle capabilities.
7. Steering Wheel Control (SWC) Setup
The unit supports the original car's steering wheel controls. After correct wiring, you can configure the buttons to control various functions of the car stereo.
- Ensure the SWC wires are correctly connected during installation.
- Go to Settings > Steering Wheel Control (or similar menu option).
- The interface will prompt you to press and hold a button on your steering wheel, then select the corresponding function on the screen (e.g., Volume Up, Next Track).
- Repeat for all desired buttons and save the configuration.
Image 7.1: A car steering wheel with controls, next to the car stereo screen displaying the steering wheel control learning interface, where users can assign functions to buttons.

Image 7.2: The car stereo's steering wheel control interface, showing various functions that can be mapped to physical steering wheel buttons.
8. Maintenance
To ensure the longevity and optimal performance of your Zomolither car stereo, follow these maintenance guidelines:
- Screen Cleaning: Use a soft, lint-free cloth to gently wipe the touchscreen. Avoid abrasive cleaners or harsh chemicals.
- Software Updates: Periodically check for system updates in the settings menu to ensure you have the latest features and security patches.
- Avoid Extreme Temperatures: Do not expose the unit to extreme heat or cold for extended periods.
- Ventilation: Ensure the unit's ventilation areas are not blocked to prevent overheating.
9. Troubleshooting
If you encounter issues with your Zomolither car stereo, refer to the following common troubleshooting steps:
- Unit Does Not Power On:
- Check all power connections and fuses.
- Ensure the vehicle's battery is charged.
- Screen Freezes or Becomes Unresponsive:
- Perform a soft reset by pressing the RST (Reset) button, usually located on the front panel (refer to Image 2.1 for location).
- If a reset button is not available, turn off the vehicle's ignition, wait a few minutes, and restart.
- No Audio Output:
- Check speaker connections.
- Verify volume levels are not muted or set too low.
- Ensure the correct audio source is selected.
- GPS Not Functioning:
- Ensure the GPS antenna is properly connected and has a clear view of the sky.
- Check if location services are enabled in the system settings.
- Bluetooth Connectivity Issues:
- Ensure Bluetooth is enabled on both devices.
- Delete previous pairings and attempt to re-pair.
- Restart both the car stereo and your phone.
- Backup Camera Not Displaying:
- Verify the camera is properly connected and powered.
- Ensure the vehicle is in reverse gear.
For persistent issues, please contact Zomolither customer support.
10. Specifications
| Feature | Detail |
|---|---|
| Brand | Zomolither |
| Model Number | 8257 |
| Operating System | Android 13 |
| Processor | 8-Core |
| RAM | 4GB |
| ROM | 64GB |
| Display Size | 9 Inches |
| Display Resolution | 1280x720 IPS |
| Connectivity | Bluetooth 5.0, Wi-Fi |
| Special Features | Wireless Apple CarPlay, Wireless Android Auto, GPS Navigation, DSP Audio (32 EQ), 59 UI Themes, Backup Camera Support, Steering Wheel Control |
| Audio Output Mode | Stereo |
| Item Weight | 3.67 pounds (1.67 Kilograms) |
11. Warranty and Support
Zomolither is committed to providing quality products and customer satisfaction.
- Refund Policy: 30-day refund period from the date of purchase.
- Replacement Policy: 12-month replacement warranty for manufacturing defects.
- Technical Support: Lifetime technical support is available for all Zomolither products.
For any concerns, compatibility questions, or technical assistance, please contact our support team:
Email: Zomolither@126.com


