
1. Introduction
This manual provides detailed instructions for the installation, maintenance, and care of your WOODBRIDGE Solid Surface Shower Wall Panel kit. These panels are designed for durability, ease of installation, and a clean aesthetic in your bathroom. Please read all instructions carefully before beginning installation.

Image 1.1: Example of installed WOODBRIDGE Solid Surface Shower Wall Panels.
2. Safety Information
- Always wear appropriate personal protective equipment (PPE) including safety glasses, gloves, and a dust mask during cutting and installation.
- Ensure the work area is well-ventilated when using adhesives and sealants.
- Handle panels with care to avoid damage or injury. Panels can be heavy.
- Keep children and pets away from the installation area.
- Follow all local building codes and regulations for shower installation.
3. Package Contents
The WOODBRIDGE Solid Surface Shower Wall Panel kit includes the following components:
- One (1) 60-inch x 96-inch back wall panel.
- Two (2) 36-inch x 96-inch side panels.
- All panels are 0.138 inches (3.5mm) thick.
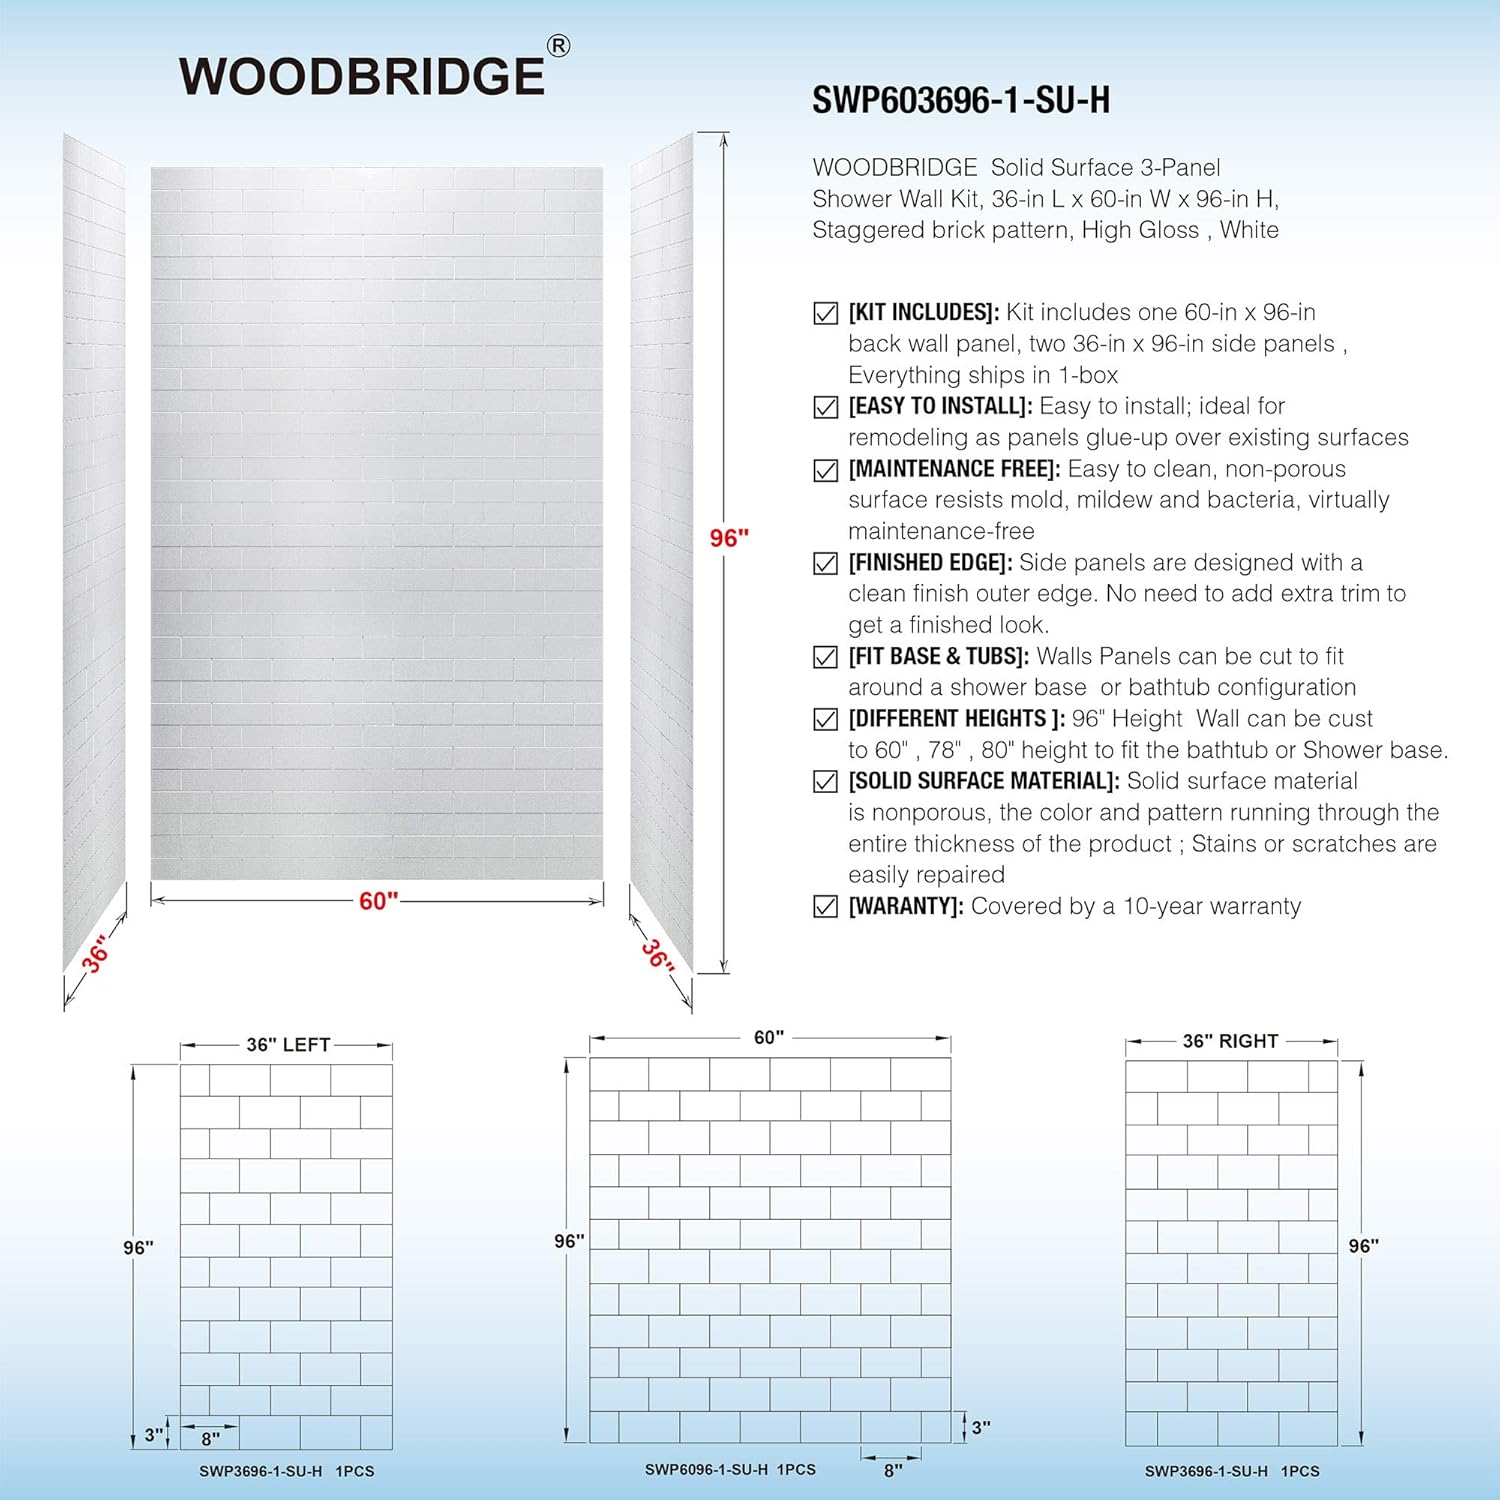
Image 3.1: Diagram illustrating the dimensions of the shower wall panels included in the kit.
4. Setup and Installation
4.1 Preparation
- Ensure the shower area walls are clean, dry, and structurally sound. The panels can be installed over existing tile or drywall.
- Measure the shower area carefully to determine if any panels require trimming.
- Gather all necessary tools, including a circular saw with a fine-tooth blade, a hole saw for plumbing cutouts, a caulk gun, adhesive, and sealant.
4.2 Cutting Panels
The 3.5mm thick panels are trimmable for a precise fit. Use a circular saw with a fine-tooth blade for straight cuts. For plumbing fixtures, mark the cutout locations accurately and use a hole saw.

Image 4.1: Visual guide demonstrating the ease of cutting panels and their durability features.
4.3 Applying Adhesive and Panel Placement
Apply a generous amount of construction adhesive to the back of each panel in a serpentine pattern, ensuring good coverage. Carefully position each panel onto the wall, pressing firmly to ensure full contact. Start with the back wall panel, then proceed to the side panels.

Image 4.2: A worker installing a shower wall panel, highlighting the quick installation process.
4.4 Sealing Joints
Once panels are in place, apply a high-quality silicone sealant to all seams and corners to ensure a waterproof seal. Smooth the sealant for a clean finish.
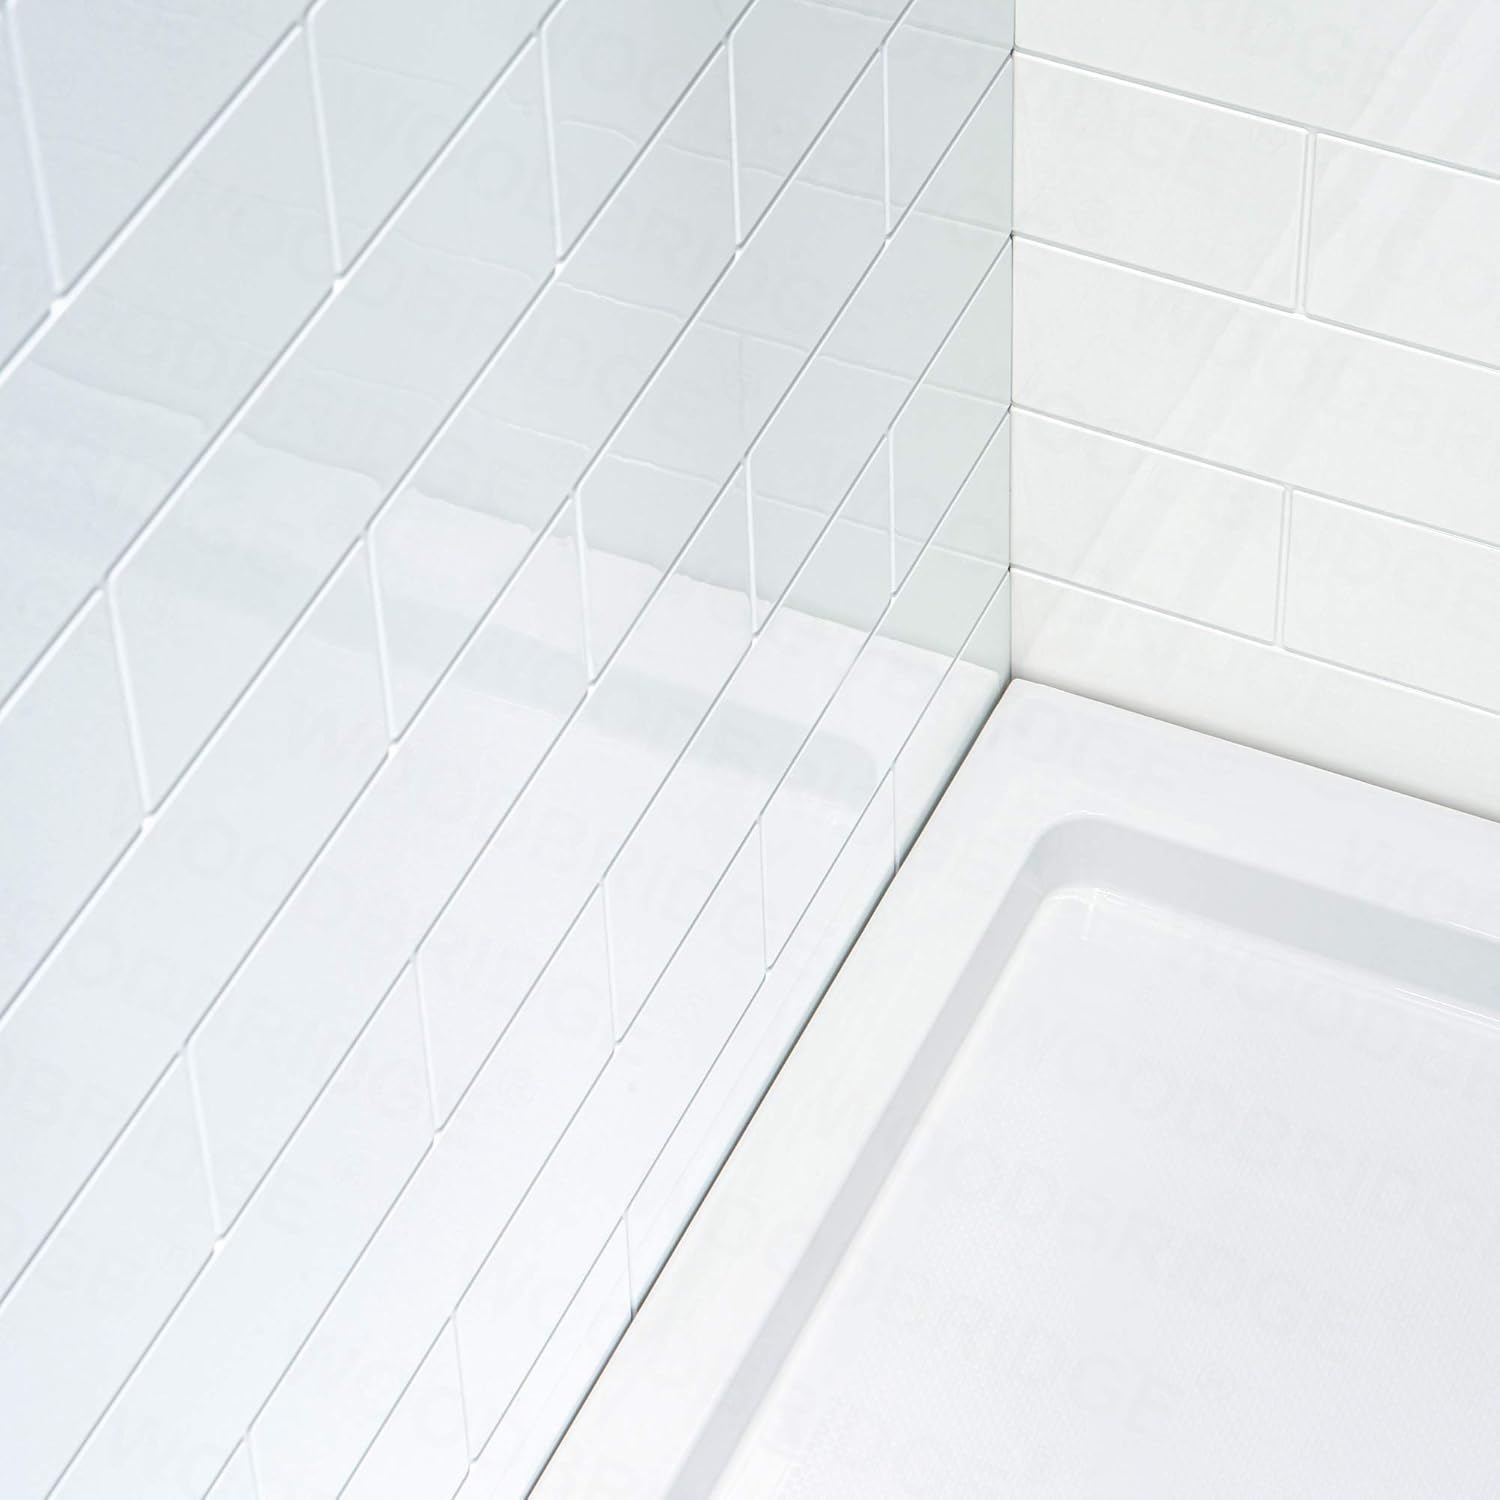
Image 4.3: Detail of a sealed corner joint between shower wall panels and a shower base.
4.5 Installation Video Guide
For a visual guide on the installation process, please refer to the official WOODBRIDGE installation video below:
Video 4.1: Official WOODBRIDGE Wall Panel Installation Video. This video demonstrates the steps for cutting, applying adhesive, and installing the shower wall panels.
5. Maintenance
The WOODBRIDGE Solid Surface Shower Wall Panels are designed for low maintenance. The smooth, non-porous finish resists dirt, soap scum, and hard water buildup. To clean:
- Wipe surfaces with a damp cloth and a mild, non-abrasive cleaner.
- Avoid harsh chemicals or abrasive scrubbing pads, as these can damage the surface.
- For minor scratches, the solid surface material can be gently sanded with fine-grit sandpaper to restore its smooth finish.

Image 5.1: Detail of faux grout lines on the shower wall panels, emphasizing the grout-free and easy-to-clean design.
6. Troubleshooting
6.1 Panel Adhesion Issues
- Problem: Panels are not adhering properly to the wall.
- Solution: Ensure the wall surface was clean, dry, and free of debris before adhesive application. Apply sufficient adhesive and press panels firmly. Allow adequate curing time before exposing to moisture.
6.2 Water Leaks
- Problem: Water is leaking from seams or corners.
- Solution: Inspect all sealed joints for gaps or cracks. Reapply a high-quality silicone sealant to any compromised areas. Ensure proper sealing around plumbing fixtures.
7. Specifications
| Feature | Detail |
|---|---|
| Model Number | SWP603696 -1-SU-H |
| Product Dimensions | 60" W x 36" D x 96" H |
| Material | Solid Surface (Fiber-reinforced composite) |
| Panel Thickness | 0.138" (3.5mm) |
| Color | High Gloss White |
| Finish Type | Glossy |
| Installation Type | Glue Up |
| Number of Panels | 3 (1 back, 2 sides) |
| Item Weight | 112 Pounds |
8. Warranty and Customer Support
This product is covered by a 10-year warranty. For any product advice, installation assistance, after-sales service, or free warranty replacement parts, please contact our U.S.-based support team.
- Email: help@woodbridgebath.com
- Phone: Available during business hours (contact details may vary, please refer to the WOODBRIDGE website for current phone numbers).


