1. Introduction
Thank you for choosing the BougeRV Movable Area Light. This compact and versatile rechargeable lantern is designed to provide reliable illumination for various outdoor activities, emergencies, and everyday use. Its durable, waterproof design and multiple lighting modes make it an essential tool for camping, hiking, power outages, and more. This manual provides detailed instructions for the safe and efficient operation and maintenance of your device.
2. Product Overview
2.1 Key Features
- Highly Portable: Compact design (4.06 x 1.54 x 1.96 inches) for easy transport in backpacks or pockets.
- Adjustable Brightness: 5 levels of brightness with smooth stepless control, up to 380 lumens.
- Multiple Lighting Modes: Includes 3 color temperature modes (Cool White, Warm White, Red Light) and an SOS mode for emergencies.
- Extended Runtime: 3200mAh rechargeable battery provides up to 6 nights of use (8 hours/night at lowest brightness).
- Automatic Sensing Feature: Motion-activated mode for convenience and safety.
- Durable & Waterproof: IP65 waterproof rating ensures functionality in rainy conditions.
- Power Bank Function: Can charge mobile devices via its USB-C port in emergencies.
- Versatile Mounting: Features an integrated hook, clip, and magnetic base for flexible placement.
2.2 Package Contents
- 1 x BougeRV Movable Area Light (Model CL02)
- 1 x USB-C Charging Cable
- 1 x User Manual
2.3 Product Diagram
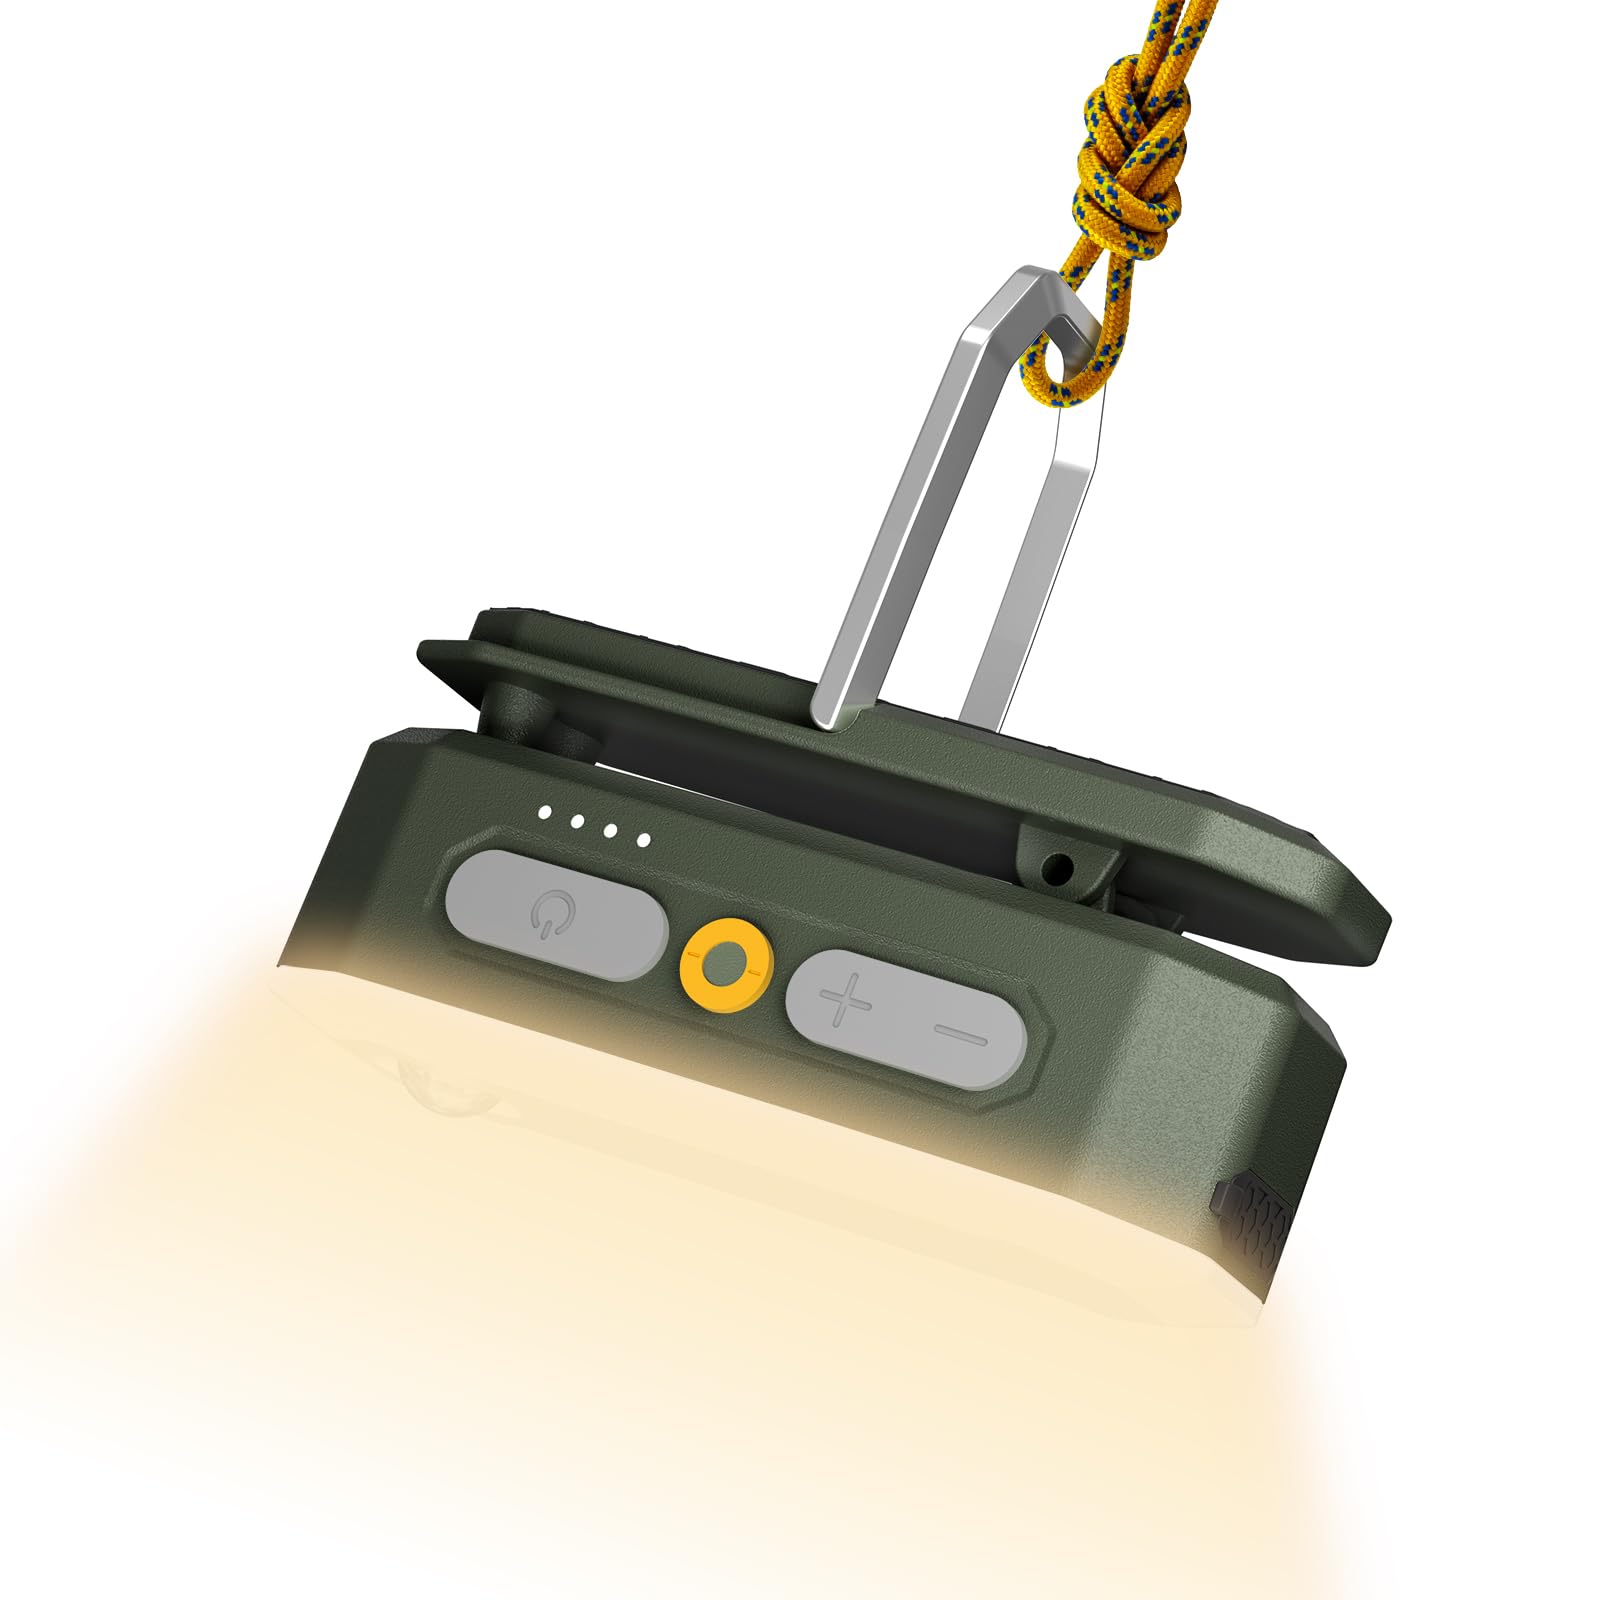
Figure 1: BougeRV Movable Area Light showing its compact dimensions (4.06"L x 1.54"W x 1.96"H) and light weight (0.4 lb).

Figure 2: Detailed view of the light's controls, including the power button, brightness adjustment buttons (+/-), motion sensor button (yellow), battery level display, USB-C port, and concealable hook.
3. Setup
Before first use, fully charge the BougeRV Movable Area Light. Connect the provided USB-C cable to the charging port on the device and to a compatible USB power source (e.g., wall adapter, power bank, computer USB port). The battery indicator lights will show the charging progress. All four lights will illuminate when fully charged.
4. Operation
4.1 Power On/Off
- To Power On: Press and hold the power button () for approximately 2 seconds. The light will turn on in the last used mode and brightness setting (memory function).
- To Power Off: Press and hold the power button for approximately 2 seconds.
4.2 Adjusting Brightness
Once the light is on, use the '+' and '-' buttons to adjust the brightness.
- '+' Button: Increases brightness. There are 5 preset brightness levels, and holding the button allows for stepless brightness adjustment.
- '-' Button: Decreases brightness. Holding the button allows for stepless brightness adjustment.

Figure 3: Illustration of the 5-level brightness adjustment and smooth stepless control.
4.3 Changing Lighting Modes
Short press the power button () to cycle through the available lighting modes:
- Cool White Light (6500K): Bright light, ideal for work, cooking, or general illumination.
- Warm White Light (2500K): Soft light, ideal for reading or creating a comfortable ambiance.
- Red Light (1000K): Dim light, suitable for preserving night vision or not disturbing others.

Figure 4: The three adjustable color temperatures: Cool White, Warm White, and Red Light.
4.4 SOS Mode
For emergency signaling:
- To Activate SOS: Long press the yellow motion sensor button (
 ). The light will flash in an SOS pattern.
 - To Deactivate SOS: Short press the motion sensor button again.

Figure 5: The light activated in SOS mode for emergency use.
4.5 Motion Sensor Mode
The motion sensor feature provides automatic illumination when movement is detected.
- To Activate Motion Sensor: Short press the yellow motion sensor button (). A blue indicator light will illuminate, confirming the sensor is active. The light will automatically turn on when motion is detected and turn off after a period of no motion.
- To Deactivate Motion Sensor: Short press the yellow motion sensor button again. The blue indicator light will turn off.

Figure 6: The motion sensor feature detecting movement, ideal for nighttime outdoor use.
4.6 Power Bank Function
The Movable Area Light can serve as an emergency power bank for your mobile devices.
- To Charge External Devices: Connect your mobile device to the light's USB-C port using a compatible USB-C cable. The light will begin charging your device.

Figure 7: The light functioning as a power bank, charging a mobile device via its USB-C output port.
5. Mounting Options
The BougeRV Movable Area Light offers several versatile mounting options:
- Integrated Hook: A concealable hook allows you to hang the light inside tents, from branches, or other elevated points.
- Integrated Clip: A sturdy clip enables attachment to clothing, backpack straps, or tent poles.
- Magnetic Base: The magnetic base allows for secure attachment to metal surfaces, such as car hoods or workshop shelves.

Figure 8: Various adaptable designs for hands-free convenience, including hanging, magnetic mounting, and clipping.

Figure 9: Examples of the light being used in different scenarios: hanging in a tent, mounted under a car hood, clipped to a window, and handheld.
6. Charging
The light is equipped with a 3200mAh rechargeable Lithium-Ion Polymer battery. It takes approximately 2 hours to fully charge.
- Charging Port: USB-C (Input: 5V/2A, 10W Max).
- Battery Indicator: Four LED lights indicate the current battery level. Each light represents approximately 25% charge.
- Runtime: Up to 6 nights (48 hours) on the lowest brightness setting (8 hours per night).

Figure 10: The light's impressive runtime, capable of lasting up to 6 nights (8 hours/night) on low brightness.
7. Maintenance
- Cleaning: Wipe the device with a soft, damp cloth. Do not use harsh chemicals or abrasive cleaners.
- Water Resistance: The light has an IP65 waterproof rating, meaning it is protected against dust and low-pressure water jets. It can operate normally in rainy conditions but should not be submerged in water.
- Storage: Store the light in a cool, dry place when not in use for extended periods. Charge it periodically to maintain battery health.

Figure 11: The IP65 waterproof rating ensures the light functions even on drizzle days.
8. Troubleshooting
- Light not turning on: Ensure the device is charged. Press and hold the power button for 2 seconds.
- Motion sensor not working: Ensure motion sensor mode is activated (blue indicator light on). Check for obstructions blocking the sensor.
- Device not charging: Verify the USB-C cable is securely connected to both the light and the power source. Try a different cable or power adapter.
- Short battery life: Ensure the device is fully charged. High brightness settings or continuous use will reduce battery life.
If you encounter any issues not listed here, please refer to the warranty and support section for assistance.
9. Specifications
| Model Number | CL02 |
| Brand | BougeRV |
| Product Dimensions | 4.06"L x 1.54"W x 1.96"H |
| Item Weight | 0.2 Kilograms (7 ounces) |
| Material | Acrylonitrile Butadiene Styrene (ABS), Plastic |
| Color | Dark Green |
| Power Source | Rechargeable Battery |
| Battery Type | Rechargeable Lithium-Ion Polymer (3200mAh) |
| Battery Life | Up to 48 Hours (on lowest setting) |
| Brightness | 380 Lumens (Maximum) |
| Light Source Type | Light Emitting Diode (LED) |
| Water Resistance Level | IP65 Waterproof |
| Mounting Type | Tabletop Mount, Hook, Clip, Magnetic |
10. Warranty and Support
Your BougeRV Movable Area Light comes with 1-Year Tech Support. If you have any product questions, require assistance, or need to claim warranty service, please do not hesitate to contact BougeRV customer support. Refer to the product packaging or the official BougeRV website for the most current contact information.


