
Introduction
This manual provides detailed instructions for the setup, operation, and maintenance of your FOKEY R4-F Remote Sensor. This sensor is designed to work exclusively with the FOKEY Z2 Weather Station (ASIN: B0F31VHMTF) to provide accurate indoor and outdoor temperature and humidity readings.

Figure 1: FOKEY R4-F Remote Sensor. This image shows the front of the white remote sensor with its digital display showing temperature and humidity, and the FOKEY logo at the bottom.
Package Contents
Please ensure all items are present before proceeding with the setup:
- 1 x FOKEY R4-F Remote Sensor
- User Manual (this document)
Note: 2 x AA batteries are required for operation and are not included in the package.
Product Overview
Familiarize yourself with the components of your FOKEY R4-F Remote Sensor:

Figure 2: FOKEY R4-F Remote Sensor with labeled components. This image displays the front and back of the sensor, highlighting key parts such as the display, channel selection buttons, TX button, battery compartment, and wall mount hole.
- C1: Remote Temperature and Humidity Display
- C2: Channel Indicator (1, 2, or 3)
- C3: RF Transmit LED Indicator
- C4: Wall Mount Hole
- C5: °F / °C Button (Temperature Unit Selection)
- C6: Channel 1,2,3 Select Button
- C7: "TX" Button (Transmit RF Signal Manually)
- C8: Battery Compartment
- C9: Battery Cover
Setup
1. Battery Installation
- Remove the battery cover (C9) from the back of the sensor.
- Insert 2 x AA batteries into the battery compartment (C8), ensuring correct polarity (+/-).
- Replace the battery cover.
2. Channel Selection
The sensor supports up to 3 channels. If you are using multiple sensors with one Z2 Weather Station, assign a unique channel to each sensor.
- Press the "Channel 1,2,3 Select Button" (C6) to choose the desired channel (1, 2, or 3). The selected channel will be displayed on the screen (C2).
- Ensure the selected channel matches the channel setting on your FOKEY Z2 Weather Station for proper synchronization.
3. Pairing with FOKEY Z2 Weather Station
This sensor is designed exclusively for the FOKEY Z2 Weather Station (ASIN: B0F31VHMTF). It is not compatible with other FOKEY weather stations, such as the FOKEY Q7 Weather Station.
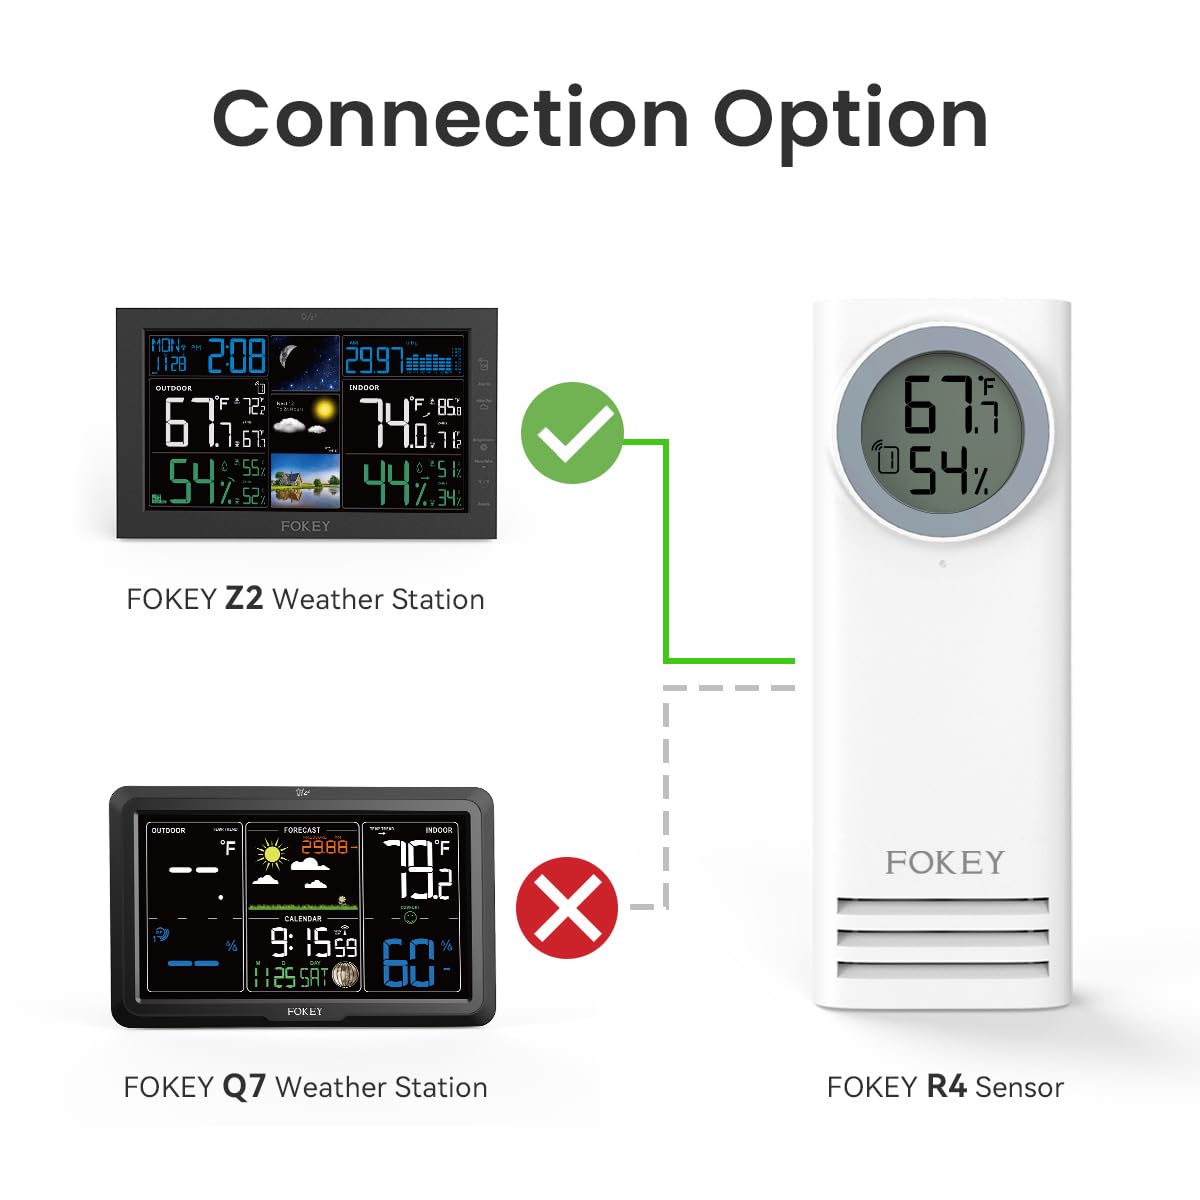
Figure 3: Compatibility diagram showing the FOKEY R4-F sensor connecting to the FOKEY Z2 Weather Station (green check) and not connecting to the FOKEY Q7 Weather Station (red X).
- After installing batteries and selecting a channel on the sensor, power on your FOKEY Z2 Weather Station.
- The weather station will automatically search for and connect to the sensor on the selected channel. This may take a few minutes.
- Once connected, the temperature and humidity readings from the sensor will appear on the Z2 Weather Station's display.
- If connection is not established, press the "TX" button (C7) on the sensor to manually transmit the signal. Ensure the sensor and weather station are within range and free from interference.
Operating Instructions
Temperature Unit Selection
To switch between Celsius (°C) and Fahrenheit (°F) temperature units:
- Press the "°F / °C Button" (C5) located inside the battery compartment.
- The display (C1) will immediately show the temperature in the newly selected unit.
Manual Signal Transmission
If you notice a loss of signal or wish to force a data transmission, you can manually send the signal:
- Press the "TX" button (C7) located inside the battery compartment.
- The RF Transmit LED (C3) will flash, indicating a signal transmission.
Placement and Mounting
The FOKEY R4-F Remote Sensor is designed for both tabletop and wall-mount placement.

Figure 4: Placement options for the FOKEY R4-F Remote Sensor, showing it on a tabletop and mounted on a wall.
Tabletop Placement
- Place the sensor on a flat, stable surface.
- Ensure it is in a location where it can accurately measure the ambient temperature and humidity, away from direct sunlight, heat sources, or drafts.
Wall Mounting
- Use the wall mount hole (C4) on the back of the sensor to hang it on a screw or nail.
- Choose a location that is representative of the area you wish to monitor and is protected from direct weather exposure if placed outdoors.
Maintenance
Battery Replacement
When the battery indicator on the sensor or your Z2 Weather Station shows low power, replace the batteries:
- Remove the battery cover (C9).
- Remove the old AA batteries.
- Insert 2 new AA batteries, observing correct polarity.
- Replace the battery cover.
Cleaning
- Wipe the sensor's exterior with a soft, damp cloth.
- Do not use abrasive cleaners or solvents, as these may damage the unit.
- Ensure no moisture enters the battery compartment or internal components.
Troubleshooting
| Problem | Possible Cause | Solution |
|---|---|---|
| No temperature/humidity reading on Z2 Weather Station. | Sensor not powered on. Incorrect channel selected. Sensor out of range or interference. Sensor not paired with Z2 Weather Station. | Check battery installation. Ensure sensor channel matches Z2 Weather Station channel. Move sensor closer to Z2 Weather Station; remove obstacles. Press "TX" button on sensor to force signal transmission. |
| Inaccurate readings. | Sensor exposed to direct sunlight, heat sources, or drafts. Low batteries. | Relocate sensor to a more appropriate environment. Replace batteries. |
| Display on sensor is dim or blank. | Low batteries. | Replace batteries. |
Specifications
| Feature | Detail |
|---|---|
| Model Number | R4-F |
| Compatibility | Exclusively with FOKEY Z2 Weather Station (ASIN: B0F31VHMTF) |
| Power Source | 2 x AA Batteries (not included) |
| Temperature Units | Celsius (°C) / Fahrenheit (°F) selectable |
| Channels | 3 available channels |
| Dimensions | 5.08 x 2.05 x 1.34 inches |
| Weight | 2.4 ounces |
| Included Components | Remote Sensor |
Warranty and Support
For warranty information and technical support, please refer to the FOKEY official website or contact their customer service directly. Specific warranty terms may vary by region and purchase date.
Note: No specific warranty or support details were provided in the product information. Please consult the manufacturer's official resources for the most accurate and up-to-date information.